Rainbow Finger Jello Squares
Recipe Introduction
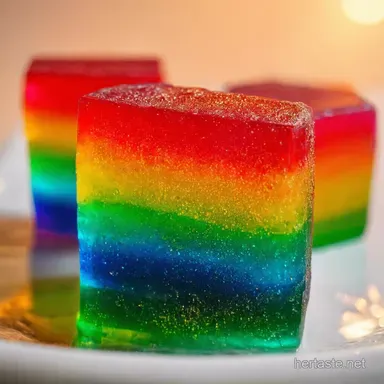
Ever fancied a dessert that's not only a treat to eat but also a sight to behold? Okay, let's get this sorted, shall we? Have you ever had Rainbow jello squares ? Well, today we're diving headfirst into the world of finger jello recipe ! This isn't just your average jelly; it's a rainbow explosion of fruity goodness.
Think sunshine in a square, perfect for brightening up any day.
This jiggly dessert recipe has roots in classic American party fare. But, honestly, flavored gelatin dessert are just universally joyful.
This recipe is simple, requiring about 20 minutes of prep and five minutes of cooking. However, it demands at least six hours of chilling, so plan ahead! This recipe yields about 24 squares.
The perfect amount for sharing...or not.
One of the best things about this finger jello recipe is its versatility. Plus, the gelatin itself can be a good source of collagen.
These gelatin dessert squares are amazing for parties. A jello party treats will be sure to be a hit with kids.
They're also perfect for picnics, or just a quick treat when you need a bit of sweetness. It is an easy jello recipe , so you'll be able to master it in no time.
The fruity jello recipe will make for kids party food ideas that everyone will enjoy. Ready to get jiggly with it?
What You'll Need for Your Finger Jello Feast
First up, you'll need those colorful gelatin packets. Think cherry, orange, lemon, lime, berry, and grape the whole rainbow.
Creamy Delight (Optional)
For those who like a bit of creaminess (because, let's be honest, who doesn't?), grab some sweetened condensed milk jello !
Ingredients & Equipment for Your Rainbow Dream
Okay, let's get this sorted, shall we? We're about to dive into the ingredients for the finger jello recipe that'll make your Rainbow jello squares the talk of the town.
Seriously, this jiggly dessert recipe is easier than putting on your socks. Honestly!
Main Players: Jello Layers
- 6 boxes (3 ounces/85g each) of flavored gelatin. Get a rainbow of colours: red/cherry, orange, yellow/lemon, green/lime, blue/berry, and purple/grape.
- 6 cups (1.4 liters) of boiling water.
Quality is important for a flavored gelatin dessert . Make sure your jello hasn't expired. Expired jello won't set properly . You know, nobody wants a sloppy layered jello recipe !
Creamy Dreamy Layer (Optional):
- 1 can (14 ounces/397g) sweetened condensed milk.
- 1 cup (240 ml) boiling water.
- 2 envelopes (0.25 ounce/7g each) unflavored gelatin.
If you're using condensed milk, go for the full fat kind. It makes the creamy layer extra rich and delicious. Seriously, it’s worth it. This is what makes your jello party treats amazing.
Seasoning Notes: A Symphony of Flavours
Essential Spice Combinations? Nah, this easy jello recipe doesn't need spices. The flavored gelatin packs a punch all on its own.
Think fruity jello recipe explosion in every bite! For a bit of extra zing, you could add a tiny drop of lemon or orange extract to your favourite layer.
If you're feeling fancy, a splash of vanilla extract in the creamy layer? Amazing! If you don't have extracts, don't sweat it. The jello does the trick.
Equipment Needed: Keep It Simple
- A 9x13 inch baking dish.
- Measuring cups and spoons
- Whisk
- Saucepan or microwave safe bowl
- Mixing bowls
- Spatula
No fancy gadgets needed. A standard baking dish is perfectly fine. If you don't have a whisk, a fork will do in a pinch.
A Gelatin dessert squares recipe doesn't require the moon on a stick
My Grandma use to make it and serve as kids party food ideas . Remember, a little creativity goes a long way.
The beauty of this finger jello recipe is that it's incredibly forgiving. So, don't stress if you don't have exactly the right kit.
Just dive in and have some fun.
Based on the "finger jello recipe" description, and keeping it all very British and simple, let's dive right in.
Rainbow Jello Squares: Prep Like a Pro

Okay, let's get this sorted, shall we? Honestly, before you even think about boiling water, a bit of prep work makes all the difference.
It's like having your ducks in a row, innit?
Essential Mise en Place
Right, first things first. Dig out your 6 packets of flavored gelatin (red, orange, yellow, green, blue, and purple are classics, but go wild!), condensed milk, and unflavored gelatin if you're feeling fancy.
Measure out your 6 cups of water and get that 9x13 inch baking dish ready. Grab your whisk, mixing bowls, and spatula.
Got it all? Good!
Time Saving Organization Tips
Here's a cheeky trick: pre-measure each gelatin packet into separate bowls. That way, when you're ready to add the boiling water, it's just a quick pour and stir.
Makes life so much easier, trust me. I once tried to eyeball it and ended up with a sticky, uneven mess.
Never again!
Safety Reminders
Boiling water is no joke, yeah? Keep those kiddies away and be careful not to splash yourself. It's also a good idea to let the gelatin cool slightly before pouring it into the dish.
We don't want a melted plastic situation.
Crafting Your Jiggly Masterpiece
This finger jello recipe is about to become your new favourite! It's easier than you think!
- Dissolve the First Layer: Pop one gelatin packet into a bowl. Add 1 cup of boiling water . Stir until completely dissolved.
- Pour and Chill (The First Time): Gently pour that liquid into your baking dish. Spread it evenly. Then, into the fridge it goes for at least 1 hour . You want it firm, not solid.
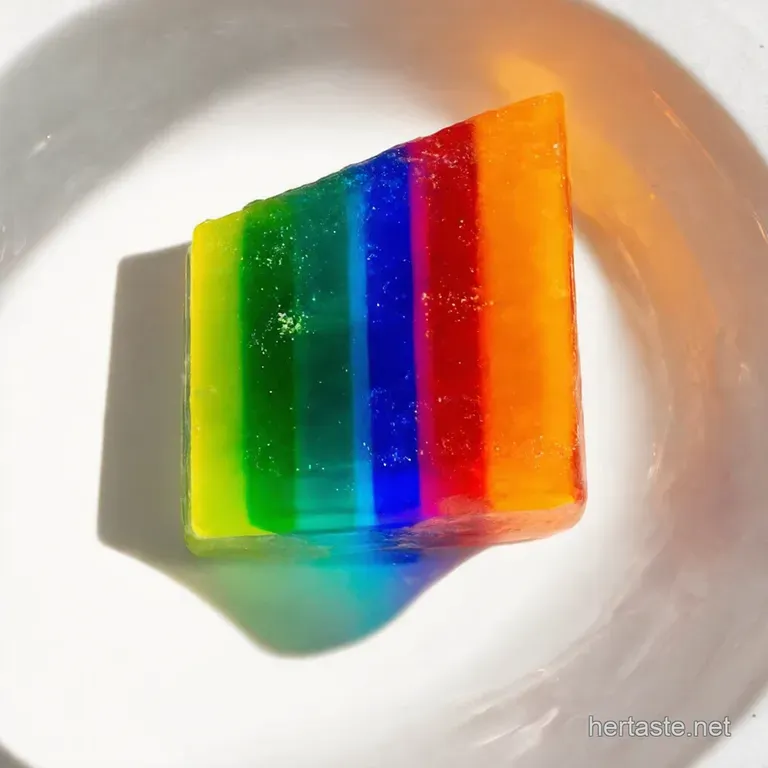
- Repeat the Rainbow: Repeat steps 1 and 2 for the rest of the colours. Layer them carefully, chilling between each. Don't rush; that's how you get a jumbled mess instead of those lovely, rainbow jello squares, a proper Layered jello recipe .
- The Creamy Dreamy Layer (Optional): Sprinkle your unflavored gelatin over 1/2 cup of cold water . Leave it for a minute. Then, add 1 cup of boiling water . Stir it up. Add the condensed milk. Let it cool a bit.
- Top it Off: Gently pour the creamy mixture over the last jello layer. Use your spatula to smooth it out.
- The Final Chill: Back into the fridge for at least 4 hours , or even better, overnight.
- Cut and Serve: Cut it into squares and serve it chilled.
Pro Tips for Finger Jello Recipe Glory
Want to take your finger jello recipe to the next level? Course you do!
Don't Rush: Honestly, patience is key with this one. Rushing the chilling time leads to a muddled mess. Trust me, I know from experience! I once tried to speed things up and ended up with a swirly, unappetizing disaster.
Not my finest moment.
Make it Ahead: This is perfect for prepping in advance. Make the whole thing the day before a party, then just slice and serve.
Super easy, innit? This makes perfect Jello party treats .
Avoid This Mistake: Letting each layer set completely solid is a big no-no. It'll stop the layers from sticking together properly. A slightly tacky surface is what you're after.
This easy finger jello recipe will not only be a hit with the kids but bring back memories for the adults too! It's great for searching for Kids party food ideas .
You can make this Fruity jello recipe your signature dish.
Recipe Notes: Cracking on with Your Finger Jello Recipe
Okay, let's get this sorted, shall we? We've got our finger jello recipe down, but before you dive headfirst into gelatin-y goodness, a few extra bits of wisdom to ensure it’s proper lush.
Serving Suggestions: Show Off Your Jello
Right, so you've made this amazing rainbow jello squares . How do you make it look even better? Plating is key, innit? Cut those gelatin dessert squares into fancy shapes using cookie cutters.
Think stars, hearts, even little dinosaurs if you're feeling adventurous. A scattering of fresh berries on the plate never hurts either.
And to drink? How about a glass of ice-cold lemonade, or even a cheeky cocktail?
Storage Tips: Keep It Jiggly
Honestly, the last thing you want is your lovely flavored gelatin dessert turning to mush. Store your easy jello recipe in the fridge, covered, for up to 3 days.
Freezing isn't recommended, trust me, it'll end up all watery and sad. Reheating? Don't even think about it. It's a cold dessert, through and through.
Variations: Mix It Up a Bit
Fancy a change? Condensed milk jello is already a bit special, but let's push the boat out! For a dairy-free version, try using coconut condensed milk.
Gives it a lovely tropical vibe, that does. And if you're watching the sugar, use sugar-free gelatin dessert squares and a touch of stevia.
Seasonal? Fruity jello recipe options are amazing. In summer, fresh strawberries and raspberries are lush! In winter, how about a layered jello recipe with cranberry and orange?
Nutrition Basics: What You're Actually Eating
Jello party treats are fun, but let's be real, they are a treat, yeah? One square clocks in at about 70-90 calories.
Not bad! They've got a bit of protein from the gelatin. And the jiggly dessert recipe is mostly carbs from the sugar.
But hey, everything in moderation, right?
Honestly, making this finger jello recipe is a doddle. So don't be scared to give it a go. Have fun with it. The most important ingredient? A good sense of humour.
Frequently Asked Questions
My finger jello recipe isn't setting properly! What am I doing wrong?
Oh dear, a wobbly jelly is no good! The most common reason is not using the correct ratio of water to gelatin. Double check your measurements, ensuring you're using the right amount of boiling water. Also, make sure you're chilling it for long enough patience is a virtue, especially with gelatin!
A minimum of 4 hours, or preferably overnight, is usually needed for a firm set.
Can I make a vegan version of this finger jello recipe?
Absolutely, you can! Simply substitute the regular gelatin with a vegan gelatin alternative like agar agar powder. You'll need to follow the instructions on the agar agar packaging as the ratio to water may differ.
For the creamy layer, use a dairy-free condensed milk alternative, like coconut condensed milk, which works a treat.
How do I prevent the different colored layers in my rainbow finger jello recipe from bleeding into each other?
Ah, the dreaded bleed! The key is patience. Make sure each layer is partially set before adding the next. It should be firm enough to support the next layer without mixing, but still slightly tacky. You can also cool each gelatin layer slightly before pouring it on to prevent melting the previous one.
How long can I store leftover finger jello? Will it keep its shape?
Leftover finger jello will happily keep in the fridge for up to 3-4 days in an airtight container. However, the longer it sits, the more likely it is to weep a bit of liquid and potentially lose some of its structural integrity, so it's best enjoyed sooner rather than later.
Think of it like a good cup of tea, best had fresh!
Is there a way to make my finger jello recipe even more colourful and exciting?
You bet! Get creative! Try using different shaped cookie cutters to make fun shapes. You can also add edible glitter or sprinkles between the layers for extra sparkle. Experimenting with contrasting colors and flavors can also add a special touch. Think of it as your own edible canvas!
Can I use fresh fruit in my finger jello recipe?
Using fresh fruit can be a little tricky, as some fruits contain enzymes that can prevent gelatin from setting properly think pineapple, kiwi and mango. If you really want to use these fruits, cook them first to deactivate the enzymes.
Otherwise, stick to canned fruits (drained well) or softer berries which generally play nicely with gelatin. They'll give it a lovely fresh twist!
Rainbow Finger Jello Squares