Nobake Bliss the Easiest Banana Pudding This Side of Graceland
- No-Bake Bliss: The Easiest Banana Pudding This Side of Graceland
- Ingredients & Equipment: Your Banana Pudding Arsenal
- No-Bake Bliss: The Easiest Banana Pudding This Side of Graceland
- Prep Like a Pro: Your Banana Pudding Mise en Place
- Step-by-Step: Creating Pudding Magic
- Pro Tips for Pudding Perfection
- Recipe Notes For Your Banana Pudding Masterpiece
- Frequently Asked Questions
- 📝 Recipe Card
No-Bake Bliss: The Easiest Banana Pudding This Side of Graceland
Fancy a dessert that's easier than finding a parking spot at Tesco on a Saturday? This simple banana pudding recipe is it! Think creamy, dreamy, and packed with banana flavour.
It's pure comfort in a bowl.
This recipe is inspired by classic Southern flavours. It reminds me of something Elvis would have loved. This dessert layers vanilla wafers, bananas, and a lush custard.
Honestly, it's so good, you won't believe how easy it is.
How To Make Banana Pudding Easy? It Starts Here!
Did you know that banana pudding might have German roots? Apparently, it evolved from similar custard based puddings. This version, however, is straight-up American comfort food.
It’s an easy recipe that takes about 25 minutes to prep. You will also need a few hours to chill.
This recipe yields about 6-8 servings.
Why This Banana Pudding Rocks
This easy banana pudding recipe is amazing! The best thing is that it requires no baking. It is also lighter than many traditional desserts.
The bananas provide potassium and fibre, too. This dessert is perfect for potlucks or BBQs. It is also great for those days you crave something sweet without much effort.
What makes it special? It is the simplicity combined with that nostalgic flavour.
Nilla Wafer Dreams: Ingredients You'll Need
Ready to get started? First, let’s gather the troops the ingredients! You'll need sweetened condensed milk, milk, vanilla pudding mix, and vanilla extract.
Don't forget the cream cheese, Nilla wafers , and ripe bananas. Remember, slightly green bananas are better than overripe ones.
Trust me on this! I learned it the hard way making this recipe!
Quick Banana Pudding Dessert Equipment
To make this quick banana pudding dessert , grab your electric mixer and a large bowl. You'll also need a medium saucepan if you want to thicken the custard (optional).
A whisk and spatula are also essential. Finally, you'll need a 9x13 inch baking dish or a fancy trifle bowl, if you’re feeling posh.
Ingredients & Equipment: Your Banana Pudding Arsenal
Right then, let's get down to brass tacks. To make this simple banana pudding recipe , you don't need a kitchen overflowing with fancy gadgets.
Just a few trusty bits and bobs. Honestly , if you can find your way around a fridge, you're already halfway there! And, of course, ingredients.
The good stuff.
Main Ingredients Breakdown
Alright, here's the shopping list. Remember, quality matters, especially with those bananas. You don't want any mushy business.
For the Dreamy Custard:
- Sweetened Condensed Milk: 1 (14 ounce/397g) can . This is your base, don't skimp!
- Cold Milk: 1 1/2 cups (355ml) . Whole or 2% is best. Gives it that creamy richness.
- Instant Vanilla Pudding Mix: 1 (3.4 ounce/96g) package . The magic ingredient for speed and flavour.
- Vanilla Extract: 1 teaspoon (5ml) . A little boost of vanilla goodness.
- Cream Cheese: 8 ounces (227g) , softened. This is what makes our version extra special! Think Philadelphia.
For Building Banana Pudding Nilla Wafer Recipes Perfection:
- Vanilla Wafers: 1 (12 ounce/340g) box . Nilla Wafers are the classic. It is important to use vanilla wafers for a proper Nilla Wafer Banana Pudding Easy experience.
- Ripe Bananas: 3-4 , sliced. Look for that "just right" ripeness - yellow with a few brown spots.
Seasoning Notes: The Flavor Fireworks
We are making the most basic banana pudding , here's where you can subtly kick it up a notch. How To Make Banana Pudding Easy? with extra flavour!.
Vanilla is your best friend. Don’t be shy with the extract. A tiny pinch of nutmeg on top can also add a lovely warmth.
For a bit of a grown-up twist, a splash of rum extract? Oh my gosh , amazing! I used imitation rum once.
Not again!
Equipment Needed: Keep It Simple, Stupid (KISS)
For this easy banana pudding , you really don't need much. A Quick banana pudding dessert for minimal kitchen kit,
- Electric Mixer: Handheld or stand mixer. Makes the custard silky smooth.
- Large Bowl: For mixing the custard base.
- Whisk: For getting rid of any pesky lumps.
- Spatula: For scraping down the sides of the bowl.
- Baking Dish: A 9x13 inch dish or a trifle bowl. The trifle bowl is proper fancy.
And that’s it! Nothing too scary, right? You probably have most of this stuff already lurking in your cupboards. So, roll up your sleeves, and let’s get this Southern banana pudding recipe started.
No-Bake Bliss: The Easiest Banana Pudding This Side of Graceland
Oh my gosh, you guys! Craving a sweet treat that's actually easy to make? This simple banana pudding recipe is your answer.
Inspired by the South and Elvis's probable dessert dreams, it's creamy, dreamy, and no-bake! I'm talking minimal effort, maximum flavor.
So, grab your ingredients and let's get started.
Prep Like a Pro: Your Banana Pudding Mise en Place

First things first, let's get organized. This essential mise en place will make your life so much easier. We're talking about softening that cream cheese.
Slice up those bananas and opening that box of Nilla Wafers. Did you know that Nilla Wafer Banana Pudding Easy makes for an incredible desert experience?
Honestly, this recipe is straightforward, but having everything ready saves time. Speaking of, make sure your cream cheese is actually soft.
Nobody wants lumpy pudding. Also, be careful when slicing those bananas! We don't want any kitchen mishaps. The better the bananas, the more delicious your Basic Banana Pudding will taste!
Step-by-step: Creating Pudding Magic
Here's how to make easy banana pudding , step by step:
- Whip It Good: In a large bowl, beat that softened cream cheese until it's smooth. Use an electric mixer or stand mixer.
- Custard Base: In a separate bowl, whisk together your condensed milk and cold milk. Then, whisk in your vanilla pudding mix until it's all smooth.
- Cream Cheese Time: Slowly add the cream cheese to the pudding mixture. Beat until it's well combined.
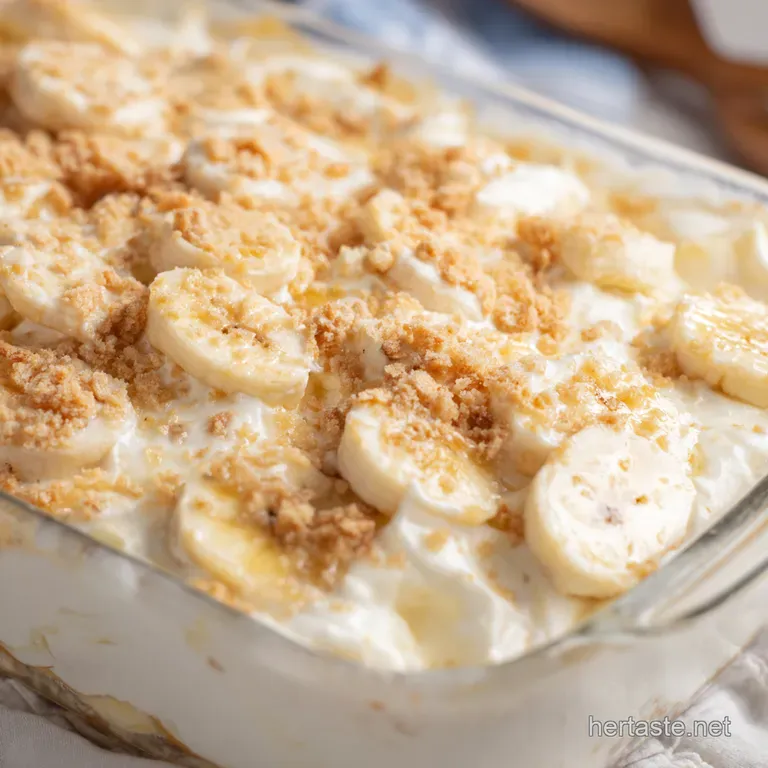
- Layer Up: Line the bottom of your dish with vanilla wafers. Then, add a layer of sliced bananas and top with a layer of that delicious pudding.
- Repeat the Fun: Repeat those layers wafers, bananas, pudding. Finish with a layer of pudding.
- Chill Out: Cover that dish with plastic wrap. Put it in the fridge for at least 2 hours . Longer is even better!
Pro Tips for Pudding Perfection
Want to take your pudding to the next level?
- Wafer Wisdom: Assemble the pudding ahead of time if you want softer wafers. Overnight is ideal!
- Banana Browning Be Gone: Toss your banana slices in a tiny bit of lemon juice. This will stop them from going brown.
- Chill Time is Key! Don't skip it! The flavors need to meld. Plus, the wafers get perfectly soft. People who have tried the Magnolia Bakery banana pudding recipe have been blown away.
A common mistake is not softening the cream cheese enough. Trust me, it makes a difference. You can prep the custard base a day ahead.
Just store it in the fridge. This no bake banana pudding recipe is so easy, even my nan loves it! It's like a slice of the Southern banana pudding recipe without all the fuss.
Now that's what I call proper comfort food! The best part? It's all about those Banana pudding with vanilla wafers .
Recipe Notes For Your Banana Pudding Masterpiece
So, you're ready to dive into this amazing simple banana pudding recipe ? Awesome! Before you get started, let's chat about a few things to make sure your pudding turns out perfect .
I'm sharing a few tips and tricks that I have learned over the years.
Serving Up Sunshine: Plating and Presentation
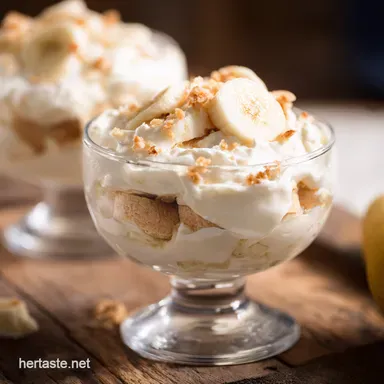
Honestly, presentation does matter. You know? Think about how to make your quick banana pudding dessert look amazing. I like to use a fancy trifle bowl if I'm feeling extra.
It's like giving your pudding a proper stage to shine! For a more casual vibe, individual glass bowls are perfect.
A sprinkle of crushed Nilla wafers on top always makes it look divine.
Pair this no bake banana pudding recipe with a scoop of vanilla ice cream for an extra treat. Maybe a dollop of whipped cream. Coffee or iced tea make a great accompaniment!
Storage Secrets
Got leftovers? Lucky you! This easy banana pudding can be stored in the fridge for up to 3 days. Be sure to cover it tightly with plastic wrap.
Honestly, I've never tried freezing it, but I suspect the texture might change. It's always disappeared before I've had the chance.
Switching It Up: Variations That Rock
Looking to spice things up? Try adding a splash of rum or bourbon to the custard. It's a total game changer.
For a healthier twist, swap out the regular cream cheese for a reduced fat version. You know, just to make it a little less naughty.
Getting Down to Basics: Nutrition Info
Okay, let's be real. This banana pudding with vanilla wafers isn't exactly health food. But it's good for the soul, right? Each serving packs a decent amount of carbs and sugar.
But hey, life is too short to skip dessert. The key health benefit is the happiness you feel after eating it!
I truly hope this simple banana pudding recipe becomes a family favorite. Remember, don't be afraid to get creative and make it your own.
Get ready to hear "Oh my gosh! This is the best banana pudding ever!" You've got this!
Frequently Asked Questions
How can I stop my bananas from going brown in this simple banana pudding recipe? I want it to look like it came straight from Downton Abbey!
Nobody wants sad, brown bananas in their pudding! The trick is to toss your sliced bananas in a little lemon juice or pineapple juice before layering them. This helps slow down oxidation. Also, slightly underripe bananas hold their shape and color better than overly ripe ones. Think firm, not mushy!
Can I make this simple banana pudding recipe ahead of time?
Absolutely! In fact, making it ahead of time is almost better. The vanilla wafers will soften as they sit in the pudding, creating a lovely, melt-in-your mouth texture. I recommend assembling it a few hours or even a day in advance. Just be sure to cover it tightly to prevent it from drying out.
What are some fun variations I can try with this simple banana pudding recipe? Maybe something a bit "cheeky"?
Ooh, fancy a bit of adventure, do we? For a boozy twist, add a tablespoon or two of rum, bourbon, or banana liqueur to the custard a real treat for the grown ups! Or, for a chocolate banana pudding, stir cocoa powder into the custard or use chocolate wafers instead of vanilla ones.
You could even try swirling a little Nutella between the layers. Get creative!
How long will my banana pudding last in the fridge? I seem to make too much of it and I'm wondering if I can enjoy this delicious "simple banana pudding recipe" for days?
Homemade banana pudding is best enjoyed within 2-3 days of making it. After that, the bananas can start to get a bit mushy and the wafers might become overly soft. Store it in an airtight container in the refrigerator to maintain its freshness for as long as possible.
It's usually so delicious though, it never lasts that long in my house!
I'm trying to be a bit healthier. Any tips on how to lighten up this simple banana pudding recipe without sacrificing too much flavor?
You can definitely make some swaps to lighten it up! Use reduced fat cream cheese, almond milk instead of whole milk, and consider using a sugar-free pudding mix. You could even add a scoop of protein powder to the custard for an extra boost.
While it won't be exactly the same, you can still enjoy a delicious treat with fewer calories and less fat. Every little helps!
Nobake Bliss The Easiest Banana Pudding This Sid