Home Canning Your Essential Toolkit
Recipe Introduction
Quick Hook
Ever wonder how your grandma made those amazing preserves? Honestly, it all starts with the right gear. This article covers a Checklist: The Essentials Tools for home canning .
We are diving into the flavorful world of Canning Essentials !
Brief Overview
Home canning is an age-old tradition. It allows us to enjoy summer's bounty all year round. It's fairly straightforward. This guide will take about 30- 45 minutes to read through, with hands-on canning taking longer depending on the recipe.
This guide prepares you to fill many jars with delicious goodness.
Main Benefits
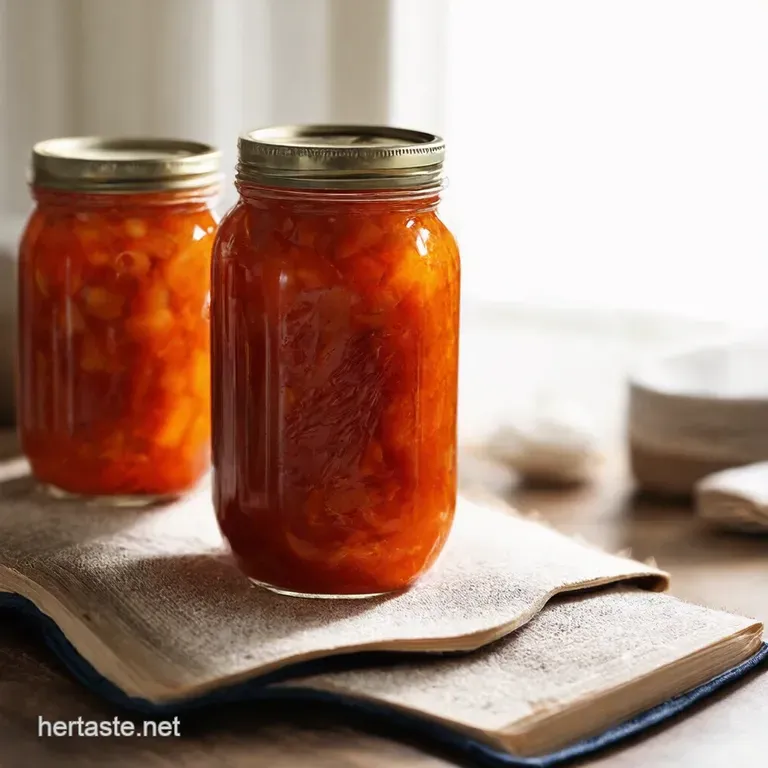
Imagine opening a jar of homemade jam in the dead of winter. Home canning is a fantastic way to control ingredients.
You know, avoid all those nasty preservatives in store-bought stuff. This guide is perfect for anyone wanting to start their Canning For Beginners journey.
What makes it special? We're making it approachable, even fun.
Now, let's look at the Canning Tools that'll make you a canning champion!
Essential Canning Toolkit
Let's get started.
1. The Canning Pot
This is the Big Daddy of Canning Equipment . You need a large pot. Make sure it is big enough to fully submerge your jars in boiling water.
My first canning pot was an old lobster pot. I still have fond memories. A standard water bath canner usually holds 7 quart jars.
2. Jars
These are your flavor fortresses. Specifically designed for canning, these come with two-part lids. We are talking Pints, Quarts, and Half Pints Mason Jar Sizes for Canning .
Just grab the correct size for your recipe!
3. Canning Lids
One-time use only, these flat metal lids seal the deal. Always use new lids. Trust me, it’s worth it for peace of mind and to avoid any spoilage disasters.
4. Jar Screw Bands
These reusable metal bands hold the lid in place during processing. Check for rust or damage each time. Food Preservation Checklist includes inspecting them.
5. Jar Lifter
This tool is a life saver. Safely lift those hot jars from the canner. Don’t even think about using tongs; get a proper jar lifter. Safety first!
6. Wide Mouth Funnel
Less mess is always a win. This funnel fits wide mouth jars perfectly, making filling a breeze. Trust me, pouring hot jam without one is asking for trouble.
7. Bubble Remover/Headspace Tool
Air bubbles are the enemy. Use this tool to release them. A chopstick works well too. It also helps measure headspace accurately.
8. Lid Lifter
Say goodbye to burnt fingers. A magnetic wand lifts lids from hot water. This is such a cheap and easy addition to ensure Safe Canning Practices .
9. Kitchen Scale
Accurate measurements are crucial, especially with pectin heavy recipes. Get yourself a decent kitchen scale. You need the right measurements of grams and ounces for each ingredient.
10. Timer
Don't guess. Use a timer! Accurately timing the canning process is essential. This ensures your Home Canning Recipes are safely preserved.
This Home Canning Supplies list will get you started, and don't forget to have a little fun with it!.
Ingredients & Equipment
Okay, so you wanna get into home canning? Good on ya! First things first, let’s talk about what you actually need.
Forget fancy gadgets you see online. We're going back to basics and focusing on the Canning Essentials to make this a Canning For Beginners journey.
I mean, who needs more clutter, right? Plus, Canning Tools are so much fun!
Main Ingredients
Listen, this is about tools , not edible ingredients. But you can't do this without the right jars and accessories! So here’s the lowdown for Home Canning Supplies .
- Water Bath Canner: You need a pot big enough to cover your jars with at least 1 inch of water. A standard size canner is generally 15-20 liters . That's enough for 7 quart jars or 9 pint jars. You can use a big pot if you already have one, but the canner usually comes with a rack, which is important.
- Canning Jars (Mason Jars): Pint (16 oz/473 ml) , Quart (32 oz/946 ml) , Half Pint (8 oz/237 ml) . Make sure you get the right size for your recipe. Always inspect them for cracks or chips before you even think about using them. Mason Jar Sizes for Canning are really easy to find!
- Canning Lids: Always use new lids for each batch! The sealing compound is only good for one go-round. No cheating here.
- Canning Jar Screw Bands: You can reuse these unless they’re rusty or damaged. Check them before you start!
Seasoning Notes
Alright, not really seasoning , but these little helpers make life SO much easier. And Food Preservation Checklist is key!
- Jar Lifter: Honestly? This thing is a lifesaver. Don’t try to get hot jars out of boiling water without it. Trust me on this.
- Wide Mouth Funnel: This is your friend. It makes filling jars so much less messy, and prevents waste.
- Bubble Remover/Headspace Tool: A chopstick works in a pinch, but a proper tool is best for getting out those air bubbles and measuring headspace.
- Lid Lifter (Magnetic): I love this little gadget! Keeps your fingers away from hot water when you're grabbing those lids.
Equipment Needed
Checklist: The Essentials Tools for successful home canning, we just covered. Now, here is the rest.
- Large Stockpot (if not using a dedicated water bath canner): See above.
- Measuring cups and spoons: You probably already have these.
- Large mixing bowls: For prepping your food.
- Wooden spoon or spatula: For stirring things up.
- Clean kitchen towels: Lots of them!
- Cooling rack: For setting the jars on after processing.
I'd say that the essential canning equipment is not to complicate the work but the contrary, I think it is important to follow the Safe Canning Practices .
Honestly, don't overthink it. Home canning is about preserving the good stuff. Canning For Beginners , so I've made sure to keep it simple.
Happy canning!
Home Canning: Your Essential Toolkit for Preserving Goodness
Home canning, sounds intimidating, right? Honestly, it's not as scary as it looks. Think of it as bottling sunshine for a rainy day.
This guide walks you through all the gear you'll need to safely can your favourite stuff: jams, pickles, the works! Consider this your personal Fort Knox of flavour .
Ready? Let's dive in.
Checklist: The Essentials Tools for Home Canning might seem daunting, but think of it as an investment. You'll be eating delicious, homegrown goodies all year round.
Prep Steps: Gearing Up for Canning Glory
Before you even think about peeling a tomato, get your ducks in a row. This is your essential mise en place , canning edition! Having everything organized is a major time saver.
Trust me, you don't want to be hunting for a jar lifter with boiling water bubbling away. Remember: Safety first.
We're dealing with hot water and glass. No running, jumping, or juggling.
Step-by-step Process: From Garden to Jar
Here's the lowdown on transforming your kitchen into a canning command centre:
-
Gather your arsenal.
Make sure you have all 10 essential tools mentioned above including
Canning Essentials - Wash, wash, wash! Scrub those Mason Jar Sizes for Canning, lids and bands in hot, soapy water. Sanitize the jars.
- Set up your station. Place your water bath canner, filled with water, on the stove. Bring to a simmer.
-
Follow your recipe.
Don't go rogue! Stick to a tested recipe from a
Canning For Beginners resource. - Fill 'er up! Use a wide mouth funnel. Leave recommended headspace.
- Bubble Trouble. Banish those pesky air bubbles with your bubble remover.
- Wipe those rims. A clean rim ensures a good seal.
- Lid on, band on. Finger tip tight, not Hercules tight!
Pro Tips: Canning Like a Boss
-
Invest in quality gear.
Seriously, good tools make all the difference to any
Canning Tools . - Don't skimp on Headspace. Too little, and things can buckle and break. Too much, and you'll never get a good seal.
- Listen for the "Ping." It's the sound of success. But always double check those seals!
Home canning isn't just about preserving food; it's about preserving a tradition. It's a labor of love, a way to connect with the seasons.
So, what are you waiting for? Grab your tools, choose your fruit, and let's get canning! This Food Preservation Checklist is your ticket to deliciousness.
Recipe Notes
Right, let's dive a bit deeper. Honestly, sometimes the smallest details make all the difference. These are my kinda go-to reminders for best results.
You know? I've learned a few things along the way, usually the hard way, haha! Here's Checklist: The Essentials Tools for successful home canning.
Serving Suggestions: Make It Look Amazing!
How you plate things matters. I think your grandma would tell ya the same. Think about it: a dollop of vibrant homemade jam on a scone screams "I made this with love.
" For sides, try a crusty baguette. With the canning essentials you can make pickled onions that are great with cheese and crackers.
For beverages, maybe some elderflower cordial or a cup of Earl Grey.
Storage Tips: Keep It Fresh!
Right so, refrigeration guidelines . Once opened, keep your canned goods in the fridge. For freezing options , don’t freeze canned goods in the jar.
The glass will shatter. Reheating instructions ? If you're using a canned sauce, gently warm it in a saucepan, never boil.
Variations: Mix It Up!
For a diabetic adaptation, use a sugar substitute. Remember to adjust quantities. Try swapping out some fruits with seasonal ingredients to spice things up.
With this food preservation checklist , you can adapt easily to your dietary needs.
Nutrition Basics: Goodness in a Jar!
Home canned goods retain most of their vitamins. They are also free from artificial preservatives. Canning For Beginners might think it's just about jam, but it's about healthy eating too!
Alright then, that is all you need to know for now!. Now get cracking and have fun with your home canning recipes ! You've got this!.
Here are 10 to guide you : Canning Essentials : Tools and Knowledge. Canning For Beginners : Your first steps.
Canning Tools : What you need. Canning Equipment : Gear up. Home Canning Recipes : Inspiration awaits. Water Bath Canning Kit : Ready to go.
Mason Jar Sizes for Canning : Get the right fit. Food Preservation Checklist : Make sure you're ready. Safe Canning Practices : Crucial steps.
Home Canning Supplies : Stock up for success. Don’t be afraid to mess up. Every batch is a learning experience.
Happy canning, love!
Frequently Asked Questions
Okay, spill the tea! Why do I really need all these tools on the "Checklist: The Essentials Tools for" home canning? Can't I just wing it like they do on Bake Off?
While a "Bake Off" spirit is admirable, canning is more science than art! Each tool in "Checklist: The Essentials Tools for" plays a crucial role in ensuring your food is safely preserved.
From the canner that properly heats the jars, to the jar lifter that prevents burns, skipping these essentials can risk botulism or spoilage, and nobody wants that in their pantry! Plus, using the right tools makes the whole process smoother and less stressful a bit like having Mary Berry on your side.
What's the deal with headspace? It sounds like something from a sci-fi film. Is it really that important in "Checklist: The Essentials Tools for" home canning?
Headspace is seriously crucial! It's the empty space left at the top of the jar, and it allows for proper expansion of the food during processing. Too little headspace, and your jars might explode in the canner! Too much, and you might not get a good seal, leading to spoilage.
Think of it like Goldilocks and the Three Bears it needs to be just right.
Help! I accidentally used the canning bands way too tight. Am I doomed? What do I do now with this "Checklist: The Essentials Tools for"?
Don't panic! If you've just put the jars into the canner, carefully remove them (using your handy jar lifter, of course!) and loosen the bands to "fingertip tight" just snug enough that they won't come undone. This allows air to escape during processing.
If you didn't catch it in time and the jars have already been processed, check the seals carefully after cooling. If any didn't seal, you'll need to reprocess them with new lids, or refrigerate and use the contents within a few days.
I’m on a budget. Are there any tools from the "Checklist: The Essentials Tools for" that I can temporarily substitute until I can buy the real McCoy?
Safety first! While a large stockpot with a rack can sometimes substitute a water bath canner, it needs to be tall enough to fully submerge the jars by at least an inch, which isn't always easy. A chopstick can work as a bubble remover/headspace tool in a pinch.
However, a jar lifter is non-negotiable for safe jar handling, and new canning lids are always essential for a proper seal. Don’t cheap out on safety!
My Grandma swore by reusing lids, but this "Checklist: The Essentials Tools for" guide says not to. Why the change? Is Grandma wrong?
Grandma probably canned in different times, but unfortunately, modern canning lids are designed for single use. The sealing compound on the lids degrades after one use, meaning they're less likely to form a proper, reliable seal the second time around. It's all about food safety!
New lids are a small price to pay for peace of mind, and keeping your delicious creations safe to eat. Think of it as an upgrade, rather than saying Granny was wrong!
Home Canning Your Essential Toolkit

