The Proper Pâté Brisée a Foolproof Flaky Allbutter Pie Crust
- Why Butter Reigns Supreme: Unlocking True Pastry Flavour
- The Philosophy Behind This Superior AllButter Pie Crust
- Essential Components for a Rich, Tender Dough
- Tool Kit Mastery: What You Absolutely Need
- Techniques for Texture: Integrating Butter into Flour
- The Hydration Dance: Achieving the Perfect Dough Consistency
- Resting and Rolling: Prepping Your AllButter Pie Crust for the Oven
- Troubleshooting Common Pastry Pitfalls
- Maximizing Your Double-Crust Yield: Storage and Freezing Insights
- Beyond the Basic Bake: Creative Applications
- Recipe FAQs
- 📝 Recipe Card
Why Butter Reigns Supreme: Unlocking True Pastry Flavour
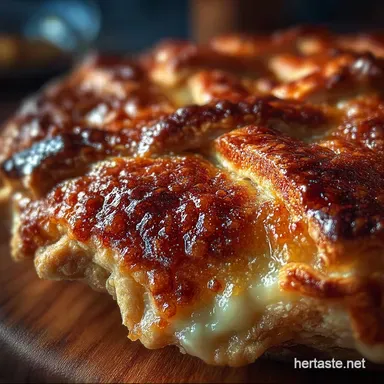
When pursuing the ultimate shortcrust experience, the choice of fat is the single most defining decision you will make. While convenience might tempt some towards shelf stable alternatives, nothing imparts the rich, complex flavour profile and shatteringly delicate texture quite like pure, high-quality butter.
This dedication to dairy is the cornerstone of our definitive AllButter Pie Crust . The subtle salinity and inherent creaminess that butter brings to the dough elevates a simple vessel into a co-star of your favourite filling, whether it’s a tart apple crumble or a savoury chicken pot pie.
If you seek that true, melt-in-your mouth flakiness, you must commit to the butter.
The Philosophy Behind This Superior AllButter Pie Crust
This all butter pie crust recipe strips away complexity to focus purely on technique and temperature control. We aren't aiming for merely "acceptable"; we are striving for the best all butter pie crust achievable in a home kitchen.
This pursuit requires understanding how the fat interacts with the flour and water to create steam pockets, which are the literal drivers of flakiness.
Bidding Farewell to Shortening Myths
Many recipes champion shortening for its higher melting point, suggesting it’s easier to handle. While true, shortening lacks the crucial flavour compounds that butter naturally possesses. Shortening contributes only tenderness, often at the expense of taste.
Our homemade all butter pie crust embraces the challenge of working with colder temperatures because the reward that unmistakable, luxurious buttery aroma and taste is worth every moment spent chilling.
The Golden Ratio for Ultimate Flakiness
Achieving the perfect balance hinges on the ratio of flour to fat, alongside the introduction of a tiny amount of acid. For a standard two crusts recipe yielding enough dough for a 9 inch double crust pie (or two single shells), we utilize 315g of all-purpose flour paired with 226g of cold butter.
This generous fat percentage, nearly 70% by weight relative to the flour, ensures those crisp, visible layers. The inclusion of a teaspoon of apple cider vinegar or vodka is our secret weapon, as it briefly interferes with gluten bonding, guaranteeing a tender structure.
Prep Time Commitment: Getting Ready for Baking Brilliance
While the active work required for this all butter pie crust is relatively brief clocking in at about 25 minutes the mandatory chilling stages extend the total process to around two hours minimum. This time is not wasted; it is crucial preparation.
Proper resting allows the flour to fully hydrate and the butter to re-solidify after handling, both non-negotiable steps for producing a truly flaky all butter pie crust .
Essential Components for a Rich, Tender Dough
Beyond the technique, the quality of your starting ingredients dictates the final outcome. For this recipe, we require 2 ½ cups of all-purpose flour (315g), 1 teaspoon of fine sea salt, a small amount of sugar (about 1 teaspoon for minimal browning assistance), 1 cup of unsalted butter (226g), 6 to 8 tablespoons of ice water, and 1 teaspoon of acid (vinegar or vodka).
Every component plays a specific role in this delicate ecosystem.
Tool Kit Mastery: What You Absolutely Need
You don't need specialized machinery, but the right approach to chilling and mixing tools makes the process significantly smoother. While this guide is adaptable to a food processor , the hand mixing method allows for greater temperature control.
The Chilling Imperative: Sourcing Ice-Cold Dairy
This cannot be overstated: your butter must be frozen solid . If you plan to use the grating method highly recommended for beginners place your butter sticks in the freezer for at least 30 minutes prior to starting.
The colder the fat enters the flour, the larger the pockets of steam it will produce during baking, directly translating to superior flakiness.
Flour Selection: Choosing the Right Protein Content
Standard all-purpose flour, typically containing moderate protein levels (around 10-12%), is ideal. Higher protein bread flours can lead to a tougher crust because they develop more gluten when mixed with water. We want the bare minimum of gluten development possible in this pastry.
Measuring Precision: Why Weight Trumps Volume Here
For absolute consistency, especially when dealing with fat ratios, measuring the flour by weight (315g) is far superior to scooping and leveling cups. A heavily packed cup of flour can throw off the delicate balance required for a successful all butter pie crust recipe .
Techniques for Texture: Integrating Butter into Flour
The goal here is integration without emulsification. You are essentially coating particles of flour with tiny, flat shards of frozen butter. If you are mixing by hand, use a pastry blender or two knives to quickly cut the grated butter into the flour, salt, and sugar mixture.
The mixture should look like coarse meal with visible, distinct pieces of butter no larger than small peas. If using the all butter pie crust food processor method, use short, pulsing actions no more than 10 to 12 total pulses to achieve the same result.
Related Recipes Worth Trying
- Best Creamy Pumpkin Pie Recipe From Scratch — Ditch the bland tins This Pumpkin Pie Recipe features a brown butter crust and a silky perfectly spiced filling Your new goto for Thanksgiving Get the recipe
- The Best Classic Pumpkin Pie Recipe Flaky Crust Silky Filling — Ditch the soggy bottoms Master the perfect Homemade Pumpkin Pie from scratch with this trustworthy recipe featuring a flaky allbutter crust and rich spiced...
- Best Flaky Crust Pumpkin Pie Recipe From Scratch — Ditch the soggy bottom Learn to make the perfect creamy Pumpkin Pie filling with a shatteringly flaky allbutter crust Its the ultimate autumn bake
The Hydration Dance: Achieving the Perfect Dough Consistency
This is where many bakers stumble. You introduce the ice-cold water (mixed with the acid) slowly. Start by drizzling in 6 tablespoons over the flour and butter mixture. Use a fork or your fingers to lightly toss everything together. The dough should look shaggy and barely cohesive.
It should not immediately form a ball. Only add more water, one teaspoon at a time, until the dough just begins to hold together when squeezed. Over hydration is the fastest route to a tough, biscuit like crust, ruining the delicate promise of this all butter pie crust .
Resting and Rolling: Prepping Your AllButter Pie Crust for the Oven
Once hydrated, the dough must be handled minimally and chilled thoroughly before it ever sees a rolling pin.
The Pea-Sized Pieces: Mastering the Rubbing-In Method
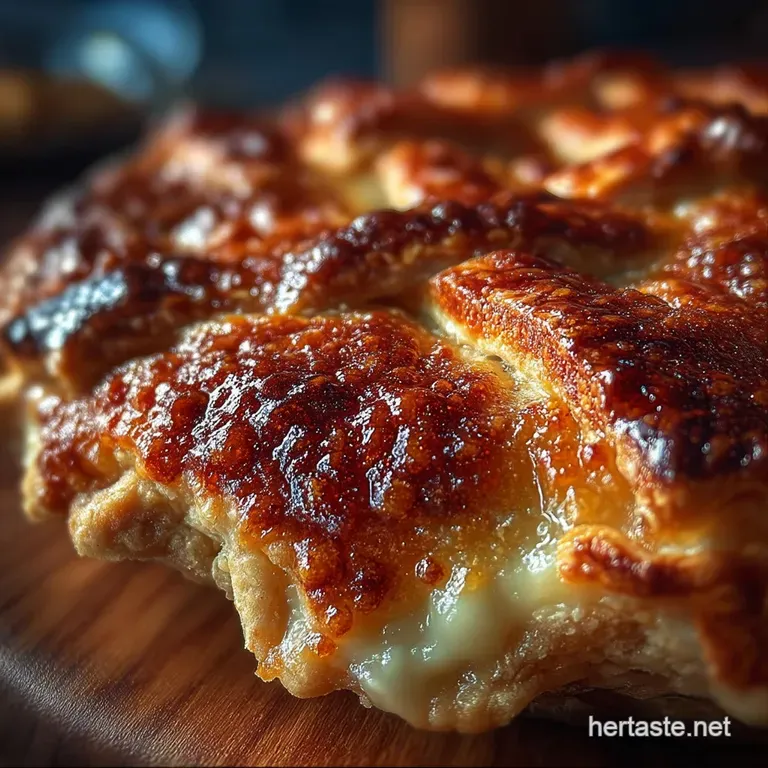
Whether using a blender or your hands, ensure that those pea-sized, visible pieces of butter remain intact. These are your insulation layers; they prevent the dough from becoming tough and are responsible for the characteristic shattering quality of a flaky all butter pie crust .
Water Temperature Control: The Secret to Preventing Toughness
Using water directly from the ice bath, ensuring it's close to 32° F ( 0° C), guarantees that the butter pieces do not soften before they even get mixed in.
Warm water activates gluten immediately, leading to an undesirable texture in your finished all butter pie crust .
The Quick Chill: Essential Resting Times Explained
After forming the shaggy mixture into two flattened discs, wrap them tightly in plastic wrap. The first mandatory chill should last at least 60 minutes. This allows the gluten strands which were stressed during mixing to relax, making the dough far easier to roll out without shrinking back later.
From Disk to Diameter: Rolling Out Evenly
Take one disc out of the fridge about ten minutes before you intend to roll it. On a lightly floured surface, begin rolling from the centre outward, rotating the dough frequently to prevent sticking and ensure a circular shape. You want a 12 inch circle for a standard 9 inch pie plate.
Handle the dough delicately; it should feel cool and pliable, not hard or sticky.
Troubleshooting Common Pastry Pitfalls
If you find your dough is too crumbly upon rolling, it’s likely dehydrated or too cold. Before panicking, let it rest for another 5 minutes, or lightly spritz the surface with a touch more ice water before gently trying to press the cracks together.
If the dough tears badly during transfer to the pie plate, patch it immediately; the second chill will hold the repair in place.
Maximizing Your Double Crust Yield: Storage and Freezing Insights
This recipe yields enough for a top and bottom crust. Leftover dough perhaps from making only a single shell is highly adaptable.
Freezer Longevity: How Long Does Unbaked Dough Last?
Flatten the wrapped dough discs slightly before placing them in a heavy duty freezer bag. Stored correctly, this all butter pie crust dough will maintain peak quality for up to three months.
When you are ready to use it, transfer it directly from the freezer to the refrigerator overnight to thaw gently.
Beyond the Basic Bake: Creative Applications
The simplicity of this foundation means it works beautifully across various culinary landscapes, making it a truly versatile all butter pie crust recipe .
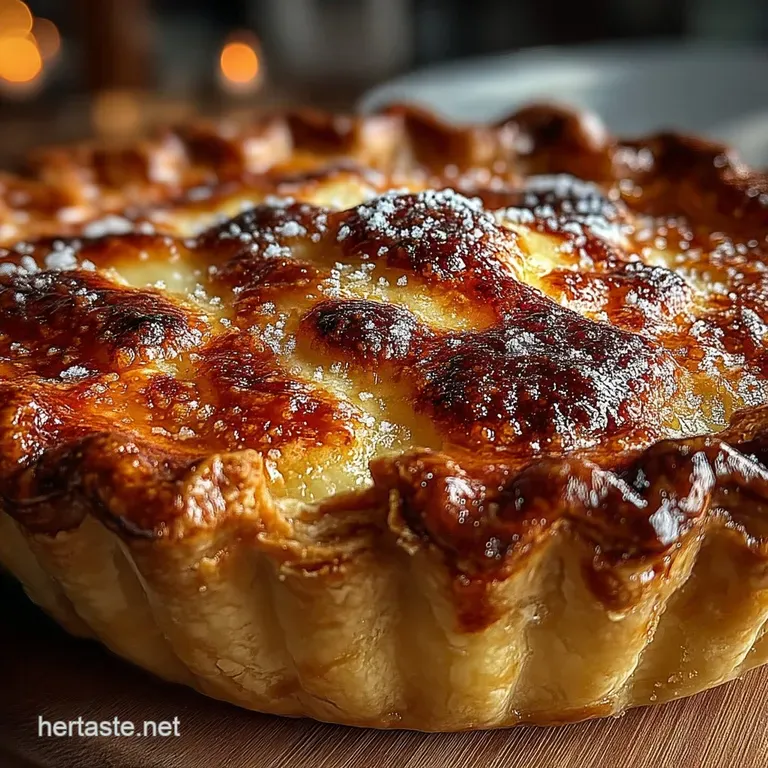
Blind Baking Brilliance: Avoiding the Soggy Bottom
For wet fillings like quiche or lemon meringue, blind baking is essential. Prick the base thoroughly (docking), line it with parchment paper, fill it with ceramic pie weights or dried beans, and bake until the edges are set.
Remove the weights and paper and continue baking until the bottom is dry and just starting to turn a pale gold.
Nutritional Snapshot: Understanding the Butter Factor
It is important to acknowledge that relying solely on butter results in a pastry that is richer in saturated fat than those made with vegetable shortening. However, this fat content is directly responsible for the superior flavour and the light, layered mouthfeel that makes the homemade all butter pie crust so revered.
Fixing a Crumbly Dough: Quick Rehydration Tips
If your dough crumbles excessively when you first try to bring it together, it needs just a tiny bit more moisture. Dampen your hands slightly with ice water and work the moisture in by lightly kneading for just 5 seconds no more then re-wrap and chill again before rolling.
Serving Suggestions
The proper way to serve a pie made with this exquisite foundation is simply: warm, allowing the rich butter flavour to fully permeate every bite, perhaps paired with a robust English Breakfast Tea for daytime enjoyment, or a crisp dessert wine for an evening indulgence.
Recipe FAQs
Why is my All-Butter Pie Crust coming out tough instead of flaky?
Nine times out of ten, toughness is down to one thing: warm butter or overworking the dough. Butter must remain icy cold so that when it hits the oven, the water inside turns to steam, creating those beautiful, flaky layers.
Make sure you are using grated, frozen butter and mixing it in quickly, just until the mixture resembles coarse crumbs.
Can I make this All-Butter Pie Crust ahead of time, and how should I store it?
Absolutely, making it ahead is highly recommended! Once wrapped tightly in plastic wrap, the dough discs can be stored in the fridge for up to three days, or frozen for up to three months.
If frozen, thaw them gently overnight in the fridge before rolling out, and always let them sit on the counter for 10 minutes to take the chill off before you start rolling.
I've heard shortening gives a flakier result. Is an All-Butter Pie Crust really worth the fuss?
While shortening has a higher melting point which can offer structure, you simply cannot beat the flavour profile of 100% butter it’s richer and gives that lovely, crisp snap we all crave.
The trick to flakiness with butter is getting those pea-sized chunks distributed throughout the flour, which creates steam pockets when baked.
What’s the deal with adding vinegar or vodka to the dough? Does it actually make a difference?
It’s not just kitchen folklore; it really does help! The acid from the vinegar or the nature of the high proof alcohol inhibits gluten formation in the flour. Less gluten means a more tender, less chewy crust.
Since alcohol evaporates completely during baking, you get the tenderness without any residual flavour it's a top tip for a proper pâté brisée.
My pie crust shrinks when I blind bake it. How do I stop my All-Butter Pie Crust from pulling away from the edges of the dish?
Shrinkage is nearly always due to insufficient chilling before baking. You must chill the lined pie plate for at least 30 minutes after crimping, or ideally, pop it in the freezer for 15 minutes before adding weights.
This sets the butter, meaning the dough structure is locked in before it hits the heat, drastically reducing the pull back.
Can I use this dough for savoury dishes like a quiche, or is it strictly for sweet pies?
This dough is incredibly versatile it’s a classic French pâté brisée, which works brilliantly for both sweet and savoury. Just omit the teaspoon of sugar listed in the recipe, or even add a pinch of black pepper or dried herbs like thyme instead for a savoury kick.
It stands up perfectly to rich fillings, be they apple or cheese!
Flaky Allbutter Pie Crust