The Proper Pubstyle Apple Cobbler Buttery Biscuits over Spiced Fruit
Why This Rustic Apple Cobbler Reigns Supreme Over All Other Desserts
There are desserts that impress with their towering layers and intricate piping, and then there is the Apple Cobbler . This humble baked fruit dish speaks a language understood deeply by anyone seeking genuine comfort in food.
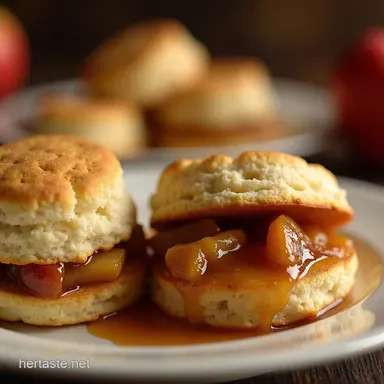
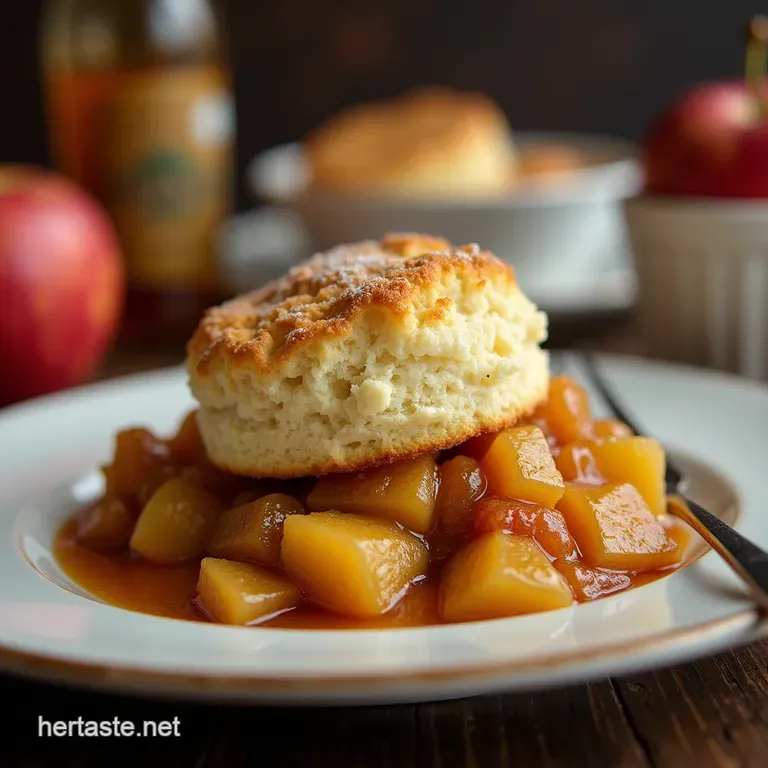
Forget fussy pastry work; this recipe delivers a deeply comforting, rustic dessert featuring tender, warmly spiced apples nestled beneath a golden, slightly crisp, and wonderfully rich biscuit topping.
It’s the quintessential taste of autumn, best served warm enough to melt the vanilla ice cream sitting proudly on top. It truly harks back to simple, honest baking, the kind of thing you’d happily tuck into after a bracing walk across the common.
We aren't aiming for perfection here; we are aiming for pure, unadulterated satisfaction, making this one of the Best Apple Desserts you will ever encounter.
The Philosophy Behind Our Unbeatably Buttery Topping
What separates a truly memorable cobbler from a merely decent one is the crown it wears. The topping for this Apple Cobbler Recipe Easy is not a delicate shortbread or a heavy cake layer; it is a true biscuit flaky, tender, and rich with cold butter.
This preparation keeps the process straightforward, ensuring that even if you’ve never baked before, you can achieve stellar results.
Setting the Stage: Comfort Food Reimagined
We’ve taken the concept of home baking and refined it slightly. The preparation time clocks in at a quick 25 minutes active prep time, making this an ideal candidate for a weeknight treat or a last minute gathering centerpiece.
This preparation method focuses on maximizing flavour extraction from the fruit while ensuring the topping bakes up light and airy, contrasting beautifully with the soft fruit beneath.
Beyond the Pie: Understanding the Cobbler's Charm
The charm of the cobbler lies in its intentional unevenness the "cobbled" effect where dollops of dough bake up into soft peaks and valleys. This texture is vital; it allows the juices from the fruit to bubble up between the biscuits, creating crispy edges where the dough meets the hot fruit.
This technique bypasses the need for rolling out pie dough, cementing its status as an Easy Apple Cobbler .
Aromatic Foundations: The Spice Blend Secrets
The Apple Filling base must sing, not merely hum. Our secret lies in the careful balance of simple pantry spices. We use a generous teaspoon of ground cinnamon for warmth, complemented by just a whisper of nutmeg about a quarter teaspoon to add aromatic depth without overpowering the fruit.
A tablespoon of fresh lemon juice ensures the overall flavour profile remains bright, cutting through the richness of the butter in the topping.
Assembling the Orchard's Finest: Essential Components List
To create this magnificent Apple Cobbler with Fresh Apples , you’ll need ingredients that prioritize temperature and quality, especially for the topping.
We require about 6 large apples a mix of tart varieties like Granny Smith alongside a firmer, sweeter type such as Honeycrisp provides the best outcome for texture and flavour balance.
For the filling, you'll need a blend of granulated and light brown sugar (a quarter cup of the latter adds essential molasses notes), 2 tablespoons of all-purpose flour to help the juices thicken beautifully, and the aforementioned cinnamon and nutmeg.
Crucially, 2 tablespoons of small cubes of unsalted butter are dotted over the fruit before baking to enrich the sauce.
Selecting the Ideal Apples for Perfect Tender Consistency
The choice of apple dictates the final texture. Soft apples will turn to mush, while overly hard ones might remain slightly crisp we aim for tender. A mix ensures that some apples break down slightly to form the sauce while others hold their shape. Peel, core, and slice your selection roughly 1/4 inch thick.
This consistency ensures everything cooks evenly during the 40 to 45-minute bake time.
The Essential Pantry Stock for Warming Spices
Beyond the fresh fruit, ensure your spice rack is stocked. Beyond the cinnamon and nutmeg, having high-quality baking powder is non-negotiable for the topping’s rise. If you happen to have buttermilk on hand, utilize it for the topping; if not, a quick substitute can be made by curdling whole milk with a teaspoon of vinegar, which yields excellent results for our biscuit blanket.
Must Have Tools for Seamless Assembly and Baking
While this is an Apple Cobbler Recipe Easy in concept, the right tools help tremendously. You will need a standard 9 inch square baking dish or a 2-quart oval casserole dish.
Mixing is straightforward, but for the topping, a pastry blender or even just your fingertips will be necessary to work the cold butter into the flour quickly without melting it.
Related Recipes Worth Trying
- Best Fresh Cherry Cobbler with Buttermilk Biscuits Easy Bake — Ditch the canned stuff This Easy Cherry Cobbler Recipe features sweettart fresh cherries under tender golden buttermilk biscuits Perfect summer baking
- Easy Cherry Cobbler Recipe with Buttery Biscuit Topping — Forget complicated pies This homemade Cherry Cobbler recipe features a perfectly tart fruit filling and a divine flaky biscuit topping The ultimate comfort...
- The Best Rustic Peach and Cherry Cobbler Recipe — Forget fussy pastry This easy Peach and Cherry Cobbler recipe features a tender buttermilk biscuit topping for the perfect summer fruit dessert
Crafting the Tender, Spiced Apple Filling Base

The foundation of our dessert is rich, fragrant, and perfectly sweetened. This filling requires minimal cooking time prior to baking, as the majority of the softening occurs once it’s beneath the dough.
Prepping the Fruit: Slicing and Sweetening Strategy
Once your 6 pounds of apples are peeled and sliced, they head into a large bowl. Combine them immediately with the sugars, flour, spices, and lemon juice. The action here is gentle tossing; we want every slice coated, but we don't want to bruise the fruit or start macerating it too much before it hits the pan.
Building Flavor: Simmering the Filling to Perfection
For this rustic style, we skip a preliminary simmer. Instead, we rely on the oven’s heat. Pour the tossed apple mixture directly into your prepared, lightly greased baking dish, ensuring an even layer. Next, take those 2 tablespoons of cold, cubed butter and dot them randomly across the surface of the apples.
This melts during baking, infusing the surrounding sauce with creamy richness.
Mastering the Drop Biscuit Topping Technique
This is where many beginners hesitate, but trust me, achieving success with this topping the hallmark of a great Apple Cobbler with Bisquick alternative is about speed and coldness.
Techniques for Dropping Dough: Creating Uneven, Charming Clouds
In a separate bowl, whisk your dry topping ingredients: 1 3/4 cups of flour, 2 tablespoons of sugar, baking powder, and salt. The key is the butter: add 6 tablespoons of very cold, cubed butter.
Use a pastry blender or your fingers to swiftly cut the butter in until the mixture resembles coarse crumbs, leaving some pea-sized chunks intact. This variation between fine meal and small butter pockets is what creates the flakiness.
Next, pour in the 3/4 cup of cold buttermilk all at once. Stir just until a shaggy dough forms. Overmixing develops gluten and leads to tough, cake like tops, which defeats the purpose. You want a barely cohesive mass.
Using two spoons, drop uneven mounds of this dough randomly over the entire surface of the apple filling, leaving small gaps between them this is the literal "cobble" effect that allows steam to escape and the fruit underneath to breathe.
For extra crunch, brush the tops lightly with an egg wash (one egg whisked with a tablespoon of water) and sprinkle generously with extra granulated sugar.
Baking Times and Visual Cues for Golden Perfection
Slide your Apple Cobbler Recipe into a preheated 375° F ( 190° C) oven. Bake for 40 to 45 minutes.
You are looking for two specific signs of doneness: first, the biscuit topping should be a deep, inviting golden brown; second, you must see thick, viscous bubbles of the apple filling actively erupting through the gaps in the dough.
If the top browns too quickly, you can loosely tent it with foil for the remainder of the bake time.
Elevating Your Apple Cobbler Experience Post Oven
Patience is required immediately after removing the cobbler from the oven. Allowing it to rest for 15 to 20 minutes on a wire rack is crucial. This resting period permits the juices, which have been violently boiling, to cool slightly and thicken into the perfect syrupy consistency that coats the fruit.
If you cut into it immediately, you risk a runny mess.
Serving Suggestions: Pairings Beyond Vanilla Ice Cream
While the classic accompaniment of high-quality vanilla bean ice cream is unbeatable the hot/cold contrast is heavenly do not limit your options. A dollop of thick, slightly warmed double cream offers a more traditional, rich texture.
For something truly luxurious, a drizzle of homemade salted caramel sauce complements the spiced apple notes beautifully.
Storing Leftovers: Keeping the Cobbler Fresh for Days
This Apple Cobbler Recipe keeps remarkably well. Once completely cooled, cover the dish tightly with plastic wrap or transfer portions to an airtight container. It maintains excellent quality at room temperature for up to two days, or in the refrigerator for four to five days.
Reheat individual slices gently in the oven (not the microwave, which softens the topping) at 300° F ( 150° C) for about ten minutes to restore some of that fresh baked crispness.
Seasonal Twists: Integrating Peaches or Berries into this Apple Cobbler Recipe
While we celebrate this as the definitive Apple Cobbler , the technique is wonderfully versatile. When peaches are in season, substitute half the apples with firm, ripe peaches and add a splash of almond extract to the filling.
In summer, this base works perfectly with a mix of tart berries, though you may need to slightly reduce the added sugar as berries are naturally sweeter.
Achieving a Richer Depth: The Brown Butter Topping Upgrade
For those seeking an even more sophisticated flavour profile than our already buttery topping provides, consider a brown butter upgrade. Instead of cutting in cold butter, gently melt the 6 tablespoons of butter in a pan until it foams, then subsides, leaving behind nutty brown solids.
Chill this browned butter briefly until it is solid but pliable (like soft clay), and then cut that into your flour mixture. This simple step adds incredible depth, transforming this into a truly show stopping dessert.
Recipe FAQs
My biscuit topping for the Apple Cobbler seems dense; what did I do wrong?
Ah, that’s a common pitfall! The secret to a light, fluffy cobbler top is keeping everything cold especially the butter and buttermilk. If the butter melts before it hits the oven, you lose the steam pockets needed for lift, resulting in a dense topping, much like a badly risen scone.
Can I make this Apple Cobbler ahead of time, or how should I store leftovers?
This cobbler is best eaten on the day it's made, as the topping will soften overnight. If you must prep ahead, assemble the filling and topping separately, storing both covered in the fridge for up to 24 hours, then assemble and bake fresh.
Leftovers keep well covered in the fridge for three days; just reheat in the oven for 10 minutes to crisp the top back up a bit.
What apples are best to use so the filling isn't too mushy or too sharp?
You want a blend for the perfect flavour balance! Use a mix of tart apples, like Granny Smith, for structure, combined with a slightly sweeter, firmer variety such as Honeycrisp or Braeburn. This combination ensures the filling holds its shape nicely without becoming overly sweet or dissolving into sauce.
My filling isn't bubbling properly, but the topping is browning too fast. What should I do?
That means your oven temperature might be a tad high, or the apples weren't cut quite thick enough. To save it, gently tent the top with a piece of aluminium foil like putting a little sunhat on it to prevent further browning.
Then, pop the cobbler on a lower rack for the final 10 15 minutes until you see those thick, hearty bubbles escaping the gaps.
I don't have buttermilk; what can I substitute in the biscuit topping?
No need to nip to the shop just for buttermilk! You can create a very effective substitute right now. Simply measure out 3/4 cup of whole milk and stir in 3/4 teaspoon of white vinegar or fresh lemon juice.
Let it sit for five minutes until it looks slightly curdled, and it will work brilliantly in place of buttermilk for that essential tang and tenderness.
Rustic Buttery Apple Cobbler