Bubbly Bliss My Goto Summer Garden Fresh Cherry Cobbler with a Buttermilk Biscuit Topping
- The Unbeatable Charm of True Summer Baking: Why This Fresh Cherry Cobbler Reigns Supreme
- Elevating the Humble Cobbler: Our Secret to Intense Fruit Flavor
- Assembling the Cornerstone Components for Peak Fresh Cherry Cobbler
- Step-by-Step Guide to Simmering the Jewel-Toned Cherry Filling
- Achieving That Perfectly Fluffy, Golden-Brown Biscuit Topping
- Serving Suggestions: What Pairs Best with This Ultimate Summer Dessert
- Troubleshooting and Storage Tips for Your Homemade Cherry Cobbler
- Recipe FAQs
- 📝 Recipe Card
The Unbeatable Charm of True Summer Baking: Why This Fresh Cherry Cobbler Reigns Supreme
There is a particular magic that settles over the kitchen when stone fruit is perfectly in season. The air fills with a fragrance that promises indulgence, and the search for the ultimate summer dessert ends the moment you decide to bake.
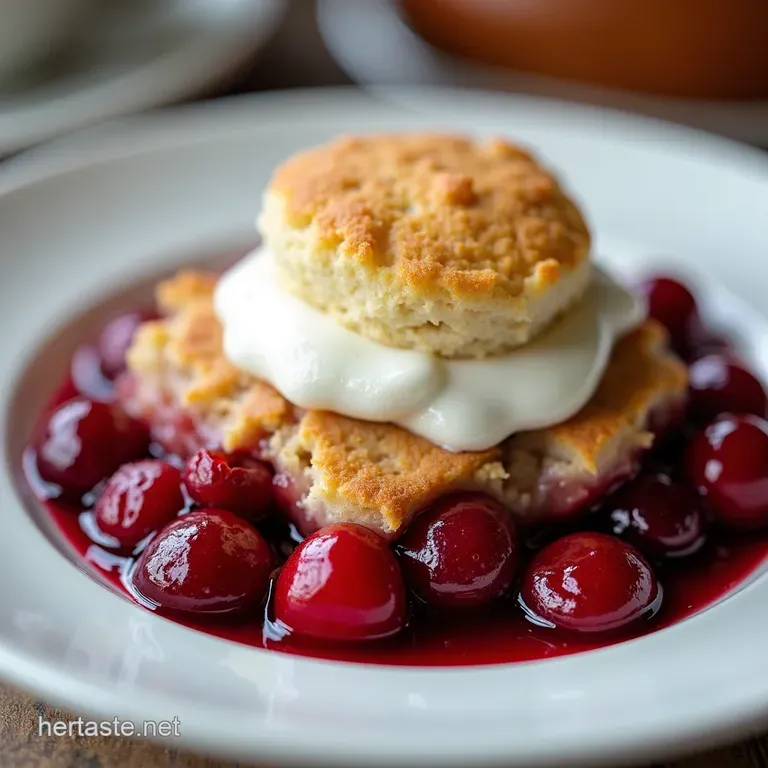
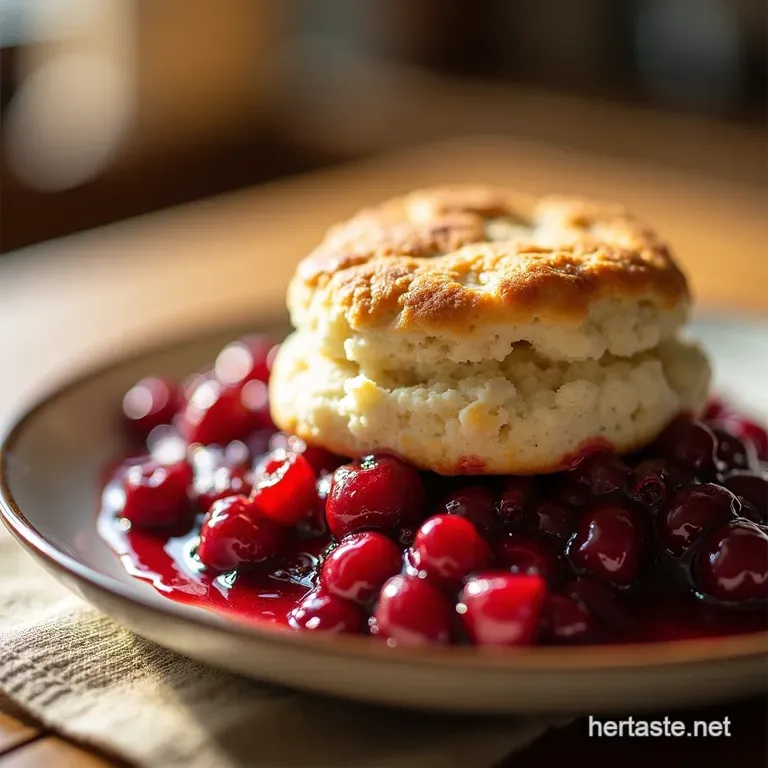
Forget complicated layered cakes or finicky tarts; the Fresh Cherry Cobbler stands supreme in its glorious simplicity. It’s rustic, deeply comforting, and showcases the very best of peak season fruit, crowned with a tender, golden biscuit.
This is not merely a dessert; it’s a celebration of warmth, sunshine, and the sheer joy of baking something truly marvelous from scratch. If you've been searching for the Best Fresh Cherry Cobbler , look no further this recipe focuses on maximizing that vibrant fruit flavour beneath a cloud like, buttermilk topping.
Elevating the Humble Cobbler: Our Secret to Intense Fruit Flavor
The fundamental difference between a truly memorable cobbler and a passable one lies in respecting the star ingredient. While many rely on sugary syrups, our approach to this Sweet Cherry Cobbler focuses on a nuanced balance of acidity, aroma, and texture, ensuring the filling is jewel toned and perfectly set without becoming overly gloppy.
This technique transforms a straightforward bake into an elegant, rustic masterpiece perfect for any occasion, from an easy weeknight treat to a show stopping finale for a barbecue.
Why Fresh Cherries Make All the Difference in Your Cobbler Filling
The vibrancy that fresh cherries bring to this dessert is irreplaceable. When you start with six cups of pitted, ripe fruit, you introduce a natural tartness that cuts beautifully through the rich, buttery topping.
Unlike canned alternatives, the fresh variety holds its shape better when briefly simmered, offering delightful bursts of flavour rather than a uniform mush. Using a mix of sweet and tart cherries, if available, deepens the complexity, preventing the final product from tasting one-dimensionally sweet.
A British Take on Sunshine: Capturing Summer in Every Bite
Though often associated with American baking traditions, the spirit of the cobbler simple fruit covered in a scone or biscuit feels wonderfully akin to classic British baking sensibilities.
There’s an inherent comfort in this format, which requires no precise rolling or shaping, just good ingredients mixed well. Baking this dessert, perhaps in a Fresh Cherry Cobbler Cast Iron Skillet for an authentic rustic presentation, evokes the feeling of a proper Sunday afternoon tea, albeit one that serves as a grand finale.
This recipe is proof that the Easy Cherry Cobbler Recipe is often the most rewarding.
The Marriage of Tart and Sweet: Understanding the Flavor Profile
Achieving that perfect equilibrium in our fruit base is crucial. We use just enough granulated sugar about three quarters of a cup to enhance the cherries’ natural sweetness while allowing their characteristic tart edge to remain prominent.
A tablespoon of freshly squeezed lemon juice acts as a flavour brightener, lifting the heavier notes. Crucially, we introduce a half teaspoon of almond extract. This subtle addition is the secret handshake that elevates cherry desserts, giving it that unmistakable, professional bakery depth.
Assembling the Cornerstone Components for Peak Fresh Cherry Cobbler
This recipe hinges on two distinct, yet complementary, structures: the luscious, thickened fruit base and the light, fluffy biscuit topping. While the filling requires only gentle mixing, the topping demands attention to temperature and minimal handling to ensure a tender crumb rather than a tough chew.
Successful baking here means treating these two components with the respect their different structures require.
Essential Equipment for Crafting the Golden Crust
While you certainly can make a Cherry Pie Cobbler using pie dough, the biscuit topping truly defines this dessert. For the best results, gather a standard 9x13 inch baking dish or a deep, oven safe 2.5-quart vessel.
You’ll need two large mixing bowls one for the fruit and one for the dry topping components and critically, a pastry blender or two sturdy forks. These tools are essential for 'cutting in' the cold butter, which is non-negotiable for achieving that desirable flaky texture in your biscuits.
The Fruit Base: Selecting and Prepping the Best Seasonal Cherries
You will need a generous six cups of pitted, firm, ripe cherries. Whether you choose Bing, Rainier, or a sour variety, ensure they are thoroughly washed and drained before pitting.
In the bowl designated for the filling, gently combine these cherries with the sugar, cornstarch (or tapioca starch, which lends a slightly silkier finish), lemon juice, and the crucial almond extract.
Toss everything lightly; we want the coating to be even, but we must avoid bruising the fruit before it even hits the oven.
Creating the Signature Buttermilk Biscuit Topping: Ingredient Breakdown
The topping requires precision. For the two cups of all-purpose flour, ensure it is spooned and levelled, not scooped directly from the bag, to avoid a dense result. Balance the dry mix with one tablespoon of baking powder for lift and a half teaspoon of salt for savoury depth.
The heroes here are the cold, cubed unsalted butter half a cup and three quarters of a cup of cold buttermilk. The low temperature of these dairy elements prevents the butter from melting prematurely, ensuring pockets of steam create that airy lift during baking.
The Flavor Boosters: Almond Extract, Zest, and Spices You Can't Skip
Beyond the core ingredients, the flavour boosters are what separate a good Homemade Cherry Cobbler from a great one. That aforementioned almond extract pairs magically with cherry, deepening its natural flavour profile.
While the recipe calls for lemon juice for tang, adding a half teaspoon of finely grated lemon zest into the fruit mix adds essential aromatic oils that brighten the entire dish. Should you wish to experiment, a tiny pinch of nutmeg mixed into the dry biscuit ingredients can add warmth without competing with the fruit.
Related Recipes Worth Trying
- Easy Cherry Cobbler Recipe with Buttery Biscuit Topping — Forget complicated pies This homemade Cherry Cobbler recipe features a perfectly tart fruit filling and a divine flaky biscuit topping The ultimate comfort...
- The Best Rustic Peach and Cherry Cobbler Recipe — Forget fussy pastry This easy Peach and Cherry Cobbler recipe features a tender buttermilk biscuit topping for the perfect summer fruit dessert
- The Best OldFashioned Cherry Bake Recipe with Flaky Crust — Forget fussy tartsthis OldFashioned Cherry Bake features a rich buttery crust and comforting filling Get the foolproof recipe
Step-by-step Guide to Simmering the Jewel Toned Cherry Filling
The initial cooking phase is about activating the thickener and softening the fruit just slightly so it releases its gorgeous juices without breaking down entirely. Preheating your oven to 400° F ( 200° C) while you prepare the components is the first step to efficiency.
Lightly grease your chosen baking dish before transferring the coated cherry mixture into the base. Dot the top of the fruit with small pieces of one tablespoon of butter; these will melt down during baking, enriching the sauce beautifully.
Achieving That Perfectly Fluffy, Golden Brown Biscuit Topping
The topping is where many recipes fall short, resulting in dense discs instead of tender biscuits. Patience and cold ingredients are your allies here.
Activating the Fruit: Cooking Down the Cherries Without Turning Them to Mush
While we are not pre-cooking the fruit extensively, the butter melting and the initial high heat will begin the thickening process immediately. The objective is achieved at the end: the filling must be actively bubbling through the cracks in your topping, signalling the cornstarch has activated fully.
Mixing the Biscuit Dough: Handling Techniques for Tender Results
In your second bowl, whisk the dry flour mix, sugar, baking powder, and salt thoroughly. Now, add the cold, cubed butter. This is where the pastry blender or your fingertips come into play.
Work quickly to cut the butter into the flour until you achieve a coarse crumb texture, where the largest butter pieces are roughly the size of small peas. These pockets of cold fat are essential for flakiness. Pour in the cold buttermilk all at once.
Mix with a fork only until the ingredients barely cling together it should look shaggy and undeveloped. Overmixing activates the gluten, leading to tough biscuits.
The Assembly Line: Layering the Cobbler for Optimal Baking
Turn the shaggy dough onto a lightly floured surface. Resist the urge to knead! Gently press or fold the dough two or three times to bring it into a cohesive mass, then pat it into a rough ¾-inch thick shape.
Using a sharp, 2 inch round cutter, cut straight down without twisting (twisting seals the edges and prevents a high rise). Arrange these biscuits closely together, perhaps slightly overlapping, over the bubbling cherry base.
For that appealing golden sheen, brush the tops lightly with any remaining buttermilk and sprinkle with the reserved teaspoon of sugar. If you are aiming for a Mini Cherry Cobbler , use individual ramekins and adjust baking time down by about 10 minutes.
Oven Temps and Timing: Guaranteeing a Bubbly Interior and Crisp Exterior
Bake at that initial 400° F ( 200° C) for 40 to 45 minutes. Do not open the oven door during the first 30 minutes to ensure the biscuits achieve maximum lift.
The cobbler is ready when the topping is deeply golden brown and, most importantly, the fruit juices are vigorously bubbling up between the biscuits. Allow the Fresh Cherry Cobbler to rest on a wire rack for at least 10 minutes after removal; this allows the thickened juices to settle slightly so they don't immediately run everywhere when served.
Serving Suggestions: What Pairs Best with This Ultimate Summer Dessert
The beauty of this cobbler is that it is superb on its own, but truly transcendent with a cooling counterpoint. The classic pairing remains a large scoop of high-quality vanilla bean ice cream, allowing the cold cream to slowly melt into the warm, spicy fruit.
For a slightly more traditional, less sweet finish, opt for a generous drizzle of very cold, thick double cream the British way! This dessert also pairs wonderfully with a robust cup of black tea, making it an excellent, hearty dessert option for late afternoon gatherings.
Troubleshooting and Storage Tips for Your Homemade Cherry Cobbler
Even the best bakers encounter hiccups, but this Fresh Cherry Cobbler Recipe is quite forgiving. If your topping looks pale after 40 minutes, briefly move it to a lower rack or switch the oven to the broiler for 60 seconds (watch very carefully!).
If your filling seems thin after cooling slightly, it means the cornstarch didn't fully activate, usually due to insufficient heat or an early oven opening.
Creative Variations: Swapping Fruits or Enhancing the Topping Texture
If fresh cherries are out of season, this formula translates beautifully to peaches or blackberries. If you prefer a crunchier texture over the soft biscuit, you can easily substitute the biscuit topping with a crumble made from oats, brown sugar, and cold butter cut into the flour mixture.
For an adventurous twist, consider adding half a teaspoon of finely chopped fresh rosemary to the fruit base; its herbaceous note complements the cherry perfectly.
Making Ahead: Can You Prep Parts of This Fresh Cherry Cobbler in Advance?
You can certainly prepare the cherry filling completely a day in advance, storing it tightly covered in the refrigerator. The biscuit dough, however, should ideally be made right before baking, as the cold butter begins to soften almost immediately upon mixing.
For an even easier assembly, you can cut the biscuit shapes ahead of time, arrange them on a parchment lined tray, and keep them chilled until the moment you are ready to place them atop the chilled fruit base before baking.
Freezing Instructions: Preserving That Summertime Taste for Later Enjoyment
This dessert freezes well, though the texture of the biscuit topping may change slightly upon thawing. To freeze, bake the Sweet Cherry Cobbler completely, let it cool to room temperature, cover tightly with plastic wrap and then foil, and freeze for up to three months.
To reheat, bake, covered, at 350° F ( 175° C) until heated through, removing the foil for the last ten minutes to crisp the topping slightly. Enjoying this taste of summer long after the season ends is truly the best reward!
Recipe FAQs
My cherries are quite tart; how should I adjust the sugar in this Fresh Cherry Cobbler recipe?
That's a perfectly normal consideration when using seasonal fruit! If your cherries are very tart, you can safely add an extra 1 to 2 tablespoons of sugar to the filling mixture. Taste a tiny piece of a pitted cherry first, and if it makes your eyes water, add that extra sugar.
Remember, the biscuit topping is less sweet, so it needs a sweet base to balance things out.
The biscuit topping didn't rise much; what’s the secret to getting those fluffy tops?
Ah, the classic cobbler conundrum! The secret is keeping everything ice cold your butter and your buttermilk must be fridge cold. When the cold butter hits the hot oven, the melting pockets create steam, which pushes up those lovely flaky layers.
If the butter gets warm during mixing, you’ll get a dense result, so work quickly!
Can I prepare the cherry filling ahead of time to save time later in the day?
Absolutely, making the filling ahead is a smashing time saver. You can mix the filling ingredients and store them, covered, in the fridge for up to 24 hours. Just give it a gentle stir before pouring it into the dish, and make sure the filling is relatively cool before placing the cold biscuit topping on top so you don't melt the butter prematurely.
How long will leftovers of this cobbler keep, and what’s the best way to reheat it?
This cobbler is usually best eaten within two days, stored tightly covered at room temperature or in the fridge. To reheat, the best way is to pop a slice (or the whole thing) back into a moderate oven (about 350°F/175°C) for about 10 minutes until the topping is crisp again and the filling is bubbling.
Microwaving can make the topping a bit soggy, so we avoid that if we can.
I don't have buttermilk; what’s a good, simple substitute for the biscuit topping?
Don't fret if the shops have run out of buttermilk! The acidity is important, but you can easily make your own 'sour milk' substitute. Simply measure out ¾ cup of regular milk (whole milk works best) and stir in 1 teaspoon of white vinegar or lemon juice.
Let it sit on the counter for 5 minutes until it looks slightly curdled voilà, instant buttermilk substitute ready for your topping!
Fresh Cherry Cobbler Recipe

