The Real Deal Slowsimmered Southern Turnip Greens with Smoked Ham Hock
- Unveiling the Secrets to Truly Soulful Southern Turnip Greens
- Why This Recipe Bypasses Bitter Greens
- Assembling Your Pantry for Authentic Potlikker Depth
- Essential Components for Legendary Southern Turnip Greens
- The Step-by-Step Path to Tender, Flavor-Infused Greens
- Mastering the Simmer and Seasoning Technique
- Elevating Your Greens Beyond the Basic Bowl
- Ensuring Leftover Success with Your Cooked Turnips
- Recipe FAQs
- 📝 Recipe Card
Unveiling the Secrets to Truly Soulful Southern Turnip Greens
Right then, pull up a chair! As a chef who's spent many a happy hour coaxing flavour out of humble ingredients, I can tell you that proper Southern Turnip Greens are an absolute triumph.
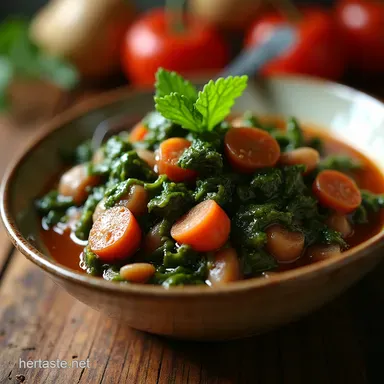
Forget those bitter, boiled-to-death versions you sometimes encounter; we’re aiming for greens that are tender, smoky, and packed with savoury depth. This recipe dives deep into the heart of Southern cooking, transforming slightly bitter turnip greens into a tender, deeply savoury side dish.
We coax out their natural sweetness by slow simmering them with a smoked ham hock, a splash of apple cider vinegar, and just the right amount of red pepper flake. The resulting ‘potlikker’ (that glorious, nutrient rich broth) is just as important as the greens themselves.
It’s comfort food, pure and simple. While the active preparation for this Turnip Greens Recipe Southern style is minimal, success relies more on patience and good seasoning checks it’s largely a "set it and forget it" situation once the initial flavour building is complete.
Why This Recipe Bypasses Bitter Greens
The key to truly magnificent Soul Food Turnip Greens lies in understanding the leaf itself and the method of cooking. Turnips, like their cousin the collard, possess a natural, earthy sharpness.
To achieve the melt-in-your mouth texture and mellow flavour we seek, we need time, smoke, and acid working in concert.
A Culinary Ode to the American South
This is more than just a side dish; it’s a piece of culinary history. The tradition of slow cooking greens with cured pork developed from necessity, turning tough, sometimes harsh greens into a highly palatable and nutritious meal.
When you master How To Cook Turnip Greens using this method, you are honouring a lineage of resourceful, flavour focused cooking. The sheer volume of greens required about 2 lbs of Fresh Turnip Greens Recipe material seems daunting initially, but they reduce dramatically during the long simmer, concentrating their flavour into every fiber.
The Philosophy of Low and Slow Flavor Infusion
We are not aiming to wilt these quickly; we are aiming to tenderize them completely while allowing the smoke from the meat to permeate every strand. This requires heat management. Over high heat, the cell structure of the greens tightens, leading to chewiness.
A very gentle simmer, where the liquid barely trembles, ensures a long, slow breakdown of those tougher fibres. This patient approach is precisely what yields that famous, deeply flavoured broth known as potlikker.
Identifying the Perfect Leafy Harvest
When selecting your greens, look for vibrant colour and firm leaves. Avoid any bunches that appear wilted or yellowed. If you can find them fresh, they are ideal. While packaged, pre-washed greens are convenient, I strongly recommend buying fresh bunches if at all possible, as the washing process, though tedious, is non-negotiable for gritty greens.
The active prep time for this recipe clocks in around 20 minutes, with a total cook time stretching past two and a half hours, emphasizing that patience is our primary ingredient.
Assembling Your Pantry for Authentic Potlikker Depth
To create the essential umami backbone of this dish, we need to layer fats, acids, and aromatics before the greens even enter the pot. A crucial step involves browning a smoked element we rely on a large, bone-in smoked ham hock for this particular iteration of the Southern Turnip Greens Recipe .
This imparts a salty, smoky depth that is impossible to replicate quickly.
Essential Components for Legendary Southern Turnip Greens

This recipe serves 6 to 8 as a hearty side, and the ingredients are chosen specifically to balance the earthiness of the leaves.
Sourcing the Right Smoked Meat for Umami
The star flavour enhancer here is the Southern Turnip Greens with Ham Hocks . A single, large ham hock (around 1.5 lbs) works perfectly, as the bone and connective tissue release gelatin during the long simmer, enriching the potlikker beautifully.
If you prefer a leaner profile, a smoked turkey wing or neck is an excellent alternative, making this a wonderful Southern Turnip Greens with Smoked Turkey dish.
Selecting Aromatic Building Blocks (Beyond the Greens)
We start by sautéing one large roughly chopped yellow onion until soft, followed by four smashed cloves of garlic. Crucially, we introduce heat using half a teaspoon of red pepper flakes; this adds warmth, not overwhelming spice.
To achieve that signature bright finish that cuts through the richness, 2 tablespoons of apple cider vinegar are non-negotiable. We also stock basic salt and pepper, remembering that final seasoning should wait until the end.
Necessary Equipment for Optimal Simmering
Your vessel matters. The best results come from a large, heavy bottomed Dutch Oven or stockpot. This heavy material ensures even heat distribution across the bottom, preventing scorching while the long simmer occurs.
You’ll also need tongs for turning the ham hock and a colander system for the mandatory washing of the greens.
Related Recipes Worth Trying
- Gooey Pecan Pie Cheesecake Recipe Southern Belle Swirl — Master the ultimate Pecan Pie Cheesecake with a buttery shortbread pecan crust and a luscious caramel swirl Get our water bath technique for the perfect New...
- Easy Southern Boiled Peanuts Crockpot The Salty Snack Thats Right as Rain — Fancy a proper Salty Southern snack This Easy Southern Boiled Peanuts Crockpot method uses raw peanuts in shell for the ultimate tender appetizer snacks No...
- Boiled Peanuts History and Recipe The Proper Southern Brine Secrets — Want proper creamy Boiled Peanuts History and Recipe Ill show you the Southern Style Boiled Peanuts technique including the crucial brine soak Easy peasy
The step-by-step Path to Tender, Flavor Infused Greens
Our total journey to perfectly cooked greens is nearly three hours, mostly hands off cooking.
Preparing the Greens: Washing Away Grime, Not Flavor
Before anything touches the heat, the greens must be immaculate. I advise filling three successive large bowls with cool water. Submerge a portion of the chopped greens, agitate gently, lift them out (do not pour the water out, as the grit settles at the bottom), and repeat this process through all three baths until the water remains perfectly clear.
This step prevents grit from ruining your meal.
Browning the Meat and Building the Flavor Base
Start by heating your Dutch Oven over medium high heat. Place the ham hock in the dry pot and brown it aggressively on all sides this caramelization builds profound flavour. Once browned, remove the hock and set it aside.
Reduce the heat to medium, using the rendered fat (add a slick of neutral oil if necessary), and sauté your chopped onion until translucent, about five minutes. Toss in the garlic and red pepper flakes for one minute until fragrant.
The Crucial Low-and-Slow Cooking Duration
Return the ham hock to the pot. Pour in six cups of broth (vegetable or chicken) or water enough to cover the meat and most of the greens later. Stir in the apple cider vinegar, along with a preliminary teaspoon of salt and black pepper.
Bring the liquid to a boil, then immediately drop the heat to the absolute lowest setting so that the liquid only barely bubbles. Cover the pot loosely and allow this base to simmer undisturbed for 1. 5 hours.
Achieving Perfect 'Potlikker' Consistency
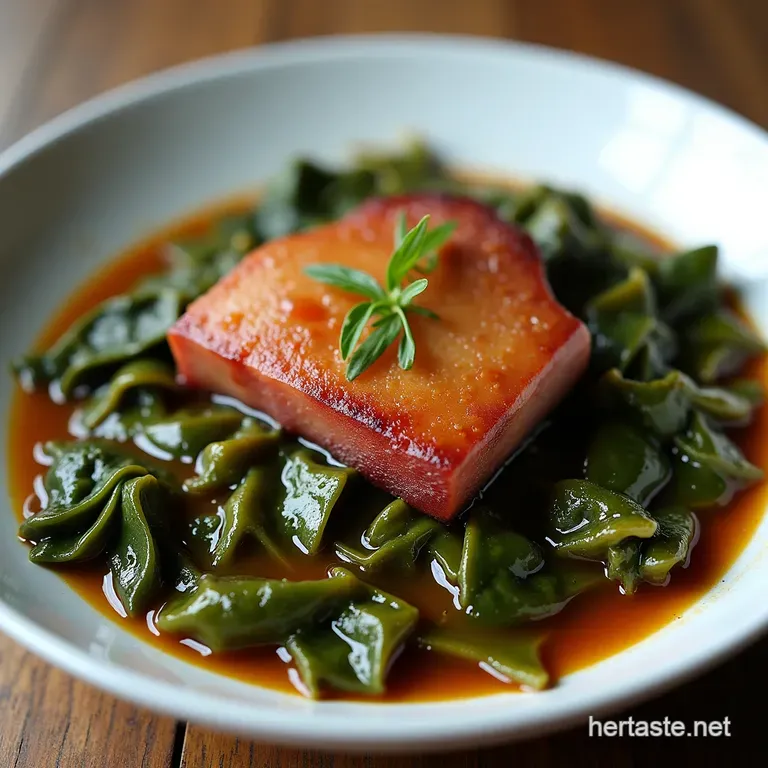
After 90 minutes, the ham hock should be tender. Carefully remove it, shred the salvageable meat (discarding most heavy skin and excess fat), and return the shredded meat to the pot. Now, add the washed and chopped turnip greens in batches, pressing them down until they submerge into the liquid.
Continue simmering, uncovered slightly, for another 45 minutes to an hour. The greens are done when they are deeply wilted, tender, and your liquid has reduced into a rich, flavourful broth the coveted potlikker.
Mastering the Simmer and Seasoning Technique
The final phase is all about refinement. The long simmer extracts flavour, but the final seasoning dictates the balance.
Troubleshooting Common Flavor Imbalances
The biggest variables in your final flavour profile will be the saltiness of your cured meat and the natural bitterness of your greens. After the long cook, taste the potlikker first.
If it is too sharp or astringent, a very small pinch of sugar (about half a teaspoon) can neutralize the edge without making the dish sweet. If it tastes flat, increase the salt slightly or add another splash of vinegar for brightness.
Remember, if you are using Southern Turnip Greens with Ham Hocks , you must exercise restraint with added salt until the meat has fully rendered.
Elevating Your Greens Beyond the Basic Bowl
While perfection is found in the simple, smoky simmer, these greens are versatile. For a richer experience, consider cooking this using the Turnip Greens Instant Pot Recipe method for quicker results, though you will lose some depth compared to the traditional 3-hour stove top simmer.
For those seeking maximum depth without the ham hock, you can use a combination of smoked paprika infused olive oil and a dash of liquid smoke when sautéing the aromatics.
Ensuring Leftover Success with Your Cooked Turnips
Leftovers are arguably better the next day, as the flavours meld further.
Creative Garnishes and Serving Suggestions
When serving, ensure everyone gets plenty of the potlikker. The essential accompaniment remains hot, non-sweet cornbread, perfect for soaking up every last drop. For a tangier contrast, serve alongside some lightly dressed coleslaw.
Alternative Smoking Elements (When Ham Hock Isn't Available)
Should you find yourself without a ham hock, a few thick slices of bacon or smoked turkey neck will work well to start the flavour base. Sauté these until crisp, remove the solids, and then proceed with the onions and garlic in the rendered fat.
If using these alternatives, you might need to add a bit more salt toward the end.
Freezing Instructions for Future Feasts
These greens freeze beautifully. Allow them to cool completely, then portion them into freezer safe containers, ensuring a good ratio of greens to liquid. They will maintain quality for up to three months.
Thaw them overnight in the refrigerator and reheat gently on the stovetop, tasting for final seasoning adjustments before serving.
Freezing Instructions for Future Feasts
Leftovers are fantastic; the flavours deepen overnight. If you used a ham hock, the meat will likely fall completely off the bone upon reheating. The essential way to enjoy these remains with fresh, skillet baked cornbread the perfect tool for ensuring not a single drop of that precious potlikker goes to waste.
Recipe FAQs
My Southern Turnip Greens always turn out tough and bitter what am I doing wrong?
That’s a common pitfall, often caused by rushing the process or skipping the acid! For tenderness, you need a very low, slow simmer for at least 2.5 hours; the liquid should barely ripple.
To tackle bitterness, don't forget that splash of apple cider vinegar mentioned in the recipe it’s crucial for balancing those earthy notes.
What exactly is "potlikker," and why is it so important?
Potlikker (or pot liquor) is the flavourful, nutrient dense broth left behind after the greens have slow simmered with the smoked meat. It’s the essence of the dish! You must save it; serve it generously over the greens and use it to dunk your cornbread that’s where all the good flavour is hiding.
I can't find a ham hock; what's the best substitute for flavouring my Southern Turnip Greens?
While a ham hock brings unmatched smoky depth, a smoked turkey wing or neck works wonderfully well if you're looking for a leaner alternative. For a vegetarian version, skip the meat entirely, but make sure to sauté your onions in olive oil infused with smoked paprika, and add a teaspoon of liquid smoke to mimic that deep, soulful flavour.
How should I clean the greens? I hear they can be terribly gritty!
You are absolutely right; turnip greens are notorious for trapping grit! Treat the washing process like a proper chore. Chop them first, then submerge them in a large pot of cool water, agitate them gently, and let the grit settle to the bottom.
Scoop the greens out into a colander, leaving the dirty water behind, and repeat this process at least three times until the rinse water is crystal clear.
Can I make a big batch ahead of time, and how should I store leftovers?
These greens are even better the next day, so absolutely make a big batch! Once cooled, store them in an airtight container in the fridge for up to four days. When reheating, always taste the potlikker first; if it tastes a bit flat, add a small splash of vinegar or a dash of hot sauce to bring the flavour right back up to snuff.
Ham Hock Turnip Greens