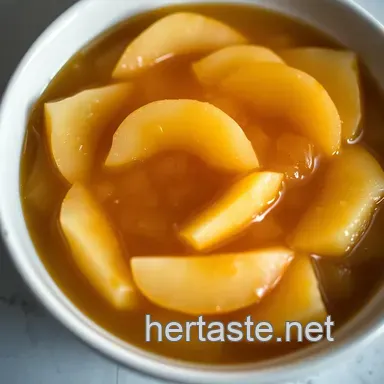
Homemade Pear Jam Delight
A Sweet Journey into Pear Jam
You know that moment when you bite into a piece of toast and your senses are overwhelmed by the sweet, juicy goodness of pear jam ? yeah, that’s the moment i chase every fall! a couple of years ago, i found myself knee deep in ripe pears gifted by a neighbor who had a tree bursting with the sweet fruits.
As i transformed those luscious gems into homemade preserves , i experienced a flavor explosion and a cascade of memories grandma’s kitchen, warm bread, and sweetly spiced aromas filling the air.
Trust me; this is not just a recipe; it’s a walk down memory lane, and i can already smell the goodness!
Recipe Overview: A Delicious Legacy
Let’s dive into a little history, shall we? the art of making fruit preserves has been around for centuries. traditionally, our ancestors used canning techniques to save fruit for the winter months.
Pear jam is no exception! this delightful spread captures the essence of ripe, juicy pears while giving us a taste of nostalgia and comfort.
Fast forward to today, and you’ll see pear jam in many kitchens across america. its modern twist blends effortlessly with our busy lives; it’s super accessible.
You can whip it up in about 45 minutes 15 minutes for prep and 30 minutes of cooking.
And don’t worry; it’s marked as easy so even if you stumble upon this newfound hobby of preserving fruit, you’re going to feel like a pro in no time!
As far as costs go, you’re looking at about $5 way cheaper than some gourmet jams at the store! plus, you get about 4 cups of that sweet goodness, which is more than enough for your breakfast spreads or even as homemade gifts for the holidays.
Key Benefits: Spread the Love
Now, let’s talk about why you should totally make this jam. first off, let’s be real pear jam doesn’t just taste good; it’s good for you too! pears are packed with vitamins and fiber, making this spread a healthier option compared to processed jams filled with weird stuff like corn syrup.
You can also easily adapt it into a low-sugar pear jam if you’re watching your sugar intake.
Plus, there’s something special about making it yourself. you’ve got control over the ingredients. want to add in some aromatic spices ? go for that spiced pear jam option! the flavor range is endless; it’s not just jam; it’s a canvas!
You can use it for dessert spreads , slather it on bread, toss it in yogurt, or bake it into cakes.
Seriously, there are so many applications enough to explore all fall!
You can’t ignore the wow factor when you serve this to friends or family. it’s perfect for special occasions , like brunch with the girls or a cozy winter get-together.
It feels fancy, and yet it's super easy to make. plus, can you imagine the compliments? who doesn’t love getting praised for their artisan jams ?
Transitioning to Ingredients: Let the Fun Begin
So, ready to roll up those sleeves? to kick off your journey into the world of spreadable fruit recipes , let’s gather our fruit canning supplies and get our hands on some ripe pears.
Below, i’ve laid out everything you’ll need to embark on this sweet adventure.
With a few simple ingredients and in less than an hour, you’ll whip up a jar (or four) of delicious, homemade pear jam that will undoubtedly become a pantry staple.
Trust me; you’ll wonder how you survived without it! now, let's check out that ingredient list and get started on making some magic in the kitchen!
Essential Ingredients Guide for Pear Jam and Beyond
Alright, friends! let’s dive into the scrumptious world of pear jam and all the essential ingredients you’ll need to whip up some delightful spreads.
Whether you’re a seasoned canner or just starting out with easy jam recipes , this guide has you covered. so grab your ripe pears and let’s get cooking!
Premium Core Components: Getting Prepared
First thing's first, let’s talk about the essential ingredients. When it comes to pear preserves , you want to ensure you have the best quality stuff:
- Ripe Pears: Aim for about 4 cups of ripe pears , peeled, cored, and chopped, which is about 4 to 5 medium pears.
- Granulated Sugar: You’ll need 1 cup (200 g) for that sweetness bomb.
- Lemon Juice: A 1/4 cup (60 ml) of this will balance out the flavors beautifully.
- Spices: A teaspoon of vanilla extract , half a teaspoon of ground cinnamon , and if you’re feeling adventurous, try 1/4 teaspoon of nutmeg .
Store your ingredients in a cool, dark place. a good rule of thumb sugar lasts forever, but your pears... not so much! use them when they’re fresh and ripe for the ultimate flavor explosion.
Signature Seasoning Blend: Spice It Up!
When it comes to jam, spices are your best friends. for our pear jam , the cinnamon and nutmeg work wonders without overpowering the pear’s natural sweetness.
If you're looking to jazz it up, consider adding a pinch of ginger or even some zesty citrus peel !
Let’s not forget that every region has their unique twist. From vanilla pear jam to spiced pear chutney , feel free to explore and adapt spices you love based on what’s available.
Smart Substitutions: When Life Gives You Lemons
Sometimes you run out of something or you just can’t find it at the store. Here’s the lowdown on smart substitutions:
- No Sugar? No worries! Try raw cane sugar or honey, but keep in mind you may need to adjust the amount.
- Different Acids: Don’t have lemon juice? Apple cider vinegar works too, giving your jam a little twist.
- Fresh Herbs: If you’ve got rosemary or thyme growing in your garden, toss in a sprig or two for a unique flavor.
Sometimes, it’s about being adaptable. Here’s a pro tip keep a list of your favorite substitutions handy!
Kitchen Equipment Essentials: Gear Up!
Now let’s talk gear! For making that mouthwatering pear butter or jam, you need the right tools in your kitchen arsenal.
- Heavy Pot: A large pot is key for making your jam, making sure an even boil.
- Wooden Spoon: Seriously, it’s a classic for mixing without damaging your pot.
- Canning Jars: Make sure you have at least 2-4 sterilized jars (8 oz) standing by.
- Canning Funnel: This makes transferring hot jam into jars so much easier.
While fancy gadgets can be fun, you can make do with what’s on hand. No need for stress, just find ways to innovate with what you’ve got!
Wrap It Up!
So there you have it, folks! armed with these essentials, you’re all set to tackle homemade preserves and become a fruit canning wizard.
With tips on storage and selection criteria as your trusty sidekicks, you’ll create sweet spreads like pear jam that could make anyone’s morning brighter.
Now that we’ve covered the basics, let’s jump into the instructions for making that mouthwatering pear jam ! Get ready for a delicious ride in your kitchen!
The Art of Professional Cooking: Mastering Your Kitchen Game
Cooking isn’t just about following a recipe; it’s a symphony of flavors, time, and technique. so let’s talk about a professional cooking method that can elevate your kitchen skills, making even simple dishes like homemade pear jam feel gourmet.
Ready to dive in?
Essential Preparation Steps
First things first mise en place . oh my gosh, it’s a fancy way to say "everything in its place!" chop those ripe pears , measure your sugar, and gather your spices.
This prep is absolute gold when you start cooking. it helps you avoid those last minute scrambles and, trust me, no one wants to be frantically looking for that canning funnel while the jam bubbles over!
Next, let’s get into time management . whether you mix it up on a weeknight or prep a full-on batch for your next gift giving adventure, understanding your timing is key.
For our pear jam adventure, you’re looking at 15 minutes to prep and about 30 minutes to cook.
Set a timer to avoid getting lost in the fragrant pear filled world of your kitchen.
Now, organization strategies —keep your workspace tidy. A clean kitchen makes cooking a joy rather than a chore. Stack your tools and keep those fruit canning supplies within arm's reach.
And let’s not skip on safety considerations ! keep your cutting board stable, use sharp knives (trust me, they’re safer!), and always remember those hot pots need respect.
Burnt hands don’t make for a successful jam-making story!
Step-by-step Process
Okay, onto the fun part! Here’s a step-by-step guide that’s super easy to follow:
- Prepare the Pears : Peel, core, and chop 4 cups of ripe pears .
- Combine Ingredients : In a large pot, mix the pears, 1 cup granulated sugar , and 1/4 cup lemon juice .
- Simmer : Cook on medium heat, stirring occasionally for 15- 20 minutes , making sure the mix thickens up.
- Add Flavorings : Stir in 1 teaspoon vanilla extract and 1/2 teaspoon ground cinnamon for that cozy spice kick in the last few minutes.
- Test for Doneness : For this, drop a spoonful onto a cold plate. If it holds its shape, you're good to go!
- Fill Jars : Pour your hot jam into sterilized jars, leaving about 1/4 inch of headspace at the top.
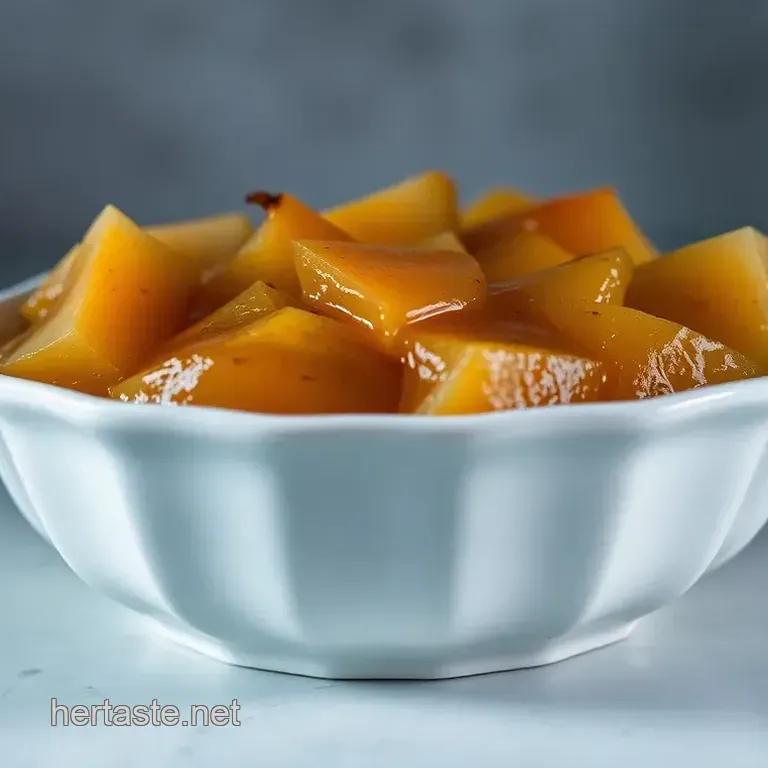
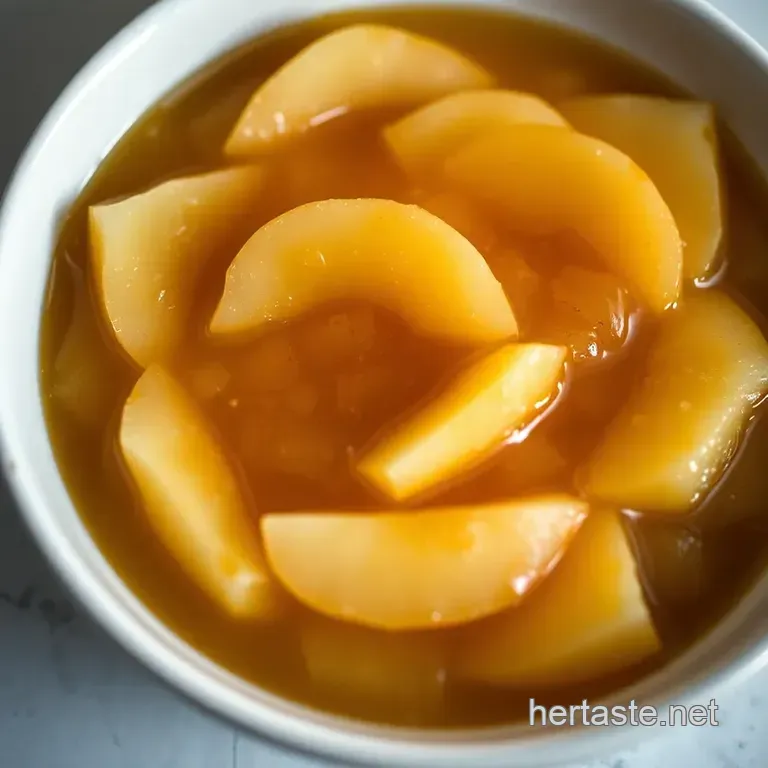
- Cool & Store : Let it cool before sealing. You’re absolutely on track for delicious pear preserves !
Expert Techniques
Let’s chat about some expert techniques. quality checkpoints are essential always taste your mixture before jarring it up. if it feels off, tweak the sweetness with a bit more sugar or a splash of lemon juice.
And if you run into any trouble, like the jam’s too runny? no problem! just pop it back on the heat.
A few more minutes simmering will help thicken it. it’s all about those troubleshooting tips .
Success Strategies
Do you want to avoid those common mistakes? Here’s my personal pro tip: Label and date your jars. When playing with unique jam flavors, the last thing you want is to forget what’s in there months later!
A couple more things quality assurance tips: always use fresh ingredients. random bruised fruits might end up turning your pear chutney into a questionable experience.
And for the make-ahead options, this jam can be stored for weeks in the fridge, making it an ideal breakfast spread ready for your busy mornings.
Additional Information
There you go! with just a bit of patience and practice, you'll end up with mouthwatering low-sugar pear jam that’s perfect for spreading on toast or gifting.
Plus, playing around with different spices can give you an excuse to create also some spiced pear jam , which is totally a special delight! look into into the world of preserving fruit , and who knows what sweet treats you'll whip up next? cheers to your jam-making adventures let the kitchen fun begin!
Extra Pear Jam Goodness: Tips and Tricks
Oh man, if you’ve made homemade pear jam before, you know it’s like a hug in a jar! but let’s be real there’s always room for a little finesse, right?
Whether you're a fellow jam ensoiast or just diving into easy jam recipes , i’ve got some pro tips and secrets to elevate your pear game.
Pro Tips & Secrets
First off, pick the right pears . seriously, ripe but firm pears are the name of the game. if they’re too soft, your jam might turn into pear mush, and nobody wants that.
Oh, and here’s a little secret: when you’re cooking that mixture up, try adding a pinch of salt. it really makes the flavors pop !
Time saving techniques? chop your pears while you’re waiting for your pot to heat up. multitasking is key, especially when you’re trying to whip up that batch for brunch.
And if you’re ever in a hurry, just do a quick jam recipe skip the canning and keep it in the fridge for fresh spreads all week!
Want to take the flavor up a notch? add in some aromatic spices , my friend! cinnamon is a classic, but don’t shy away from experimenting with nutmeg, ginger, or even a dash of chili powder for a kick.
Before you know it, you'll have your own unique jam flavors that'll have folks begging for the recipe.
And let’s not forget presentation! your pear jam deserves to look as good as it tastes. when you’re done, fill those sterilized jars and don’t just slam the lid on.
Wipe the rims with a clean cloth it makes sealing easier and keeps your jars looking polished.
Perfect Presentation
Okay, so we’ve established that the jam is delish, but we want it to shine , right? try using a canning funnel when filling your jars.
It'll save you from those sticky spills and make your jam look all gourmet and professional. and don’t skip the labeling! write down the date, and maybe even what personality the jam has like “vanilla dream” or “spiced bliss!”
Garnish ideas? Consider adding a sprig of mint on top when serving. It looks fresh and fancy, and honestly, who doesn’t love being a little extra? Plus, those lovely color combinations the golden hue of your pear jam paired with a dark slice of bread? Chef's kiss !
Storage & make-ahead
Let’s chat about storing your jam. if you’re all about those homemade preserves , keep them in a cool, dark place.
A pantry would be perfect! properly sealed, your pear jam can last about a year if you don’t gobble it all up first.
For freshness, though, refrigerate after opening, and it’ll hang out for about two to three weeks.
When it comes to reheating, just scoop out what you need! no need to nuke the whole jar; just a spoonful.
And for those who like it super thick, a quick stir over low heat can help.
Creative Variations
Now, let’s get adventurous. did you ever think about turning your jam into pear chutney ? just toss in some onions, vinegar, and spices for a savory twist that’s to die for.
You can even mix in other fruits imagine how good apples or cranberries would pair with those juicy pears!
Seasonal twists are fun too. As fall rolls in, today’s pear jam can become a spiced pear jam with cinnamon and cloves. Get festive!
And don’t forget about dietary modifications. if you’re aiming for something lighter, try a low-sugar pear jam . you can still keep that sweet vibe with natural sweeteners like honey or agave just experiment a little.
Complete Nutrition Guide
Now, i won’t bore you with complicated nutritional breakdowns, but here’s the scoop. your homemade pear jam comes in at around 100 calories per serving, meaning those breakfast spreads won’t wreck your day.
Plus, pears are a great source of fiber and vitamin c, so you’re also being healthy while indulging!
If you’re counting your portions, stick to about two tablespoons per serving. That should hit the sweet spot for toast, yogurt, or whatever your heart desires.
Wrap It Up!
So there you have it! making pear jam isn’t just about slathering it on toast; it’s an experience. from pro tips to creative twists, every batch can be unique and reflective of your style.
Don’t be afraid to jazz it up! whether it’s a chunky jar of pear butter or a smooth, spiced pear chutney, the possibilities are endless.
Get out there and make your kitchen smell amazing! After all, jam-making is more than just a recipe it's a sweet adventure . Happy canning, folks!
Frequently Asked Questions
What kind of pears are best for making pear jam?
For making pear jam, it's best to use ripe yet firm pears like Bartlett, Bosc, or Anjou. They provide a sweet flavor and good texture, ensuring your jam has the right consistency and taste. Avoid overly ripe pears as they may result in a jam that's too soft.
Can I adjust the sweetness of my pear jam?
Yes, you can adjust the sweetness of your pear jam easily! Before finishing the cooking process, taste the mixture and add more sugar if you prefer it sweeter. Alternatively, you can add a little more lemon juice for acidity, which can balance out the sweetness.
How should I store homemade pear jam?
Store homemade pear jam in sterilized canning jars and seal them while hot. If properly canned, it can be stored in a cool, dark place for up to a year. Once opened, keep the jam in the refrigerator and consume it within 2-3 weeks for best quality.
Can I use other fruits in my pear jam?
Absolutely! You can enhance your pear jam by adding other fruits like apples, cranberries, or even chopped ginger for more flavor complexity. Just make sure to adjust the sugar and acidity levels to maintain the proper balance in flavor and texture.
What are some serving suggestions for pear jam?
Pear jam is delightful when spread on toast, mixed into yogurt, or drizzled over pancakes and waffles. It also pairs wonderfully with cheese like brie or aged cheddar for a gourmet cheese platter or used as a filling in pastries.
Is pear jam healthy?
Homemade pear jam can be a healthier option compared to store-bought versions, which often contain preservatives and high fructose corn syrup. However, it's important to enjoy it in moderation due to its natural sugar content.
It provides fiber and essential nutrients from pears, making it a nice addition to a balanced diet.
Homemade Pear Jam Delight