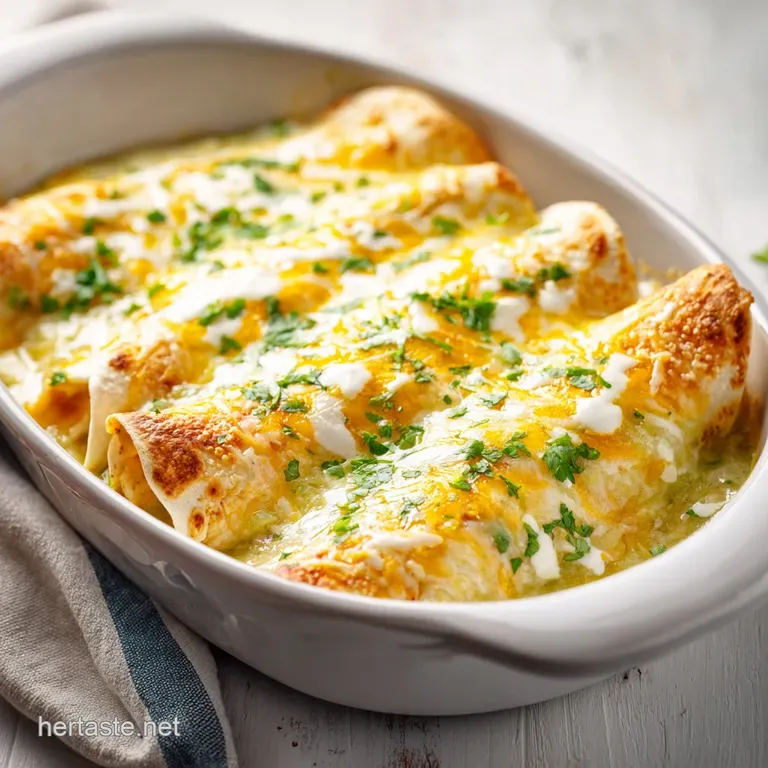
Pioneer Woman Green Chile Chicken Enchiladas: Creamy
- Time:20 minutes prep + 30 minutes cook = Total 50 minutes
- Flavor/Texture Hook: Velvety creamy sauce with a slight char on the corn tortillas
- Perfect for: Family dinner night or a cozy weekend meal
- Better Pioneer Woman Green Chile Chicken Enchiladas
- Quick Recipe Specs
- The Essential Ingredient List
- Kitchen Tools You Need
- The Step-By-Step Process
- Fixing Common Enchilada Issues
- Fresh Flavor Twists
- Adjusting Your Portion Sizes
- Truths About Enchiladas
- Safe Storage Guidelines
- Serving Your Feast
- Very High in Sodium
- Recipe FAQs
- 📝 Recipe Card
Better Pioneer Woman Green Chile Chicken Enchiladas
There is nothing worse than biting into an enchilada only for the tortilla to disintegrate into a mushy, flavorless paste. It happens when the sauce is too thin or the tortillas are just dumped in raw.
I used to deal with this "soggy bottom" syndrome every time I tried a creamy recipe, and it honestly made me want to stick to basic tacos.
The trick is all in the preparation of the tortilla and the thickness of the sauce. By lightly charring the corn tortillas and using a proper roux, we create a structural barrier that keeps the filling inside and the texture firm.
Here is the ultimate Pioneer Woman Green Chile Chicken Enchiladas Recipe for your next family dinner.
You can expect a dish that is rich and comforting but still has that bright, spicy hit from the green chiles. It's the kind of meal that feels like a hug in a baking dish, and because we're using rotisserie chicken, you aren't spending hours at the stove.
Trust me, once you see how the cheese bubbles and the edges get that slight crisp, you'll never go back to the "dump and bake" method.
Quick Recipe Specs
Before we get into the grit, let's talk about how this fits into your night. This is a high reward, medium effort meal. Since the chicken is already cooked, most of your active time is spent on that velvety sauce and the rolling process.
It's a great way to use up a store-bought bird while making it taste like it simmered all day.
Right then, let's look at the numbers. You're looking at a 20 minutes prep window and 30 minutes in the oven. The total time of 50 minutes is incredibly efficient for a dish that tastes this complex.
Because it's a casserole, it feeds a crowd easily, but it also holds up surprisingly well for the next day.
The secret to the efficiency here is the workflow. You make the sauce, sauté the filling, and roll. There's no waiting for meat to braise or sauces to reduce for hours. It's a streamlined process that delivers a huge amount of flavor without the kitchen chaos.
| Servings | Ingredient Adjustments | Pan Size | Cook Time |
|---|---|---|---|
| 4 people | 1.5 cups chicken, 8 tortillas | 8x8 inch | 25 minutes |
| 8 people | 3 cups chicken, 16 tortillas | 9x13 inch | 30 minutes |
| 12 people | 4.5 cups chicken, 24 tortillas | 9x13 (deep) | 35-40 minutes |
The Essential Ingredient List
Getting the right cheese is where most people trip up. You want Monterey Jack because it has a high fat content and melts into a smooth pool without separating or becoming oily. If you use a pre shredded mix with cornstarch, your sauce might feel a bit grainy, so I always suggest grating your own if you have the time.
The green chiles provide the acidity and heat. I prefer the canned diced variety for this specific version because they distribute evenly through the sauce and the filling, ensuring every bite has that signature zing.
Ingredient Deep Dive
| Ingredient | Science Role | Pro Secret |
|---|---|---|
| Unsalted Butter | Fat Base | Use high fat European butter for a silkier roux |
| All Purpose Flour | Thickener | Whisk vigorously to avoid "flour clumps" |
| Monterey Jack | Binding Agent | Grate from a block to avoid anti caking agents |
| Sour Cream | Tang & Body | Adds a lactic acidity that cuts through the fat |
Main Components and Substitutions
- 4 tbsp unsalted butter (Substitute: Ghee - works well but tastes nuttier)
- 1/4 cup all purpose flourWhy this? Creates the base for the creamy sauce (Substitute: gluten-free 1:1 flour)
- 2 cups chicken broth (Substitute: Vegetable broth for a lighter taste)
- 1.5 cups Monterey Jack cheese, shreddedWhy this? Superior meltability (Substitute: Pepper Jack for more heat)
- 1/2 cup sour cream (Substitute: Greek yogurt - adds more tang and protein)
- 8 oz canned diced green chiles (split into two 4 oz portions) Why this? Essential for the "Green Chile" flavor (Substitute: Roasted Hatch chiles for authenticity)
- 1 tsp paprika (split into two 1/2 tsp portions) (Substitute: Smoked paprika for a woodsy note)
- Salt and black pepper to taste
- 3 cups rotisserie chicken, shredded (Substitute: Poached chicken breast)
- 1 tbsp olive oil (Substitute: Avocado oil)
- 1/2 cup white onion, finely diced (Substitute: Shallots for a milder flavor)
- 2 cloves garlic, minced
- 16 corn tortillasWhy this? Classic flavor and structure (Substitute: Flour tortillas - result is softer and less authentic)
- 2 cups Monterey Jack cheese, shredded (for topping)
Kitchen Tools You Need
You don't need a professional kitchen to pull this off, but a few specific tools make the process a lot smoother. A large skillet or a heavy bottomed saucepan is non negotiable for the sauce. You want something that distributes heat evenly so the butter doesn't burn while you're whisking in the flour.
For the tortillas, you have two options. If you have a gas stove, the open flame is the gold standard for getting those charred spots. If you're on electric, a dry cast iron skillet (like Lodge) works perfectly. The goal is to make them pliable so they don't crack when you roll them.
Finally, a 9x13 inch baking dish is the standard here. Make sure it's ceramic or glass so you can see the edges bubbling. If you use a metal pan, just keep a close eye on the bottom to ensure the tortillas aren't scorching before the cheese on top is golden.
The step-by-step Process
Let's crack on. The flow here is: Sauce → Filling → Assembly → Bake. If you follow this order, the sauce stays warm and the chicken doesn't overcook.
Phase 1: Crafting the White Sauce
- Melt 4 tbsp butter over medium heat in a large skillet. Whisk in 1/4 cup flour and cook for about 2 minutes until it looks like pale gold sand. Note: This roux is what prevents the sauce from being watery.
- Slowly pour in 2 cups chicken broth. Keep whisking constantly until the mixture thickens and starts to bubble.
- Stir in 1.5 cups shredded Monterey Jack, 1/2 cup sour cream, and 4 oz diced green chiles. Mix until the sauce is velvety and cohesive, then remove from heat.
Phase 2: Preparing the Filling
- Heat 1 tbsp olive oil in a pan. Sauté 1/2 cup diced onion and 2 minced garlic cloves until they are translucent and smell fragrant.
- Fold in 3 cups shredded rotisserie chicken, the remaining 4 oz green chiles, and 1/2 tsp paprika.
- Stir in a small splash of your prepared white sauce. Heat through until the chicken is well coated and steaming. Note: This binds the meat so it doesn't fall out of the tortilla.
Phase 3: Assembly and Baking
- Lightly char the 16 corn tortillas over an open flame or in a dry skillet for 10-15 seconds per side until they are pliable and have small brown spots.
- Spread a thin layer of the creamy green sauce on the bottom of your 9x13 inch dish.
- Fill each tortilla with the chicken mixture, roll tightly, and place seam side down in the pan.
- Smother the top with the remaining sauce and 2 cups of shredded Monterey Jack.
- Bake at 350°F (180°C) for 30 minutes until the cheese is bubbling and golden brown.
Chef's Tip: To avoid tortillas breaking, wrap them in a clean kitchen towel and microwave them for 30 seconds after charring. This keeps them steaming and soft while you roll.
Fixing Common Enchilada Issues
Even the best of us hit a snag. Usually, the problem is either with the sauce consistency or the structural integrity of the corn tortillas. If your sauce feels "broken" (meaning the oil is separating), it's usually because the heat was too high when you added the cheese.
Another common gripe is the filling leaking. This usually happens if you overfill the tortillas. You want a generous amount of chicken, but if you pack it too tight, the tortilla will split during the rolling process, and the sauce will leak into the gaps.
Rapid Fix Guide
| Problem | Root Cause | Solution |
|---|---|---|
| Grainy Sauce | Cheese overheated | Lower heat; stir in a teaspoon of broth |
| Tortilla Cracking | Too dry/cold | Char on flame or steam in a towel |
| Mushy Bottom | Sauce too thin | Simmer roux longer before adding broth |
Essential Prevention Checklist
- ✓ Always whisk the roux for at least 2 minutes to remove the "raw flour" taste.
- ✓ Char tortillas individually; never skip this step or they will split.
- ✓ Place tortillas seam side down to "lock" the filling in place.
- ✓ Use a rotisserie chicken that is warm, not ice cold from the fridge.
- ✓ Don't over fill; leave a half inch border around the edge of the tortilla.
Fresh Flavor Twists
While the classic is great, I love forging new paths with my flavors. If you want to brighten the dish, try adding a squeeze of fresh lime juice to the chicken filling. It cuts through the richness of the Monterey Jack and makes the green chiles pop.
For those who want more heat, swap the mild canned chiles for roasted Hatch chiles or add a diced jalapeño to the onion sauté. If you're looking for a different way to use your chicken, you might enjoy my Garlic Parmesan Chicken for a completely different flavor profile.
If you have leftover sauce, don't let it go to waste. You can thin it out with a bit more broth and use it as a base for a Chicken Enchilada Soup recipe the next day. It's a brilliant way to stretch the ingredients across two different meals.
Adjusting Your Portion Sizes
When scaling this recipe, you can't just double everything linearly, especially with the liquids. If you're doubling the recipe for a party, increase the salt and paprika by only 1.5x. Liquids can become overwhelming if you just double them, so reduce the extra broth by about 10% to keep the sauce thick.
For a smaller batch (half recipe), use an 8x8 inch pan. You'll likely need to reduce the bake time by about 5-7 minutes since there's less mass in the oven. If you're using a single egg as a binder in any variation, beat the egg first and then use half of the liquid.
| Method | Time | Texture | Best For |
|---|---|---|---|
| Classic Oven | 30 min | Bubbling & Browned | Family Dinner |
| Slow Cooker | 3 hours | Very Soft/Melty | Set and Forget |
| Air Fryer | 15 min | Crispy Edges | Small Portions |
Truths About Enchiladas
There are a few myths floating around that just don't hold up in a real kitchen. One is the idea that you must deep fry your tortillas in oil before filling them. While that's a traditional method, it often makes the enchiladas too greasy, especially when you're already using a creamy cheese sauce.
Charring is a leaner, more flavor focused alternative.
Another misconception is that rotisserie chicken is too dry for this dish. Actually, because the chicken is shredded and then bound with a splash of white sauce, it absorbs the moisture from the surrounding sauce during the baking process. It ends up being just as tender as poached chicken.
Finally, some people think you can't freeze these. You absolutely can, provided you under bake them slightly. If you bake them to full golden brown before freezing, they'll overcook and dry out when you reheat them.
Safe Storage Guidelines
These are best eaten fresh, but they hold up well. Store leftovers in an airtight container in the fridge for up to 3-4 days. When you reheat them, I recommend adding a tiny splash of water or chicken broth to the edges of the dish before popping it in the oven; this creates steam and prevents the cheese from becoming rubbery.
For the freezer, you can store these for up to 2 months. Wrap the dish tightly in plastic wrap and then a layer of foil. To reheat from frozen, thaw in the fridge overnight, then bake at 325°F (160°C) covered with foil until heated through, removing the foil for the last 10 minutes to crisp the top.
To avoid waste, use any leftover onion or garlic stems in a veggie scrap bag in your freezer. Once the bag is full, boil them with water to make a quick, free vegetable stock. Also, any leftover corn tortillas can be sliced into strips, fried, and used as a crunchy topping for salads.
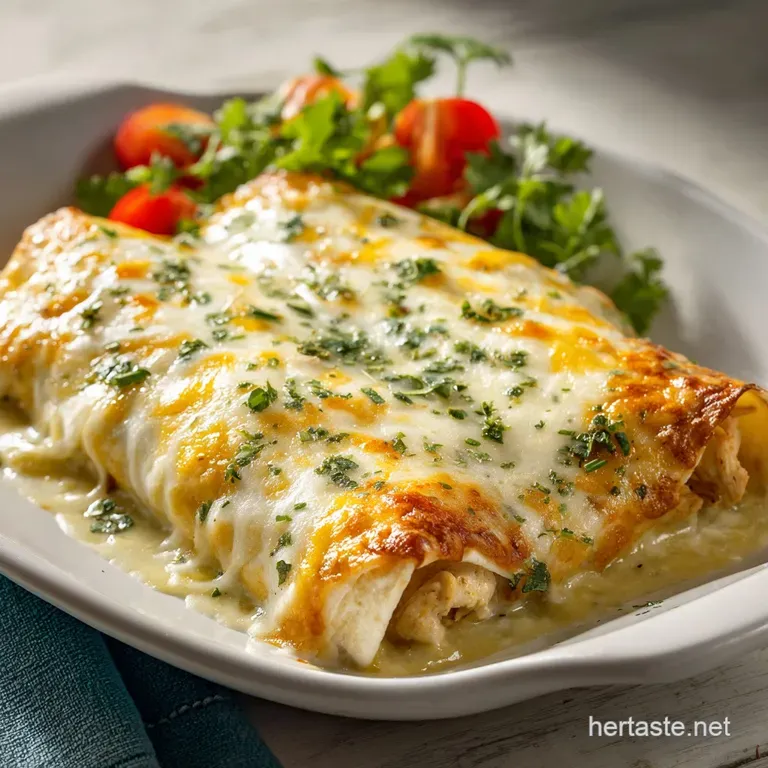
Serving Your Feast
To really make this dish shine, don't just serve it plain. The richness of the Pioneer Woman Green Chile Chicken Enchiladas needs some fresh, acidic contrast. I always top mine with a dollop of cool sour cream, sliced radishes for a peppery crunch, and a handful of fresh cilantro.
A side of lime cilantro rice or a simple crisp slaw works wonders here. If you have some avocado, slice it thin and lay it across the top just before serving. The creaminess of the avocado pairs perfectly with the heat of the green chiles.
Right then, just make sure you let the dish rest for about 5-10 minutes after it comes out of the oven. This allows the sauce to set slightly so the enchiladas hold their shape when you scoop them onto the plate. It's the final touch that separates a messy pile from a professional looking meal.
Very High in Sodium
1340 mg 1,340 mg of sodium per serving (58% 58% of daily value)
The American Heart Association recommends a daily limit of no more than 2,300 mg of sodium, with an ideal limit of 1,500 mg for most adults to reduce cardiovascular risk.
Personalized Sodium Reduction Tips
-
Swap Your Broth-30%
Replace the standard chicken broth with low-sodium or no-salt added chicken broth to drastically reduce the base sodium level.
-
Ditch the Rotisserie-25%
Use home cooked, unseasoned chicken breast instead of store-bought rotisserie chicken, which is often processed with high amounts of sodium brine.
-
Skip Added Salt-25%
Completely omit the 'salt to taste'; the Monterey Jack cheese and broth already provide significant sodium for the dish.
-
Rinse the Chiles-20%
Place the canned diced green chiles in a fine mesh strainer and rinse them under cold water to remove excess salty canning liquid.
-
Moderate the Cheese-15%
Reduce the amount of Monterey Jack cheese or substitute a portion of it with a lower sodium fresh cheese or a smaller quantity of sharp cheddar for more flavor with less volume.
-
Boost the Aromatics
Add fresh cilantro, a squeeze of lime juice, or extra garlic to enhance the flavor profile without adding any sodium.
Recipe FAQs
Why should I char the corn tortillas before filling them?
It prevents the tortillas from becoming soggy. Lightly heating them makes the corn pliable for rolling and creates a barrier that keeps the sauce from soaking through.
Can I use flour tortillas instead of corn?
No, stick with corn for this recipe. Flour tortillas have a different density and often become gummy or overly soft when smothered in a heavy roux based sauce.
How to avoid lumps in the creamy green sauce?
Whisk the chicken broth slowly into the roux. Adding the liquid in a steady stream while stirring constantly ensures the flour incorporates fully for a velvety finish.
Is it true that using rotisserie chicken will make the filling too dry?
No, this is a common misconception. Stirring a splash of the prepared white sauce into the shredded chicken binds the mixture and maintains moisture during the bake.
How to store and reheat these enchiladas?
Store in an airtight container in the refrigerator for up to 3 days. Reheat in the oven or microwave until the Monterey Jack cheese is bubbling and hot.
Can I prepare the chicken filling in advance?
Yes, you can. Sauté the onion, garlic, and chicken ahead of time and keep it chilled until you are ready to roll and bake.
What side dishes pair best with green chile chicken enchiladas?
A crisp, fresh salad provides the best contrast. These rich enchiladas pair beautifully with a creamy broccoli salad to balance the richness of the cheese.
Green Chile Chicken Enchiladas

