The Proper Crispy Tuna Melt Patties Nextlevel Comfort Food
- Elevating the Classic: Why These Tuna Melts Break the Sandwich Barrier
- The Secret to Irresistible Texture in Every Bite
- Assembling Your Crispy Tuna Melt Patty Toolkit
- The Step-by-Step Guide to Perfect Patty Construction
- Maximizing Freshness and Future Enjoyment
- Creative Twists for Your Next Batch of Tuna Fritters
- Recipe FAQs
- 📝 Recipe Card
Elevating the Classic: Why These Tuna Melts Break the Sandwich Barrier
The tuna melt. It’s the quintessential definition of comforting, nostalgic food. Usually, it involves two slices of slightly squishy bread grappling with a generous, often over moistened filling, all pressed under a blanket of melting cheese. It’s good, yes, but it rarely achieves true textural brilliance.
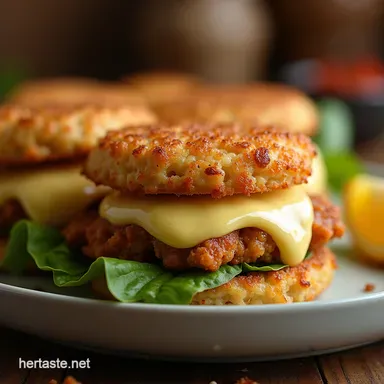
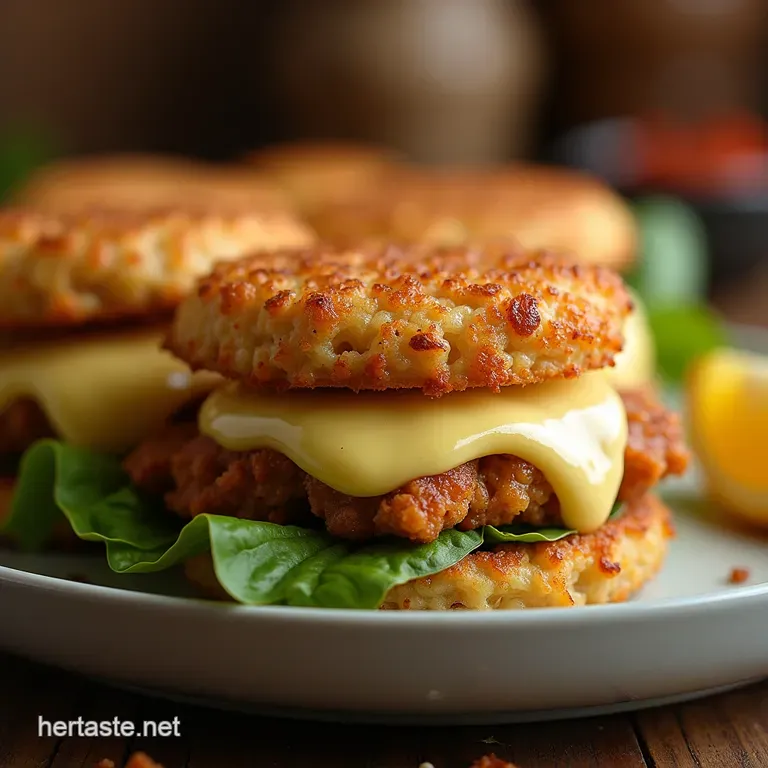
That’s precisely why we’ve dismantled the sandwich structure and reinvented it. These Crispy Tuna Melt Patties take all the flavour profiles you adore the salty tuna, the sharp tang of cheese, the subtle crunch of fresh onion and transform them into perfectly portable, golden discs of delight.
We are aiming for maximum crunch exterior and a warm, gooey center, proving that sometimes, ditching the bread is the only way to honour a classic.
The Secret to Irresistible Texture in Every Bite
Achieving the ideal texture requires careful consideration at every stage, from ingredient selection to the final moments in the pan. Our goal here is to deliver a substantial, savoury cake that stands up on its own, rather than something prone to collapsing under pressure.
Why We Ditched the Bread for Golden Brown Perfection
Traditional tuna melts suffer from the inevitable sogginess that comes from liquid soaked bread meeting hot cheese and warm tuna salad. By creating Crispy Tuna Patties , we bypass this issue entirely.
The crisp exterior comes from a dedicated breading process utilizing Panko breadcrumbs, which shatter beautifully when fried. This protective coating seals in the moisture and warmth of the interior, ensuring every bite is a study in contrast: loud crunch followed by yielding softness.
This preparation method positions these patties perfectly as fantastic Comfort Food Main Dishes .
A Seaside Favourite Reimagined for Modern Palates
Think back to the best fish and-chip shops or seaside stalls that satisfying deep fried element brings a profound depth of flavour that steaming or baking simply cannot replicate. We are channeling that seaside magic into this Tuna Melt Patties Recipe .
The shallow frying technique we employ ensures that the cheese melts perfectly within the mixture while the outside develops a rich, golden brown hue reminiscent of high-quality street food.
What Makes These Crispy Tuna Melt Patties Unforgettable
The magic lies in balancing the wet and dry components. Too much mayonnaise, and your patties spread into thin puddles; too little, and they crumble. We achieve the perfect balance by ensuring the tuna is thoroughly drained and relying on the chilling time to firm up the structure.
The inclusion of sharp Cheddar or Gruyère provides the essential savoury tang that transforms a simple tuna salad into an Ultimate Tuna Melt experience.
Assembling Your Crispy Tuna Melt Patty Toolkit
A successful batch of these Fried Tuna Patties Recipe hinges on having the right components ready before mixing begins. Preparation ensures a smooth flow through the breading process, which is crucial for coating uniformity.
Sourcing the Finest Components for Flavor Depth
Start with high-quality, well drained tuna. Whether you prefer spring water or olive oil packed, ensure you press out every excess drop of liquid; this is our first defence against a soggy patty.
For aromatics, finely diced celery provides essential freshness and snap, perfectly complemented by the sharp bite of finely minced red onion or shallots. These fresh elements elevate this beyond standard canned fare, fitting squarely into the category of Tuna Patties with Fresh Herbs .
The Cheese Selection: Achieving the Perfect Melt and Tang
The cheese is non-negotiable for a true melt experience. We favour a coarsely grated sharp Cheddar because its fat content melts beautifully while its flavour cuts through the richness of the tuna mixture. If you prefer a milder, silkier interior, Gruyère is an excellent substitute.
Grating your own cheese is highly recommended; pre-shredded varieties contain anti caking agents that can inhibit a truly smooth melt.
Necessary Utensils for Flawless Patty Formation
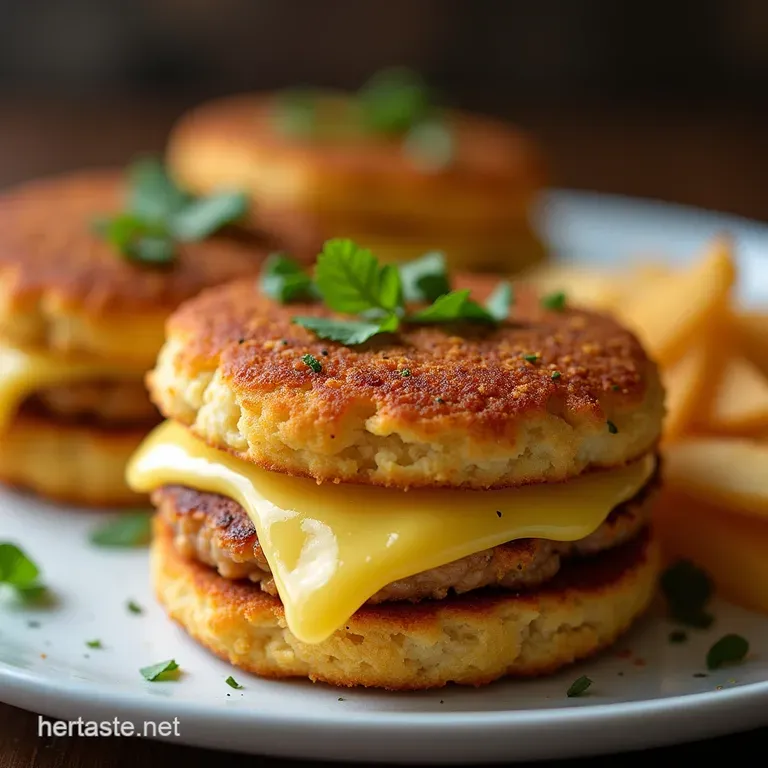
You’ll need a large bowl for mixing, a sturdy spatula, and the essential setup for breading: three shallow dishes. The first will hold flour seasoned with a whisper of smoked paprika for colour, the second will house two lightly beaten eggs for binding, and the third must be brimming with Panko breadcrumbs the key ingredient for maximum exterior crispness.
A wire cooling rack placed over a baking sheet is also vital for draining the finished product without sacrificing that hard earned crunch.
Related Recipes Worth Trying
- FlashFried Sesame Tuna Rice Bowl Recipe 30 Mins — Ditch the dull sandwich This Easy Tuna Rice Bowl features seared sesame tuna and quick pickles A healthy tuna dinner ready in 30 mins
- Golden Sunrise Sweet Potato Hash Browns Crispy Savoury — Ditch the soggy breakfast Learn how to make the Best Sweet Potato Hash Browns that are beautifully crisp outside and tender within A healthy breakfast upgrade
- The Proper Crispy Baked Cauliflower Golden Spicy OvenBaked Crunch — Forget soggy veg This Crispy Baked Cauliflower Recipe uses Panko for a shatteringly crisp coat A simple delicious baked cauliflower sideready in under an hour
The step-by-step Guide to Perfect Patty Construction
Creating these Easy Tuna Patties moves from simple mixing to precise handling. Remember, this is less like making meatballs and more like carefully assembling a small, highly seasoned cake.
Mixing Mastery: Combining Ingredients Without Overworking
In your large bowl, flake the drained tuna thoroughly. Next, introduce the diced celery, minced red onion, grated cheese, mayonnaise (use full fat for superior binding and flavour), Dijon mustard, fresh lemon juice, and Worcestershire sauce.
Fold these ingredients together using a rubber spatula until they are just combined. Overmixing activates the proteins in the mayonnaise and risks compacting the mixture too tightly, leading to a dense, heavy patty rather than a light, flaky one.
Finally, fold in the freshly chopped parsley and season assertively with salt and freshly ground black pepper.
Forming Uniform Patties for Even Cooking Times
Cover the mixture and place it in the refrigerator for a minimum of 45 minutes. This chilling period is crucial; it allows the binders to hydrate and the fats to solidify, making the mixture manageable. Once chilled, divide the mixture into eight equal portions.
Gently shape each portion into a firm, round disc, aiming for a thickness of about 3/4 of an inch. Consistency in size ensures every patty cooks at the same rate.
Frying Fundamentals: Oil Temperature and Timing Secrets
Set up your breading station. Gently dredge each patty first in the seasoned flour, shaking off the excess. Next, dip it fully into the egg wash, allowing the surplus to drip off. Finally, press the patty firmly into the Panko breadcrumbs, ensuring the coating adheres tightly to all surfaces.
In a large, heavy bottomed skillet, heat about 1/2 inch of neutral oil (like canola or sunflower) over medium high heat until it reaches approximately 350° F ( 175° C).
Carefully place the breaded patties into the hot oil, ensuring you don't overcrowd the pan work in batches to maintain oil temperature. Fry for 3 to 4 minutes per side until they achieve a deep, consistent golden brown colour.
Maximizing Freshness and Future Enjoyment
Once fried, the immediate transfer to a wire rack is paramount. Placing them directly on paper towels steams the underside, turning your beautiful crust soft. A light sprinkle of sea salt while they are still hot enhances the overall flavour profile immediately after draining.
Storage Solutions: Keeping Your Patties Fresh for Later
If you anticipate leftovers, ensure the patties are completely cooled before storage. Place them in an airtight container layered between sheets of parchment paper to prevent sticking. Stored correctly in the refrigerator, these Crispy Tuna Melt Patties will keep well for up to three days.
They are an excellent option for prepping ahead for quick lunches or appetizers.
Quick Reheating Methods to Restore Outer Crunch
The best way to reheat is in a toaster oven or a conventional oven set to 375° F ( 190° C). Place the patties directly on a baking sheet and heat for 8– 10 minutes, flipping halfway through.
This draws out residual moisture and crisps the exterior beautifully. Avoid the microwave, as it will completely destroy the desirable crunch we worked so hard to achieve.
Nutritional Highlights of Our Elevated Tuna Creation
While these are fried, the high protein content derived from the tuna and eggs makes them a satisfying choice. Tuna is renowned for its omega-3 fatty acids, contributing healthy fats to the mix.
When enjoyed in moderation alongside a fresh, non-creamy salad, these patties integrate well into a balanced diet, offering far more substance than a typical high carb sandwich lunch.
Spice It Up: Herb and Heat Variations for Bold Eaters
For those who find the standard recipe too tame, experimentation is encouraged. Consider mixing a teaspoon of finely chopped fresh dill along with the parsley for a classic complementary flavour.
Alternatively, incorporating a finely minced jalapeño (seeds removed) into the tuna base before chilling adds a bright, immediate heat that complements the richness of the cheese, creating a spicy iteration of the Fried Tuna Patties Recipe .
Creative Twists for Your Next Batch of Tuna Fritters
Once you master the base technique, these patties become a canvas for culinary creativity. They function wonderfully as savoury fritters or even as a base for a layered dinner.
Serving Suggestions for Maximum Enjoyment
These golden beauties deserve equally vibrant accompaniments. Skip the standard mayonnaise and instead serve them with a zesty chipotle aioli or a quick homemade relish made from capers, cornichons, and a touch of honey.
For a light dinner, serve two Crispy Tuna Melt Patties alongside a substantial mound of peppery arugula tossed simply with lemon juice and olive oil. The acidity is crucial for balancing the richness of the fried coating and the gooey cheese within.
Recipe FAQs
My tuna melt mix is too sloppy; how can I ensure my Crispy Tuna Melt Patties hold their shape?
The secret weapon here is chilling! Make sure you refrigerate the tuna mixture for the full 45 minutes (or even an hour) before shaping. This allows the binders, like the cheese and mayo, to firm up nicely, making the patties much less likely to crumble when they hit the hot oil.
Can I bake these instead of shallow frying them to make them healthier?
You absolutely can bake them, though you won't get that exact "properly crispy" exterior we aim for. If you do bake, place them on a wire rack set over a baking sheet and bake at 400°F (200°C) for about 15 minutes, flipping halfway through. Be sure to press the Panko coating on firmly!
What is the absolute best way to store leftovers, and how do I reheat them to bring back the crunch?
Store cooled patties in an airtight container in the fridge for up to 3 days don't let them sit in a damp environment! To revive that gorgeous crispiness, use an air fryer or conventional oven set to about 375°F (190°C) for 5-7 minutes; avoid the microwave, as it turns them sadly soggy.
I don't like celery; what can I substitute in the Crispy Tuna Melt Patties mixture?
If celery isn't your cup of tea, no worries, we can swap it out! Try replacing the finely diced celery with an equal amount of very finely minced sweet pickle relish (drained well) for a similar texture and tang, or use finely chopped water chestnuts for a subtle, lovely crunch.
Why do the instructions insist on using Panko breadcrumbs specifically?
Panko breadcrumbs are lighter and flakier than standard breadcrumbs, which means they absorb far less oil when frying. This results in a much lighter, shatteringly crisp crust it’s the key difference between a standard fried item and one that’s truly golden and crunchy!
Crispy Tuna Melt Patties