The Real Deal Copycat Olive Garden Garlic Breadsticks
- Unlock the Secret to Restaurant-Quality Olive Garden Breadsticks at Home
- Why This Recipe Captures the Iconic Fluff and Flavor
- Assembling the Components for the Ultimate Garlic Butter Glaze
- The Essential Pantry List for Yeasted Dough Mastery
- Step-by-Step Guide to Developing Fluffy, Bouncy Dough
- Achieving Golden Perfection: Baking and Glazing Techniques
- Maximizing Freshness: Storing Your Homemade Breadsticks
- Creative Twists: Elevating Your Olive Garden Breadsticks Beyond Tradition
- Recipe FAQs
- 📝 Recipe Card
Unlock the Secret to Restaurant Quality Olive Garden Breadsticks at Home
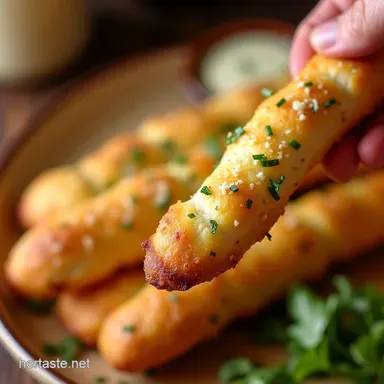
There are few culinary experiences quite as comforting as being presented with that endless basket of warm, pillowy Olive Garden Breadsticks at the start of a great Italian meal.
They are famously soft, subtly sweet, and absolutely drenched in a glistening garlic butter coating that keeps you reaching back for more. While it feels like a closely guarded secret, replicating that iconic texture and flavour profile in your own kitchen is surprisingly achievable.
Forget the reservations; we are diving deep into the precise methods needed to master the Olive Garden Breadsticks Recipe , transforming simple pantry staples into addictive, homemade goodness.
Why This Recipe Captures the Iconic Fluff and Flavor
This specific approach isn't about shortcuts; it’s about understanding the few key elements that separate a standard piece of garlic bread from the legendary soft sticks we crave.
This detailed guide ensures you capture that unique balance of a light, airy interior structure married to a savory, aromatic exterior coating, making these the best Copycat Olive Garden Breadsticks you’ll ever taste.
Bypassing the Wait: Your Kitchen's New Signature Starter
The beauty of this recipe lies in its balance: it utilizes active dry yeast to achieve true bread like texture, but it keeps the rest of the process exceptionally simple. While the total time hovers near two hours, the actual active work required for assembling the dough is minimal only about 25 minutes.
This classifies it firmly as an Easy Breadsticks Recipe , perfect for weekend baking or as an impressive yet manageable starter for a weeknight dinner.
Deconstructing the Signature Subtle Sweetness
What makes these Italian Bread Sticks Recipe variants so distinct from standard dinner rolls? It’s the slight sweetness inherent in the dough itself. A small measure of granulated sugar isn't just there to activate the yeast; it plays a crucial role in the final crumb structure and flavour profile, mimicking the exact flavour balance found in the restaurant's famous Olive Garden Rolls Recipe .
Pay close attention to using just the right amount of sugar to enhance the flavour without making the dough taste dessert like.
Essential Baking Equipment for Perfect Texture
While you certainly don't need a professional bakery setup, having the right tools helps guarantee success. Two standard half sheet baking pans lined with parchment paper are non-negotiable for even baking and easy cleanup.
We will also rely on a large mixing bowl (or a stand mixer fitted with a dough hook, if you prefer machine assistance) and, most importantly, a good pastry brush for applying that glorious finish. Having these items ready ensures a smooth transition through the shaping and baking stages.
Assembling the Components for the Ultimate Garlic Butter Glaze
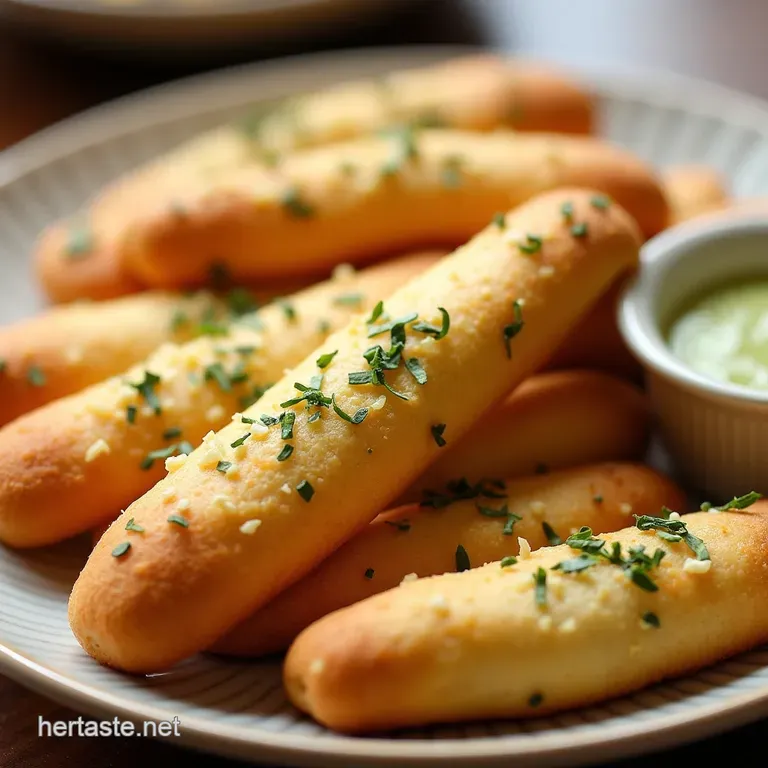
The topping is arguably the most critical element of any successful Olive Garden Breadstick Seasoning blend. It requires only four ingredients, but their quality and application timing are crucial.
You'll need a full stick of unsalted butter, melted down to create a pool of rich flavour, combined with fragrant garlic powder, a touch of dried parsley for visual appeal, and fine sea salt to amplify the savoury notes.
This glaze must be ready to go the second the breadsticks emerge from the oven, as the transfer from oven heat to buttery coating is essential for maximum absorption.
The Essential Pantry List for Yeasted Dough Mastery

Creating the perfect foundation means starting with quality basics. For the dough, we rely on water, yeast, sugar, flour, salt, and melted butter to introduce richness. The required Olive Garden Breadsticks Ingredients are humble, but precision in their use separates the chewy from the cloud like.
Navigating Ingredient Substitutions for the Dough Base
While this recipe is designed around standard all-purpose flour, know that you can easily make adjustments. If you need a dairy-free option, substitute the 3 tablespoons of melted butter in the dough itself with an equal amount of a neutral oil, such as canola or sunflower oil.
The yeast activation step is less flexible; the water temperature must be carefully controlled to ensure viability.
Measuring Precision: Tools That Elevate Your Results
When dealing with yeast and flour, accuracy matters immensely, particularly when aiming for that signature fluffy rise. Using a digital kitchen scale for measuring the flour, rather than relying solely on volume measurements (cups), will drastically reduce the chance of adding too much flour, which leads to dense, heavy breadsticks.
Precision helps secure the integrity of this Homemade Breadsticks base.
Calculating the Ratios for Maximum Butter Saturation
The ratio of butter glaze to breadstick surface area is generous here we use a full half cup of melted butter for approximately 16 to 20 sticks. This generous coating ensures every surface is saturated.
Don't be shy when preparing this mixture; the breadsticks should be able to swim comfortably in the garlic butter pool for a thorough coating.
Related Recipes Worth Trying
- The Ultimate Olive Garden Breadsticks Copycat Recipe — Make fluffy garlicky Homemade Olive Garden Breadsticks that taste better than takeout Foolproof yeast instructions and the perfect butter glaze
- The Best Homemade Breadsticks Recipe Soft Garlicky — Forget the takeout Make these incredibly soft pillowy Homemade Breadsticks topped with rich garlic butter Theyre easier than you think Get the full recipe
- Easy Homemade Garlic Butter Breadsticks Recipe Fluffy Chewy — Stop ordering in These Homemade Garlic Butter Breadsticks are unbelievably soft and packed with flavour Perfect for dipping in soup or as easy appetizers...
Step-by-step Guide to Developing Fluffy, Bouncy Dough
The journey begins with waking up the yeast. Combine your warm water (ensure it’s between 105° F and 115° F), a tablespoon of sugar, and the active dry yeast. Allow this mixture to sit for about ten minutes until it becomes visibly foamy.
This "blooming" confirms your yeast is alive and ready to work its magic. Next, stir in the melted butter before gradually incorporating the flour and salt. The goal is to mix until a shaggy mass forms, at which point you’ll turn it out to knead.
Achieving Golden Perfection: Baking and Glazing Techniques
The transition from dough to golden delight requires attention to temperature and timing. This entire process is designed to be relatively quick, leading to these being categorized as One Hour Breadsticks once the rising time is accounted for.
Activating Yeast: The Foundation of Softness
As mentioned, the temperature of your water is paramount. Water that is too cold won't rouse the yeast; water that is too hot will deactivate it entirely. Aim for that perfect, lukewarm feel against your wrist to ensure a vigorous bloom, which sets the stage for a light, airy crumb structure in the finished product.
Kneading Mechanics: How Much Effort is Enough?
Once the initial ingredients are combined, the dough needs about 5 to 7 minutes of kneading, either by hand or with a dough hook. You are looking for an elastic, smooth surface. Resist the urge to add excessive flour during this process; a slightly tacky dough yields the softest result.
If the dough is stubbornly sticking to your hands after a few minutes, add just enough flour until it is manageable.
The Critical Proofing Period for Volume
After a light coating of oil in a warm bowl, the dough requires a long, undisturbed rest, typically 60 to 75 minutes, until it has doubled in size. This is where flavour develops and the structure becomes incredibly light. Do not rush this first proof.
Once doubled, gently punch the air out, divide the dough, and shape the strips about half an inch thick. A short 15-minute rest on the baking sheet while the oven preheats helps the shaped sticks relax before they hit the heat.
Slathering Secrets: When and How to Apply the Garlic Butter
This is the grand finale. Bake the breadsticks at 400° F ( 200° C) for 12 to 15 minutes until they achieve a pale, light golden hue.
Immediately upon removal, transfer the hot sticks, one by one, into the shallow dish containing your prepared garlic butter glaze. Use a pastry brush to ensure every surface is thoroughly coated. The residual heat draws the flavour deep into the breadstick interior.
Maximizing Freshness: Storing Your Homemade Breadsticks
These are undeniably best served piping hot from the oven, but often there are leftovers. Proper storage ensures they remain soft for the next day.
Reheating Methods for Restoring That Just Baked Feel
To recapture that fresh from-the-oven tenderness, avoid the microwave, which can turn them chewy. Instead, wrap the desired number of breadsticks loosely in aluminum foil and place them in a 350° F ( 175° C) oven for about 8 to 10 minutes.
This gentle heat restores the soft interior beautifully.
Freezing Guidance for Future Cravings
For longer term storage, you can freeze these Homemade Breadsticks before or after baking. If freezing baked sticks, ensure they are fully cooled, place them in an airtight, freezer safe bag, and freeze for up to two months.
When ready to eat, use the foil wrapped reheating method described above. If freezing raw dough, place the shaped, unbaked sticks on a tray to flash freeze, then transfer them to a bag. When baking from frozen, add an extra 5 to 7 minutes to the bake time.
Creative Twists: Elevating Your Olive Garden Breadsticks Beyond Tradition
While the classic garlic butter is unbeatable, experimenting with the finishing touch can lead to exciting new Olive Garden Breadsticks experiences.
Flavor Variations: Beyond the Classic Garlic Profile
Try swapping out some of the garlic powder in your glaze for other dried Italian herbs. A mix that incorporates dried oregano and basil creates a wonderfully robust "Pizzeria Style" flavour.
For a richer taste, sprinkle finely grated Parmesan cheese over the sticks during the final three minutes of baking, then proceed with the garlic butter wash once they are out.
Pairing Suggestions: What Dips Complete the Meal?
Nothing complements these soft sides better than a classic accompaniment. While they are famously served alongside Olive Garden's soup offerings like Minestrone or Zuppa Toscana, having a small bowl of warm, slightly thinned marinara sauce for dipping takes the experience to the next level.
Alternatively, a creamy Alfredo sauce offers a rich, decadent pairing for these perfectly textured Copycat Olive Garden Breadsticks .
Recipe FAQs
How can I make sure my homemade Olive Garden Breadsticks aren't dry?
The secret to that signature soft texture is twofold: don't over knead the dough, and be generous with the final garlic butter bath. Brush the breadsticks liberally with the butter mixture immediately after they come out of the oven while they are still piping hot so they can soak up all that flavour.
Can I make the dough ahead of time or freeze these breadsticks?
Absolutely! You can refrigerate the dough after the first rise for up to 24 hours; just give it a short rest at room temperature before shaping. For freezing, bake the breadsticks completely, let them cool, then freeze airtight. Reheat from frozen in a 350°F oven for about 10 minutes.
My yeast isn't frothing up will my breadsticks still rise?
If your yeast didn't bloom (get foamy), it means it was likely dead or the water was too hot. Unfortunately, without active yeast, you won't get the light, pillowy rise necessary for this recipe. It’s best to start fresh with new yeast and ensure your water is perfectly warm, around 105°F.
What's the best way to get that authentic Olive Garden Breadsticks flavour?
The key is the finishing glaze stick strictly to garlic powder, not fresh garlic, as fresh garlic burns too easily. Also, the dough itself has a hint of sweetness from the sugar which balances the saltiness, so don't skip that tablespoon!
My sticks are puffy but pale; how do I get them golden brown like in the restaurant?
To achieve that gorgeous golden hue, ensure your oven is fully preheated to 400°F (200°C) and rotate the baking sheets halfway through the bake time. If they are golden on the edges but still pale on top, brush them lightly with some melted butter 5 minutes before they finish baking.
Copycat Olive Garden Breadsticks