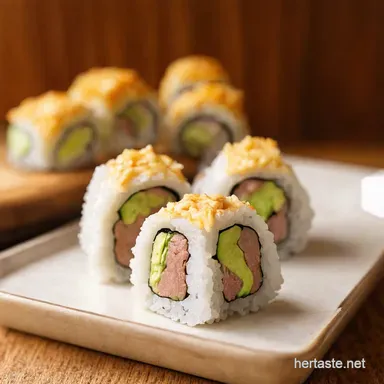
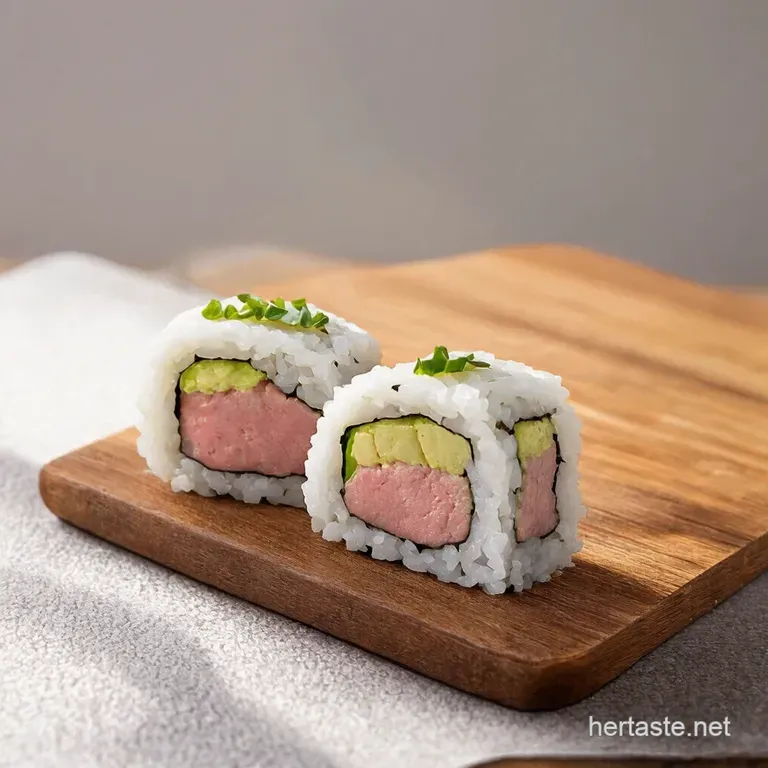
Classic Tuna Mayo Onigiri
Recipe Introduction: Say Hello to the Perfect Onigiri!
Fancy a trip to Japan without leaving your kitchen? I've got just the ticket. This onigiri recipe is your gateway to delicious, portable happiness! Think of it as a tasty little parcel of joy.
Quick Hook
Ever wondered what Japanese mums pack for their kids' lunchboxes? It's often onigiri , those cute Japanese rice balls . This easy onigiri recipe brings that savory, umami goodness right to your fingertips.
We're talking comfort food that's also surprisingly healthy.
Brief Overview
Onigiri , or rice balls, have been a staple in Japan for centuries. This tuna mayo onigiri version is super simple to make.
It takes about 40 minutes, start to finish, and makes 6 satisfying rice balls. Perfect for a light lunch or a quick snack.
Main Benefits
These little guys are packed with energy from the rice and protein from the tuna. Plus, they're utterly delicious! This onigiri for lunchbox is a guaranteed crowd pleaser, and let's be honest, way cooler than a boring sandwich.
What makes this homemade onigiri special? It’s the perfect balance of creamy mayo, salty tuna, and that slightly tangy sushi rice recipe .
Time to gather the Ingredients for Our Rice Balls
I always find that the secret is getting the sushi rice recipe just right and experimenting with onigiri fillings . But don't worry, we'll tackle it together. So, let's get started!
Ingredients & Equipment: Let's Get Started!

Fancy making some smashing Japanese rice balls , eh? This onigiri recipe is a total winner. It's simpler than you think, honestly! I'll walk you through the bits and bobs you'll need.
Plus, there is a world of rice ball variations !
Main Ingredients
Let’s sort out our key players for these homemade onigiri . It's easier than making a cuppa!
- Sushi Rice: 1 ½ cups (300g) . Get short grain. It needs to be sticky! The good stuff makes all the difference.
- Water: 1 ¾ cups (414ml) . For cooking the rice.
- Rice Vinegar: 2 tablespoons (30ml) . This is what makes it sushi rice!
- Sugar: 1 tablespoon (15ml) . A little sweetness is magic.
- Salt: ½ teaspoon (2.5ml) . Just a pinch!
- Tuna in Water: 1 can (5 oz / 140g) , drained. Good quality tuna is best. I’d recommend Princes tuna brand.
- Japanese Mayo: 3 tablespoons (45ml) . Kewpie is the one, but regular mayo will do.
- Soy Sauce: 1 teaspoon (5ml) . Adds a bit of umami goodness.
- Black Pepper: ½ teaspoon (2.5ml) . For a little kick.
- Nori Seaweed: 6 sheets, cut into strips. These give a nice wrap.
Seasoning Notes: Bang On Flavors
Want to level up your tuna mayo onigiri ? I’ve got your back!
- Soy sauce and pepper are a must. It's a classic combo.
- A tiny dash of sesame oil in the rice? Amazing.
- No Japanese mayo? Add a squeeze of lemon to regular mayo. It brightens the flavor.
Think about other things you can add to the onigiri fillings . Make the quick onigiri recipe your own! How about some chilli?
Equipment Needed: Keep it Simple
You don’t need fancy kit for an easy onigiri recipe . Just a few basics.
- Rice cooker. Makes life easy, but a pan works too.
- Mixing bowl. For mixing the rice and tuna.
- Spatula or wooden spoon. To handle the rice gently.
- Cutting board. A must have for everything.
- Sharp knife. Just for cutting the nori.
- Cling film (optional). For shaping the onigiri for lunchbox so it is neat.
If you haven't got a rice cooker, don’t sweat it. A saucepan with a lid is fine. Just keep an eye on it at medium heat! I remember one time I totally burnt the rice…oops! A baking paper instead of cling film can be used.
These are your keys to nailing this vegetarian onigiri recipe .
Cooking Method: Mastering the Art of Homemade Onigiri
Honestly, who doesn't love Japanese rice balls ? They're like little pockets of joy. Today, we're tackling a super easy onigiri recipe , perfect for your lunchbox or a quick snack.
Forget complicated sushi making. This is all about simple, delicious, homemade onigiri . Trust me, once you get the hang of it, you'll be making them all the time.
I reckon it might just beat the sarnies.
Prep Steps: Get Your Ducks in a Row
First things first, let's talk mise en place . It's just a fancy way of saying "get everything ready." For this onigiri recipe , you'll need cooked sushi rice, your chosen onigiri fillings , and nori seaweed.
Ensure you got the sushi rice recipe down perfect before. My top tip? Cook your rice a bit earlier so it has time to cool down.
Nobody wants burnt fingers!
Oh, and a quick safety reminder: Always use a clean knife when cutting the nori. Sharp knives are safer than dull ones, you know.
Step-by-step: From Rice to Delight
- Rinse 300g of short grain sushi rice until the water runs clear.
- Cook the rice with 414ml of water in a rice cooker or saucepan. Let it steam for 10 minutes after cooking.
- Mix 30ml rice vinegar, 15ml sugar, and 2.5ml salt. Stir it into the cooked rice.
- Combine 140g drained tuna, 45ml mayo, 5ml soy sauce, and 2.5ml pepper for your tuna mayo onigiri filling.
- Wet your hands! This stops the rice from sticking.
- Form a ball, add your filling, then shape into triangles.
- Wrap with nori strips. Ta-dah!
Pro Tips: Level Up Your Onigiri Game
Want to be an onigiri ninja? Here's the secret: Don't overmix the rice! It gets gluey. Also, slightly damp hands are your best friend.
I learned that the hard way. Another thing? Don't be shy with the fillings.
For a quick vegetarian onigiri recipe , try using pickled plums or seasoned edamame. Rice ball variations are endless, so experiment.
You can even make these ahead of time for a quick onigiri recipe that's perfect onigiri for lunchbox , just wrap them well in cling film!
Recipe Notes: Your Onigiri Adventure Continues!
So, you're ready to make some killer homemade onigiri ? Ace! But before you dive in headfirst, let's chat about a few extra bits and bobs to make your onigiri recipe experience even better.
Honestly, these Japanese rice balls are pretty forgiving. But a few pointers never hurt, right?
Plating Like a Pro: Serving Suggestions for Your Onigiri Masterpiece
Okay, let's talk presentation. These easy onigiri recipe bad boys are already pretty cute. But you can totally elevate them! I like to arrange them on a plate with the nori facing up.
Think about adding some colour. A side of edamame? Some pickled ginger? Even a simple green salad works wonders. For drinks, chilled green tea or even a light Japanese beer complements the tuna mayo onigiri perfectly.
Think kawaii and delicious.
The Art of the Leftover: Storage Tips for Onigiri
Right, so you've made a batch of quick onigiri recipe , but can't eat them all? No worries! These rice ball variations are fairly easy to keep.
Pop them in the fridge, wrapped individually in cling film. They'll be good for a day or two. I don't recommend freezing them, because the rice texture can go a bit weird.
When reheating, give them a quick zap in the microwave. Just be careful not to dry them out! Pro tip: A damp paper towel wrapped around them keeps them moist.
These are fantastic onigiri for lunchbox .
Adapt and Conquer: Variations on the Onigiri Theme
Fancy mixing it up? Course you do! You could easily make this a vegetarian onigiri recipe by swapping the tuna for something like avocado and cucumber, or even some marinated tofu.
And for seasonal vibes? Think about using different veggies depending on the time of year. Asparagus in spring? Roasted sweet potato in autumn? Get creative with your onigiri fillings !
Fuel Up! Nutrition Basics of the Rice Balls.
Each tuna mayo onigiri is about 250 calories . It is a good mix of carbs, protein, and healthy fats. Rice gives you energy, and tuna provides protein.
It will keep you full and happy! Just watch the sodium if you are using lots of soy sauce. It's a good idea to balance it with a nice serving of fruit on the side.
You know?
So, there you have it. Everything you need to nail that sushi rice recipe and create epic onigiri . Don't be afraid to experiment, and most importantly, have fun! Making onigiri should be enjoyable.
So, go on, give it a go! You've got this!
Frequently Asked Questions
What exactly is onigiri, and is this onigiri recipe easy enough for a complete beginner?
Onigiri are Japanese rice balls, often shaped into triangles or cylinders and filled with various savory ingredients. Think of them as the ultimate packed lunch, a bit like a Japanese sandwich! This onigiri recipe, especially with the tuna mayo filling, is absolutely beginner friendly.
If you can cook rice and mix ingredients, you're already halfway there. It's easier than making a Victoria Sponge, trust me!
Can I make onigiri ahead of time? I'm thinking of prepping them for my lunchbox like a true salaryman!
You can make onigiri ahead of time, but they are definitely best enjoyed the same day. The rice tends to harden a bit in the fridge, which affects the texture. If you do prep them ahead, wrap them tightly in cling film to maintain some moisture and eat within 24 hours.
To keep them at their best don't put them in the fridge!
What are some good variations or substitutions I can make to this onigiri recipe? I’m a bit of a creative cook!
The possibilities are endless! For a veggie option, try pickled plum (umeboshi), edamame, or seasoned shiitake mushrooms. Swap the tuna mayo for flaked salmon, leftover grilled chicken, or even a spicy kimchi.
If you don’t have rice vinegar, a mix of white wine vinegar and a pinch of sugar works in a pinch, like when you are out of eggs for that perfect sunday breakfast!
How do I stop the rice from sticking everywhere when making onigiri? It's proving to be a bit of a sticky wicket!
Ah, the sticky rice conundrum! The key is to keep your hands very damp. Have a bowl of water nearby and re-wet your hands each time before handling the rice. Some people also sprinkle a little salt on their hands, which helps prevent sticking and adds a subtle flavor.
If you're still struggling, try shaping the onigiri inside cling film/plastic wrap.
Is this onigiri recipe healthy? What's the nutritional lowdown?
Onigiri can be a reasonably healthy snack or light meal. It offers carbohydrates from the rice, protein from the tuna, and some healthy fats from the mayo. The nutritional value depends heavily on the filling, so opt for leaner options if you are trying to reduce calories.
Watch the sodium content as well, as soy sauce can be quite salty!
Where can I buy Kewpie mayonnaise? I’ve heard it’s essential for the best tuna mayo onigiri!
Kewpie mayonnaise is a game changer! You can often find it in the international section of larger supermarkets, particularly those with a good Asian food selection. Asian grocery stores are your best bet. If all else fails, Amazon or other online retailers are reliable options, but you might pay a bit more.
Once you try it, you'll understand the hype it's like the difference between a builder's tea and Earl Grey!
Classic Tuna Mayo Onigiri