Thanksgiving Stuffing: the Ultimate Sage and Thyme Festive Bake
- The Quest for the Perfect Thanksgiving Stuffing: A Recipe Overview
- Mastering the Stuffing Science: Achieving the Perfect Texture
- Ingredients for The Ultimate Sage and Thyme Thanksgiving Stuffing
- Step-by-Step: Preparing and Baking Your Festive Stuffing
- Pro Tips and Troubleshooting Common Stuffing Mistakes
- Planning Ahead: Storage, Freezing, and Reheating Guide for Thanksgiving Stuffing
- Recipe FAQs
- 📝 Recipe Card
The Quest for the Perfect Thanksgiving Stuffing: A Recipe Overview
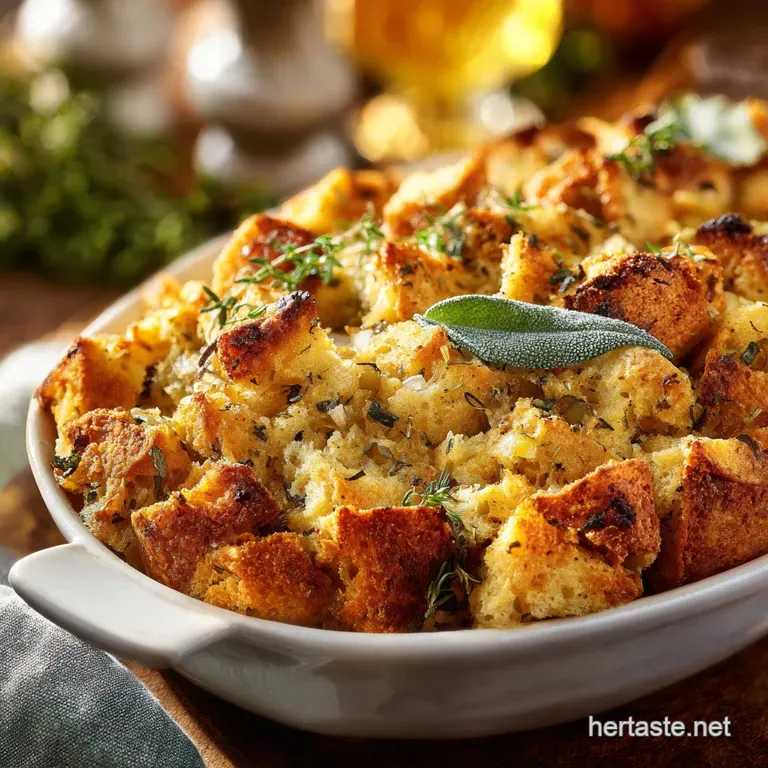
When that incredible aroma of butter and deeply browned sage hits you, Thanksgiving has officially started. This Thanksgiving Stuffing Recipe is more than just a side dish; it’s the cornerstone of the meal, boasting a crackling crust and an unbelievably moist, flavour packed centre.
Forget the dry cardboard version your Aunt Mildred used to make.
Holiday cooking is stressful enough, but this simple Buttery Stuffing Recipe is a guaranteed winner that actually saves you time. It's affordable, can be prepped days ahead, and asks for almost zero hands-on time once it hits the oven.
This recipe is the definition of high reward for minimal effort.
Ready to bake the best batch of dressing —or stuffing, whatever you call it when it’s baked in a pan your family has ever tasted? We’re going deep into the secrets of texture and flavour science to ensure flawless results every single time.
Let’s get this Classic Stuffing Recipe sorted.
Mastering the Stuffing Science: Achieving the Perfect Texture
The difference between great stuffing and edible filler is entirely down to moisture management and flavour depth. We are aiming for a dish that is crunchy on top, soft and spongy within, and packed with complex savory flavour, not just salt. This requires intentional steps.
Why We Bake This Stuffing Separately (The "Dressing" Debate)
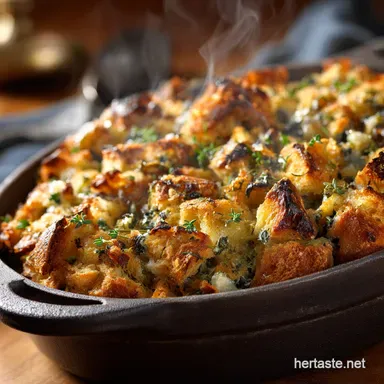
For the record, when cooked outside the turkey cavity, it's technically called "dressing." However, most people crave that deep, savoury flavour profile that comes from classic Thanksgiving Stuffing , regardless of where it’s baked. Baking separately is simply safer; the temperature of stuffing cooked inside the bird is notoriously hard to regulate safely. Plus, baking it in a casserole dish gives you maximum surface area for that incredible, crispy crust and we all know that's the best part, right? If you’re looking for a slightly different approach focusing purely on the top crust, check out my recipe for Thanksgiving Dressing: The Ultimate Crispy Topped Sage Recipe .
The Defining Flavor Profile: Sage, Thyme, and Aromatics
The magic here is built on fat and fresh herbs. Slowly caramelizing the onions and celery in butter and sausage fat if you are using the sausage creates a flavour base called swoon .
We use fresh sage and thyme, because their essential oils release so much more potency than dried herbs ever could. That tiny touch of nutmeg really elevates the profile, adding an unexpected warmth that makes people wonder what your secret is.
Essential Tools for a Proper Festive Bake (Casserole Dish Guide)
You really need a large, heavy baking dish, usually 9x13 inches. I recommend ceramic or cast iron because they retain heat beautifully, helping the bottom edges get nicely brown and crispy too. Do not use a shallow sheet pan, as the mixture will dry out too fast before the centre can steam properly.
The Secret to Moist Interior: Liquid Ratio and Egg Binding
We bind this big, beautiful mess with eggs and stock. The eggs act as a gentle binder, giving the stuffing that slightly custard like, spongy texture when baked. The key is using just enough stock to fully saturate the dried bread cubes without leaving them swimming in liquid before baking.
You want wet sponge texture, not mushy oatmeal.
Why You Must Dry Your Bread Cubes Properly
This is the non-negotiable step that determines success. If your bread is still soft, it dissolves immediately into a paste when the hot butter and stock hit it. Properly dried bread holds its shape, allowing it to soak up the flavourful liquids, but still retain enough structure to crisp up wonderfully on the outside. If you are using a sturdy loaf like sourdough, you'll love my deeper dive into the topic in my recipe for Homemade Stuffing Recipe: Ultimate Sage Sourdough for a Crisp Crust .
The Maillard Reaction: Browning the Top Crust
We bake this Thanksgiving Stuffing covered initially; this traps the steam and ensures the inside is thoroughly cooked and moistened. Removing the foil for the final 10– 15 minutes allows the bread and fat on the surface to reach a high temperature.
This creates the Maillard reaction, resulting in that irresistible, deep golden brown, crispy top crust that everyone fights over.
Ingredients for The Ultimate Sage and Thyme Thanksgiving Stuffing

This recipe is built on simplicity, allowing the high-quality of the bread and the freshness of the herbs to really shine. Don't skimp on the butter or the broth; they are the delivery mechanism for flavour.
Choosing the Right Bread Base (Sourdough vs. Day-Old White)
| Ingredient | Why it Works | Viable Substitute |
|---|---|---|
| Sourdough/Pain de Mie | Strong crumb holds up to liquid without dissolving; fantastic flavour. | Day-old, high-quality white bread or Italian loaves (Ciabatta). Avoid heavily sweetened breads. |
| Unsalted Butter | Provides the richness and browning factor. | Vegan butter sticks or rendered duck/goose fat for intense savory depth. |
| Italian Sausage | Adds incredible fat, seasoning, and texture contrast. | Omit completely for vegetarian, or use finely diced prosciutto or pancetta. |
| Chicken Stock | Concentrated savory liquid base. | Robust vegetable stock (must be low-sodium and high flavour). |
| Fresh Sage & Thyme | Essential autumnal flavour profile. | Use 1 tsp dried herbs for every 1 Tbsp fresh, but fresh is genuinely better here. |
Building Depth: Onions, Celery, and the Aromatics Base
We’re not just softening these vegetables; we are coaxing deep flavour out of them. The celery provides a slight bitterness and structure, while the onion caramelizes, adding necessary sweetness to balance the salty, fatty nature of the dish.
Cooking them slowly in the sausage fat (or extra butter) ensures they give up all their raw bite.
Making It Vegan Friendly: Butter and Broth Swaps
If you need a strictly plant based option, it's easy! Swap the butter for a good quality vegan butter substitute. Ditch the sausage and use high-quality, intensely flavoured vegetable stock instead of chicken or turkey broth.
The eggs can be swapped for a flax egg substitute (1 T flaxseed meal + 3 T water per egg) or simply increase the liquid slightly and rely on the bread’s starch to bind.
Fresh vs. Dried Herbs: Maximizing Sage and Thyme Flavor
Use fresh. I beg you. Dried herbs work in a pinch (use far less!), but fresh sage and thyme bring a brightness and complexity that dried herbs simply lack after sitting in your cupboard for months. That fragrant combination is truly the hallmark of a great holiday bake.
Chef's Note: If you want a truly complex herbal profile, toss the fresh herbs with the melted butter and let them steep for 5 minutes before adding the mixture to the bread. This releases maximum flavour before baking.
step-by-step: Preparing and Baking Your Festive Stuffing
Remember, we work in stages. Get your bread dry, then build your flavour base, and finally, combine it all for a majestic bake.
- Dry the Bread: Cube your bread 24 hours ahead, or bake it gently for 15 minutes to dry it out completely. You want the cubes to feel like croutons, firm and light.
- Sauté the Meat: Brown the Italian sausage in a large pan with a tablespoon of butter, breaking it up as you go. Remove the sausage and keep the rendered fat for the next step.
- Sweat the Aromatics: Add the remaining butter, then cook the diced celery and onions over medium heat for 8- 10 minutes. They must be completely softened and translucent.
- Flavour Bomb: Stir in the minced garlic, fresh sage, fresh thyme, and nutmeg. Cook for only one minute until the herbs are intoxicatingly fragrant. Season this mixture aggressively with salt and pepper now.
- Combine the Dry: Pour the hot aromatic mixture over the dried bread cubes in a massive bowl. Add the cooked sausage back in. Toss this carefully so every cube is coated in butter and herbs.
- Add the Liquid: Whisk the eggs with about half the stock. Pour this over the mixture. Now, gradually add the remaining stock, tossing gently until all the bread is uniformly moist but not waterlogged.
- Bake: Transfer the mix to your greased baking dish, keeping it loose. Cover tightly with foil and bake at 190°C (375°F) for 25 minutes.
- Finish Crispy: Remove the foil and bake for an additional 10– 15 minutes until the top is deeply golden brown. Let it rest for 10 minutes before serving; this allows the flavours to settle.
Pro Tips and Troubleshooting Common Stuffing Mistakes
Stuffing is pretty forgiving, but there are a few places where people consistently mess up. Avoid these pitfalls for the perfect batch.
Stage 1: Sautéing Aromatics Until Deeply Caramelized
This is not a quick sauté! You are trying to coax sweetness and depth from the vegetables, not just warm them up. Cook the celery and onions until they look truly glossy and have shrunk significantly in volume; this concentrates their flavour.
If you rush this step, your stuffing will taste disappointingly raw and sharp.
Stage 2: Combining the Ingredients and Achieving the Right Consistency
The most common mistake is adding too much stock too fast. I once did this, and the whole batch turned into a dense, wet, unappetizing brick. Instead, add the stock slowly, using your hands to feel the texture.
You are looking for uniform dampness , where the bread is saturated but hasn't fully collapsed.
Stage 3: The Baking Timeline and Testing for Doneness
The covered bake is essential for internal moisture, but don't skip the uncovering step. If you pull it out while pale, you miss the crispy texture entirely. The stuffing is done when the internal temperature hits 74°C (165°F) and the top is deeply browned.
Avoiding a Soggy Bottom (The Foil Trick)
If you are worried about the bottom of your casserole dish getting too wet, especially if you added a lot of liquid, try this trick: line the bottom of your dish with a layer of parchment paper before adding the stuffing.
You can also bake the stuffing dish on a baking sheet; this prevents the bottom from getting too much direct heat and ensures better air circulation.
Temperature Control: Why Resting the Mixture Matters
When you add the hot butter and sautéed aromatics to the dry bread, the bread immediately starts absorbing the fat. Letting the mixture rest for 10 minutes before adding the egg/stock ensures the bread is ready to soak up the liquid evenly.
Rescuing Dry Stuffing Post Bake
Oh no, it happens! If you cut into your Easy Stuffing Recipes For Thanksgiving and it's too crumbly, don't panic. Gently drizzle 1/4 to 1/2 cup of warm stock or melted butter over the top and then cover the dish tightly with foil.
Pop it back in the warm oven for 5 minutes. The steam will re-moisten the bread without ruining the crust too badly.
Planning Ahead: Storage, Freezing, and Reheating Guide for Thanksgiving Stuffing
Efficiency is the name of the game when hosting a big meal. Knowing exactly how to handle leftovers or prepped stages is crucial for a smooth Thanksgiving day.
How to Prepare Stuffing Mix Up to 48 Hours in Advance
You can complete steps 1 through 7 (everything but the final bake) up to two days ahead of time. Assemble the entire mixture in the casserole dish, cover it tightly with plastic wrap and foil, and place it in the refrigerator.
When ready to bake, pull it out 30 minutes before you plan to put it in the oven to let it lose some of the fridge chill. Add an extra 5– 10 minutes to the initial covered baking time.
Freezing Unbaked vs. Baked Stuffing
You can freeze this Thanksgiving Stuffing Casserole either baked or unbaked! If freezing unbaked, assemble it fully in a disposable aluminum tray, cover it well, and freeze for up to 3 months. Thaw overnight in the fridge and bake as directed.
Baked leftovers freeze perfectly too; seal them in an airtight container for up to 2 months.
Best Methods for Reheating Leftovers
The microwave is okay, but it results in soft, floppy stuffing. For that perfect crisp soft combo, reheat leftovers in a 175°C (350°F) oven. Cover the dish with foil and bake until warm (about 20 minutes).
Then, uncover and bake for 5 minutes to restore the lovely crust.
Pairing This Savory Stuffing: Complementary Side Dishes
This savoury, herb forward stuffing pairs beautifully with dishes that offer sweetness or brightness. It needs a counterpart that cuts through all that buttery richness.
Pairing with Roasted Root Vegetables (e.g., Maple Glazed Squash)
The earthy, sweet flavour of roasted squash or carrots, especially when lightly glazed with maple syrup, offers a fantastic contrast to the salty herbs in the stuffing. It’s a classic fall combination that simply works.
Fresh Counterbalance: Simple Kale or Seasonal Salads
Since the stuffing is so rich, make sure you have something fresh and acidic on the table. A simple salad dressed with a bright vinaigrette maybe featuring apples or pomegranate seeds will cleanse the palate between bites of rich Sage and Thyme Stuffing .
Alternatives to Potato Dishes
If you’re already serving this hefty, bread based stuffing, you might want to skip the heavy mashed potatoes. Instead, try a lighter root vegetable purée or, if you enjoy sourdough based sides, consider something like my Thanksgiving Side Dishes: Proper Sourdough Dressing with Apple Sage . It provides a slightly different texture and flavour profile, keeping things interesting!

Recipe FAQs
Why did my stuffing turn out dry and crumbly?
This usually happens due to insufficient liquid absorption or overbaking, especially if your bread cubes were excessively dry. Ensure you use the proper amount of quality broth and measure it accurately, adding slightly more if your bread has been dried for more than 48 hours.
Covering the stuffing pan tightly for the first 30 minutes of baking helps trap necessary steam before you uncover it to crisp the top.
My stuffing is too mushy or soggy. How can I fix the texture?
Soggy stuffing often results from using bread that wasn't adequately dried or using too much liquid relative to the bread volume. If the mix appears too wet before baking, try gently stirring in a small amount of extra cubed toasted bread to absorb the excess moisture.
Always make sure the sautéed vegetables are properly drained of any pooled butter or liquid before mixing them in.
How can I adapt this recipe for vegetarian or vegan guests?
To make this stuffing vegetarian, simply substitute the chicken or turkey broth entirely with a high-quality, flavorful vegetable broth. For a completely vegan version, swap the butter for a neutral, robust plant based margarine or olive oil, and confirm that your bread does not contain hidden dairy or eggs.
Can I prepare this stuffing mixture ahead of Thanksgiving Day?
Absolutely, this stuffing is an excellent make-ahead component for the holiday. You can prepare the entire mixture combining bread, sautéed aromatics, herbs, and liquid up to 24 hours in advance and store it covered tightly in the refrigerator.
Allow it to sit at room temperature for about 30 minutes before baking to ensure uniform heat penetration.
What are some good additions to customize the flavor profile?
This base pairs beautifully with savory and sweet additions. Consider adding 1 cup of dried cranberries or chopped apples for sweetness, or 1 cup of toasted pecans or walnuts for crunch.
If you prefer meat, fully cooked Italian sausage or diced bacon pieces should be sautéed and drained before folding them into the mixture.
Is it safe to cook this stuffing inside the turkey?
While traditional, cooking stuffing inside the turkey requires careful monitoring, as the center must reach 165°F (74°C) to be food safe, which can overcook the breast meat.
For the best flavor and texture control, and to save time, it is highly recommended that this savory recipe be baked separately in a casserole dish. When baking separately, we call it "dressing," but it’s the same delicious outcome.
Can I freeze leftover stuffing, and how should I reheat it?
Yes, cooked leftover stuffing freezes very well; transfer completely cooled stuffing to an airtight container and freeze for up to three months. To reheat, thaw the stuffing overnight in the refrigerator and bake it covered at 350°F (175°C) until piping hot throughout, removing the cover for the last 10 minutes to restore its crisp surface.
Ultimate Thanksgiving Stuffing Bake
Ingredients:
Instructions:
Nutrition Facts:
| Calories | 236 kcal |
|---|---|
| Protein | 3.0 g |
| Fat | 7.0 g |
| Carbs | 44.0 g |
