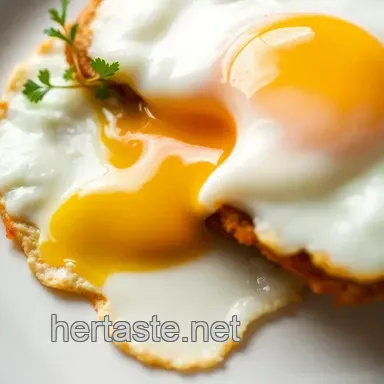
Sunny Side Up Egg in 4 Minutes

- Time: 1 min active + 3 min cooking
- Flavor & Texture: Rich, buttery, and silky
- Perfect for: A slow weekend breakfast or a quick protein boost
The soft crack of a shell and that first hiss of butter in a warm pan. It's the sound of a slow morning, maybe with a fresh cup of coffee and a stack of toast.
Getting this right isn't about luck. It's about controlling the heat so the whites don't turn into rubber while the yolk stays liquid.
When you make a sunny side up egg, you're looking for a bright, yellow bullseye. You want the whites to be completely opaque and set, but the center should still wobble.
Sunny Side Up Egg Specs
| Method | Time | Texture | Best For |
|---|---|---|---|
| Stovetop | 3 mins | Tender | Classic breakfast |
| Air Fryer | 4-6 mins | Firmer | Hands-off cooking |
The stovetop gives you more control, while the air fryer is a great shortcut if you're multitasking.
What Each Ingredient Does
- 1 large egg
- 1 tbsp unsalted butter
- 1 pinch salt
- 1 pinch black pepper
| Component | Purpose | Substitute Notes |
|---|---|---|
| Large Egg | Main structure | Use organic or pasture raised for a deeper orange yolk |
| Unsalted Butter | Fat and flavor | Olive oil works but lacks the creamy taste |
| Salt & Pepper | Flavor balance | Smoked paprika adds a nice earthy note |
For the Egg
I prefer eggs straight from the fridge. They cook slightly slower, which gives the whites more time to set before the yolk gets too hot.
Essential Gear
You only need a few things. An 8 inch non-stick skillet is non-negotiable here. Without it, the egg will likely tear when you try to slide it onto the plate. You'll also need a lid that fits the pan and a thin silicone spatula.
Cooking Steps
Phase 1: The Setup
Crack the egg into a small ramekin. Note: This helps you check for shells and keeps the yolk from breaking when it hits the pan.

Phase 2: The Sizzle
Place your non-stick skillet over medium-low heat. Add 1 tbsp unsalted butter and heat until it melts and foams slightly. Make sure the butter doesn't turn brown.

Phase 3: The Gentle Cook
Slowly pour the egg from the ramekin into the center of the pan. Season immediately with 1 pinch salt and 1 pinch black pepper.
Cover the pan with a lid for 60 to 90 seconds. Note: The trapped steam cooks the top of the whites without needing to flip. Cook until the whites are opaque and fully set, but the yolk still wobbles when you shake the pan.

Phase 4: The Plating
Slide a thin silicone spatula underneath the egg. Carefully transfer it to a plate.
Why the Method Works
- Steam Trap: The lid creates a moist environment that cooks the surface of the egg.
- Temperature Control: Medium-low heat prevents the bottom from browning or curling.
- Ramekin Pour: This minimizes the impact of the egg hitting the pan, keeping the yolk centered.
Quick Fixes
If the whites are still clear, you probably didn't use a lid or the heat was too low. Just pop the lid back on for another 30 seconds. If the yolk breaks, it's usually because the egg was dropped from too high.
Fixing Snotty Whites
When the whites stay translucent, the top isn't getting enough heat. Use the lid method to fix this.
Preventing Broken Yolks
Crack your egg into a bowl first. This prevents the shell from piercing the yolk.
Managing Brown Edges
If the edges are frying and curling, your pan is too hot. Lift it off the burner for 20 seconds to cool down.
| Problem | Root Cause | Solution |
|---|---|---|
| Clear whites | Lack of steam/heat | Cover with lid for 60 seconds |
| Broken yolk | High drop height | Pour from a ramekin |
| Rubbery edges | Heat too high | Lower to medium-low |
Keeping it Fresh
Enjoy these immediately after plating. Because of the runny yolks, they aren't ideal for reheating, which usually results in rubbery whites and hard yolks.
Store any leftovers in the refrigerator in an airtight container for 24 hours. I suggest serving them cold over a salad.
Flavor Variations
Chili Oil Base
Swap the butter for a tablespoon of chili crunch. It adds a spicy, savory crust to the bottom of the egg.
Pesto Twist
Spoon a bit of pesto into the pan before adding the egg. The oil in the pesto fries the egg, and the basil adds a fresh hit of flavor.
Olive Oil Swap
For a lighter version, use olive oil. It won't be as rich, but it's a great option for those avoiding dairy.
Best Ways to Serve

I enjoy these on a thick slice of sourdough spread with avocado. They are also delicious served over steamed rice or atop smoked salmon. For a more gourmet touch, pair them with sautéed spinach for a nutritious breakfast.
Frequently Asked Questions
How to properly make sunny side eggs?
Crack the egg into a ramekin, then pour it into a non-stick skillet with melted butter over medium-low heat. Cover with a lid for 60 to 90 seconds until the whites are opaque and the yolk still wobbles.
What makes an egg sunny side up?
An egg is sunny side up when the whites are fully set but the yolk remains liquid and visible on top. It is cooked without being flipped, leaving the yolk looking like a bright yellow sun.
Can you make these in an air fryer?
Yes, you can use an air fryer for a firmer result. This method takes 4 to 6 minutes and is a great hands-off shortcut.
Why do sunny side up eggs differ from over easy eggs?
Sunny side up eggs are never flipped during cooking, while over easy eggs are turned over briefly to sear the top of the yolk. This ensures the sunny side up version keeps a completely liquid, bright center.
Sunny Side Up Egg in 4 Minutes