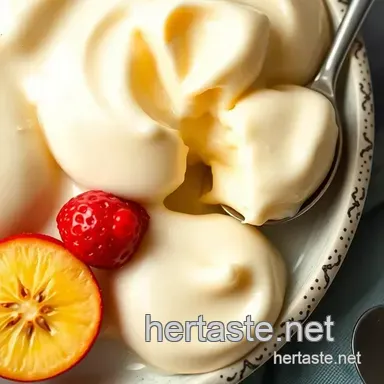
Silky Vanilla Pudding
- What’s your favorite dessert memory?
- The Ultimate Guide to Mastering Silky Vanilla Pudding
- The Magic Behind This Recipe
- Health and Nutrition Highlights
- Recipe at a Glance
- Master Ingredient List
- Professional Cooking Guide
- Professional Secrets
- Perfect Presentation
- Storage and Make-Ahead
- Creative Variations
- Complete Nutrition Guide
- Expert FAQ Solutions
- 📝 Recipe Card
What’s your favorite dessert memory?
If you're anything like me, one of those sweet moments probably involves a creamy, dreamy pudding that melts in your mouth.
I mean, who can resist a dessert that feels like a hug on a spoon? today, we’re diving into a recipe that’s not just any dessert; it’s a silky vanilla pudding that’s quick, simple, and a fantastic option that qualifies as one of those “soft desserts for seniors.
” with just around thirty minutes of your time, you’ll whip up a treat that’s not only silky but also brings a touch of nostalgia to the table.
Plus, it's easy enough for any kitchen novice!
The Ultimate Guide to Mastering Silky Vanilla Pudding
Pudding has been around for centuries, a nostalgic staple in kitchens across the world. it harks back to medieval times when sweet dishes were often made with grains and milk.
Fast forward a few hundred years, and we find ourselves enamored with this creamy dessert. silky pudding can soothe the soul, and it has such a rich culinary heritage that brings people of all ages together.
What makes this recipe stand out? for starters, it’s all about the texture. the smooth, creamy richness is utterly comforting, especially for those who need a bit of gentleness in their dessert.
There’s something about that sensation of spooning out each serving, tasting the pure vanilla essence while knowing you created this magic in your a own kitchen.
It’s a simple pleasure that’s deeply satisfying.
The Magic Behind This Recipe
Let's talk flavors. the combination of whole milk, sweet sugar, and real vanilla extract creates a sweet symphony that sings with each bite.
And i’ve got to share my not-so-secret tip: tempering the egg yolks is a game changer. it’s all about that silky texture; if you skip this, you might end up with scrambled eggs in your pudding.
Trust me, i learned that the hard way!
And while we’re on the subject of techniques, this pudding is about as foolproof as they come. between the constant whisking and those comforting bubbles that start to appear as it simmers, you’ll feel like a culinary pro in no time.
For those of you cooking for soft desserts for seniors , you’ll be thrilled to know that this classic dessert can be made dairy-free too! just swap out the whole milk for something like almond or oat milk it works surprisingly well.
Health and Nutrition Highlights
Now, let's peek at the health benefits. yes, it’s a dessert, but it can contribute to a balanced diet! this recipe has a decent protein content, which can be helpful for those needing a bit more in their diets, like seniors.
What's nice about making it at home is you can fine tune the sweetness to your preference, opting for alternative sweeteners if desired.
This pudding is also a great choice for those with a more sensitive palate, as it’s easy to swallow and digest.
It's comforting and packed with nutrients, which is especially important for our aging loved ones.
Recipe at a Glance
- Total preparation time : About 10 minutes
- Cooking time : 20 minutes
- Total time : 30 minutes (don’t forget a couple of hours for chilling)
- Servings : 4 delightful portions
- Cost efficiency : Super affordable, making it a win-win!
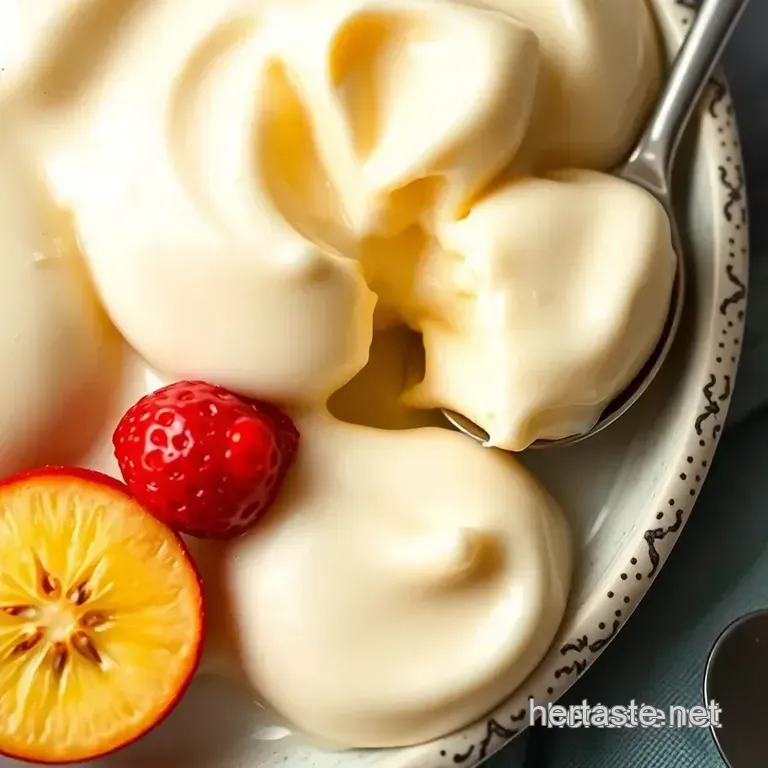
And before we dive into the ingredients, let me just say that this silky vanilla pudding is such a versatile treat.
Whether you serve it as is or pair it with some fresh fruit (bananas anyone?) or a light drizzle of caramel, it’s bound to impress.
I can already hear the praises from family, friends, or even those special seniors you’re catering to!
So, if you’re ready to embrace this little culinary adventure, let's move on to the ingredients. they’re simple and should be pretty easy to gather.
You’ll be surprised how such straightforward components can create something so delicious!
Master Ingredient List
Premium Core Ingredients
If you're diving into the world of silky vanilla pudding, you’ll want to start with the best ingredients. Here’s what you’ll need:
2 cups whole milk : look for fresh, high-quality milk to achieve that creaminess. you can also opt for organic if you like.
I’ll admit i’ve ended up with milk that’s a day away from expiring and it’s not pretty. always check the date!
1/2 cup granulated sugar : regular granulated sugar does the trick. if you’re looking to cut down on sugar, you might experiment with an alternative sweetener.
Just keep in mind they can vary in sweetness.
3 tablespoons cornstarch : This is your thickening agent. Make sure it’s fresh old cornstarch can lose its power, and who wants a watery pudding?
1/4 teaspoon salt : Just a pinch to elevate all the sweet flavors. Trust me, it makes a difference!
2 large egg yolks : Fresh eggs give you a richer flavor, making a world of difference in soft desserts for seniors.
2 tablespoons unsalted butter : Use the good stuff! It adds that luscious mouthfeel that makes this pudding oh so good .
1 tablespoon pure vanilla extract : This is where the magic happens. If you can swing it, get real vanilla it’ll change your life!
Signature Seasoning Blend
This pudding is simple yet divine. But you can add a little twist if you fancy:
Spice Combinations : A dash of nutmeg or cinnamon can make for an interesting flavor shift. Just be careful not to overdo it subtlety is key.
Aromatic Additions : Ever thought about adding a hint of lemon zest? Gives it a refreshing zing that can brighten up dessert night!
Smart Substitutions
Sometimes you just don’t have everything on hand, and that’s okay! Here are some smart swaps you can make:
Milk Alternatives : Almond or oat milk works if you're aiming for dairy-free pudding. Just remember to adjust sugar since they vary in sweetness.
Egg Alternatives : For a vegan twist, consider using a flax egg or store-bought egg replacers. I tried it once and, while it was a tad different, it was still pretty good!
Sugar Swaps : Keep it healthier with alternatives like agave nectar or stevia, but adjust the amounts to taste.
Kitchen Equipment Essentials
Now that you’ve got your ingredients sorted, let’s gear up for the fun part cooking!
Must Have Tools : A medium saucepan, whisk, and measuring cups are non-negotiables. You’ll thank yourself later!
Recommended Appliances : If you have a double boiler handy, it can help you control the heat better, but I often just stick to my trusty saucepan.
Helpful Gadgets : A rubber spatula is a game changer for scraping every last bit of that pudding into your bowls. Don’t waste any!
Pro Ingredient Tips
This isn’t rocket science, but these little gems can elevate your pudding making:
Selection Secrets : Always choose your eggs at the store by checking the size and date. I’ve made the mistake of grabbing eggs that looked good, only to find they’re slightly past their prime!
Quality Markers : Look for milk that has a smooth finish in the bottle, and if you see any separation, skip it!
Money saving tips : buy cornstarch in bulk if you use it often, and keep sugar sealed in a dry place for longevity.
I once had sugar clump up on me ugh !
With all your ingredients assembled and your tools at the ready, let’s jump into the cooking instructions. this is where the pudding magic happens, and trust me, you won’t want to miss a beat!
Get ready for a soft dessert that’s not only gentle enough for seniors but scrumptious enough to make you go back for seconds (or thirds).
Let’s make this divine silky vanilla pudding!
Professional Cooking Guide
Creating soft desserts for seniors can be a wonderfully rewarding experience, especially when you see their faces light up with joy.
I remember the first time i made silky vanilla pudding ; my grandmother, who had a knack for critiquing my cooking, gave me that nod of approval.
It felt like a mini victory! so, let's dive into the nitty gritty of producing this creamy delight with a professional touch.
Essential Preparation Steps
Before we jump into the cooking, let's set ourselves up for success. this is where mise en place comes into play.
It's just a fancy way of saying “everything in its place.” measure out your ingredients first 2 cups of whole milk, ½ cup of granulated sugar, and the rest.
Trust me, this saves time and prevents any frantic searching mid-recipe.
Next, you'll want to consider prep techniques . in this case, whisking is your best friend. a good whisking technique will help keep everything lump free.
And oh, time management! make sure you know how long each step takes. the cooking will take about 20 minutes, with a total prep time of 10 minutes, and then let’s not forget the chilling time (you'll want at least 2 hours).
Finally, organization is key! keep your workspace tidy to avoid the dreaded “where’s that spoon?” panic.
Professional Cooking Method
Alright, let’s tackle the actual cooking.
- Start by mixing your dry ingredients (sugar, cornstarch, salt) in a medium saucepan . Whisk well to ensure everything is blended properly.
- Gradually whisk in your milk —no one likes clumps!
- Heat over medium heat while continuing to whisk. You need to keep the vessel moving to avoid scorching. This shouldn’t take more than 5 to 7 minutes. Before you realize it, bubbles will start to form this is your cue to keep whisking for another 2 to 3 minutes until you achieve that lovely thickness.
As tempting as it is to skip ahead, don’t forget the temperature control ! if the heat’s too high, you’ll end up with a burnt mess (guilty!).
The sweet spot is low and slow.
- The next step is super critical: temper your egg yolks by gradually introducing them to the hot mixture. This prevents cooking them too quickly nobody likes scrambled egg yolks in their pudding!
- Stir everything back into the saucepan and cook for another 2 to 3 minutes. Timing precision is crucial here; this is when it really thickens up.
- Finally, when it reaches that silky, luscious state, remove it from heat and stir in the butter and vanilla.
You’ll know it’s ready when it coats the back of a wooden spoon. That's your success indicator .
Expert Techniques
As you work through the recipe, there are a few expert techniques to keep in mind. for instance, infusing your milk with a split vanilla bean can elevate your pudding to gourmet status.
Just remember to remove the bean before you add the egg yolks! also, don’t rush feeding the hot mixture back to the yolks; this is one of those simple yet critical steps that can make or break your pudding’s texture.
Another trick I picked up is to cover the surface with plastic wrap during chilling. It doesn’t sound like much, but it prevents that annoying skin from forming always a plus!
Success Strategies
Now, let’s talk troubleshooting tips . if your pudding turns out grainy, chances are the heat was too high, or it didn’t get whisked enough.
Be gentle, and give it the love it deserves!
For quality assurance , taste as you go. if you feel it’s lacking sweetness, you can always adjust with an alternative sweetener that works for you.
And if you’re keen on keeping it low-calorie or dairy-free, feel free to explore those options.
As for serving suggestions, think about soft textures. Pair it with light cookies or fresh fruits for a lovely contrast in flavors.
Now, doesn't that just sound delightful? Speaking of delightful, let’s move on to a few additional information nuggets that could really enhance your cooking!
In the next section, we'll dig into variations and substitutions, perfect for those looking to experiment a little. whether you're looking for dairy-free pudding options or something low in sugar, i've got you covered.
Let’s keep that creativity flowing in the kitchen!
Professional Secrets
When it comes to whipping up silky treats like this vanilla pudding, i've picked up a few pearls of wisdom along the way.
First off, use whole milk . you might be tempted to reach for that low-fat option, but trust me, the creaminess is key for that rich texture.
And when i say whisk constantly, i mean it! if there’s one thing i learned the hard way, it's that letting your guard down can lead to lumpy pudding, and nobody wants that.
Cooking isn’t just about following a recipe, though. it's about getting to know your kitchen and how your stove behaves.
When i first started, i had no idea that different brands of cornstarch can thicken at varying rates. so, take some time to experiment.
You’ll soon discover what works best in your own kitchen.
Perfect Presentation
Once you’ve made your silky vanilla pudding, you'll want to make sure it looks just as good as it tastes.
I like to serve mine in little glass dishes; it makes everything feel extra fancy, even if it’s just a tuesday night at home.
For garnish, a sprinkle of grated chocolate or a few fresh berries can add that splash of color and texture.
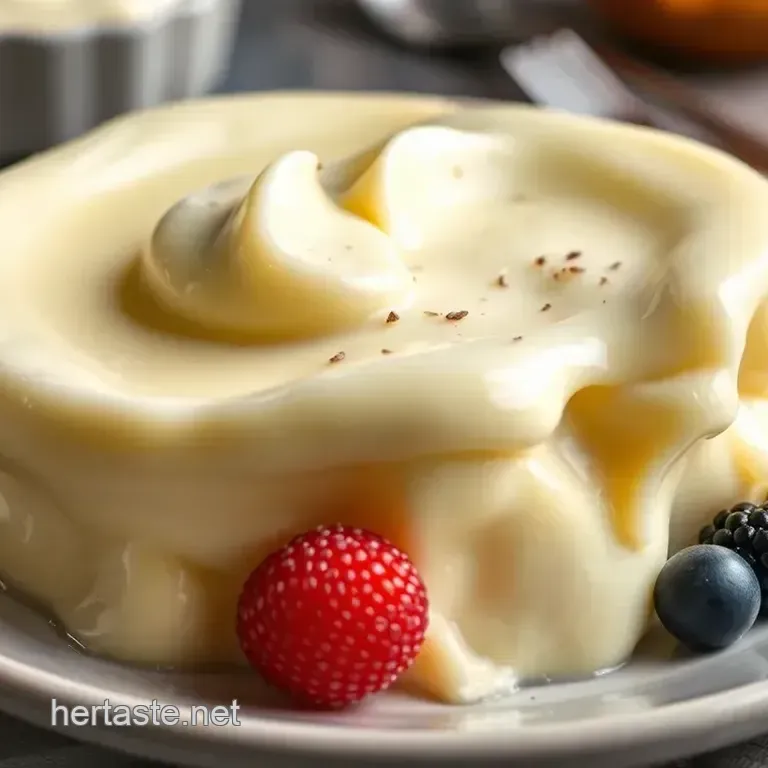
Also, remember that presentation matters. i’ll let you in on a little secret: taking the time to smooth the top of the pudding with a spatula before chilling can make it look super professional.
A good spoonful of whipped cream on top? chef’s kiss!
Storage and make-ahead
One of the best things about this pudding is that you can make it ahead of time. if you find yourself in a pinch, remember it’s best to chill it for at least two hours, but overnight is even better.
Just cover those silky treasures with plastic wrap to keep a skin from forming.
As for storage, you can keep any leftovers in the fridge for about three days. just make sure the containers are air-tight.
You want that freaking silky texture to last, right? and if you need to reheat, i've found that medium low heat with a little whisking usually does the trick to bring it back to life without curdling.
Creative Variations
Don’t get stuck in a pudding rut! this recipe can absolutely be a base for creativity . feeling adventurous? how about a little orange zest sprinkled in? or maybe you want to swap out the vanilla for almond extract.
If you’re keeping an eye on your sugars, try replacing it with a sugar substitute .
Another fun twist is using seasonal flavors. In the cooler months, canned pumpkin puree can transform your pudding’s flavor (and color) beautifully! It’s like a dessert version of your pumpkin spice latte.
Complete Nutrition Guide
Let’s be real even though dessert is meant to be indulgent, you can keep it a bit on the lighter side, especially for those who enjoy soft desserts for seniors.
Each serving has about 190 calories, which is not too shabby as far as sweet treats go. this pudding has a good balance of protein and carbs, and we can even say it’s comfort food with some nutritional value.
For those looking to keep it healthier, try using alternatives for milk in pudding. Almond or soy milk can still get you that dreamy texture while keeping certain dietary restrictions in mind.
Expert FAQ Solutions
One of the most common questions i get is, "what if my pudding doesn't thicken?" don't panic! if you notice it still feels watery after the cook time, keep it on the heat a little longer.
Sometimes, it just needs a bit of tlc.
Another common concern is about lumps. you can avoid that by really whisking together your dry ingredients before adding the milk.
And if you do end up with lumps, use a handheld blender to rescue it. trust me , it works wonders and can save your dessert from disaster.
So there you have it! from professional secrets to creative spins, this silky vanilla pudding is an absolute triumph whether you're serving it to seniors or making a cozy dessert for yourself.
Embrace the process, enjoy those small wins (and the gentle desserts for seniors!), and remember: cooking is as much about the journey as it is about the destination.
So roll up your sleeves, channel your inner pastry chef, and have fun with it!
Silky Vanilla Pudding