Microwave Choco Mochi Chewy Delight
- Look into into Delight: Microwave Choco Mochi Chewy Delight!
- A Sweet History Lesson
- Why You'll Love This Treat
- From Kitchen to Table
- Essential Ingredients Guide to Your Microwave Choco Mochi Chewy Delight
- Mastering the Art of Chewy Dessert: Microwave Choco Mochi Chewy Delight
- Look into into the Delight: Microwave Choco Mochi Chewy Delight
- 📝 Recipe Card
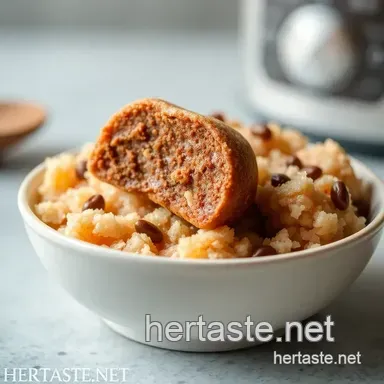
Look into into Delight: Microwave Choco Mochi Chewy Delight!
Let me tell you about one of my absolute favorite snacks that i whip up when i'm feeling adventurous (or just a little too lazy to bake a cake).
The microwave choco mochi chewy delight brings back sweet memories of my childhood. every summer, my grandma would treat us with traditional japanese sweets after dinner.
I loved how mochi felt like a little pillow of happiness in my mouth. fast forward to today, and i’ve found a way to combine that chewy nostalgia with my love for chocolate.
Seriously, it’s like a hug from the inside. ever tried one?
A Sweet History Lesson
Mochi has been a beloved treat for centuries, originating in japan and becoming part of their rich culinary culture. it’s made from sweet rice flour , giving it that delightful chewy texture that’s unique to rice based goodies.
Nowadays, folks all around the world embrace easy mochi recipes . it’s a hit at parties, potlucks, and even just lazy weekends when you want to impress folks without the fuss.
Plus, the best part? this recipe is a total no-bake mochi treat that takes about 20 minutes to whip up! yep, you heard that right.
Don’t get scared off just because it’s new to you. this is an easy peasy recipe that anyone can master truly! you’ll be a mochi making machine in no time.
It's budget friendly too; with just sweet rice flour, cocoa powder, and chocolate chips, your wallet won’t even notice. and it yields about 6-8 pieces .
Perfect for munching or sharing with friends!
Why You'll Love This Treat
Okay, let's break down the key benefits of the microwave choco mochi chewy delight. first off, it’s gluten-free , which is fantastic for those with dietary restrictions.
Plus, this delightful dessert is packed with sweet treats for chocolate lovers . with each blissful bite, you're diving into that rich cocoa flavor while enjoying the unique texture that only mochi can provide.
And let’s talk health benefits . while it’s definitely a treat, mochi made with sweet rice flour has fewer calories than your typical cake or cookie.
But i won't lie, balance is key this is still a dessert! perfect for special occasions or just an afternoon pick-me-up.
Want to get fancy? you can sprinkle on some creative mochi toppings or use fun fillings like fruit jams or even peanut butter.
People won’t believe you made it in the microwave! sounds pretty cool, right?
From Kitchen to Table
Ready to dive into the deliciousness? gather your ingredients, a microwave safe bowl, and let's get started. who knew making your own traditional japanese sweets could be this fun and simple? it's perfect for a date night or as edible gifts from the kitchen to your friends.
They'll love the thoughtfulness!
So, what’s next? by now, you're probably thinking about whipping up the dough and filling. with just a few steps, you'll see how to make mochi in the most luxurious way with chocolate!
I promise, after trying your hand at this microwave choco mochi chewy delight, you’ll want to experiment with all kinds of fillings, from the classic chocolate to every sweet rice flour recipe under the sun.
Let’s move on to what you need to grab for this scrumptious adventure! Stay tuned for the ingredient list!
Essential Ingredients Guide to Your Microwave Choco Mochi Chewy Delight
Alright, my friends! let’s dive into the delicious world of microwave choco mochi chewy delight . this dessert isn’t just a mouthful; it’s a chewy, chocolatey hug that’s perfect for any sweet tooth.
Before we jump into making these awesome treats, we gotta talk about the essential ingredients you’ll need. trust me, knowing what to stock up on can make your life so much easier in the kitchen!
Premium Core Components
Detailed Measurements
First things first, you can't go wrong with a little precision! For our mochi, here's what you'll need:
- 1 cup (120g) of sweet rice flour (Seriously, this is the magic stuff!)
- 1/4 cup (30g) of cocoa powder (Oh yeah, we’re getting chocolatey!)
- 1/2 cup (100g) of granulated sugar
- 1 cup (240ml) of water
- 1 tablespoon (15ml) vegetable oil (plus more for greasing)
Get these amounts down, whether you roll with US or metric !
Quality Indicators
When picking up your ingredients, make sure to check freshness! look for sweet rice flour that’s soft and fine, not gritty.
Your cocoa should be rich in color and smell like heaven. trust your nose!
Storage Guidelines & Shelf Life
Keep your sweet rice flour in a cool, dry place. if stored right, it can last for years ! cocoa powder can stick around for up to two years , but check the expiration date.
Your sugar? well, it’s basically immortal!
Freshness Tips & Selection Criteria
Always sift your cocoa before using it; it makes it easier to mix. And don’t forget to smell those ingredients! Fresh is best, especially when you're diving into delicious dessert ideas .
Signature Seasoning Blend
Now, let’s talk about flavor - because that’s where the magic happens! Your signature seasoning blend starts with those essential spices and herbs.
Essential Spice Combinations
For our mochi, keep it simple. Cocoa powder is our star, but you can add a sprinkle of sea salt to enhance that chocolatey goodness.
Herb Selections & Pairings
Honestly, we’re not going heavy on herbs here, but if you want to get funky, a dash of mint extract can give a refreshing twist!
Flavor Enhancers & Aromatics
Consider adding a hint of vanilla or almond extract into the mochi dough. It takes it to another level, especially when it’s all chewy and moist!
Regional Variations & Alternatives
Feel adventurous? Try incorporating matcha for a green tea mochi twist! Who doesn’t love Japanese desserts in all their forms?
Smart Substitutions
Okay, we all know life can throw curveballs. Here are some smart substitutions in case you find yourself short on ingredients.
Common Alternatives
If you don’t have sweet rice flour, glutinous rice flour can stand in. And for cocoa powder? Carob powder could be an option, though it will change the flavor profile.
Dietary Modifications
It’s easy to adapt! Use sugar substitutes if you’re looking for calorie cuts or try gluten-free dessert options if you’re on a health kick.
Emergency Replacements
Out of chocolate chips? Use peanut butter or any nut butter for a totally different yet delicious filling!
Seasonal Options
Depending on what’s available, you can swap in seasonal goodies like pumpkin puree or even apple filling for some creative mochi toppings!
Kitchen Equipment Essentials
Here’s what you’ll need in your kitchen setup:
Must Have Tools
- Microwave safe bowl (This is your best friend now.)
- A whisk for mixing
- A rubber spatula or spoon
Alternative Equipment Options
No microwave? You could try steaming the mochi. It’ll just take a little longer.
Preparation Tips
Make sure everything is prepped and ready to go! It makes the process so much smoother!
Storage Solutions
Keep any leftover mochi in an airtight container at room temperature for about a day or in the fridge for up to a week.
So, now that you know what’s what, let’s move on to whipping up that microwave choco mochi chewy delight ! you're just a few steps away from sinking your teeth into a delightful, gooey treat.
Let’s get cooking!
Mastering the Art of Chewy Dessert: Microwave Choco Mochi Chewy Delight
Oh, let me tell ya if you haven’t dived into the world of microwave choco mochi chewy delight , you’re totally missing out! it’s like a warm hug in dessert form.
Picture this: you’re craving something sweet, but you don’t want to spend hours in the kitchen. that’s where this easy mochi recipe comes in.
Imagine a little piece of japanese dessert heaven that’s chewy, chocolatey, and oh-so-comforting. seriously, it's all the rage for those quick snack ideas or, if you wanna wow your friends, it’ll be the perfect edible gifts from the kitchen!
So, let’s break this down with some professional cooking methods to whip up this delightful treat.
Essential Preparation Steps
Mise en place is the name of the game. Gather all your ingredients first. It’ll save you time and keep things smooth. Nothing worse than realizing midway through you’re missing something!
Now, about time management give yourself about 15 minutes to prep. that’s all you need. once everything is laid out, you’ll be breezing through this like a pro.
And trust me, organization strategies are key; keep your workspace tidy. nothing disrupts a flow like a messy counter!
Safety first, folks! Remember, you’re dealing with the microwave. Use microwave safe dishes and, if you’re using plastic wrap, make sure it’s vented. Those steam explosions yikes!
Step-by-step Process
Alright, let’s get into the nitty gritty. Here’s how you do it:
Mix it up : in a microwave safe bowl, throw in 1 cup of sweet rice flour, 1/4 cup of cocoa powder, and 1/2 cup of granulated sugar .
Give it a good whisk.
Add Water : Gradually introduce 1 cup of water and 1 tablespoon of veggie oil into your bowl while whisking. No lumps allowed!
Microwave Time : Cover your mixture with plastic wrap, but leave a little vent for steam. Microwave on high for 2 minutes .
Stir and Repeat : Take it out (carefully, it's hot!), stir it around, then back into the microwave for another 2 minutes .
Chocolate Filling : While that cools, melt 1/2 cup of chocolate chips in short bursts around 30 seconds at a time until creamy.
Mochi Time! : Grease your hands! Scoop a small piece of mochi dough, flatten it, and add a teaspoon of your chocolate goodness. Pinch it shut and roll it into a ball.
Cool Down : Let ‘em sit for a few minutes on a greased plate. Trust me, patience is key here!
Expert Techniques
Let’s get fancy for a second. first off, always use sweet rice flour this is essential for that chewy texture we’re after.
If you go with regular flour, you’ll have a total flop.
Wanna switch it up? Get wild with fillings! How about using Nutella or peanut butter? And don’t forget about filling checkpoints; if you see a gap, seal it up to avoid a chocolate explosion!
Success Strategies
Now, we’ve all made mistakes in the kitchen. I once forgot to vent my plastic wrap, and let me tell you, it turned into a mini volcano! So make sure to vent.
Another pro tip? If you're not getting that delightful chewiness, you might’ve cooked it too long— microwave in short bursts if you’re unsure.
Lastly, storing your mochi is key. Keep it in an airtight container at room temp for the best texture. If you store it in the fridge, you’ll lose that glorious chew!
When it comes to serving suggestions, I love pairing this with a scoop of ice cream or even fresh fruit. It’s a comforting, chewy dessert that just gets better with a sidekick.
So, next time you need a quick dessert, remember the Microwave Choco Mochi Chewy Delight . It’s easy, delicious, and honestly, the best thing to whip up for a movie night!
Additional Information
Now, if you’re curious about other microwave dessert recipes or want to explore more easy mochi recipes , stay tuned for plenty more ideas.
Whether it’s switching flavors or diving into different fillings, there’s a ton of room to get creative! let’s keep this dessert journey going, friends.
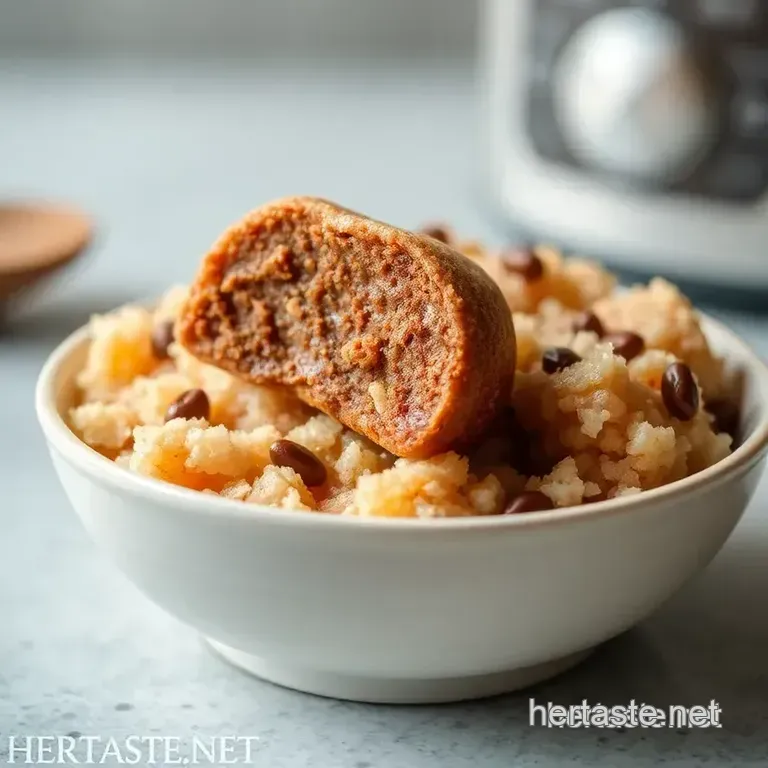
Look into into the Delight: Microwave Choco Mochi Chewy Delight
If you’re on the hunt for a quick and easy microwave dessert recipe , then look no further than the microwave choco mochi chewy delight ! seriously, folks, this little gem brings the heavenly chewy texture of mochi together with rich chocolate goodness.
Talk about comfort food!
Pro Tips & Secrets
Let’s kick things off with some pro tips. first, always use sweet rice flour . it’s what gives mochi its signature chewy texture.
Regular flour? nah, it won’t do the trick. and here’s a time saving hack: whisk your dry ingredients really well to avoid lumps when you mix in the wet stuff.
Nobody wants a clumpy mochi.
Flavor enhancement is crucial too! feel free to add a splash of vanilla extract to your dough for that extra oomph.
Got a chocolate lover in the house? maybe sprinkle a few chocolate chips right into the dough. you can thank me later!
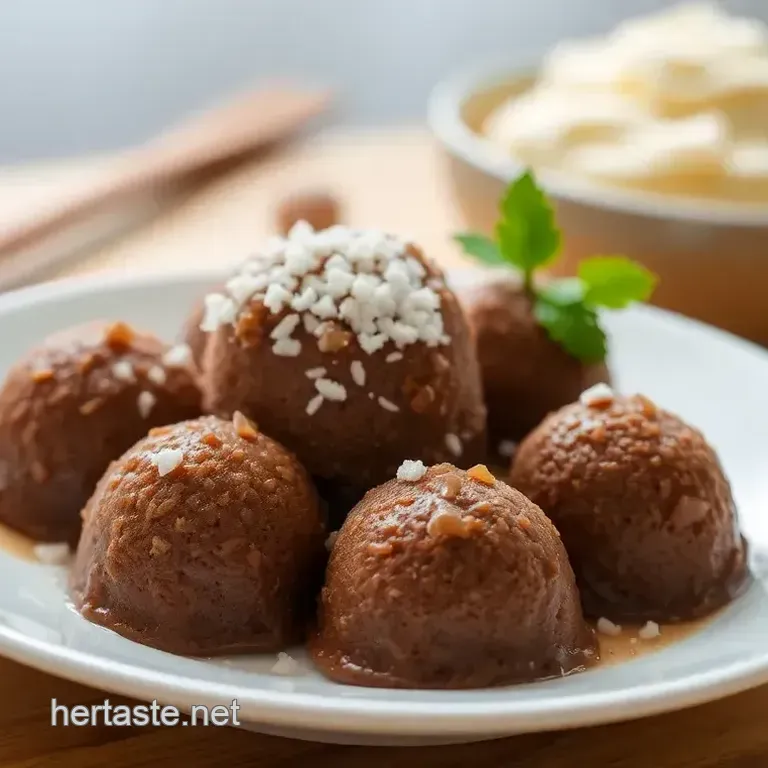
As for presentation? don’t just toss these chewy delights on a plate. garnish them with powdered sugar or drizzle some melted chocolate on top.
Trust me, your friends will think you spent all day in the kitchen!
Perfect Presentation
Now, let’s talk about plating. you know how sometimes food just doesn’t look appetizing? with mochi, this isn’t an issue if you get creative.
Use vibrant color combinations! think dark chocolate mochi on a white plate. it creates that mouthwatering contrast. you could also nestle the mochi on a bed of sliced strawberries for that visual appeal that screams “eat me!”
For garnishing ideas, consider rolling your mochi in dusty cocoa powder or shredded coconut . Looks fancy, right? And bonus points for making your friends think you are a pastry chef!
Storage & make-ahead
Got leftovers? no problem! these chewy delights store well. keep them in an airtight container at room temp for a day, or pop them in the fridge for up to a week.
But make sure to let them come back to room temperature before munching. they really shine when they’re fresh.
If you want to make these ahead of time, you totally can! prepare the mochi dough and fill them, but don’t roll them into balls just yet.
Store them in the fridge and shape them just before you’re ready to serve. bam! easy peasy.
Creative Variations
Let’s switch things up! there are tons of flavor variations for mochi . feeling adventurous? try using matcha powder instead of cocoa for a green tea twist.
Or make fruit filled mochi using strawberry jam or mango puree.
Need to cater to different diets? These treats can be made gluten-free just double check your sweet rice flour is certified. Plus, you can skip the chocolate filling for a lighter version of these delightful no-bake mochi treats !
Complete Nutrition Guide
Let’s get real for a sec. eating sweets in moderation is key! this microwave choco mochi chewy delight packs about 100 calories per piece and has just the right amount of sweetness.
Plus, it gives a little protein and makes for a fun snack or dessert that's surprisingly filling. remember, though: portion control is your friend here!
Expert FAQ Solutions
You got questions? i’ve got answers. a common one i hear is, “why did my mochi turn out too sticky?” well, make sure you’re cooking it long enough but not too long! microwave cooking tips : check about every minute and adjust as necessary.
Need a troubleshooting guide? If your chocolate filling isn’t melting right, make sure you’re microwaving in short bursts, stirring in between. You want that smooth, chocolatey goodness inside!
Wrapping It Up
So, there you have it! the microwave choco mochi chewy delight isn’t just another dessert. it’s a cheerful treat that’s simple to make, delicious to eat, and perfect for any occasion.
Whether you’re indulging by yourself or impressing your pals, this recipe is a winner.
Go on, give it a whirl! you might just find a new favorite to add to your list of easy mochi recipes .
What are you waiting for? grab your ingredients and start creating those sweet little bites of heaven!
Microwave Choco Mochi Chewy Delight