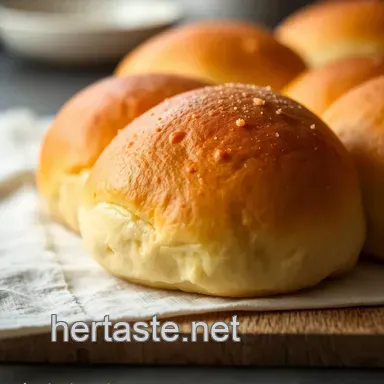
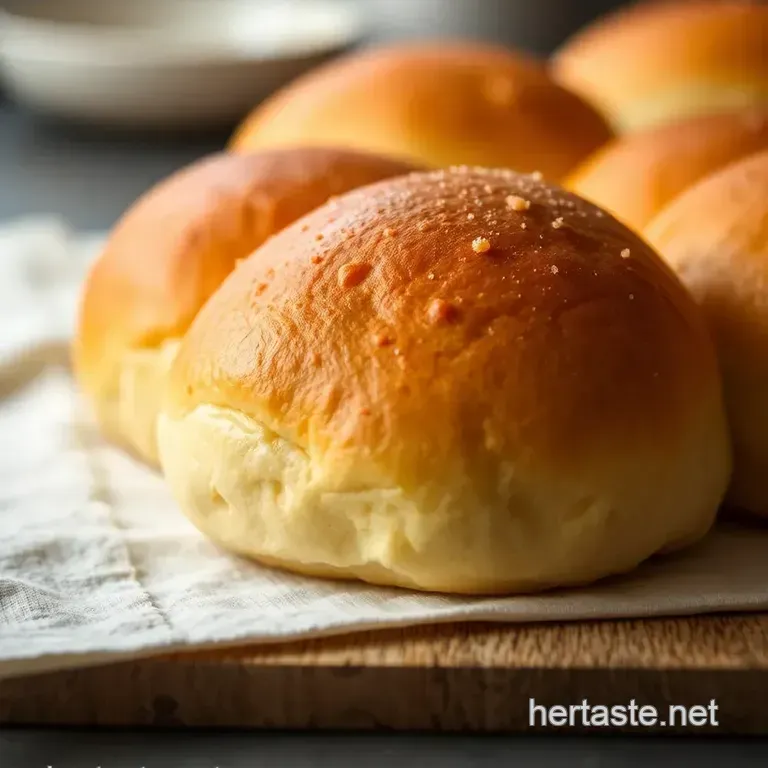
Homemade Kaiser Buns: a Soft and Golden Delight
Bringing Home the Kaiser Bun: A Delightful Journey
Have you ever walked into a bakery and been hit with that warm, yeasty aroma? it’s like getting a warm hug from your grandma.
Honestly, that’s what inspired my love for the kaiser bun . one chilly afternoon, i strolled into my local bakery, and right there, under the glow of the display case, were the most beautiful golden rolls, perfectly shaped with a scored top.
I just had to know how to make those delicious little bundles of joy myself!
Let’s Talk Kaiser Buns
The kaiser bun , or as some call it, the vienna roll , isn’t just any bread it's a soft yet crispy treat that traces its roots back to austria.
Historically, these buns were designed for royalty and special occasions. fast forward to today, and they’ve earned a place in american homes across the country, becoming a staple in lunchboxes and on dinner tables alike.
Now, don’t let the thought of baking intimidate you! making these soft homemade bread rolls requires a bit of patience, but hey, rome wasn’t built in a day! you can whip up a batch of these beauties in roughly two hours and five minutes .
That includes about 15 minutes of hands-on prep followed by a little baking magic. and the good news? they yield eight delightful buns , perfect for sandwiches, soups, or just munching warm with a bit of butter!
The Perks of Baking Kaiser Buns
Now let’s chat about why you should dive into this recipe. first and foremost, there’s something incredibly satisfying about creating your own bread.
The health benefits of freshly baked goods can’t be overlooked control over your ingredients means you can ditch preservatives and embrace wholesome nutrition.
Plus, these buns boast a hint of sweetness, making them adaptable for both savory and sweet toppings.
One of my favorite moments was serving up these kaiser buns at a family gathering. they were the hit of the party! imagine serving them warm with soup or pairing them with your favorite deli meats.
If the super bowl or thanksgiving is approaching and you want to impress, these rolls might just seal the deal!
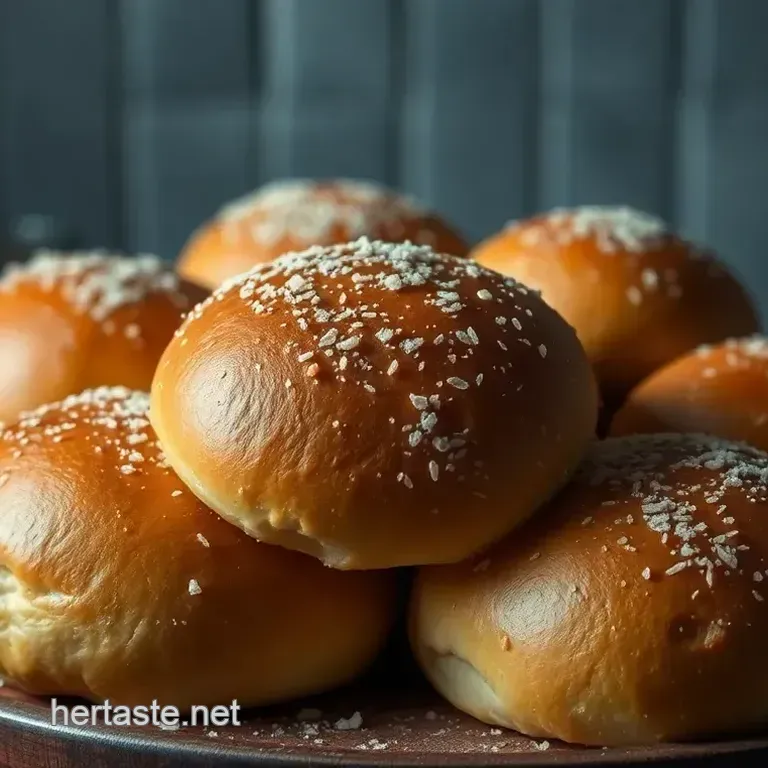
Got a special event? These versatile buns are perfect for parties, barbecues, or just because. They can be dressed up with sesame seeds or a sprinkle of poppy seeds , making everyone think you went to culinary school!
Breaking Down the Recipe
For anyone eyeing the fluffy bun recipe , here's a quick rundown. the beauty of this dish lies in the high hydration bread dough , which can be a game changer.
It gives the rolls that just right chewiness! and if you’re wondering how to score them to get that iconic star shape, don't fret! just a simple deep cut will do the trick think of it as giving your buns a stylish haircut!
Ready to tackle this? Here’s your shopping list:
- 4 cups of all-purpose flour (yep, standard stuff)
- 1 cup of warm water (not lava aim for about 110° F)
- A packet of instant yeast
- Granulated sugar, salt, and vegetable oil for the dough
- An egg wash for that glowy finish (did I mention how pretty it makes them?).
Whether you’re a novice or a pro, there’s always something new to learn. It’s all about adapting bread recipes to your taste and experimenting with flavors.
So, if you’re ready to create that golden brown crust and fluffy texture that will make your taste buds do a little happy dance, gather your ingredients! now, let's jump into the nitty gritty of the ingredients you’ll need .
Essential Ingredients Guide for Your Homemade Buns
Alright, my fellow food lovers! if you’ve dreamed of creating homemade bread rolls but felt a bit overwhelmed, worry not! we’re diving into an essential ingredients guide that'll set you up for success.
Think of it like your treasure map for baking those fluffy kaiser buns yes, those soft, crusty delights that make a perfect sandwich or side with soup!
Premium Core Components
Let’s kick things off with the premium core components . you’ll want to know the ins and outs of what you're using.
First up, exact measurements matter. for our kaiser buns recipe, that’s 4 cups (500g) of all-purpose flour with 1 cup (240ml) of warm water.
Remember, the yeast needs warmth, about 110° f ( 43° c) don’t cook it, just warm it up, baby !
Quality indicators ? Look for flour that feels soft and fluffy, and instant yeast that’s fresh because old yeast? Well, that’s just a no-go .
When it comes to storage , keep it cool and dry. Most of your ingredients will last for months, but that warm water? Use it fresh.
Freshness tips? here’s what i do: always check for signs like funky smells or discolored grains. not every cook has a sixth sense, but when your gut says “ugh” to an ingredient, trust it.
Signature Seasoning Blend
Now, don’t sleep on the signature seasoning blend . Your Kaiser buns might be a bit plain without some kick. Think of essential spice combinations a pinch of salt is great but don’t be afraid to sprinkle in dried herbs like oregano or rosemary for a flavor explosion!
Need a flavor enhancer? try a touch of garlic powder or even mix in sesame seeds for that crunchy top! if you're channeling your inner gourmet chef, add in poppy seeds .
There’s nothing wrong with a little fancy every now and then!
Smart Substitutions
We all have those days where we find ourselves without a certain ingredient. enter smart substitutions ! missing egg for that egg wash for buns ? just brush them with a bit of milk or melted butter.
No biggie!
Dietary modifications are easy too. if you’re looking to go whole grain, swap half of that all-purpose flour for whole wheat ! trust me, those whole wheat kaiser buns will be just as divine.
Got guests with allergies? check out alternatives for your baking kaiser rolls you can use coconut oil in place of vegetable oil or even dairy-free milk instead of regular milk.
Easy peasy !
Kitchen Equipment Essentials
Alright, let’s talk about kitchen equipment essentials . What do you really need? A good mixing bowl, a wooden spoon (or dough scraper, hey, we’re fancy!) and a baking sheet will do.
If you find yourself without parchment paper, you can just grease that pan. seriously, just go for it. and about that sharpened knife for scoring ? it’s all about making those signature star patterns on your rolls don’t skimp here.
It makes ‘em pretty and allows for that perfect rise.
Bring It All Together
This guide is just like assembling a puzzle the right pieces make your homemade kaiser bun experience shine! the joy of baking is all about experimentation too.
You’ll find your rhythm. whether it’s adjusting quantities or figuring out your favorite seasoning, baking kaiser rolls should feel like a fun adventure, not a chore.
Now, let's get into the good stuff instructions time. whether you’re whipping them up for a cozy dinner or packing them as part of your lunch box ideas with buns , i promise these will be the talk of the table.
So grab your apron, and let’s dive into the world of rolling, kneading, and baking together. Here come the buns!
Mastering the Art of Professional Cooking: The Ultimate Guide to Kaiser Buns
Oh my gosh! if you’ve never made kaiser buns at home, let me tell you, you’re missing out on something really special.
These little gems, often called vienna rolls , are soft, fluffy, and just begging to be filled with the creation of your dreams.
Imagine biting into a bun with a golden brown crust , and a slightly chewy interior. yum! let’s dive into everything you need to know about making these beauties from scratch.
Essential Preparation Steps
First things first, let’s get our game on with some mise en place . this fancy term just means “everything in its place.
” gather all your ingredients first: flour, warm water (make sure it’s around 110° f ), yeast, sugar, salt, and vegetable oil.
Trust me, nothing screws up your rhythm like searching for flour halfway through!
Time management is key. you’ll want to set aside about 2 hours and 5 minutes for the entire process, but don't worry, much of that is down time! use the proofing time to clean up or kick back for a bit.
Plus, organization is half the battle keep your workspace tidy as you go.
And let’s not forget safety! When baking, make sure to handle sharp instruments with care especially when scoring your buns! Safety first!
Step-by-step Process
Alright, here’s how to bring those kaiser buns to life! Follow these simple, numbered instructions :
Mix and froth: combine 1 cup of warm water , 2 tbsp sugar , and 1 packet of yeast in a bowl.
Let it sit for about 5 minutes until it’s frothy. if it doesn’t foam up, your yeast might be dead, and trust me, you don’t want that!
Create the Dough: Add 4 cups of all-purpose flour , 2 tbsp vegetable oil , and 1 tsp salt . Stir until you get a shaggy dough.
Knead: Time to roll up those sleeves! Knead that dough on a floured surface for 8- 10 minutes until it’s smooth and elastic. It should bounce back when poked!
First proofing: toss the dough into a greased bowl, cover it, and let it chill in a warm spot for about 1 hour or until it’s doubled in size.
Best spot? the oven turned off, with a bowl of hot water sitting inside!
Shape Them Buns: Punch down the dough (let out that frustration!) and divide it into 8 equal pieces . Shape each piece into a round bun.
Second Proofing: Place those babies on a baking sheet lined with parchment and let them puff up again for 30 minutes .
Score the tops: preheat your oven to 400° f ( 200° c) . score the top of each bun in a star shape.
This little detail is what gets you that classic kaiser look!
Egg Wash (Optional): Whisk together 1 egg and 1 tbsp water for a shiny finish! Brush it on for a bakery style sheen.
Bake: Pop those buns into the oven and bake for 20 minutes , or until they’re beautifully golden brown and sound hollow when tapped.
Cool: Transfer to a wire rack to cool before slicing and devouring!
Expert Techniques & Success Strategies
Okay, let’s make sure you ace these kaiser buns with some insider tips.
Kneading Tips: Make sure you knead enough. If you skip this, your buns might end up a bit flat and sad. You want gluten development, people!
Ideal Proofing Conditions: Keep things warm and cozy for your dough. Cold environments can slow down that rising action.
Common Mistakes: Be wary of over proofing. If you let them rise too long, they could collapse in the oven!
make-ahead Options: You can also freeze the shaped but unbaked buns. Just thaw before baking!
And there you have it your very own easy kaiser bun recipe , perfect for sandwiches, or simply enjoying warm with butter.
Whether you're pairing them with a hearty soup or crafting the ultimate deli sandwich, these little breads pack the punch.
Now, you’re ready to tackle any bread roll recipes out there! just remember, baking is as much about passion as it is precision.
Are you feeling inspired? well, stick around for some additional information to explore even more about artisan bread baking techniques and variations on this classic recipe! happy baking!
Unraveling the Magic of Homemade Kaiser Buns: Tips and Tricks for Success
Hey there, fellow baking ensoiasts! let’s talk about kaiser buns , those delicious little rolls that are basically the unsung heroes of the bread world.
If you've ever taken a bite of a fresh roll, warm and golden brown, you know what i’m talking about.
So, buckle up; i’ve got some awesome tips, presentation ideas, storage hints, and even some funky variations to make your baking journey super fun!
Pro Tips & Secrets
First off, let’s get into some pro tips ! when making your easy kaiser bun recipe , the key to success is kneading that dough like you mean it.
Aim for about 8- 10 minutes of serious workout time. you want that dough to be smooth and elastic, not just a lump of flour and water.
Here’s a little secret: if your dough springs back when poked, you’re on the right track!
Oh, and let’s not forget about proofing! creating the ideal proofing conditions is crucial. i like to pop my dough in an oven turned off but with a bowl of hot water inside.
It creates a cozy greenhouse effect that helps the dough rise beautifully. trust me, you'll see the difference!
Want to boost the flavor? Try adding a sprinkle of herbs or garlic powder to the dough. It kicks things up a notch, making your homemade bread rolls something to rave about!
Perfect Presentation
Now, once you've baked up those glorious kaiser buns and you're ready to serve, it’s all about presentation . try placing them on a colorful plate and adding a sprinkle of sesame seeds or poppy seeds on top for an extra touch.
It adds flair and color that makes your meal pop.
When plating, consider a color combination that attracts the eye. perhaps a fresh green salad beside your buns? or maybe some roasted vegetables? it’s all about making your meal instagram worthy!
Seriously, a good looking plate can make even the most casual meal feel gourmet, and we all know we love to snap a pic before we dig in.
Storage & make-ahead
Want to get ahead of the game? here’s the scoop on storage : once your kaiser buns cool, pop them in an airtight container.
They’ll keep at room temp for about 2 days . longer than that? just toss them in the freezer; they'll stay fresh for a few weeks.
When you're ready to enjoy, a few minutes in the oven at 350° f will have them tasting like they just came out of the oven.
I swear, it’ll make your house smell like baking heaven!
Creative Variations
Feeling adventurous? let’s talk about some creative variations . you could make whole wheat kaiser buns for a healthier twist. or go wild with a cheese filled roll recipe .
Stuff them with your favorite cheese before shaping them into rolls for a melty surprise when you bite in. yum!
To switch it up seasonally, think about adding some chopped herbs in the spring or maybe some diced jalapeños for a spicy kick in the summer. The world is your bread canvas!
Complete Nutrition Guide
Now, listen up, because i know nutrition matters. a typical kaiser bun comes in around 200 calories . while they make great sandwich rolls , the trick is to balance your fillings.
Pair those fluffy buns with nutritious ingredients think lean meats, loads of vegetables, healthy fats like avocado, or even a nice homemade tapenade.
Just remember, moderation is key! These rolls are a treat, so enjoy them but balance them with fresh goodies.
Wrapping It Up
So there you have it a whole treasure trove of tips on making the best kaiser buns that’ll have anyone begging for your secret! remember, baking is all about experimenting and having fun.
Don't stress too much; every baking adventure is a lesson, and if it doesn’t come out perfect, who cares? it’s all about the experience and the delicious smells that fill your kitchen.
Happy baking, friends! Go grab those ingredients and start whipping up something fabulous. Can’t wait to hear about your adventures in baking kaiser rolls !
Frequently Asked Questions
What are kaiser buns and how do they differ from regular rolls?
Kaiser buns are iconic Austrian bread rolls known for their soft texture and distinct star like scoring on top. Unlike regular rolls, they often have a slightly chewy crust and sweeter taste, making them an excellent choice for sandwiches or served alongside soups.
Can I make kaiser buns with whole wheat flour?
Absolutely! You can substitute half of the all-purpose flour with whole wheat flour to add a nuttier flavor. Just keep an eye on the hydration level, as whole wheat flour generally absorbs more water.
How can I ensure my kaiser buns rise properly?
For the best rise, make sure your yeast is fresh and proof it in a warm environment. Knead the dough well to develop gluten and create a structure that can hold the gas produced during fermentation. A warm, humid spot works wonders for proofing!
What should I do if my kaiser buns come out dense?
If your kaiser buns turn out dense, it might be due to under kneading or improper proofing. Make sure to thoroughly knead the dough until it's smooth and elastic, and allow it to rise until it's doubled in size.
A warm, inviting spot could help; think of a cozy sofa on a rainy day perfect for a bit of relaxation!
How should I store leftover kaiser buns?
Store your leftover kaiser buns in an airtight container at room temperature for up to 2 days. If you want to keep them longer, freeze them wrapped in plastic wrap and then foil they'll stay fresh for a couple of months. Just pop them in the oven for a few minutes to restore their delightful texture!
Can I add other ingredients for different flavors in my kaiser buns?
Definitely! You can infuse the dough with dried herbs like rosemary or add cheese in the centre for a scrumptious surprise. Get creative and experiment with flavors; just remember to not overload the dough as it may affect the rise.
Homemade Kaiser Buns A Soft And Golden Delight