Quick & Easy Chicken Broth Recipe

A Heartfelt Bowl of Goodness
Let me share a little something with you. there was this one chilly afternoon when i was feeling kind of under the weather.
You know, that kind of down and-out feeling where a cozy blanket and a warm bowl of soup is basically a necessity? well, i decided it was time to whip up a batch of quick & easy chicken broth .
The aroma that filled my kitchen brought back memories of my grandma's kitchen warm, inviting, and so comforting. honestly, i felt like she was right there with me.
If you’ve ever found yourself in a similar situation, you’re in for a treat. let’s dive into how to cook chicken broth quickly & easily .
A Taste of Tradition
Chicken broth has been around for what feels like forever. just think about it: our ancestors relied on it to nourish and comfort their families.
Whether it was a broth made from bone-in chicken parts after a sunday feast, or a quick fix during the week, it’s always been a way to make the best out of simple ingredients.
Nowadays, chicken broth is more popular than ever. with everyone trying to get back to those comforting roots while balancing modern life, it’s a hit in kitchens across america.
The great thing about this quick chicken broth recipe is it won’t take hours to prepare. in just about 50 minutes total , you can have a rich, flavorful broth ready to go.
It’s easy to make and perfect for a weeknight dinner when time’s tight. plus, you can expect about 6 cups of that liquid gold, making it a beautiful addition to all sorts of meals without breaking the bank.
Why Broth Rocks
Let’s chat about the health benefits for a sec. chicken broth isn’t just tasty; it’s like a hug for your insides.
The rich, comforting warmth can help soothe your throat when you’re under the weather, and it’s packed with nutrients that can provide a solid boost to your immune system.
It’s got protein from the chicken, vitamins from vegetable ingredients, and even collagen if you use bones properly. seriously, homemade broth has its own kind of magic.
What’s more? the versatility is off the charts! use it as a base for soups , stews , or even for sauces honestly, it can elevate a boring dish to something you and your family will rave about.
Don’t you love when something so simple can pack so much flavor? this broth is perfect for special occasions, too think cozy dinners, holiday meals, or even when you just need a little bit of comfort food.
Getting Ready to Cook
Alright, friends, if you’re convinced it's time to get your broth game on, let’s talk ingredients. you won’t need a gourmet grocery trip; the essentials are pretty straightforward.
You’ll want some savory broth ingredients : chicken parts, onions, carrots, celery, garlic, and a few seasonings. easy peasy!
Before you dive into cooking, think about where you might want to use that broth later. it opens up a world of broth based meals that can take your weekday dinners to the next level.
And if you happen to have leftovers, don't fret! here are some broth storage tips : let it cool, and then pour it into containers for later use.
It freezes well for up to three months!
So, if you’re ready to bring a little warmth into your life with a simple broth recipe , let’s gather our ingredients! trust me, you’ll be so glad you decided to take this step.
🌟
Your Go-To Guide for Cooking Essentials
If you're ready to whip up some magic in the kitchen, it's all about knowing your essential ingredients . finding the right components can feel a bit daunting, but don’t worry! i've been there too.
Trust me, once you understand what to look for, cooking will feel like a breeze, especially when you want to cook chicken broth quickly & easily .
Let's break it down!
Premium Core Components: Know Your Basics
First things first, let’s chat about premium core components . These are the stars of your dish and you’ll want to get them right.
Measurements matter! for all you cooks out there, 4 cups (950 ml) of water adds the base for a good broth.
If you’re outside the u.s., just know that a cup is about 240 ml.
When buying ingredients, look for freshness indicators . for veggies, vibrant color and firmness are key. a wilting carrot? abandon ship! they won’t add much flavor to your broth, which we all know is what you want.
As for storage , broth can hang out in the fridge for about a week, but you can freeze it for up to three months .
I once made a huge batch, froze half, and had delicious broth ready for my next cozy soup night.
Signature Seasoning Blend: Flavor Town
Next up, we’re diving into your signature seasoning blend . The right spices can turn an ordinary broth into a flavorful chicken broth that makes your taste buds sing.
Think about combining classic herbs a teaspoon of thyme or rosemary can change the game! And don't sleep on bay leaves; they add an aromatic richness that’s chef’s kiss !
Oh, and if you’re feeling crafty, consider trying some regional variations . want to spice things up? add some chili flakes for a southern kick or throw in some ginger for an asian twist.
The sky's the limit!
Smart Substitutions: Flex Your Culinary Muscles
Let’s face it: sometimes you just don’t have what you need at home. No worries! This is where smart substitutions come in:
If you've run out of black peppercorns, grab some ground pepper it'll still do the job. for those with dietary restrictions, swap out chicken for bone-in chicken parts broth or even go vegetarian with some hearty mushrooms.
They pack a surprise punch of umami!
Don't forget, there are also emergency replacements that can save the day. No carrots? Toss in bell peppers instead! Just like that, you’re cooking up a storm without breaking a sweat.
Kitchen Equipment Essentials: Tools of the Trade
Now, let’s talk about the kitchen equipment essentials you need to pull all this off.
A large stockpot is a must. This is where all the flavor magic happens. If you don’t have one, a Dutch oven will do the trick too.
A simple wooden spoon makes stirring a breeze. You don’t need anything fancy here. Just something to mix it all up!
And don't forget a fine mesh strainer for that simple broth recipe you’re about to create. it keeps the chunks out and lets you enjoy a smooth, rich broth that’s perfect for soups or stews.
Wrapping It Up with Tasty Tidbits
With these kitchen basics nailed down, you're set to make the most delicious and versatile broth. imagine cozy nights with a bowl of comforting chicken broth made from your own hands! seriously, it’s the best feeling.
Next, you'll want to jump into those step-by-step instructions to get things rolling. just think about how nice it will be to whip up a hearty broth for all your favorite dishes like stews, sauces, or just sipping it straight up!
And when you're running out of time, remember: you can cook chicken broth quickly & easily without any fuss.
Just gather everything and get ready to vibe in the kitchen.
Now let’s roll up our sleeves and dive right into the instructions for that quick and easy chicken broth! it’s nearing dinner time, and i can already smell something amazing simmering away.
Let’s go!
Professional Cooking Method: Mastering Chicken Broth Quickly and Easily
Oh my gosh, if there’s one thing every home cook needs in their arsenal, it’s a killer chicken broth recipe ! seriously, this quick and easy chicken broth is a game changer, turning those humble ingredients into something special in under an hour.
Let’s dive into the nitty gritty of how to cook chicken broth quickly & easily, all while chatting like we’re in the kitchen together!
Essential Preparation Steps
Alright, first up is mise en place. sounds fancy, right? but it just means "everything in its place." gather your ingredients: 1 lb bone-in chicken parts, 1 medium onion, 2 carrots, 2 stalks celery, and some garlic.
Lay it all out like you’re prepping for a cooking show! this makes everything flow smoother.
Next is time management. you don’t want to be running around like a headless chicken trying to chop veggies while water boils, trust me! set up your pots, get the water ready, and have your utensils handy.
It’s amazing how much stress this can save you.
Organization strategies help too. i like to put my recipes in clear view. keep the essentials on one side, and the tools on another.
And safety? always be careful with those knifes and boiling pots, folks. don't burn yourself!
Step-by-step Process
Now, let’s get down to business with a simple, numbered approach to make this comforting chicken broth:
Rinse & Prep: Rinse your chicken under cold water and pat it dry. Then chop your veggies into large pieces. There’s no need to go tiny; bigger chunks make straining easier!
Combine Everything: Toss the chicken, quartered onion, chopped carrots (2), celery (2), garlic cloves, bay leaves, and black peppercorns into a large pot.
Add Water: Pour in 4 cups of water so all your goodies are submerged. It’s like making a comfy spa for your ingredients.
Boil It Up: Set your pot on medium high heat and bring it to a boil, giving it a stir here and there so nothing sticks.
Simmer down: once it’s boiling, reduce the heat to low, cover it partially, and let it simmer for 30- 40 minutes .
This is the magic time! skim off any foam that shows up on top it’ll keep your broth clearer.
Strain & adjust: after simmering, strain your broth into a large bowl using a fine mesh strainer. discard the solids, then taste your broth and add salt as needed.
Just start with about 1 teaspoon and go from there.
Expert Techniques
For that pro touch, consider this: browning the chicken before adding your veggies adds a rich depth to your broth. It’s a little extra step but so worth it .
Critical checkpoints happen when you’re checking the broth. you want the liquid to be a beautiful golden hue and smell like comfort itself.
If it tastes a bit flat, throw in some fresh herbs or a dash of vinegar for acidity it can totally elevate a simple broth recipe.
Troubleshooting tips? If your broth turns out too oily, chill it after cooking, and skim off the solidified fat. Easy peasy!
Success Strategies
Let’s not get tripped up by common mistakes. Over seasoning is a biggie. Start light, taste often, and remember you can always add, but you can’t take back!
Make-ahead options are a lifesaver during busy weeks. this broth keeps well; store it in airtight containers and it freezes beautifully.
This means easy weeknight dinners when all you have to do is reheat and throw in some noodles!
Remember, cooking with chicken broth opens a world of flavor! You can use it for soups, gravies, or even as a base for risotto. The versatility is just incredible.
And there you have it, folks the ultimate guide to cooking chicken broth quickly & easily ! as you whip up your rich, flavorful broth, know that you’re creating something truly special here, packed with nutritional benefits and comforting vibes.
Additional Information
Thinking about variations? You could swap bone-in chicken parts for leftover roasted bones, or play with spices like thyme or ginger. The options are endless. Just remember to taste as you go!
Now grab that pot, and let’s get cooking! That incredible chicken broth you’re about to make is going to change your meals forever.
Pro Tips & Secrets
Let’s get real for a second cooking broth is one of those things that can either be a total snooze or a rewarding experience.
I mean, what’s better than that amazing aroma wafting through your kitchen? here are some insider tips i’ve picked up along the way.
First off, give those chicken bits a little love before they hit the pot! searing your bone-in chicken parts in your pot for a few minutes adds an unbelievable depth of flavor .
Seriously, just brown those babies up! it makes all the difference in creating a rich chicken broth .
Next up, if you’re short on time and who isn’t? think about using pre-chopped veggies to save about 15 minutes.
Just toss them in with your chicken and water, and voila! you’re on your way to a quick chicken broth recipe that’ll impress anyone.
Don’t forget to adjust your seasonings as you go. a little more salt here, a bit of pepper there can elevate your broth from fine to fabulous .
Taste as you stir, friends!
Perfect Presentation
Okay, i get it. presentation might feel like extra work when we’re just making broth, but hear me out: a pretty bowl of broth warms the heart just as much as a hearty bowl of soup.
When straining your broth, make sure to use a fine mesh strainer for that crystal clear finish.
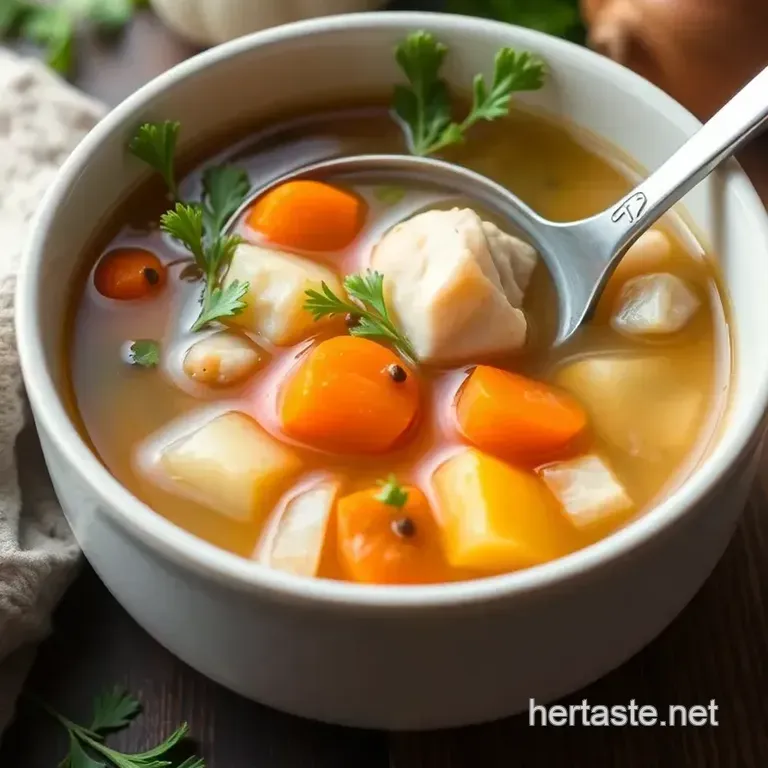
For a garnish, sprinkle chopped fresh herbs like parsley or dill on top right before serving. it brings a pop of color and freshness that makes the dish visually appealing.
You can also throw in some lemon zest to brighten the flavors trust me, it’s a game changer!
And if you really wanna impress, serve your broth in rustic, wide bowls. It gives it that homemade touch and, bonus, there’s more surface area to savor that amazing aroma.
Storage & make-ahead
Can we chat about leftovers? because if you’re like me, you definitely want to make the most of your easy homemade chicken broth .
Storage is key! once your broth has cooled down, pour it into airtight containers and pop them in the fridge.
It can last about 5-7 days .
If you’re thinking ahead, freezing is your best friend . pour your broth into freezer safe bags, lay them flat in the freezer, and they’ll freeze into easy-to-store squares! just pull one out when you need a quick meal base.
Perfect for those speedy dinner recipes during the week.
When you’re ready to enjoy leftover broth, reheat it gently on the stove or in the microwave. Just don’t let it boil, and that richness will stick around.
Creative Variations
Here’s where the fun really starts! want to mix things up ? you can try adding different herbs or spices for a unique twist.
Maybe throw in some tarragon for a little bit of fancy french flair or a splash of soy sauce for an asian inspired broth.
Feeling fancy? say hello to bone broth nutrition benefits! using bone-in chicken parts can lead to a more nutritious broth.
Bonus points if you roast some veggies beforehand for an extra layer of flavor.
And hey, if you’re watching your diet, this recipe is easily modifiable . try using lean chicken cuts or go vegetarian with mushrooms and a splash of soy sauce for that umami kick.
Seasonal veggies are always welcome think fall squash or spring peas added right at the end for freshness.
Complete Nutrition Guide
So, let’s break it down. this broth is not just soothing; it packs a healthy punch , too! each serving has around 100 calories , and your body will thank you for the 12g of protein and nutrients.
Remember, you can always tweak things based on your needs less salt or adding more veggies can lighten it up.
One serving approximately counts as one serving of vegetable and can even help you keep that cold at bay hello, comfort food!
Expert FAQ Solutions
"how do i know when my broth is done?" you ask. well, the answer is simple! you’ll see that it's a gorgeous golden color and smells incredibly aromatic.
Skim any foam off the top, and you're golden.
No chicken? No problem! Make chicken broth without a recipe using whatever leftover bones or veggies you have. Just get creative!
And if something feels off in taste, just trust your instincts. a dash of vinegar or lemon can brighten things up in a hurry, and believe me, i’ve had my share of taste testing mishaps on the journey to the perfect savory broth ingredients .
In the end, remember to experiment and make this recipe your own. there’s no right or wrong way to enjoy quick cooking broth .
You’ll find that every batch just gets better and better. so grab your favorite pot and start cooking you'll be taking comfort food to a whole new level! 🍲 happy cooking, my friends!
Cook Chicken Broth Quickly Easily