Red Lobster Biscuit Chicken Pot Pie: Creamy Fusion
- Time: Active 15 minutes, Passive 30 minutes, Total 45 minutes
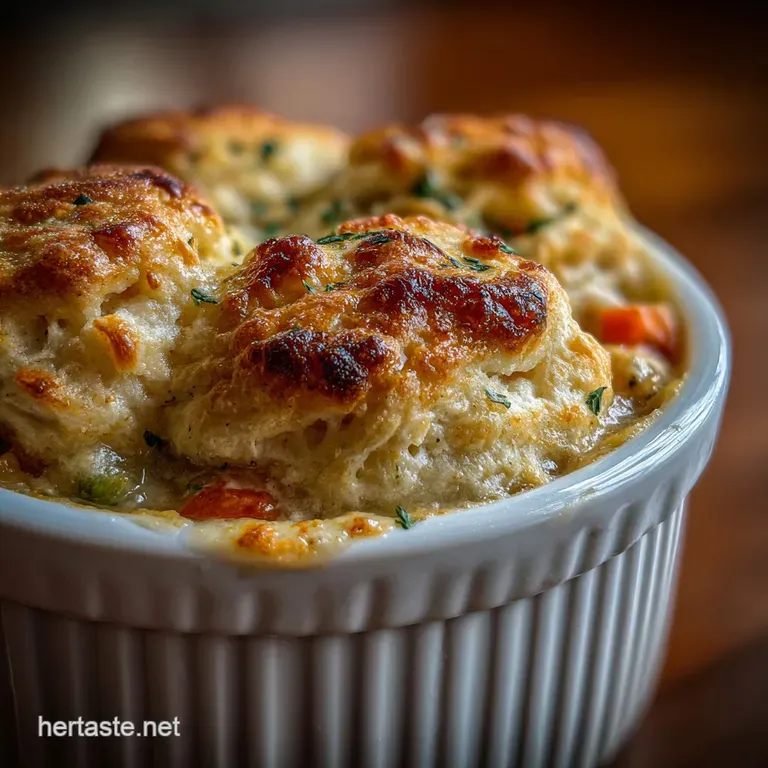
- Flavor/Texture Hook: Silky, herb flecked gravy meets a buttery, cheddar crusted shatter.
- Perfect for: Stressful weeknights or lazy Sunday dinners when you need a hug in a bowl.
- Red Lobster Biscuit Chicken Pot Pie
- Why This Savory Comfort Dish Works
- The Science of the Biscuit Shatter
- Essential Ingredients and Smart Substitutes
- Reliable Tools for a Simple Bake
- Detailed From Prep to Plate Instructions
- Proven Troubleshooting Guide
- Simple Ways to Adapt This Dish
- Kitchen Myths Debunked
- Storing and Reheating Your Leftovers
- Perfect Sides to Serve Tonight
- High in Sodium
- Recipe FAQs
- 📝 Recipe Card
Red Lobster Biscuit Chicken Pot Pie
Picture this: it is a Tuesday evening, the rain is drumming against the window, and you are craving something that feels like a warm blanket. I remember the first time I tried swapping traditional pie dough for biscuit mix.
I was skeptical, thinking it might be too heavy, but the moment that first sizzle hit the pan and the herb aroma filled my kitchen, I knew I was onto something special.
This article features a comforting chicken pot pie recipe with a savory Red Lobster biscuit topping. We are skipping the rolling pin and the "will it or won't it" anxiety of a bottom crust.
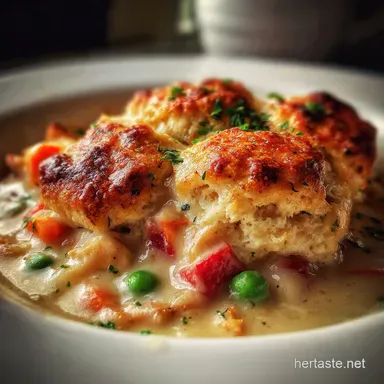
Instead, we are focusing on a velvety filling packed with tender chicken and bright veggies, all tucked under a golden, craggy layer of cheddar goodness. It's the kind of meal that makes everyone at the table go quiet for a few minutes, which is the ultimate compliment for any home cook.
We have all been there, staring at a frozen pie crust wondering if it's worth the effort. Trust me, it’s not. By the time you finish reading this, you'll see why this specific combination is a total game changer for your dinner rotation.
It’s fast, it’s reliable, and it uses basic tools you already have in your cupboard. Let’s get stuck in.
Why This Savory Comfort Dish Works
The magic of this dish isn't just in the flavor; it's in the way the ingredients interact under heat. We aren't just tossing things in a pot; we are building layers of texture and taste that hold up from the oven to the table.
- Starch Gelatinization: When the flour hits the hot butter and broth, the starch granules swell and burst, creating a stable, velvety thickener that coats the chicken without becoming gummy.
- Chemical Leavening: The biscuit mix relies on a precise balance of acidic and alkaline components that react the moment they hit the milk, ensuring the topping stays light and airy rather than dense.
- Maillard Reaction: The sharp cheddar cheese in the topping contains proteins and sugars that brown beautifully at 400°F, creating that signature savory crust and complex aroma.
- Fat Emulsification: Heavy cream acts as a bridge between the water based broth and the fats in the butter, resulting in a rich mouthfeel that lingers.
| Method | Time | Texture | Best For |
|---|---|---|---|
| Stovetop Finish | 15 minutes | Softer, dumpling like biscuits | Faster cleanup, humid days |
| Oven Baked | 30 minutes | Golden, crispy edged crust | Ultimate crunch and depth |
| Air Fryer | 20 minutes | Super shatter crisp top | Smaller portions (3-4 people) |
Cooking is often about these little chemical wins that happen behind the scenes. If you are looking for another way to use these skills, you might enjoy the technique in my Creamy CheddarPotato Soup recipe.
The Science of the Biscuit Shatter
The secret to that incredible biscuit texture lies in the "Fat Barrier" principle. By mixing the cheddar cheese directly into the dry mix before adding the milk, the fat in the cheese creates tiny barriers that prevent the flour from developing too much gluten.
This results in a "shaggy" dough that stays tender inside while the outer surface undergoes rapid dehydration in the oven, leading to a crust that will literally shatter when your spoon hits it.
| Ingredient | Science Role | Pro Secret |
|---|---|---|
| Unsalted Butter | Fat Source | Use cold butter for the roux to prevent lumps. |
| Chicken Broth | Liquid Base | Low sodium allows you to control the final seasoning. |
| Cheddar Cheese | Protein/Fat | Sharp cheddar provides more "browning" sugars than mild. |
| Heavy Cream | Emulsifier | Prevents the sauce from breaking under high heat. |
When you understand these basics, you can start to play around with other dishes. For instance, the way we handle the chicken here is quite similar to the approach in my Cozy Crockpot Chicken recipe.
Essential Ingredients and Smart Substitutes
To get that authentic taste, we are using the 11.36 oz Red Lobster Cheddar Bay Biscuit Mix, but the filling is where you can really show your personal touch.
- 4 tbsp unsalted butter: Essential for the roux. Why this? Provides a richer flavor base than oil.
- Substitute: Salted butter (just reduce the added salt by half).
- 1 medium yellow onion, diced: The flavor foundation.
- Substitute: 1 tsp onion powder if you are in a massive rush.
- 2 large carrots and 2 stalks celery: The classic mirepoix.
- 3 cups cooked chicken breast: Shredded or cubed. Why this? Rotisserie chicken is a massive time saver here.
- Substitute: Leftover turkey or even canned chickpeas for a veggie twist.
- 1 cup frozen peas and 1/2 cup frozen corn: Texture and sweetness.
- 1/3 cup all purpose flour: Our thickening agent.
- 2 cups low sodium chicken broth: For the gravy volume.
- 1/2 cup heavy cream: For that velvety finish.
- 11.36 oz Red Lobster Cheddar Bay Biscuit Mix: The star topping.
- 1 cup sharp cheddar cheese: Extra cheesy goodness.
- 3/4 cup whole milk: To hydrate the biscuit mix.
Chef's Tip: Freeze your butter for 10 minutes before grating it into the biscuit mix. Those tiny frozen shards of fat will melt in the oven, creating steam pockets that make the topping extra flaky.
Reliable Tools for a Simple Bake
You don't need a mountain of equipment to make a Red Lobster Biscuit Chicken Pot Pie. A solid large skillet (preferably oven safe) is your best friend here.
- 12 inch Cast Iron Skillet: This is my go to. It holds heat beautifully and goes straight from the stove to the oven. If you don't have one, any large oven safe pan or a 9x13 baking dish works.
- Whisk: Crucial for making sure your flour and broth play nice together without lumps.
- Mixing Bowl: Just a medium one for the biscuit dough.
- Pastry Brush: For that final flourish of melted herb butter.
Using minimal tools means less washing up, which I’m always a fan of. It reminds me of the efficiency of an Instant Pot Chicken recipe where everything happens in one vessel.
Detailed From Prep to Plate Instructions

- Sauté the aromatics. Melt 4 tbsp unsalted butter in your skillet over medium heat. Add the onion, carrots, and celery. Cook 5-7 minutes until the onions are translucent and the carrots soften slightly.
- Create the roux. Sprinkle 1/3 cup all purpose flour over the veggies. Stir constantly for 2 minutes until the flour smells nutty and looks golden. Note: This cooks out the raw flour taste.
- Whisk in liquids. Slowly pour in 2 cups chicken broth and 1/2 cup heavy cream. Whisk until the mixture begins to simmer and thickens into a velvety gravy.
- Season the base. Stir in 1 tsp dried thyme, 1/2 tsp garlic powder, 0.5 tsp salt, and 0.5 tsp black pepper.
- Fold in protein. Add 3 cups cooked chicken, 1 cup frozen peas, and 1/2 cup frozen corn. Stir until everything is coated in the sauce. Turn off the heat.
- Mix the biscuits. In a separate bowl, combine 11.36 oz Red Lobster mix, 1 cup cheddar cheese, and 3/4 cup whole milk. Stir until a shaggy dough forms. Do not overmix!
- Drop the topping. Using a large spoon, drop dollops of the dough onto the hot chicken filling. It doesn't have to be perfect crags and bumps make for a better crunch.
- Bake to golden. Place the skillet in a preheated 400°F (200°C) oven. Bake 15-20 minutes until the biscuits are golden brown and the filling is bubbling.
- The herb finish. Mix the 4 tbsp melted butter with the herb seasoning packet. Brush the hot biscuits immediately after removing them from the oven.
- Rest and serve. Let the dish sit for 5 minutes before serving. This allows the sauce to set so it doesn't run all over the plate.
Proven Troubleshooting Guide
Even the most reliable recipes can hit a snag. If your filling looks a bit thin, don't panic. It often thickens up as it rests.
Why Your Filling Is Runny
Sometimes the vegetables release more moisture than expected, or the simmer wasn't long enough. If it's looking like soup rather than gravy, you can simmer it for an extra 3 minutes before adding the biscuit topping.
Why Your Biscuits Are Flat
This usually happens if the dough sits too long before going into the oven. The leavening agents in the mix start working the second they touch the milk, so you want to get that skillet into the heat as quickly as possible.
| Problem | Root Cause | Solution |
|---|---|---|
| Soggy Bottom Biscuits | Filling wasn't hot enough | Ensure the filling is simmering before dropping the dough. |
| Dry Chicken | Overcooking the breast | Use thighs or add the chicken at the very last second. |
| Burnt Biscuit Tops | Rack too high in oven | Move to the middle rack and tent with foil if browning too fast. |
Common Mistakes Checklist
- ✓ Ensure the filling is bubbling hot before adding the dough (creates a steam barrier).
- ✓ Don't overmix the biscuit dough - stop as soon as the flour disappears.
- ✓ Use a heavy bottomed pan to prevent the bottom of the stew from scorching.
- ✓ Let the pie rest for 5-10 minutes after baking to allow the sauce to emulsify properly.
- ✓ Check that your baking powder isn't expired if using a generic mix.
Simple Ways to Adapt This Dish
Scaling this recipe is fairly straightforward because it’s a casserole style bake.
- Scaling Down: If you're cooking for two, halve the filling ingredients. Use a small 8 inch skillet. For the biscuits, use half the box and half the milk. You can save the remaining dry mix in a sealed jar for next time.
- Scaling Up: To feed a crowd (14 servings), double everything and use two 9x13 pans. You might need to increase the bake time by about 5-10 minutes since the thermal mass is higher.
- The "If you want X, do Y" list:
- If you want it extra creamy, swap the milk in the biscuits for buttermilk.
- If you want a kick, add a diced jalapeño to the veggie sauté.
- If you want it lighter, use half and half instead of heavy cream and double the peas.
Kitchen Myths Debunked
Many people believe you have to cook the vegetables completely before adding the broth. In reality, they will continue to soften significantly during the 20 minute bake. Keeping them slightly crisp at the sauté stage prevents them from turning into mush.
Another common myth is that you must use fresh chicken. Honestly, rotisserie chicken or even well seasoned leftover chicken works better here because it has already been through a flavor development process, and it absorbs the gravy beautifully without becoming tough.
Storing and Reheating Your Leftovers
This dish keeps surprisingly well in the fridge for up to 3 days. The biscuits will soften a bit as they absorb moisture from the gravy, but the flavor actually deepens. To reheat, I highly recommend using the oven or an air fryer at 350°F (175°C) for about 10 minutes.
This helps the biscuits regain some of that "shatter" quality that the microwave just can't provide.
For zero waste, don't toss those celery leaves or onion skins! Toss the skins into a freezer bag for your next batch of homemade stock. The celery leaves can be chopped and stirred into the filling for an extra punch of herbal flavor.
If you find yourself with just a small amount of leftover filling but no biscuits, it makes a killer topping for a baked potato the next day.
Perfect Sides to Serve Tonight
While this is a complete meal on its own, a bright, acidic side dish helps cut through the richness of the cheddar and cream. A simple arugula salad with a lemon vinaigrette is my favorite pairing. If you're looking for something more substantial, a side of roasted broccoli or even a light Creamy Garlic Chicken recipe inspired side of asparagus works beautifully.
The goal is to balance the "heaviness" of the comfort food. Think of it like this: the pot pie is the star of the show, and the sides are the supporting cast that make the star shine brighter. You've got the crunch, the cream, and the savory herbs now go enjoy that first bite!

High in Sodium
1071 mg mg of sodium per serving (47% % of daily value)
The American Heart Association recommends limiting sodium intake to about 2,300mg per day for most adults.
Tips to Reduce Sodium in Your Chicken Pot Pie
-
Lower Sodium Broth-30%
Substitute the low-sodium chicken broth with no-sodium chicken broth. This can significantly reduce the overall sodium content of the dish by up to 30%.
-
Reduce Cheese-15%
Cut back on the amount of sharp cheddar cheese used in the biscuit topping by 25% (reduce from 1 cup to 3/4 cup). This will reduce the sodium content by approximately 10-15%.
-
Limit Added Salt-25%
Reduce the amount of added salt (0.5 tsp) by half or eliminate it entirely. Taste the dish after cooking and adjust the seasoning if needed. Salt content in other ingredients may be sufficient. This could lower sodium by 25%.
-
Herb Power
Enhance the flavor of your pot pie by using more fresh or dried herbs like rosemary, sage, or parsley. This will naturally boost the flavor and reduce the need for salt. No sodium reduction.
-
Skip Packet-15%
Omit the herb seasoning packet from the Red Lobster Cheddar Bay Biscuit Mix. This packet often contains a considerable amount of sodium. Reduce sodium up to 15%
-
Unseasoned Chicken-5%
Ensure your cooked chicken breast is unseasoned. If using pre-cooked chicken, check the sodium content and choose a brand with lower sodium or cook your own at home.
Recipe FAQs
Can I make the filling ahead of time before baking?
Yes, you can prepare the filling one day in advance. Cool the filling completely, then store it covered in the refrigerator; add the biscuit topping mixture right before baking, which may require an extra 5-10 minutes in the oven.
How do I prevent the bottom of the biscuits from getting soggy?
Ensure the filling is actively simmering when you drop the dough onto it. The intense initial heat from the filling creates a steam barrier that helps the underside of the biscuit set before it soaks up too much liquid.
What if I don't have the specific Red Lobster biscuit mix?
Substitute with a high-quality store-bought cheddar biscuit mix. If you are concerned about the texture, try grating an extra quarter cup of sharp cheddar directly into the dry mix, similar to the technique used in our Creamy Cajun Shrimp recipe for added flavor depth.
How to adjust the liquid if my pot pie filling seems too thick?
Whisk in chicken broth one-quarter cup at a time. If the filling is already thickened from the roux, adding liquid slowly allows you to control the final gravy consistency before topping it.
Is it true that using cold butter in the biscuit mix is necessary?
Yes, cold fat is crucial for optimal flakiness. The small, cold butter pieces melt during baking, creating steam pockets that expand the dough, resulting in that characteristic shatter texture rather than a dense dome.
What is the best way to reheat leftovers while maintaining a crisp topping?
Use the oven or an air fryer at 350°F (175°C). Microwaving will heat it quickly but will make the biscuits soggy; the dry heat of the oven restores the crust texture.
How can I serve a side dish that balances the richness of this pie?
Pair it with a bright, acidic salad or lightly seasoned greens. A simple slaw or a sharp vinaigrette dressed green helps cut through the heavy cream and cheese, much like the tart element balances the rich sauce in our Green Bean Casserole recipe.
Biscuit Chicken Pot Pie
Ingredients:
Instructions:
Nutrition Facts:
| Calories | 593 kcal |
|---|---|
| Protein | 31.2 g |
| Fat | 32.4 g |
| Carbs | 42.1 g |
| Fiber | 3.2 g |
| Sugar | 4.1 g |
| Sodium | 1071 mg |
