Chocolate Pie: the Ultimate Silken No-Bake Crème
- Welcome to Indulgence: The Ultimate Silken No-Bake Chocolate Pie
- Sourcing Your Success: Ingredients & Key Substitutions
- The Process: Crafting the Ultimate Chocolate Crème Pie
- Professional Touches: Troubleshooting Your Chocolate Pie
- Planning Ahead: Storage, Freezing, and Thawing Protocol
- Finishing Touches: Garnish and Serving Suggestions
- Recipe FAQs
- 📝 Recipe Card
Welcome to Indulgence: The Ultimate Silken No-Bake Chocolate Pie
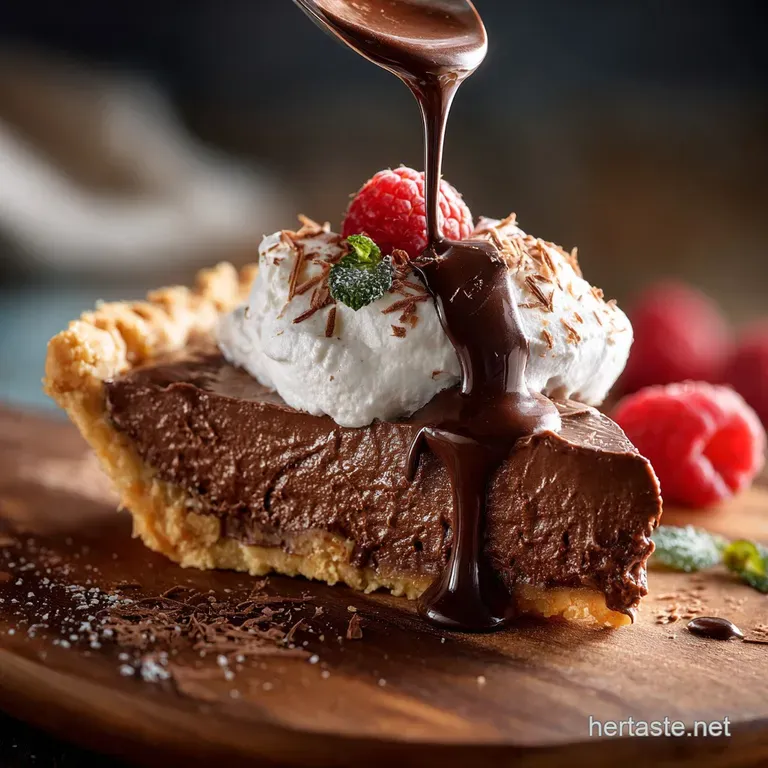
When a slice of this pie hits the plate, the room goes silent. This isn't just dark chocolate; it’s a pure, cold slab of absolute dessert euphoria. The filling is so intensely dark and silky, delivering a texture that feels like velvet melting on your tongue.
We all need a dessert hero that doesn't demand hours of active attention or turn the kitchen into a sauna. This no-bake chocolate pie is the definition of stress free elegance. You get massive flavor and stunning presentation with surprisingly minimal effort, which makes it perfect for last minute entertaining.
I’ve made every chocolate pie mistake known to humanity scrambled eggs, grainy fillings, and leaky crusts so I’ve codified this recipe into a foolproof method.
Let’s ditch the fussy French techniques and crack on with making the best, glossiest, silken chocolate pie you’ve ever tasted.
Why the No-Bake Method Creates a Superior Crème Texture
The secret sauce here is using a heated, tempered crème base to melt high-quality chocolate. This technique creates an emulsion, binding the fats from the chocolate and the cream into a stable, glossy mixture.
Because we are relying on the high fat content and the stability of the emulsified base (rather than cornstarch or flour), the resulting texture is incredibly dense but also ethereal.
It sets without becoming rubbery or overly firm , which is a common complaint with traditional baked custard pies. It's essentially a foolproof ganache that includes egg yolks for richness and structure.
Decoding the Difference: Crème vs. Mousse vs. Fudge Pie
People ask me all the time what makes this recipe different from its famous cousins. Is it just a NoBake Peanut Butter Pie: Ultra Creamy, Easy Pie Recipe but chocolate? No! The texture is key.
- Chocolate Mousse Pie: Light, airy, usually set with gelatin or stabilized whipped cream. It's fluffy, sometimes bordering on icy.
- Chocolate Fudge/Chess Pie: Rich, dense, intensely sweet, and baked . It usually contains flour and butter for a dense, candy like texture.
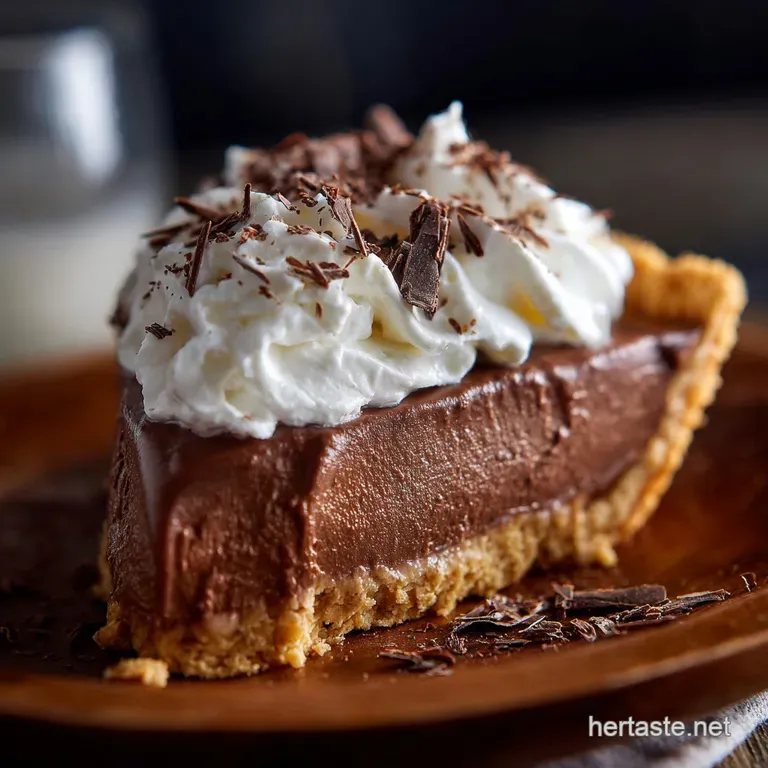
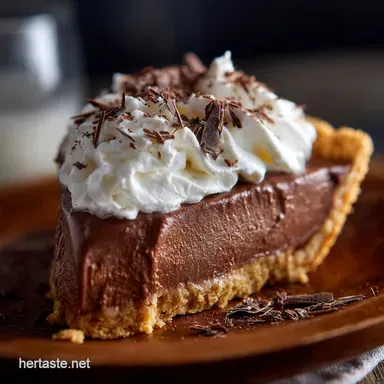
- Chocolate Crème Pie (This Recipe): Somewhere between a French Silk Pie and a super rich ganache. It's smooth, firm enough to slice cleanly, and has a deep, concentrated chocolate flavor thanks to the high cacao content.
Essential Equipment Checklist for a Perfect Pie
Don't panic; you don't need fancy pastry tools for this one. But you do need a reliable pie dish and a good whisk.
- 9 inch (23 cm) Pie Plate or Springform Pan (Springform makes removal easy!)
- Food Processor (A game changer for uniform crust crumbs).
- Medium Saucepan (Heavy bottomed is always best for heating dairy).
- Sturdy Whisk and Rubber Spatula (Essential for tempering and emulsifying).
Sourcing Your Success: Ingredients & Key Substitutions
The quality of your ingredients really shines through here because the filling is so simple. Don’t skimp on the chocolate, seriously.
| Ingredient | Role | Viable Substitute |
|---|---|---|
| Digestive Biscuits | Crust Base | Graham crackers, vanilla wafers, or Oreos (filling removed). |
| high-quality Chocolate (70% Cacao) | Flavour & Structure | Good quality baking chips (Ghirardelli or similar), but bars are better for smooth melting. |
| Heavy Cream | Richness & Texture | Full fat coconut cream (chilled overnight to skim the solid layer). |
| Whole Milk | Hydration/Body | Half and half (for extra richness) or any plant milk (oat or soy recommended). |
| Egg Yolks | Emulsifier & Firmness | 1 tbsp cornstarch dissolved in 2 tbsp cold milk (if avoiding eggs). |
Building the Foundation: Choosing Your Ideal Cookie Crumb Base
I usually stick to the digestive biscuit crust because it's sturdy and has a subtle, wheaty flavor that works beautifully with dark chocolate. However, if you want something sweeter, go for a vanilla wafer or even a chocolate wafer crust.
Hot Tip: Melt the butter, combine it completely with the crumbs, and then press it in hard. Pressing firmly is the key to a sliceable crust that won't crumble. I sometimes use a smaller measuring cup to really stamp down the base and edges.
The Non-Negotiable Grade of Cocoa and Chocolate Used
This recipe relies entirely on the quality of your main ingredient: the chocolate. You need 12 ounces of chopped chocolate, preferably 65% to 70% cacao solids. Why? Because lower quality chocolate contains stabilizers and waxes that can make your filling dull, waxy, or prevent a proper emulsion.
Chef's Note: If you use milk chocolate, the pie will be much sweeter and much softer, requiring longer chilling time. Stick to dark or semi sweet for structural integrity.
Navigating Creams and Milks for Optimal Richness
We use heavy cream (double cream) for its high fat content, which is necessary for the filling to achieve that dense, rich consistency when chilled. Don't try to use half and half or low-fat milk in the crème base; you’ll end up with soup. Trust the fat. It’s what delivers the velvet.
dairy-free or gluten-free Variations for the Chocolate Pie
Need to swap out dairy? Go ahead! Use full fat canned coconut cream (the solid part) instead of heavy cream. For the milk, use soy or oat milk, which are relatively creamy.
For gluten-free: Simply swap the digestive biscuits for certified gluten-free alternatives like GF graham crackers or gluten-free ginger snaps. The process remains the same, which is why I love this recipe so much.
The Process: Crafting the Ultimate Chocolate Crème Pie
This recipe uses a quick, heated crème base, but the whole thing remains gloriously no-bake.
Pressing the Perfect Pie Shell: Techniques for a Stable Edge
- Combine your finely crushed crumbs, melted butter, and sugar until it looks like damp sand.
- Dump it all into your 9 inch plate. Start pressing the bottom layer first, using the flat bottom of a drinking glass.
- Next, use your fingers to press the sides up evenly. The side wall must be thick and dense enough to support the filling. Freeze the prepared crust for at least 30 minutes while you get the filling ready.
The One-Pot Method for the Silken Chocolate Crème Filling
This is where we build the flavor base. Get your chopped chocolate ready in a large heatproof bowl first.
- Heat the heavy cream, milk, sugar, and salt gently in a saucepan until it just starts to steam and bubble around the edges. Take it off the heat immediately.
- Whisk your two egg yolks in a separate small bowl. Now, for the critical step: Tempering. Slowly drizzle about half a cup of the hot cream into the yolks while constantly whisking. This warms the yolks without scrambling them.
- Pour the warmed yolk mixture back into the saucepan with the rest of the cream.
- Return the pan to low heat. Stir continuously with a rubber spatula until the mixture thickens slightly and coats the back of the spoon (1– 3 minutes). Do not boil! As soon as it thickens, remove it.
Pouring, Smoothing, and Initial Chill Procedure
- Pour the piping hot crème base directly over the chopped chocolate that is waiting in the bowl.
- Walk away for exactly five minutes. Don’t touch it! This ensures even heat transfer.
- Now, starting slowly in the dead center of the bowl, whisk until the chocolate melts completely. Whisk outward slowly until you have a perfectly smooth, dark, glossy pool of chocolate. Add the vanilla.
- Pour the warm filling into your chilled crust. Let it sit on the counter for 30 minutes to cool down before loosely covering it and transferring it to the fridge.
Professional Touches: Troubleshooting Your Chocolate Pie
Why Your Filling Won’t Set (And How to Fix It)
If your filling is weeping or runny after four hours, there are usually two culprits. First, you might not have cooked the crème base long enough to activate the yolks and thicken it properly before mixing in the chocolate. Second, and most common, you didn’t chill it long enough.
Four hours is the bare minimum, but for a truly firm, sliceable pie, you need 8 to 12 hours. If it's still soft, stick it in the freezer for an hour before slicing.
Achieving that Mirror Gloss Finish Before Chilling
The gloss comes entirely from the emulsification process that slow, steady whisking after the hot cream has sat on the chocolate. If you whisk too fast or too early, you trap air and the resulting pie will be duller.
If your pie looks dull after pouring, don't worry. Simply take a rubber spatula, dip it in hot water, wipe it clean, and gently smooth the surface of the pie before placing it in the fridge. That little warmth helps smooth out any imperfections.
Planning Ahead: Storage, Freezing, and Thawing Protocol
How Long Does Freshly Made Pie Last in the Refrigerator?
This pie is dairy and egg-based, so treat it with respect. Properly stored, tightly covered, it will last 4 to 5 days in the refrigerator. I actually think it tastes best on day two, once the flavors have really married together.
Keep the whipped cream topping separate until just before serving to prevent it from dissolving into the chocolate filling.
Best Practices for Deep Freezing the Whole Dessert
But does it freeze well? You bet it does! This is a fantastic freezer dessert.
- Chill the pie completely until rock solid (at least 6 hours).
- Once solid, wrap the pie tightly in plastic wrap, pressing out any air bubbles, and then wrap it again in foil.
- Label it with the date. It will keep well for up to 3 months.
- To thaw: Transfer the wrapped pie to the refrigerator and let it thaw slowly overnight. Never thaw on the counter, as rapid temperature changes can cause the filling to weep.
Finishing Touches: Garnish and Serving Suggestions
The simple, dark nature of this pie begs for something bright and acidic to balance the richness.
The Hot Knife Trick for Clean Slices
You want those perfect, magazine worthy slices? Get a tall glass of hot water ready. Dip a thin, sharp knife into the hot water, wipe it completely dry, and then make your cut. Repeat this process dip, wipe, cut for every single slice. It prevents drag and keeps the chocolate silken, not crumbly.
Elevated Toppings Beyond Simple Whipped Cream
Yes, plain whipped cream is great, but we can do better.
- Flaked Sea Salt: A tiny sprinkle of flaky salt (like Maldon) provides an incredible counterpoint, enhancing the chocolate's depth.
- Fresh Tart Berries: Raspberries, blackberries, or sliced strawberries are non-negotiable for cutting the richness.
- Chocolate Curls: Use a vegetable peeler on a block of chocolate to create impressive, professional looking curls.
- Espresso Whipped Cream: Add a teaspoon of instant espresso powder to your whipped cream before beating it for a mocha kick.

Recipe FAQs
Why is my no-bake chocolate filling too runny and not setting?
This usually happens if the filling wasn't chilled long enough, or if the fat-to-liquid ratio is slightly off. Ensure you use high-quality chocolate with at least 50% cocoa solids, and verify that your heavy cream was whipped to stiff peaks before folding into the chocolate base, as this provides crucial structure.
Can I use pre-made whipped topping (Cool Whip) instead of fresh heavy cream?
While you technically can, using fresh whipped heavy cream delivers a far superior, silkier texture and richer flavour profile, which is key to an "ultimate" pie. If using pre-made topping, fold it gently into the cooled chocolate mixture and increase the chilling time by at least two hours to ensure firm setting.
How should I store the pie, and can I freeze leftovers?
Store the assembled pie tightly covered in the refrigerator for up to 4 days. For longer storage, freeze the pie (un-topped) for up to one month; wrap it tightly first in plastic wrap, followed by aluminum foil. Thaw the pie overnight in the refrigerator before serving.
My filling looks oily or grainy after mixing. What went wrong?
This is likely a case of 'breaking' the emulsion, often caused by incorporating cold ingredients into a warm chocolate base too quickly, or by overheating the chocolate. Try adding one tablespoon of hot cream or milk (not boiling) and whisking vigorously to smoothly re-emulsify the mixture.
What is the best type of chocolate to use for the silken filling?
For the richest flavour and best texture, use high-quality semi sweet or bittersweet baking bars (60 70% cocoa solids) rather than chocolate chips. Chips contain stabilizers that prevent them from melting as smoothly as bar chocolate, which is essential for a truly silken filling.
Is it possible to adapt this recipe to be dairy-free or vegan?
Yes, you can substitute the butter in the crust with vegan margarine and ensure you use high-quality dairy-free dark chocolate. Replace the heavy cream with full fat canned coconut cream that has been chilled overnight; only scoop the thick, solid part of the cream to use for whipping.
Can I use an alternative crust like Oreo or Graham Cracker instead of digestive biscuits?
Absolutely, any crumb crust works well provided you maintain the correct ratio of crumbs to melted butter. Oreo crumbs (crushed filling and all) provide a deeper, darker chocolate flavour that complements the rich filling beautifully. Graham crackers offer a classic, mild flavour contrast.
Ultimate No Bake Silken Chocolate Pie
Ingredients:
Instructions:
Nutrition Facts:
| Calories | 600 kcal |
|---|---|
| Fat | 50 g |
| Fiber | 3 g |
