Green Bean Casserole: the Ultimate Homemade Thanksgiving Side
- The Ultimate Green Bean Casserole: A Proper Homemade Affair
- Ditching the Can: Why Homemade Green Bean Casserole is Worth the Effort
- The Culinary Science Behind the Ultimate Green Bean Casserole
- Essential Ingredients for a scratch-made Casserole
- Mastering the Method: Step-by-Step Assembly of the Casserole
- Elevating Your Bake: Advanced Tips and Troubleshooting Common Green Bean Casserole Issues
- Making Ahead: Preparation and Storage Solutions
- Perfect Pairings: What to Serve Alongside Your Green Bean Casserole
- Recipe FAQs
- 📝 Recipe Card
The Ultimate Green Bean Casserole: A Proper Homemade Affair
Ditching the Can: Why Homemade Green Bean Casserole is Worth the Effort
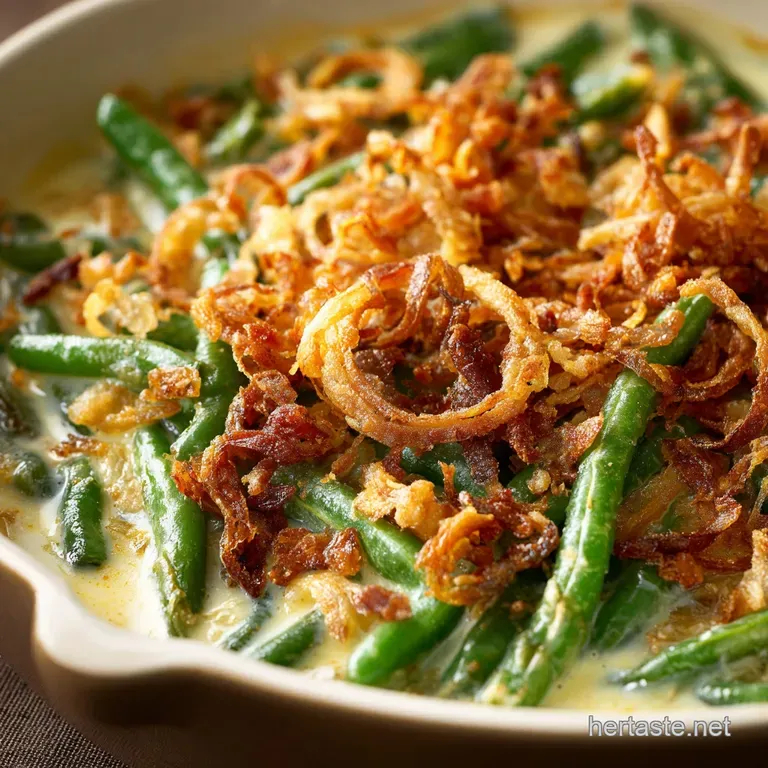
That aroma when the casserole comes out of the oven is pure holiday magic, isn't it? It’s that warm, earthy smell of garlic and slow cooked onions mingling with the rich, dairy heavy sauce.
When you make it from scratch, the texture game completely changes; you get that delightful snap of fresh green beans instead of something soft and sad. This isn’t the slop we all grew up politely tolerating.
Listen, I know what you’re thinking: why bother when the canned version is so fast? Because this recipe is a holiday lifesaver that actually tastes incredible, that’s why.
It’s comforting, it’s deeply savoury, and it’s surprisingly straightforward to manage, even when you're juggling a turkey and three other sides. A quick roux and some perfectly fried shallots is all it takes to transform a tired classic.
We are officially retiring the canned soup base today. No more gelatinous, overly salty mess! We are building a luxurious, perfectly seasoned sauce from the ground up, guaranteeing rave reviews. Trust me, once you taste the difference that real butter and fresh beans make, you won't ever look back.
The Culinary Science Behind the Ultimate Green Bean Casserole
This isn't just about throwing ingredients together; this is about strategic texture contrast and flavour building. We are aiming for complexity and crunch, not just creaminess.
The Texture Revolution: Fresh Beans vs. Canned
Canned green beans have their place, maybe in an emergency pantry meal, but never in a casserole you plan to serve at a major holiday. They are fundamentally mushy, and they release too much water, making the entire dish watery and loose. Using fresh green beans ensures that crucial, crisp tender bite.
We blanch them quickly, setting the color and locking in that fresh, vibrant flavour.
Crafting the Deeply Savoury Homemade Sauce Base
The success of this Green Bean Casserole hinges entirely on a perfect roux. A roux, which is just butter and flour cooked together, prevents the sauce from breaking or becoming grainy, creating an intensely smooth, velvety texture.
This scratch made approach allows us to control the sodium —a huge win compared to the salt bomb that is condensed soup.
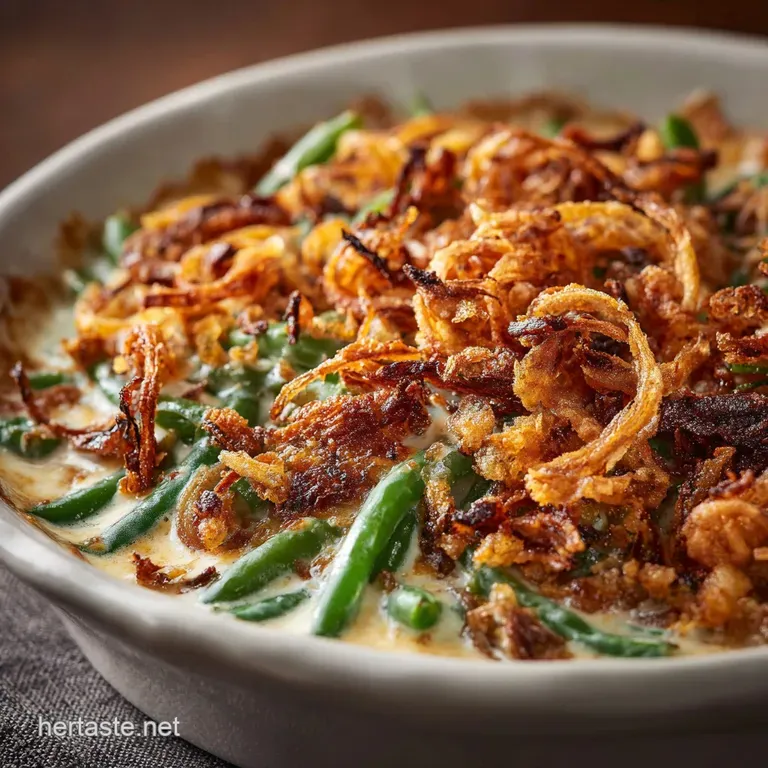
The Secret Weapon: Intense Crispy Shallots
You could buy the canned fried onions, sure, but making them yourself is seriously next level. Frying shallots in neutral oil releases incredibly sweet, oniony notes that intensify as they crisp up. They are thinner, crunchier, and have a nuanced flavour that processed toppings just can't match.
Don’t burn them; a deep gold colour is the goal.
Achieving the Perfect 'Al Dente' Snap
We need the beans to be cooked enough to lose their raw edge but retain structure. This means precisely 3– 4 minutes in boiling, salted water, followed immediately by an ice bath. This step, called blanching, is non-negotiable.
It stops the cooking process instantly , locking in that bright green colour and that satisfying snap.
Building Umami: The Mushroom Velouté Foundation
While the finished casserole doesn't scream mushroom , the finely sliced Cremini or chestnut mushrooms are essential. They are sautéed until deeply browned, providing a profound earthy, savoury base for the sauce.
This is where the umami that addictive, depth of flavor comes from, creating a sauce far superior to the canned version.
Balancing Richness and Acidity
Because this dish is so rich (hello, butter, cream, and fried shallots!), it needs a lift. That dash of stock and especially the Worcestershire sauce provide a subtle acidity and complexity that cuts through the fat. This tiny tweak prevents the casserole from tasting heavy or one-dimensional.
Essential Ingredients for a scratch made Casserole
I always say, better ingredients mean better flavor, but sometimes you need a quick swap! Here’s what you need and what you can use instead.
Selecting and Preparing Fresh Green Beans
Always opt for thin, firm, brightly coloured beans Haricots Verts are my favorite if you can find them. We are trimming the ends, naturally, but if you want a quicker cook time for a slightly simpler version, check out my recipe for Simple Green Bean Casserole: The Creamy, Made from-Scratch Recipe .
Customizing Your Crispy Shallot Topping
Shallots are sweeter and less potent than regular onions, making them ideal for frying. But if you’re in a pinch, don’t stress! You can substitute, but slice your replacement onions incredibly thin.
Dairy Options and Flour Requirements for the Velouté
For the creamiest sauce, whole milk or half and half works best. Avoid low-fat dairy, as it increases the risk of the sauce splitting when cooked for a long time. All-purpose flour is needed for both the roux and the shallot coating.
| Ingredient | Preferred Choice | Viable Substitution |
|---|---|---|
| Shallots | Banana Shallots | Thinly sliced Yellow Onion or large White Onion |
| Milk/Cream | Whole Milk or Half and Half | Full fat Oat Milk or heavy Cream (for richer texture) |
| Flour (Roux/Shallots) | All-Purpose Flour | gluten-free All-Purpose Blend or Tapioca Starch (for coating) |
| Green Beans | Fresh Haricots Verts | Frozen whole beans (thawed and dried well) |
Mastering the Method: step-by-step Assembly of the Casserole
We are tackling this in three distinct phases: crunch, sauce, and bake. Stay organized, and you’ll have a masterpiece ready in no time.
Phase 1: Frying the Shallots and Clarifying the Oil
Take your time when frying the shallots; it is so easy to go from golden perfection to burnt bits in seconds. Make sure your oil is hot, around 350°F (175°C), before you start, which keeps the coating crisp instead of greasy.
Fry them in batches so the temperature doesn't drop too low, which is a rookie mistake I definitely made my first time.
Chef's Note: Once you remove the shallots from the oil, they will continue to brown slightly due to residual heat. Pull them out when they look slightly lighter than your final desired colour, drain them on a wire rack not paper towels and sprinkle immediately with salt.
Phase 2: Whisking the Velouté Base
Start by sweating your mushrooms and aromatics in butter; this deepens the flavour remarkably. Next, sprinkle in the flour and stir continuously for two full minutes until it smells nutty. Do not rush the roux! Whisk in your warm liquid (milk first, then stock) very slowly.
This prevents clumps, giving you that silky, perfect sauce we want. Once thickened, season aggressively with salt, pepper, and nutmeg.
Phase 3: Combining and Baking for Perfect Setting
Once the sauce is thick and flavourful, stir in the blanched beans and a handful of the reserved crispy shallots. Mixing a few shallots into the casserole ensures that every bite has that sweet, onion flavour, even if the top ones get eaten first.
Bake the mixture without the bulk of the topping first, letting the sauce bubble and set slightly around the beans. Add the main topping only for the last few minutes to ensure maximum crunch.
Elevating Your Bake: Advanced Tips and Troubleshooting Common Green Bean Casserole Issues
I've messed this recipe up enough times to know exactly where things go sideways. Here are the most common pitfalls and how to steer clear of them.
How to Prevent a Grainy or Broken Sauce
A grainy sauce usually happens when the temperature of your roux (butter/flour) and your liquid (milk/stock) are too similar, or if you add the liquid too quickly. The golden rule is hot roux, cold/lukewarm liquid, added slowly while whisking vigorously.
You need that temperature difference to shock the starch and prevent lumps.
Ensuring the Shallots Stay Crispy, Not Soggy
This is the big one, isn't it? The main enemy of crispy shallots is steam. Do not cover the casserole dish with foil when baking, and absolutely do not add the topping until the last 5– 10 minutes of baking .
On top of that,, if you are transporting the casserole, keep the shallots in an airtight container and add them just before serving.
The Importance of Proper Bean Blanching
If you skip the blanching and just toss raw beans into the sauce, they won't cook thoroughly in the oven, leaving them tough. If you over blanch them, they turn mushy. Aim for 3 minutes of boiling, a quick shock in ice water, and then drain them extremely well.
Wet beans will water down your beautiful, thick sauce.
Making Ahead: Preparation and Storage Solutions
Holidays are busy. Planning ahead is non-negotiable. Luckily, this casserole is excellent for advanced prep!
Assembling the Casserole Up to 24 Hours in Advance
You can fully prepare the mushroom velouté, blanch the beans, and combine them in the casserole dish. Cover it tightly and store it in the refrigerator for up to 22 hours.
When ready to bake, pull it out 30 minutes early to take the chill off, then bake as directed (you might need an extra 5– 10 minutes in the first phase). Fry the shallots the day of serving; this is essential.
Freezing and Reheating Baked vs. Unbaked Portions
I prefer freezing the unbaked mixture, honestly. Cooked beans can become a little soft when frozen and thawed. If freezing unbaked, simply assemble the bean and sauce mixture, pour into a freezer safe dish, and cover tightly. It will keep for 2 3 months.
Thaw overnight in the fridge and add about 15 minutes to the baking time.
Revitalizing the Topping Post Bake
If, heaven forbid, your shallots start to soften during a long dinner service, you can refresh them. Simply scoop the topping off, toss it on a baking sheet, and blast it in the oven (or air fryer) for 2– 3 minutes while the casserole waits nearby. This trick saves everything.
Perfect Pairings: What to Serve Alongside Your Green Bean Casserole
Green Bean Casserole is the quintessential comfort side, demanding big, bold partners. Since this homemade version is so rich, you might want to balance it with something bright and acidic.
- The Protein: This dish is destined to sit next to a slow roasted turkey or a magnificent holiday ham.
- The Starch: If you've gone to the effort of making this from scratch, you might want to try my totally over the-top, deeply creamy Pioneer Woman Green Bean Casserole: The Ultimate scratch made, Creamy Version next year!
- The Palate Cleanser: Seriously, make a simple salad of mixed greens with a very sharp, mustard heavy vinaigrette. That acid cuts through the richness beautifully.
- For the true scratch made enthusiast: If you really want to embrace the complexity of making this dish 100% from scratch, even down to the homemade stock base, check out my recipe for Ultimate Green Bean Casserole Recipe: No Cans, Just Crispy Shallots for an even deeper dive into flavour layering.

Recipe FAQs
Can I make this Green Bean Casserole vegan or dairy-free?
Absolutely. Substitute the dairy milk with full fat oat milk or cashew cream for the required richness in the sauce. For the roux base, use quality vegan butter or high-quality olive oil, ensuring the final sauce remains creamy and luxurious without compromising texture.
My homemade mushroom sauce is too thick or too thin; how do I adjust the consistency?
Adjusting the consistency of a Velouté is simple: if the sauce is too thick, whisk in more warm milk or stock a tablespoon at a time until smooth. If it's too thin, create a slurry of equal parts cornstarch and cold water, then slowly stir it into the simmering sauce to achieve the desired thickness.
Can I use store-bought fried onions instead of making the homemade crispy shallots?
While using store-bought fried onions saves significant preparation time, they often lack the depth of flavor and intense crispness of fresh, homemade shallots. If you choose to substitute, use a high-quality, reputable brand, and be sure to hold off adding them until the last 5 10 minutes of baking to prevent them from burning or softening prematurely.
Why are my fresh green beans turning out mushy after baking?
Mushy beans usually result from over blanching before the final assembly. When blanching fresh beans, cook them only until they are bright green and still noticeably firm (al dente) before shocking them in ice water. This brief initial cooking ensures they retain a satisfying snap even after the final bake time.
Can I prepare this casserole ahead of time, and how long will it keep?
You can fully assemble the casserole the beans mixed with the sauce up to 24 hours in advance. Cover it tightly and refrigerate; do not add the crispy topping until just before baking. If baking from cold, allow an extra 10 15 minutes in the oven to ensure it heats through completely.
My casserole tastes a bit bland; how can I deepen the mushroom flavor?
Flavor depth relies heavily on the initial sauté: ensure you cook the mushrooms until all their natural liquid has evaporated and they are deeply browned, which concentrates the umami.
For an extra layer of complexity, deglaze the pan with a tablespoon of dry sherry or white wine before adding the flour for the roux.
How should I store and reheat leftover Green Bean Casserole?
Store leftover casserole tightly covered in the refrigerator for up to 3 days. To reheat, cover the dish loosely with foil and bake at 350°F (175°C) until thoroughly warmed. For the best texture, always add a fresh layer of crispy topping if available before serving.
Ultimate Green Bean Casserole

Ingredients:
Instructions:
Nutrition Facts:
| Calories | 210 kcal |
|---|---|
| Protein | 5.7 g |
| Fat | 14.0 g |
| Carbs | 18.8 g |
