Condensed Milk Desserts the Ultimate Stickywicket Milk Cake
- Why Condensed Milk Desserts Reign Supreme in Comfort Baking
- Gathering Your Secret Weapons for the Perfect Cake
- Essential Equipment for a Trouble and Free Bake
- Step and by-Step Guide to the Golden Sponge and Batter
- Pro Tips for Serving and Storing the Ultimate Condensed Milk Dessert
- Exploring Delicious Variations on the Sticky and Wicket Concept
- Recipe FAQs
- 📝 Recipe Card
Why Condensed Milk Desserts Reign Supreme in Comfort Baking
I swear, if there’s one secret weapon I keep in the pantry for emergencies, it’s that little can of gold. Sweetened condensed milk. It fixes everything. Dry cake? Nope. Bland flavour? Absolutely not. Condensed milk desserts are the ultimate comfort food.
They manage to be ridiculously simple but taste utterly complex, thanks to that slow and cooked caramel sweetness. Honestly, if you're looking for quick condensed milk desserts that feel fancy, you've found your new obsession. It’s brilliant. Truly. We are talking about pure, unadulterated, creamy decadence here.
Defining the "Sticky and Wicket" Treatment: Beyond Traditional Tres Leches
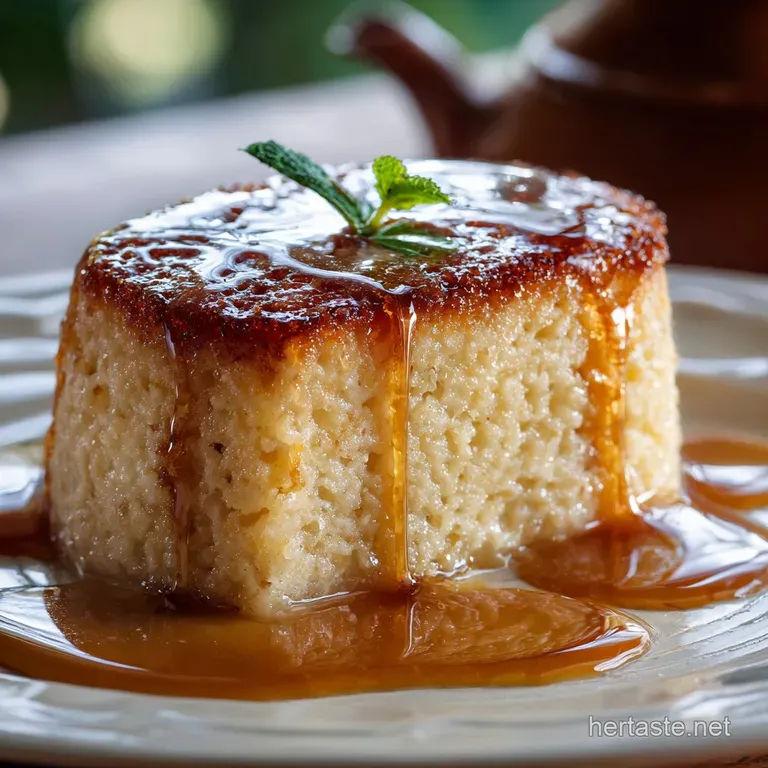
Tres Leches (Three Milk) cake is gorgeous, classic, and always welcome, but sometimes it needs a little... oomph . The "Sticky and Wicket" treatment is my slightly aggressive approach to soaking the sponge. We aren't just dampening a cake.
We are saturating it until it borders on creamy pudding territory. The ‘sticky’ comes from really leaning into that sweetened condensed milk ratio, making the final texture dense, moist, and unforgettable.
A "sticky wicket" is actually an old cricket term meaning a difficult playing surface, but here it means intensely moist, caramelized, and so delicious you'll need a fork and maybe a spoon just to manage the intensity.
The Simple Science of Sweetened Milk: Achieving Ultra and Moisture
Right, let's talk texture. Regular milk just makes your cake soggy and waterlogged. But sweetened condensed milk is magic. It’s essentially milk that has had most of its water removed and then been loaded up with sugar.
This gives it a high sugar content, which not only preserves the cake but dramatically lowers the water activity. When you pour that thick, viscous liquid into the porous structure of the warm sponge, it replaces the air with a creamy, caramelised sweetness.
Because the liquid is so thick, it doesn't just pass through; it hangs around, slowly thickening as it chills. It’s a texture game and changer that makes homemade ice cream sweetened condensed milk recipes so popular, too.
Why the Pantry Staple Earns Its Keep in This Recipe
Honestly, this is why I stock up on sweetened condensed milk whenever there’s a sale. It is stable. It sits there, ready to become instant ice cream, fudgy brownies, or this intensely moist cake. It requires zero fuss in the preparation of the soak. No simmering, no reduction.
You just open the can and whisk it with the other milks. That level of convenience paired with that incredible flavour... I mean, come on. It’s the easiest way to achieve that deep, comforting caramel note without messing around with actual caramel sauce.
These kinds of easy condensed milk desserts no bake options and bakes are true lifesavers.
Gathering Your Secret Weapons for the Perfect Cake
Before we get the mixers whirring, make sure everything is weighed out. I’m a huge advocate for weighing ingredients in baking; it’s the only way to guarantee a repeatable result. If you’re serious about making the best condensed milk dessert recipes, invest in a digital scale.
Essential Equipment for a Trouble and Free Bake
We're not using crazy expensive tools, but some basic equipment is non and negotiable for success here. Don't skip the wire rack or the skewer!
- Electric Mixer (Stand or Handheld): Necessary for achieving that "ribbon stage" with the eggs and for whipping the stiff peak topping.
- Whisk: For combining the milks smoothly. You don't want lumps of condensed milk at the bottom of the pitcher.
- A Wire Cooling Rack: Crucial for cooling the cake slightly before soaking.
- A Skewer or Chopstick: Forget the fork. We need deep, wide holes for the soak to properly penetrate.
The Three Essential Milk Components (Beyond the Standard Can)
Okay, let’s talk about the trio. It’s not just one can of condensed milk; you need three components working in tandem to hit that perfect creamy saturation.
| Milk Component | Role in the Soak |
|---|---|
| Sweetened Condensed | Sweetness, thick caramel base, and moisture retention. The star! |
| Evaporated Milk | The necessary liquid volume to ensure the entire cake is covered. |
| Heavy Cream (Double) | Provides richness, fat content, and that lovely, full mouthfeel. |
Flour Power: Selecting the Right Base for a Tender Crumb
Do NOT use bread flour. My first attempt at a milk cake years ago used standard bread flour because I was out of All and Purpose (AP). Disaster. The higher protein developed way too much gluten, creating a tough, resilient crumb that just resisted the milk soak. We want tender and fragile.
Standard AP flour is perfect here. It's forgiving, it doesn't develop too much structure, and it will happily absorb that glorious milky liquid without fighting back.
Baking Pan Specifications and Recommended Sizes
A standard 9x13 inch (23x33 cm) pan is the sweet spot for this recipe. I often use glass or ceramic because they retain heat well and honestly, they look great for serving. But a metal pan works fine, too. Just make sure the pan isn't too shallow.
You need walls high enough to contain ALL that milk you're about to pour on. This isn't a sheet cake; it should have some depth.
Related Recipes Worth Trying
- Tres Leches Cake The Ultimate Classic Three Milk Cake Recipe — Get the ultimate ultracreamy Tres Leches Cake recipe here This soaked sponge cake recipe uses the classic three milk blend for an impossibly moist and sweet...
- Foolproof Buttermilk Air Fryer Fried Chicken Recipe — Get seriously crispy juicy Air Fryer Fried Chicken without the oil drama Our secret Panko doublecoating locks in moisture for high protein recipes dinner...
- The Ultimate Cozy Cuppa Homemade Vanilla Cinnamon Milk Tea — Learn how to make vanilla cinnamon milk tea at home This comforting recipe is easy balanced and far better than takeaway Perfect for a rainy afternoon
Step and by-Step Guide to the Golden Sponge and Batter
Whipping the Eggs to Ribbon Stage (The Key to Volume)
This is the step that separates a good sponge from a great sponge. You start by creaming the softened butter and sugar until pale. But the true magic happens when you add the eggs one at a time, beating them until the mixture falls off the whisk in a thick, light ribbon that holds its shape for a second or two.
This is called the 'ribbon stage' and it incorporates crucial air, which keeps the final cake light and porous enough to soak up the liquid without collapsing when you add the weight of the condensed milk mixture. Don’t skip this step thinking you can just combine everything quickly.
Gentle Folding: Integrating Dry and Wet Ingredients Safely
Look, if you mix this batter for five minutes after the flour hits the bowl, you will activate every piece of gluten in the universe. We don't want that. We need a delicate, fluffy cake. Mix until just combined when integrating the dry and wet ingredients in alternating additions.
I mean, stop the moment you don't see streaks of flour anymore. A few small lumps? That is fine. Overmixed? Nope, you lose the airy texture, and the cake becomes dense.
Baking Timings and Testing for the Perfect Spring
Bake this sponge at 175°C (350°F) for about 35 to 40 minutes. You are looking for a light golden colour. Crucially, a slightly underbaked sponge is actually preferable here. Seriously. It will finish its process as it absorbs the liquid.
Overbaking, on the other hand, creates a dry barrier on the crust, preventing the milks from penetrating deeply. A skewer inserted in the center should come out clean, but just barely.
Creating a Cheater's Dulce de Leche Infusion
We are essentially building a quick, cheater version of dulce de leche here. Dulce de leche is traditionally slow and cooked sweetened milk. By using the condensed milk as the base, and then letting the whole cake rest for hours, that rich sweetness permeates the cake and caramelizes slightly as the starches hydrate.
You get that deep, cooked caramel flavour without ever needing to boil a can or stand over a saucepan. It's fantastic.
Pouring the Soak: Achieving Deep Saturation Without Soggy Results
Right, the moment of truth. You have this beautiful, warm cake and a pitcher full of creamy, sticky liquid. But wait, how do we pour this much liquid on and not end up with soup?
The secret is patience and the Great Poke.
- Pierce Aggressively: Take your chopstick or skewer and stab the cake all over. I’m talking 50 to 60 holes, evenly spaced. Don't be shy; these holes are the tunnels that get the condensed milk deep into the core.
- Pour Slowly: Pour the milk mixture slowly, starting at the edges and working your way inward. Don't dump it all in one corner. Let the visible liquid sink down for about 30 seconds before you add the next layer. This ensures the cake acts like a proper sponge rather than just a leaky bucket.
Pro Tips for Serving and Storing the Ultimate Condensed Milk Dessert
Exploring Delicious Variations on the Sticky and Wicket Concept
If you want to move beyond the classic version, this cake is highly customizable. It’s one of those ways to use sweetened condensed milk that always welcomes extra flair.
- Mocha Dream: Add 2 tablespoons of high and quality instant coffee or espresso powder to the Three Milk Soak. Coffee and caramel are soulmates.
- Coconut Caribbean Style: Replace the heavy cream in the soak with canned, full and fat Coconut Milk and garnish the finished cake with toasted coconut flakes. This brings big tropical vibes.
- Condensed Milk Desserts Indian Style: Use cardamom! Add 1 teaspoon of ground cardamom to the dry ingredients for the sponge and another ½ teaspoon to the milk soak for a beautifully fragrant, traditional twist.
Optimal Chilling Times for Maximum Flavor Absorption
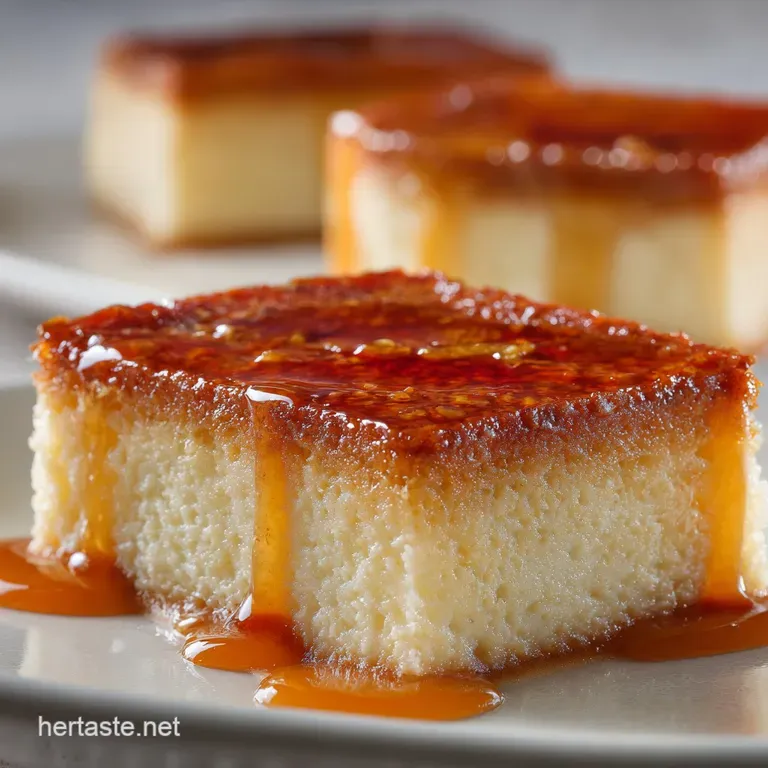
While four hours works in a pinch if you are absolutely desperate, chilling the cake overnight ( 12 hours minimum) is the gold standard. When you first pour the soak, the cake is wet.
After resting overnight, the cake structure has fully hydrated the starches, resulting in a creamy texture that is genuinely pudding and like. The flavours also deepen dramatically. Trust me, it’s worth the wait.
How Long Does Sticky and Wicket Cake Last? Storage Solutions
Because this is a high and moisture, dairy and rich dessert, food safety is key.
CRUCIAL WARNING: Always keep this cake tightly covered and refrigerated. It’s not counter and safe! You should consume it within 4 days for the absolute best quality and safety. If you use a glass pan, you can just wrap the whole thing tightly in cling film.
Customizing the Topping: From Cream Frosting to Toasted Coconut Flakes
You can stick with the classic whipped cream topping, which is light and lovely, but why not play around? I love using a mix of cream cheese and powdered sugar, whipped until light, for a slightly tangy contrast.
Or, skip the frosting entirely and just dust the whole thing with toasted coconut flakes, sliced almonds, or finely ground pistachios.
Making it Boozy: Rum or Bourbon Infusions for Adult Palates
Oh, hello, this is my favourite tip. If you are serving this only to adults, you can add a serious depth of flavor by introducing a spirit. Simply whisk 1 to 2 tablespoons of dark rum, spiced rum, or even a nice bourbon into the milk soak mixture.
The alcohol bakes off or is negligible in that volume, but the flavor compounds are left behind, adding warmth and complexity. It’s an instant upgrade.
Transforming Leftovers into Quick Condensed Milk Fudge Bites
If, by some miracle, you have actual leftovers after four days, you can turn them into little fudge bites. Scoop the cake out of the pan, mix it thoroughly with a tiny bit more condensed milk (just a tablespoon or two), and press the mixture firmly into a lined 8x8 pan. Chill until solid.
Then cut into squares and dip in melted dark chocolate. You now have easy condensed milk desserts that feel totally new. Zero waste, maximum joy.

Recipe FAQs
I poured all the milk on, but it’s sitting in a puddle. Did I muck up the soaking process?
Ah, a common sticking point! Ensure you aggressively pierce the cake deeply and uniformly (use a thin skewer, not just a fork) to create wide tunnels for the liquid. Also, remember that the essential chilling time, ideally overnight, is what allows the starches to fully hydrate and transform the texture from merely wet to genuinely creamy.
How long will this Sticky Wicket Caramelised Milk Cake keep in the fridge?
Kept well covered in the fridge, this dessert is actually fantastic the next day and will easily last for 4 5 days; the flavours only deepen over time! If you are using a fresh fruit garnish, only pop it on just before serving, as the extra moisture can reduce its shelf life.
I'm worried this is too sweet with all that condensed milk. Can I safely reduce the sugar?
While the condensed milk provides the necessary moisture and caramel texture, you can absolutely reduce the granulated sugar in the sponge cake itself by up to 1/4 cup without harming the structure.
Alternatively, serving the cake with a tart element like sharp raspberries or blackcurrants naturally cuts through the richness.
If I run out of evaporated milk, what’s the best swap for the three milk soak?
If you find yourself in a spot of bother and are missing evaporated milk, the closest substitute is typically equal parts whole milk, though it won't be quite as rich. A good cheat is to whisk a tablespoon of milk powder into your whole milk substitution for that extra creamy depth.
This cake is a triumph! What are some other super easy Condensed Milk Desserts you recommend?
Good heavens, you have options! Try classic two-ingredient fudge, which relies entirely on condensed milk for its perfect texture, or use it as a filling for quick no-bake tarts it’s the absolute MVP in quick, impressive sweets.
Sticky Condensed Milk Cake

Ingredients:
Instructions:
Nutrition Facts:
| Calories | 475 calories |
|---|---|
| Fat | 25 grams |
| Fiber | 1 grams |
