Silky Vanilla Snow Cream Recipe
- Time: Active 5 minutes, Passive 0 minutes, Total 5 minutes
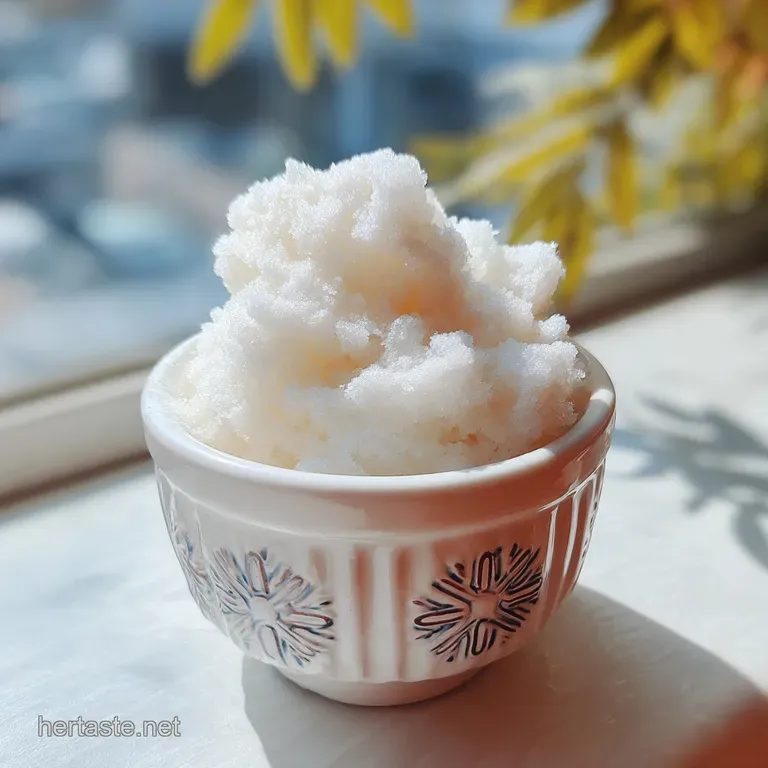
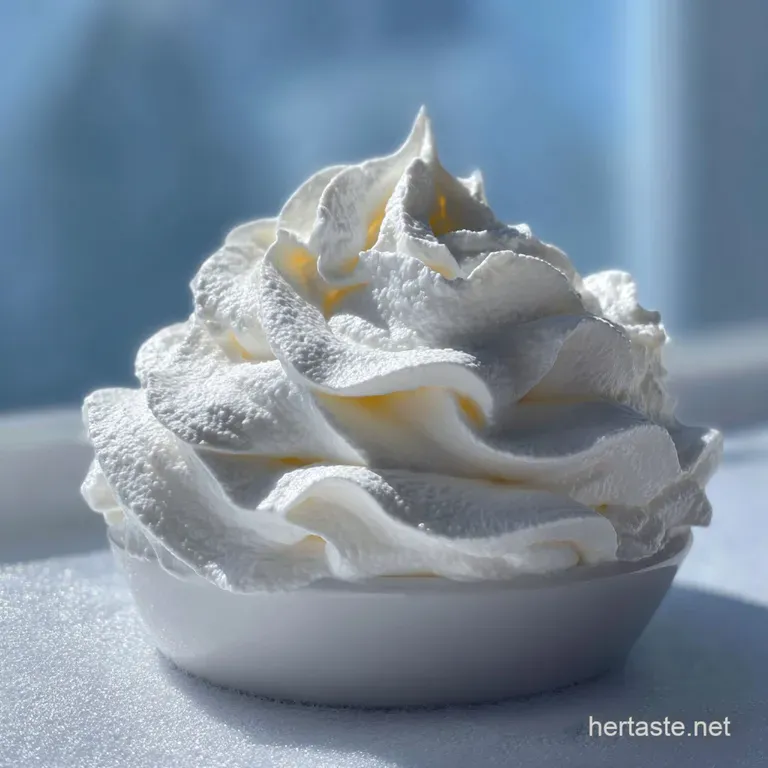
- Flavor/Texture Hook: Silky vanilla cream with a light, airy crystalline crunch
- Perfect for: Snow days, family traditions, and quick winter desserts
- Creating Memories With This Easy Snow Cream Recipe
- Essential Numbers for Your Frozen Winter Treats
- Choosing the Best Elements for Your Bowl
- The Tools Needed for Chilly Success
- Mixing Your Way to a Velvety Finish
- Keeping Your Frozen Treat From Melting
- Creative Ways to Style Your Winter Scoop
- Tips for Saving Your Leftover Snowy Dessert
- Beautiful Garnishes for the Perfect Presentation
- Recipe FAQs
- 📝 Recipe Card
Creating Memories With This Easy Snow Cream Recipe
That specific, muffled silence of a heavy snowfall always takes me back to my childhood kitchen. I remember the frantic scramble to find the biggest metal bowl in the cupboard, the cold air hitting my face as I stepped onto the porch, and the satisfying "sizzle" sound of a spoon slicing into untouched, powdery drifts.
It felt like we were harvesting clouds to eat for dessert.
We didn't need fancy machinery or hours of churning. My grandmother would simply whisk a few things together, and suddenly, the backyard was a feast. This snow cream recipe isn't just about the sugar; it's about that specific, fleeting texture that store-bought ice cream can never quite replicate.
It's light, it's ephemeral, and it tastes like a winter's nap.
But here is the thing, if you don't move fast, your snowy mountain turns into a puddle of sweet milk. I've spent years figuring out how to keep that structure firm long enough to actually enjoy the bowl.
We're going to use a few tricks, like chilling your equipment and balancing the fat content, to make sure your first bite is just as velvety as the last.
Essential Numbers for Your Frozen Winter Treats
Before we head out into the cold, let's look at the logistics of this batch. Since snow is mostly air, the volume might seem huge, but it compacts quickly once the liquid hits it. Understanding these ratios helps you avoid ending up with a soup instead of a scoop.
| Feature | Fast Version (This Recipe) | Classic Custard Base |
|---|---|---|
| Preparation Time | 5 minutes | 45 minutes + chilling |
| Texture Profile | Airy and crystalline | Dense and buttery |
| Equipment | One bowl and a spoon | Ice cream maker |
The Physics of the Fluff
The high air content in fresh snow acts as a structural lattice that traps the sweetened milk. The fat in the heavy cream and condensed milk coats these ice crystals, preventing them from immediately melting into a liquid state upon contact.
Chef's Note: Always harvest snow from a high surface like a patio table or a clean deck railing to ensure you aren't getting any dirt or "pavement seasoning" in your dessert.
Choosing the Best Elements for Your Bowl
The success of this dish relies entirely on the quality of your snow and the richness of your binder. We want a mixture that is thick enough to stand up to the ice without being so heavy that it collapses the air pockets.
- 14 oz sweetened condensed milk: This provides both the sugar and the body. Why this? Its low water content prevents the snow from melting too quickly compared to regular milk.
- 1 tablespoon vanilla extract: Use the good stuff here, as it's the primary flavor. Why this? Alcohol in the extract slightly lowers the freezing point for better scooping.
- 1 pinch fine sea salt: Just a tiny bit to sharpen the sweetness. Why this? Salt balances the heavy sugar from the condensed milk beautifully.
- 10 cups fresh, clean snow: The star of the show. Why this? Freshly fallen, powdery snow has the best air to ice ratio for fluffiness.
- 0.25 cup heavy cream: For that extra hit of decadence. Why this? Adds a velvety mouthfeel that condensed milk alone can't achieve.
| Original Ingredient | Substitute | Why It Works |
|---|---|---|
| Sweetened Condensed Milk | Coconut Condensed Milk | Similar viscosity. Note: Adds a distinct tropical nutty flavor to the base. |
| Heavy Cream | Half and Half | Lower fat content. Note: Result will be slightly more icy and less creamy. |
| Vanilla Extract | Almond Extract | Potent floral notes. Note: Use only 1/2 tablespoon as it is much stronger. |
A quick tip for the liquid base: treat it like the technique in my How to Chill recipe and get your milk mixture as cold as possible before the snow arrives. If your liquids are room temperature, they will "shatter" the delicate ice crystals on impact, leaving you with a bowl of slush.
The Tools Needed for Chilly Success
You don't need much, but the material of your tools matters. Since we are fighting against heat, anything that holds a chill is your best friend.
- Large Metal Mixing Bowl: Stainless steel is ideal because it gets cold fast and stays that way.
- Sturdy Silicone Spatula: Great for folding without crushing the snow's volume.
- Large Metal Spoon: Perfect for the final "packing" of the scoops.
- Measuring Cups: You'll need these for the snow, though I often just eyeball it until the texture looks right.
Chilling the Hardware
Place your metal bowl and your mixing spoon in the freezer for at least 15 minutes before you plan to start. If you skip this, the residual warmth of the bowl will begin melting the snow the second it touches the bottom.
It's a small step that makes a massive difference in the final "scoopability" of the cream.
Mixing Your Way to a Velvety Finish
The process is fast, so have everyone ready with their spoons before you even bring the snow inside. We are going for a texture that feels like a cross between a soft serve and a granita.
- Whisk the base. In a small bowl, combine the 14 oz sweetened condensed milk, 1 tablespoon vanilla, 0.25 cup heavy cream, and salt. Note: Whisk until completely smooth so the vanilla is evenly distributed.
- Chill the liquid. Place this mixture in the fridge or freezer for 10 minutes. Wait until it is cold to the touch.
- Gather the snow. Head outside and scoop 10 cups of fresh, fluffy snow into your pre chilled large metal bowl.
- Pour the center. Create a small well in the middle of the snow and pour in half of your chilled milk mixture.
- Fold gently. Use your spatula to lift the snow from the bottom and fold it over the liquid. Work until no large dry pockets remain.
- Add the rest. Pour the remaining milk mixture over the top.
- Final blend. Continue folding until the mixture is uniform and holds its shape on a spoon.
- Serve immediately. Portion into chilled bowls until the surface looks like soft peaks.
If you are craving a little extra texture, you can serve this alongside a Chewy Classic Snickerdoodles recipe for a bit of spice and crunch. The warmth of the cinnamon is such a lovely contrast to the icy vanilla.
Keeping Your Frozen Treat From Melting
Working with snow is a race against the thermostat. If you find your mixture is turning into a beverage rather than a dessert, it usually comes down to one of two things: temperature or timing.
| Premium Ingredient | Budget Alternative | Flavor Impact | Savings |
|---|---|---|---|
| Bourbon Vanilla Bean | Imitation Vanilla | Slightly less complex | Save $4-6 |
| Organic Heavy Cream | Whole Milk + Butter | Less silky texture | Save $2-3 |
| Sea Salt Flakes | Table Salt | Sharper salt bite | Save $1-2 |
The liquid to snow ratio is also vital. If you add too much milk at once, the weight of the liquid collapses the snow. I always suggest adding the milk in two stages so you can monitor how the snow is reacting.
Every snowfall has a different moisture content; "dry" snow can handle more liquid, while "wet" snow needs less.
Component Analysis
| Ingredient | Science Role | Pro Secret |
|---|---|---|
| Condensed Milk | Freezing Point Depressant | Use it straight from the fridge to keep the snow from melting. |
| Heavy Cream | Emulsifier/Fat Source | Don't overmix or you'll accidentally start making butter. |
| Sea Salt | Flavor Enhancer | Use fine grain so it dissolves instantly in the cold liquid. |
Preventing Gritty Texture Issues
If your cream feels "sandy" or gritty, it’s often because the sugar in the condensed milk hasn't fully integrated with the water in the snow. Make sure your base is whisked thoroughly before adding it to the bowl.
Also, avoid using snow that has started to crust over or develop an icy top layer, as those larger crystals won't soften.
Solving Rapid Melting Problems
This usually happens if the "snow cream recipe" is made in a warm room or with warm bowls. If you see the edges turning to liquid instantly, pop the whole bowl into the freezer for 3 minutes to reset the temperature.
You can also add another cup of fresh snow to "soak up" the extra moisture and restore the structure.
| Problem | Root Cause | Solution |
|---|---|---|
| Soupy Consistency | Too much liquid or warm snow | Fold in 1-2 more cups of fresh snow immediately. |
| No Flavor | Not enough vanilla | Fold in an extra teaspoon of extract or a pinch of salt. |
| Hard Ice Chunks | Used old, icy snow | Only use fresh, "powder" snow from the top of the drift. |
Common Mistakes Checklist
- ✓ Using "old" snow that has sat for more than a few hours (it becomes too dense).
- ✓ Forgetting to chill the mixing bowl (this is the #1 cause of melting).
- ✓ Pouring the milk mixture all at once (it can overwhelm the snow's structure).
- ✓ Over mixing the snow, which knocks out the air and makes it heavy.
- ✓ Waiting too long to serve; this is a "right now" kind of dessert.
Creative Ways to Style Your Winter Scoop
While the classic vanilla version is a dream, you can easily tweak this to fit your mood. Because the base is so neutral, it acts as a canvas for whatever you have in the pantry.
- If you want a chocolate version: Whisk 2 tablespoons of cocoa powder into the condensed milk before mixing. You might also want to drizzle on The Only Homemade recipe for a double chocolate hit.
- If you want a fruity twist: Swirl in a spoonful of strawberry jam or lemon curd at the very last second of folding.
- If you want a "cereal milk" vibe: Top with crushed cornflakes or colorful sugared loops for a nostalgic crunch.
Precision Checkpoints
- Temperature: The milk mixture should be below 40°F before it touches the snow.
- Ratio: 10 cups of snow is the baseline, but be ready to add up to 2 cups more if your snow is particularly light.
- Mixing Time: Limit your folding to under 60 seconds to preserve the crystal structure.
Tips for Saving Your Leftover Snowy Dessert
I’ll be honest: snow cream is best eaten the second it's made. The air pockets that make it special are fragile. However, if you find yourself with leftovers, you can keep it in the freezer for about 24 hours. Just know that it will freeze quite hard, more like a block of ice than a soft scoop.
To revive it, let it sit on the counter for 5-10 minutes, then give it a vigorous stir with a heavy spoon. It won't be quite as fluffy, but it will still be a tasty frozen treat. For zero waste, if it melts completely, don't throw it out! The melted mixture is essentially a flavored creamer.
Use it in your morning coffee or as a base for a bread pudding. It’s essentially a high-quality vanilla custard at that point!
Beautiful Garnishes for the Perfect Presentation
Since this is a "presentation" focused dish, let's talk about color balance. Pure white snow cream can look a bit flat in a white bowl. I like to use a "Triad of Color" to make it pop.
- The Ruby Pop: Pomegranate seeds are my favorite. They look like little jewels against the white cream and provide a tart "shatter" when you bite into them. Add these at the very end.
- The Emerald Touch: A tiny sprig of fresh mint or a dusting of matcha powder adds a sophisticated green that screams "winter garden."
- The Golden Glimmer: Toasted coconut flakes or a drizzle of warm honey (add the honey last so it doesn't melt the cream) adds warmth to the visual palette.
Debunking Snow Cream Myths
A common misconception is that you can't make this with "dry" snow. In reality, dry, powdery snow makes the best version because it has more air. You just have to be more careful with the folding process. Another myth is that you need an ice cream maker to "fix" the texture if it's too soft.
Never put snow cream in a machine; the churning will melt the snow instantly. The magic is in the hand folding.
Finally, some people think snow is "dirty" because of atmospheric dust. While it's true snow picks up particles as it falls, using freshly fallen snow from a clean surface is generally considered safe for an occasional treat.
If you're really worried, you can always use shaved ice from a blender, but you'll lose that specific, velvety lightness that only a blizzard can provide. Give it a try next time the flakes start falling it's a tradition that truly brings comfort to every kitchen.

Recipe FAQs
What are the ingredients for snow cream?
The core four are: Fresh snow, sweetened condensed milk, heavy cream, and vanilla extract.
You also need a pinch of salt to balance the sweetness. The condensed milk provides the sugar and body, which is essential for trapping the air in the snow crystals.
Why can't you use the first snow for snow cream?
No, this is a common misconception; you should use the freshest, top layer of snow. The first snow often carries more atmospheric dust and debris, so you want to gently scoop the pristine, powdery layer from the surface of a clean area.
What are the 4 ingredients in simple snow cream?
Fresh snow, sweetened condensed milk, heavy cream, and vanilla extract are the four essentials. This combination gives you the necessary fat content from the cream to create a velvety texture.
If you want to explore non-dairy alternatives that also focus on balancing fat, see how we manage ratios in our Greek Yogurt with Warm Black Blueberry Sauce Quick 15Minute Dessert for a similar texture goal.
How do you make Appalachian snow cream?
Chill your mixing bowl in the freezer for at least 15 minutes first. Combine 14oz sweetened condensed milk with heavy cream and vanilla, then gently fold this cold liquid base into 10 cups of fresh, fluffy snow until just combined.
The key Appalachian technique is gentleness; avoid over mixing, or you'll crush the air out of the snow.
Can I use regular milk instead of sweetened condensed milk?
No, you should use sweetened condensed milk for the best texture. Regular milk contains too much water, which will rapidly melt the snow and leave you with sugary water instead of cream.
Condensed milk is thick and low in water, helping the mixture hold its airy structure longer.
What is the secret to making snow cream creamy and not icy?
The secret is using heavy cream and ensuring all your liquid ingredients are pre-chilled. The fat in the heavy cream coats the ice crystals, preventing them from fusing into hard chunks.
If you've mastered stabilizing emulsions in other recipes, applying that fat logic here keeps the structure soft.
How do I flavor my snow cream besides vanilla?
Whisk 2 tablespoons of cocoa powder into the cold condensed milk mixture before adding the snow. This creates a rich, simple chocolate flavor base.
Alternatively, you can swirl in small amounts of fruit jam or melted dark chocolate right at the end of folding.
Quick Snow Cream Recipe

Ingredients:
Instructions:
Nutrition Facts:
| Calories | 378 kcal |
|---|---|
| Protein | 8.3 g |
| Fat | 14.0 g |
| Carbs | 54.3 g |
| Fiber | 0 g |
| Sugar | 54.1 g |
| Sodium | 85 mg |
