Puffed-Up Perfection: the Easiest Homemade Pita Bread

- Homemade Pita Bread: Your New Obsession
- Benefits of Baking Your Own Pain Pita
- Simple Ingredients for the Perfect Pita
- Puffed-Up Perfection: The Easiest Homemade Pita Bread
- Ingredients & Equipment
- Puffed-Up Perfection: The Easiest Homemade Pita Bread
- Recipe Notes
- Frequently Asked Questions
- 📝 Recipe Card
Right, let's dive straight in, shall we? ever get that craving for something warm, fluffy, and just begging to be stuffed? i'm talking about the pita bread recipe .
Honestly, forget the shop bought stuff, this recipe is a game changer! you'll be whipping up your own little pieces of middle eastern sunshine in no time.
Homemade Pita Bread: Your New Obsession
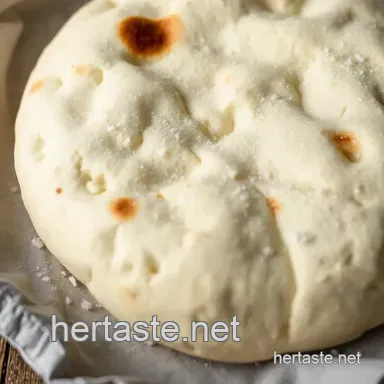
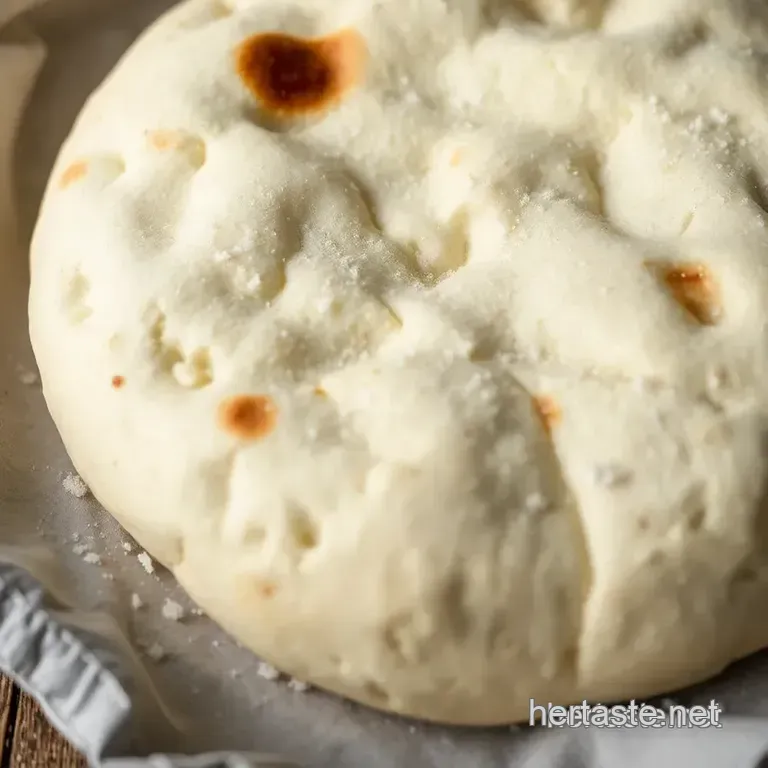
Think of it! these aren't just any old bits of flatbread. they're proper, puffed-up pita bread , perfect for everything from dipping to devouring.
Their origin? well, that goes way back, a real taste of history! this recipe is dead easy, i promise. you're looking at about 2 hours all in, and it makes around 8 beautiful pitas.
So, enough to share… or not!
Benefits of Baking Your Own Pain Pita
These pita bread recipe pitas are miles better than anything you'll find in the supermarket. not only are they fresher and tastier, but they're also better for you.
Less of those dodgy additives and you know exactly what's going in. plus, the smell of baking easy bread ? nothing beats it.
Perfect for a casual lunch, a barbeque, or even just a cheeky snack! this easy bread recipes is special because it's so simple.
Even if you're not a seasoned baker, you can nail this.
Ready to get started?
Simple Ingredients for the Perfect Pita
Let's grab the stuff you'll need. Don't panic, it's all pretty basic.
- 1 1/2 cups (360ml) warm water (105- 115° F / 40- 46° C)
- 2 1/4 teaspoons (7g or 1 packet) active dry yeast
- 1 teaspoon (6g) granulated sugar
- 3 3/4 cups (469g) all-purpose flour, plus more for dusting
- 1 1/2 teaspoons (9g) kosher salt
- 2 tablespoons (30ml) olive oil, plus more for greasing
Get yourself that and let's start making some Tortillas and Homemade Pita Bread . It is just to simple to make some Diy Pumpkin Recipes .
Right then, let's get cracking! A pita bread recipe , eh? A staple for lunchboxes and late night kebabs alike. We'll make it foolproof.
Puffed-Up Perfection: The Easiest Homemade Pita Bread
Skip the supermarket stuff! this recipe demystifies pita bread making. turns your kitchen into a mini middle eastern bakery. simple ingredients guarantee warm, fluffy pitas .
Perfect for stuffing with falafel or gyros. it's a diy adventure! you'll get fresh baked goodness way better than pre-packaged stuff.
Honestly, give it a go.
This recipe is relatively straightforward. The oven temperature is the only tricky bit. But don't worry, I'll guide you!
Prep Time: 20 minutes (active) + 1 hour, 30 minutes (resting). Cook Time: 5-7 minutes per pita. Total Time: Around 2 hours.
Makes about 8 pitas .
Ingredients & Equipment
Main Ingredients
Right, here's what you'll need. I've used these measurements for ages. Works a charm.
- Warm water: 1 1/2 cups ( 360ml ). Must be 105- 115° F ( 40- 46° C ).
- Active dry yeast: 2 1/4 teaspoons ( 7g ). One packet usually does the trick.
- Granulated sugar: 1 teaspoon ( 6g ).
- All-purpose flour: 3 3/4 cups ( 469g ). Plus, extra for dusting, you know?
- Kosher salt: 1 1/2 teaspoons ( 9g ).
- Olive oil: 2 tablespoons ( 30ml ). Plus, more for greasing.
For the yeast, quality matters! Make sure it's not past its sell-by date. Honestly, dead yeast is a kitchen disaster.
Seasoning Notes
No crazy spices needed here. It's all about simplicity.
- Essential spice combinations: None! This pita bread recipe is all about the dough. Though a pinch of garlic powder in the dough is pretty darn good, I'll say.
- Flavor enhancers: A drizzle of honey can work wonders for a sweeter taste. My nan used to add a tablespoon of semolina.
- Quick substitutions: Don't have olive oil? Veg oil works perfectly as a sub.
Equipment Needed
Keep it simple. You don't need fancy gadgets.
- Essential tools: A big mixing bowl and your hands. Or a stand mixer if you’re fancy!
- Common household alternatives: Rolling pin? A clean wine bottle works in a pinch.
Remember to preheat your oven to a toasty 500° F ( 260° C) . Seriously, a hot oven is the key to success with this homemade pita bread . Trust me.
Now, you might be thinking about other easy bread recipes . or maybe even pudding chia , but right now, let's nail this pita bread recipe ! some people call it pain pita , or even tortillas , but we all know what we're after.
And if you end up loving easy bread , why not explore some diy pumpkin recipes ?
Honestly, making your own pita bread is easier than you think. And the taste? Incredible. Far better than anything store-bought. I can't wait for you to try it.
Right then, let's get cracking! a pita bread recipe , eh? a staple for lunchboxes and late night kebabs alike. we'll make it foolproof.
I remember the first time i tried making pita bread ... disaster! they were flat as pancakes. but don't you worry, i've learned from my mistakes.
Puffed-Up Perfection: The Easiest Homemade Pita Bread
Skip the supermarket stuff! this recipe demystifies pita bread making. your kitchen transforms into a mini middle eastern bakery. simple ingredients and straightforward instructions guarantee warm, fluffy pitas.
Perfect for stuffing with falafel or your favorite dips. it’s a diy adventure. you'll get fresh baked goodness, so much better than anything pre-packaged.
This recipe is pretty easy . The only tricky part is getting the oven temperature right. Don't worry, I've got you covered.
Prep Time: 20 minutes + 1 hour, 30 minutes (resting). Cook Time: 5- 7 minutes per pita. Total Time: About 2 hours . Makes 8 pitas .
Prep Steps - Get Your Ducks in a Row
Essential mise en place. Honestly, get everything ready before you start. It makes life so much easier. Measure out all your ingredients. Trust me on this.
Time saving organization tips. Get your flour, yeast, and salt ready. Have your olive oil measured out. A stand mixer is helpful, but not essential. Kneading by hand is totally doable.
Step-by-step to Pita Perfection
- Activate the Yeast: Dissolve 2 1/4 teaspoons of yeast and 1 teaspoon of sugar in 1 1/2 cups of warm water ( 105- 115° F / 40- 46° C ). Let it stand. It should be foamy in 5- 10 minutes .
- Combine Dry: Whisk together 3 3/4 cups of flour and 1 1/2 teaspoons of salt in a bowl.
- Mix Wet and Dry: Add the yeast mixture and 2 tablespoons of olive oil to the flour. Mix until a shaggy dough forms.
- Knead Time: Knead the dough for 8- 10 minutes by hand. Or 5- 7 minutes with a dough hook. It should be smooth and elastic.
- First Rise: Place dough in an oiled bowl. Cover and let it rise. It needs about 1 hour until doubled.
- Divide and Conquer: Punch down the dough. Divide it into 8 equal pieces.
- Shape It Up: Roll each piece into a smooth ball. Then flatten into a 6 inch circle.
- Proofing Time: Place the shaped pitas on parchment paper. Cover and let rest for 30 minutes .
- Preheat Like Crazy: Preheat oven to 500° F ( 260° C) with a baking stone inside. I don't know the way, do you?
- Bake Time: Transfer 2-3 pitas to the hot stone. Bake for 5- 7 minutes . They should be puffed up and golden brown.
- Cool It: Transfer baked pitas to a wire rack. Let them cool. Store in an airtight container.
Pro Tips - Secrets to the Best Pain Pita
Hot oven is key. honestly, it’s the most important thing . the high heat is what makes them puff. don’t over knead.
Over kneading makes tough pitas. no one wants that! knead until just smooth. make-ahead options. you can make the dough ahead of time.
Just store it in the fridge after the first rise.
Enjoy your homemade pita bread . they are perfect for diy pumpkin recipes , stuffed with your favourite pudding chia . give these easy bread recipes a try.
Maybe even some tortillas .
Right then, let's get cracking! A pita bread recipe , eh? A staple for lunchboxes and late night kebabs alike. We'll make it foolproof.
Recipe Notes
Oi, before you get started on this cracking pita bread recipe , a few pointers. honestly, these little tips will make your life so much easier.
Trust me, i learned the hard way!
Serving Up Some Deliciousness
Think about how good these will look! plating's half the battle, innit? stuff them with falafel or gyros for a proper meal.
Or, tear them up and serve with pudding chia for a lighter snack. for drinks, how about a bit of lemon tea? perfect, right?
Keepin' 'Em Fresh
Right, so you've got a stack of homemade pita bread . pop them in the fridge in an airtight container. they'll last for about 3 days.
Want to keep them longer? freeze them. just wrap them well. when you fancy one, reheat it in a warm oven or toaster.
Simple.
Mix It Up a Bit
Fancy a change? why not try making these gluten-free? use a gluten-free flour mix, easy peasy! you could also swap out some of the flour for wholemeal for a nutty flavour.
Autumn coming? try using diy pumpkin recipes for a sweet taste.
Cracking Nutrition Info
These pita bread are actually pretty good for you. they've got some fibre and carbs for energy. plus, they're lower in fat than some other easy bread options.
They are like healthier tortillas . not bad for a bit of pain pita , eh?
Seriously, this pita bread recipe is easier than you think. just follow the instructions and you'll be munching on fresh, warm pita bread in no time! happy baking, and don't forget to share your creations! also, don't forget to try my other easy bread recipes soon!.
Frequently Asked Questions
Why didn't my pita bread puff up? What went wrong with my pita bread recipe?
Ah, the dreaded flat pita! The most common reason is not having a hot enough oven. You need a high temperature (around 500°F/260°C) to create the steam that makes them puff. Also, make sure your yeast is active and that you've given the dough enough time to proof.
Think of it like a soufflé; temperature is key!
Can I make this pita bread recipe ahead of time? How long does homemade pita bread last?
Absolutely! Once baked and cooled, store your pitas in an airtight container at room temperature for up to 3 days. For longer storage, you can freeze them for up to 2 months. Just make sure they are properly sealed to prevent freezer burn.
A quick zap in the microwave or a warm oven will revive them nicely before you tuck into a delicious shawarma wrap!
My pita bread is tough! What can I do differently next time?
Tough pita bread usually means the dough was over kneaded or there was too much flour. Be careful not to overwork the dough; knead until it's smooth and elastic, but not stiff. Also, be precise with your flour measurements. Remember, every baker has a 'soggy bottom' moment; practice makes perfect!
Can I use whole wheat flour in this pita bread recipe?
Yes, you can! For a nuttier flavour and added fibre, substitute up to half of the all-purpose flour with whole wheat flour. Keep in mind that whole wheat flour absorbs more liquid, so you might need to add a little more water to the dough.
You might also find that the pita isn't quite as fluffy as the all-purpose version, but it'll still be delicious and a bit healthier - a win-win situation really!
I'm trying to be healthy. What are the nutritional considerations for this pita bread recipe?
One homemade pita (as per this recipe) contains roughly 250 calories, 7g protein, 4g fat, and 45g carbohydrates. Using whole wheat flour will increase the fiber content slightly. To make it even healthier, consider using less olive oil and being mindful of what you fill it with.
Loads of veggies and lean protein will keep you on the straight and narrow!
Can I flavour my pita bread?
Absolutely! Try adding dried herbs like oregano, thyme, or rosemary to the flour mixture for a moreish, fragrant pita. You can also sprinkle sesame or poppy seeds on top before baking for added flavour and texture. The possibilities are endless; let your imagination run wild and create your signature pita!
Puffed Up Perfection The Easiest Homemade Pita B