The Proper Crispy Chicken Taquitos Roll Fry or Bake to Perfection
- The Quest for Ultimate Crunch: Introducing Proper Crispy Chicken Taquitos
- Why This Recipe Outshines Every Other Takeout Imposter
- Assembling Your Components for Flavourful Chicken Taquitos
- Phase One: Crafting the Savoury Chicken Filling
- The Art of Rolling: Securing Your Taquito Shape
- Achieving Maximum Crisp: Frying or Baking Methods Compared
- Perfect Pairing: Recommended Dips and Toppings
- Troubleshooting and Storage Longevity
- Creative Twists: Elevating Your Taquito Game
- Recipe FAQs
- 📝 Recipe Card
The Quest for Ultimate Crunch: Introducing Proper Crispy Chicken Taquitos
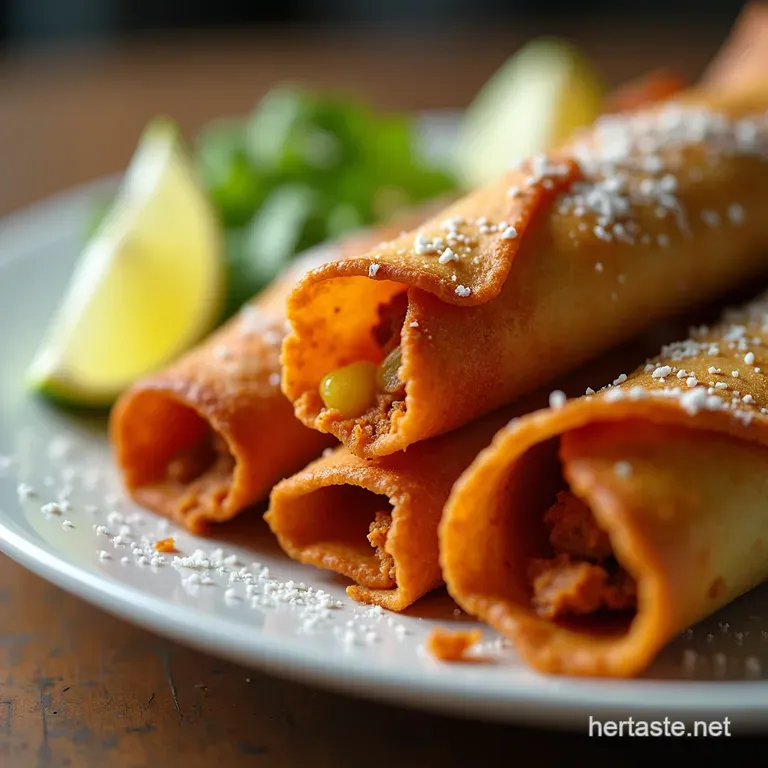
There is a particular sound every lover of Mexican inspired cuisine chases: the definitive crack of a perfectly fried tortilla giving way to a hot, savoury interior. If you’ve ever been disappointed by limp, under seasoned, or soggy attempts at this beloved snack, take heart.
We are not merely making dinner tonight; we are embarking on a flavour expedition to create the absolute Best Chicken Taquitos known to man ones that stay gloriously crisp from the first bite to the last.
These Crispy Chicken Taquitos are the answer to that persistent craving for authentic, satisfying texture and bold flavour, transforming simple ingredients into an unforgettable handheld masterpiece.
Why This Recipe Outshines Every Other Takeout Imposter
What separates a truly great Homemade Chicken Taquitos experience from the pale imitations found elsewhere? It boils down to a few crucial details in preparation and execution. We focus on moisture control and flavour layering to ensure every single roll delivers on its promise of crunch.
The Flavor Profile Promise: Beyond Basic Shredded Chicken
Too often, taquito filling is just dry, lightly seasoned chicken. Not here. We’re infusing moisture and binding agents into our chicken base. By sautéing aromatics like onion and garlic and simmering the shredded meat briefly in broth, we ensure the chicken itself is succulent.
The true game changer, however, is the incorporation of softened cream cheese. This small addition acts as a flavour carrier and, more importantly, a structural adhesive, drastically improving the success rate of your final product.
A Technique Guarantee: Achieving Non-Soggy Perfection
Sogginess is the enemy of the taquito. We mitigate this threat in two distinct ways. First, we cook down any excess liquid from the filling mixture until it is creamy but firm, not wet.
Second, whether you opt for the Fried Chicken Taquitos Recipe or the Baked Chicken Taquitos Recipe , we focus on high initial heat to rapidly crisp the exterior before the interior moisture has a chance to steam the tortilla from the inside out.
Setting the Stage: What You Need Before You Start Rolling
Before we dive into the sizzling action, preparation is key. For this Easy Chicken Taquitos endeavor, you'll need about 30 minutes of dedicated prep time. The first step involves cooking and shredding your chicken until it is fine and ready to accept seasoning.
While the chicken cooks, you can gather the remaining components, ensuring that when the filling is ready, you can move immediately into the assembly phase to maximize efficiency.
Assembling Your Components for Flavourful Chicken Taquitos
The process of bringing these Chicken Taquitos with Cream Cheese together requires attention to three main areas: the seasoned filling, the tortilla preparation, and the necessary equipment to manage the heat and shape.
Having everything staged before you begin rolling makes the difference between a relaxing culinary experience and a rushed, messy one.
Stocking the Pantry: The Filling & Seasoning Arsenal
For the base filling, you will require about one pound of cooked, shredded chicken. We bring this to life by sautéing half a diced yellow onion and two minced garlic cloves in a tablespoon of oil until fragrant.
The seasoning blend is vital: combine standard taco seasoning elements chili powder, cumin, oregano, and a whisper of cayenne and stir this into the chicken along with half a cup of low-sodium chicken broth. Let this simmer until the broth is nearly absorbed.
Once removed from the heat, vigorously stir in two ounces of softened full fat cream cheese until it melts entirely into the mixture. This binder prevents the filling from escaping during cooking. A final stir-in of fresh cilantro elevates the brightness.
Tortilla Taming: Selecting and Softening Corn Wrappers
Authentic taquitos rely on corn tortillas, though some home cooks successfully adapt using Flour Tortilla Taquitos . For the best structural integrity and flavour, stick to 6 inch corn tortillas. The most critical technique here is tempering. Cold corn tortillas snap when rolled.
To make them pliable enough for rolling, stack them and wrap them in a damp paper towel, then microwave for 30 to 45 seconds, or briefly warm them one-by-one on a dry, hot griddle. They must be flexible, not brittle.
The Essential Gear: Cookware and Measuring Mastery
You’ll need a large skillet or pot for shallow frying, ideally one deep enough to cover the taquitos with oil without filling it to the brim. If you choose the healthier route, a lined baking sheet or an air fryer basket will suffice.
Tongs are essential for safely turning the taquitos in hot oil, and a wire rack set over paper towels is non-negotiable for draining the cooked product properly, ensuring that desirable crispness remains intact.
Phase One: Crafting the Savoury Chicken Filling
Building Depth: Spicing and Shredding the Chicken Base
Start by ensuring your chicken is cooked through and finely shredded. You can achieve this by poaching or baking the chicken breasts or thighs first. Once shredded, the real flavour development begins.
Sauté your finely diced onion until soft, about five minutes, then introduce the minced garlic for its final minute of cooking until aromatic. Add the shredded chicken, the robust spice blend, and the broth. Allow this mixture to simmer gently until the liquid has evaporated almost completely.
This concentration of flavour is crucial. Finally, remove the pan from the heat and immediately beat in the softened cream cheese until the filling is unified and creamy. Season aggressively with salt and pepper to taste before letting it cool slightly; you don't want to work with piping hot filling when rolling.
Related Recipes Worth Trying
- Authentic Homemade Teriyaki Sauce Recipe for Chicken Salmon — Ditch the jar Learn how to make the best Homemade Teriyaki Sauceits rich glossy and ready in under 20 minutes Perfect for your next batch of grilled salmon
- Crispy Honey Balsamic Brussels Sprouts Recipe Perfect Glaze — Ditch boiled sprouts Learn how to roast Brussels sprouts until crispy then toss them in a sticky sweet Honey Balsamic Glaze Brussels Sprouts coating Easy...
- The Ultimate Crispy ParmesanCrusted Roasted Brussels Sprouts — Learn how to make crispy roasted Brussels sprouts with a salty golden Parmesan crust This easy recipe guarantees perfect texture every time
The Art of Rolling: Securing Your Taquito Shape
This step demands a gentle touch and speed, especially when working with corn tortillas. Lay out one warmed tortilla flat. Place approximately two tablespoons of the cooled chicken filling near the edge closest to you.
To ensure these Crispy Chicken Taquitos don't unravel mid-fry, consider brushing the exposed edge of the tortilla with a thin layer of lightly whisked egg white this acts as a natural, high adhesion glue. Begin rolling tightly from the filled edge, creating a neat cylinder.
If you find the roll slightly loose, secure it temporarily with a small wooden toothpick inserted lengthwise down the seam; remember to extract these before serving!
Achieving Maximum Crisp: Frying or Baking Methods Compared
The choice of cooking method dictates the final texture and fat content of your Chicken Crispitos Recipe . Both methods yield excellent results, but through different means.
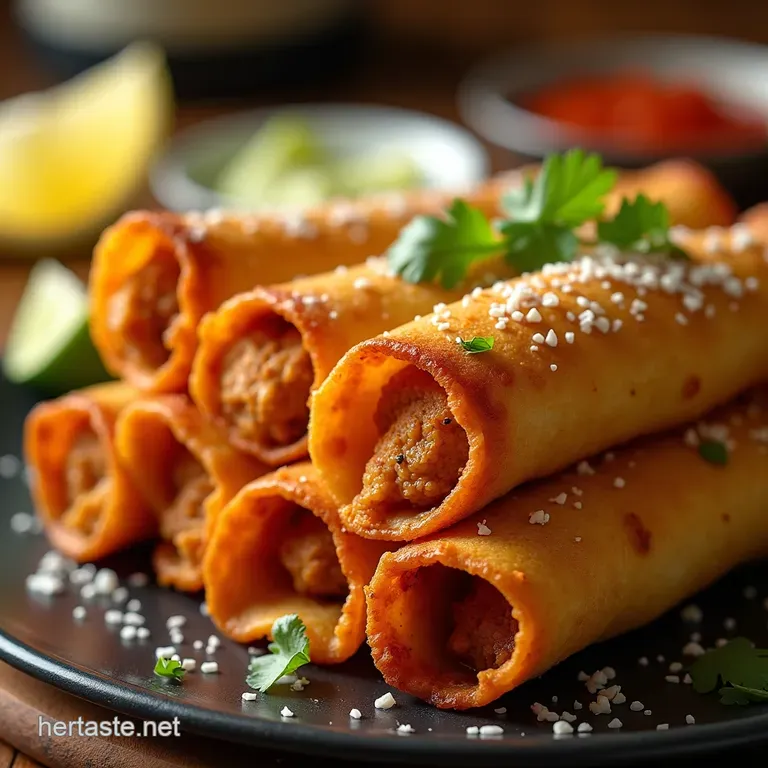
Shallow Fry Secrets: Achieving Golden Brown Perfection
For the classic, intensely crisp experience, shallow frying is the way to go. Heat 1 to 2 inches of neutral vegetable or canola oil in a deep skillet to a steady 350° F ( 175° C).
Carefully place the rolled taquitos into the oil, seam side down first to seal the roll securely. Fry them in small batches so as not to overcrowd the pan and drop the oil temperature. Cook for about two to three minutes per side, turning gently with tongs, until they achieve a uniform, deep golden brown colour.
Immediately transfer them to a wire rack layered with paper towels to drain the excess oil. This step is vital for maintaining the crunch.
The Healthier Route: Baking and Air Fryer Instructions
If you prefer to minimize oil, the oven or air fryer are superb alternatives for making Baked Chicken Taquitos Recipe approximations. Arrange the rolled taquitos on a parchment lined baking sheet, ensuring they aren’t touching.
Spray the tops generously with cooking spray this mimics the fat needed for browning. Bake them in a preheated 400° F ( 200° C) oven for 15 to 20 minutes, flipping halfway through, until they are crisp and golden.
An air fryer offers even faster results; typically 8 to 10 minutes at 380° F ( 195° C) yields superb crispness with minimal added fat.
Perfect Pairing: Recommended Dips and Toppings
A perfect taquito demands the perfect counterpoint. The richness of the filling and the crispness of the shell beg for something bright, acidic, or cooling. While simple sour cream is always welcome, elevating your dipping experience takes these snacks to the next level.
Think beyond the standard salsa; a vibrant, tangy avocado cream sauce provides an unparalleled contrast. Freshly shredded iceberg lettuce, diced tomatoes, and crumbled cotija cheese also offer fantastic textural variety when sprinkled on top.
Troubleshooting and Storage Longevity
Handling Leftovers: Reheating to Restore Crispness
If you have any Crispy Chicken Taquitos remaining (a rare occurrence, I assure you), storage is simple, but reheating requires finesse. Allow fully cooled taquitos to sit in the refrigerator, uncovered, for about 30 minutes before reheating to allow any residual surface moisture to evaporate.
To restore that just fried texture, place them back into a 375° F ( 190° C) oven or air fryer for 5 to 7 minutes. Microwaving will inevitably lead to a soggy result, so avoid that route if crispness is your goal.
Creative Twists: Elevating Your Taquito Game
Once you have mastered the foundational Homemade Chicken Taquitos technique, the flavour possibilities are endless. Don't feel confined to the standard chicken profile; these structures work wonderfully for an array of fillings.
The Must Make Condiment: Zesty Avocado Cream Sauce Recipe
To accompany your rolls, blend together one large, ripe avocado, half a cup of Greek yogurt (or sour cream), the juice of one whole lime, a tablespoon of fresh cilantro, a splash of water to thin, and a pinch of salt and garlic powder. Blend until perfectly smooth and vibrant green.
This sauce adds necessary fat, acid, and freshness that cuts through the fried exterior beautifully.
From Chicken to Carnitas: Flavor Customization Ideas
While this recipe focuses on poultry, feel free to swap out the protein entirely. Slow cooked shredded pork shoulder made into carnitas works phenomenally well inside these rolled tortillas.
Alternatively, for a vegetarian option, use seasoned black beans mixed with Monterey Jack cheese instead of the chicken and cream cheese binder. The cooking process remains exactly the same, yielding incredible Flour Tortilla Taquitos or corn based versions, depending on your wrapper choice.

Recipe FAQs
How do I stop my Crispy Chicken Taquitos from unrolling or splitting open during cooking?
This is a common sticking point, but we have two tricks up our sleeve! Firstly, ensure your corn tortillas are properly warmed and pliable a quick microwave session wrapped in a damp cloth usually does the job.
Secondly, make sure your chicken filling isn't too loose; the cream cheese binder in this recipe helps hold everything snugly together.
I'm not keen on deep frying; can I still get them crispy by baking or air frying?
Absolutely, you can! While frying gives that classic, deep fried crunch, baking or air frying yields a fantastic result with far less oil. If baking, make sure to spray the taquitos generously with cooking oil before popping them into a hot oven (around 400°F/200°C) and flip them halfway through for even browning.
Can I make the filling for these taquitos ahead of time?
Yes, the chicken filling is an excellent candidate for meal prepping! You can prepare the entire filling mixture up to two days in advance and store it in an airtight container in the fridge. Just remember to let it cool completely before rolling, and you might need to reheat it slightly just to make rolling easier.
What’s the best way to store leftover Crispy Chicken Taquitos, and can I reheat them?
If you have leftovers, allow them to cool completely before storing them in a single layer (or separated by parchment paper) in an airtight container in the fridge for up to three days. To reheat and retain crispness, the oven or air fryer is your best bet; skip the microwave, or you'll end up with soggy snacks!
My taquitos often taste bland; how can I boost the flavour in the chicken filling?
Flavour is key, just like a proper Sunday roast! Make sure you are sautéing your aromatics (onion and garlic) well before adding the chicken and spices, as this builds a depth of flavour.
Also, don't skimp on seasoning taste the mixture before rolling and add an extra pinch of salt or a dash of hot sauce if needed; they should be well seasoned!
Are these Crispy Chicken Taquitos suitable for gluten-free diets, and are there any cheese substitutions?
Since this recipe uses corn tortillas, they are naturally gluten-free, which is brilliant news! Regarding cheese, if you need a dairy-free alternative for the cream cheese binder, you can often substitute it with a firm, plain vegan cream cheese spread, although the texture might be slightly looser.
Proper Crispy Chicken Taquitos

Ingredients:
Instructions:
Nutrition Facts:
| Calories | 515 kcal |
|---|---|
| Protein | 5.0 g |
| Fat | 19.4 g |
| Carbs | 6.7 g |
| Fiber | 3.1 g |
| Sodium | 128 mg |
