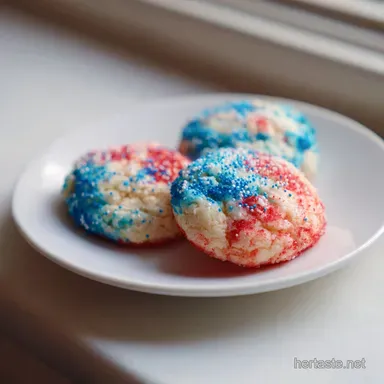
Patriotic Bomb Pop Cookies
- Time: Active 30 mins, Passive 72 mins, Total 102 mins
- Flavor/Texture Hook: A triple threat of cherry, lemon, and blue raspberry with a buttery, velvety snap.
- Perfect for: 4th of July block parties, summer birthdays, or anyone craving a throwback treat.
- How to Bake Perfect Bomb Pop Cookies
- Recipe Timing and Yield Specs
- Essential Ingredients and Smart Swaps
- Tools for Efficient Cookie Baking
- Step by Step Baking Guide
- Solving Common Baking Mistakes
- Flavor Variations and Dietary Changes
- Storing and Freezing Your Treats
- Best Ways to Serve Cookies
- Recipe FAQs
- 📝 Recipe Card
How to Bake Perfect Bomb Pop Cookies
Imagine the scene. It's a sweltering July afternoon, the kind where the air feels like a warm blanket and the sound of a distant ice cream truck siren is the most beautiful music in the world.
You’re holding that classic red, white, and blue rocket popsicle, racing against the sun to finish it before it drips down your arm. That specific scent of artificial cherry and zingy lemon is etched into our collective summer memory.
That’s exactly what we’re capturing here, but in a form that won’t melt all over your favorite shirt.
These Bomb Pop Cookies aren't just colored sugar cookies. I’ve spent way too many afternoons testing how to get that signature "rocket" flavor profile without the dough turning into a muddy mess. The secret isn't just in the colors, it's in the extract trio.
We’re talking cherry, lemon, and that elusive blue raspberry that makes your tongue turn neon. It’s a sensory experience that hits you the moment you open the oven door.
We are going for a texture that has a slight "shatter" on the edges but remains buttery and soft in the center. Most people think you need fancy molds or expensive equipment to get that iconic shape, but I’m going to show you how to do it with just a bench scraper and a little patience.
We're skipping the fussy decorating and building the design right into the dough itself. It's efficient, it’s reliable, and honestly, it’s a lot more fun than piping individual lines of icing.
Recipe Timing and Yield Specs
When you're planning a party or a bake sale, you need to know exactly how much time you're committing. I’ve timed this down to the minute because nothing is worse than realizing your dough needs another hour in the fridge when your guests are already pulling into the driveway.
This recipe makes exactly 24 cookies, which is the sweet spot for a standard large baking sheet.
Chilling Stability: The dough requires a 60 minutes rest in the fridge. This isn't a suggestion, it's the structural foundation of the cookie. If you skip this, your red layer will start hugging your blue layer, and you’ll end up with purple blobs instead of crisp patriotic stripes.
We want those layers to stay separate and proud.
| Thickness | Internal Temp | Rest Time | Visual Cue |
|---|---|---|---|
| 1 inch stack | 4°C (Fridge) | 60 mins | Dough is firm to the touch |
| 1/2 inch slice | 175°C (Oven) | 12 mins | Edges are set, not browned |
| Final Cookie | Room Temp | 15 mins | Stick is firmly anchored |
The temperature of your kitchen matters more than you think. If you’re baking these on a humid 90 degree day, that butter is going to want to quit on you. Keep the dough in the fridge right up until the moment you slice it.
I usually keep half the log in the fridge while I’m working with the first half, just to ensure every single "rocket" stays perfectly rectangular.
Essential Ingredients and Smart Swaps
The hero of this entire operation is the Blue Raspberry extract. While cherry and lemon are easy to find, the blue raspberry is what provides that authentic "ice cream truck" soul. Without it, you just have a blue cookie that tastes like vanilla, and your brain will feel a little betrayed.
If you absolutely can't find it, I’ve included some swaps below, but trust me, the raspberry is worth the hunt.
- Unsalted Butter (1 cup): Softened to room temp. Why this? Allows for air pocket creation during creaming for a velvety crumb.
- Granulated Sugar (1.5 cups): Provides the structure and that essential crisp edge.
- All Purpose Flour (3 cups): The backbone. Why this? Gives enough protein for the popsicle stick to anchor without the cookie crumbling.
- Cherry/Lemon/Blue Raspberry Extracts (1 tsp each): The flavor soul.
- Lemon Zest (1 tsp): Cuts through the sweetness.
- Gel Food Coloring (Red/Blue): Essential for vibrant color without adding extra liquid.
The Fat Suspension: When we cream the butter and sugar, we are creating a microscopic network of air bubbles. When the oven heat hits those bubbles, they expand, but the flour and egg proteins set around them to lock in that light texture.
If the butter is too melted, the bubbles collapse, and you get a greasy, flat pancake instead of a proud rocket pop.
| Original Ingredient | Substitute | Why It Works |
|---|---|---|
| Blue Raspberry Extract | Raspberry + Lime Juice | Mimics the tart berry profile but may slightly soften dough. |
| Unsalted Butter | Salted Butter | Works fine. Note: Omit the 0.5 tsp sea salt from the recipe. |
| Granulated Sugar | Caster Sugar | Same sweetness, but dissolves faster for a tighter crumb. |
When it comes to the extracts, I’ve found that using high-quality gel colors is non negotiable. Liquid colors from the grocery store are mostly water and vinegar. If you add enough to get a deep red, you’ve basically changed the hydration level of your dough, leading to a sticky mess that won't hold its shape.
Gel gives you that "neon" pop without the structural integrity issues.
Tools for Efficient Cookie Baking
You don't need a kitchen full of gadgets to nail these Bomb Pop Cookies. My philosophy is all about using a few reliable tools that actually make the job faster. A bench scraper is the MVP here.
It allows you to cut perfectly straight lines through the chilled dough, which is much easier than using a knife that might stick or drag.
If you don't have a stand mixer, a hand mixer works perfectly fine, but make sure you don't overwork the flour once it's added. We want to avoid developing gluten, which would turn our melt in-the mouth treat into a bready, tough biscuit. I also highly recommend heavy duty baking sheets.
Thin sheets warp in the oven and cause uneven heat distribution, leading to cookies that are burnt on one side and raw on the other.
| Component | Science Role | Pro Secret |
|---|---|---|
| Baking Powder | Leavening | Provides a vertical lift that keeps the "rocket" thick. |
| Large Egg | Emulsifier | Binds the fats and liquids so the colors don't separate. |
| Sea Salt | Flavor Enhancer | Sharpens the fruit extracts so they don't taste "flat." |
For another fun project that uses similar shaping techniques, you might want to look at my Vanilla Tombstone Cookies. While those are for a different season, the logic of keeping a firm dough for crisp shapes is exactly the same. Both recipes rely on that 60 minute chill time to ensure the details don't melt away in the heat.
step-by-step Baking Guide

Cream the 1 cup of softened unsalted butter and 1.5 cups of granulated sugar together for about 3 minutes until pale and fluffy. Beat in the large egg at room temperature until fully emulsified. Note: Using a room temp egg prevents the butter from curdling.
Sift together the 3 cups of all purpose flour, 1 tsp baking powder, and 0.5 tsp sea salt. This ensures no clumps of leavening ruin the texture.
Gradually add the dry ingredients to the butter mixture on low speed. Stop the mixer as soon as a soft dough forms; overmixing leads to tough cookies.
Divide the dough into three equal portions. Into the first portion, knead the 1 tsp cherry extract and red gel food coloring. Into the second, knead the 1 tsp lemon extract and 1 tsp lemon zest. Into the third, knead the 1 tsp blue raspberry extract and blue gel food coloring.
Roll each colored dough into a uniform rectangular block, approximately 1 inch thick. Stack them with red on top, white in the middle, and blue on the bottom. Note: Use a piece of parchment paper to help press them together without mixing the colors.
Wrap the stacked dough tightly in plastic wrap. Chill in the refrigerator for at least 60 minutes. This is vital to prevent color bleeding.
Preheat your oven to 350°F (175°C). Line two heavy duty baking sheets with parchment paper.
Slice the chilled dough stack into individual 1/2 inch thick "rocket" shapes using a bench scraper. Press a food grade popsicle stick about halfway into the bottom blue layer of each cookie.
Place cookies 2 inches apart on the sheets. Bake for 12 minutes until the edges are just set but not browned.
Cool completely on the baking sheet. This allows the residual heat to "set" the stick into the dough so it doesn't fall out when picked up.
Solving Common Baking Mistakes
The most common heartbreak with these cookies is the "color bleed." This happens when the dough is too warm, and the butter begins to melt before the flour structure has set. If your red is leaking into your white, it's almost always because the dough wasn't chilled long enough or the oven wasn't fully preheated.
Another issue is the "stick slip." If you try to pick these up while they are still warm, the stick will slide right out like it's on a slip and slide. The sugar and butter are still liquid when they first come out of the oven. As they cool, the sugar recrystallizes around the stick, acting like a natural glue.
Patience is your best friend here.
Why Your Cookies Spread Too Much
If your rockets are looking more like puddles, your butter was likely too soft when you started creaming. You want "room temperature" butter, which should be cool to the touch and hold an indentation from your finger, but not be greasy or shiny.
If the butter is too warm, it can't hold the air bubbles we need for structure.
| Problem | Root Cause | Solution |
|---|---|---|
| Bleeding Colors | Dough too warm | Chill for a full 60 minutes before slicing. |
| Dry/Crumbly Dough | Too much flour | Weigh your flour or use the spoon and level method. |
| Stick Falls Out | Picked up too soon | Let cool completely on the pan for 15 mins. |
Common Mistakes Checklist
- ✓ Never use liquid food coloring; it ruins the dough consistency.
- ✓ Ensure the egg is room temperature to prevent the butter from seizing.
- ✓ Sift the baking powder to avoid bitter "hot spots" in the cookies.
- ✓ Don't over knead the colors; work quickly to keep the dough cool.
- ✓ Use a bench scraper for the cleanest, most professional cuts.
- ✓ Allow the cookies to cool on the pan to anchor the popsicle sticks.
If you're finding the dough a bit finicky, check out my tips for Crisp Sugar Cookies. The base logic is very similar, and mastering a basic crisp cookie will make these multi layered rockets feel like a breeze.
Flavor Variations and Dietary Changes
While the classic cherry lemon raspberry is the gold standard for Bomb Pop Cookies, you don't have to stop there. I’ve seen people do a "Tropical Pop" version using coconut, pineapple, and mango extracts. The method remains identical; you’re just swapping the sensory profile.
Just make sure your gel colors match the new flavors so your brain doesn't get confused.
For a gluten-free version, a 1 to-1 baking flour substitute (like King Arthur or Bob's Red Mill) works surprisingly well here. Because this is a shortbread style cookie that doesn't rely heavily on a massive gluten network for rise, the texture remains very close to the original.
Just be aware that gluten-free dough can be a bit more "short" or crumbly, so you might need to press the popsicle sticks in a bit more gently.
Scaling Guidelines: To Half (12 cookies): Halve all ingredients. Use the yolk only of one large egg to maintain the fat content. To Double (48 cookies): Double everything, but keep the salt and baking powder at 1.5x to avoid a chemical aftertaste.
Work in batches to keep the dough cold.
If you're looking for a different kind of nostalgia, my Strawberry Pop Tarts recipe uses a similar fruit forward flavor profile but with a flaky pastry crust. It’s another great way to use those fruit extracts if you have leftovers.
Storing and Freezing Your Treats
These cookies are surprisingly hardy. Because of the high sugar and fat content, they don't stale as quickly as a chocolate chip cookie might. You can keep them in an airtight container at room temperature for up to 5 days.
Just make sure you don't stack them too high, or the popsicle sticks might put pressure on the cookies below and cause them to snap.
Zero Waste Tip: Don't throw away the "end pieces" of your dough log! They won't be perfect rectangles, but you can crumble them together to create "Firework Marbled Cookies." Just gently swirl the red, white, and blue scraps together and bake them as rounds.
They taste exactly the same and look like a colorful explosion.
- Fridge Storage: 5 days in an airtight container.
- Freezer Storage: 3 months. Wrap individual cookies in parchment paper so they don't stick together.
- Pro Tip: You can freeze the raw, sliced dough (with sticks inserted) for up to 2 months. Bake them straight from the freezer, adding 2 minutes to the cook time.
Best Ways to Serve Cookies
Presentation is half the fun with these. Since they're on sticks, they are the ultimate "walking around" food for a backyard BBQ. I love serving them standing up in a glass jar filled with white sugar or blue sanding sugar. It looks like they’re launching off into space, and it keeps them from getting smudged.
If you want to go the extra mile, serve them alongside a small bowl of whipped cream or even a scoop of vanilla bean ice cream. The acidity from the lemon and cherry layers cuts through the richness of the cream beautifully. Just remember, these are conversation starters.
People will inevitably ask how you got the flavors so "accurate," and you can just tell them it's all in the extract timing.
Don't feel limited to just the 4th of July, either. These are a massive hit at Olympic viewing parties or any summer gathering where you want a bit of "wow" factor without the "how to" stress.
Just keep them out of direct sunlight; while they won't melt like a real popsicle, the butter can soften, making the sticks a little less stable if they sit in the sun for hours. Enjoy the crunch, the nostalgia, and that triple flavor punch!

Recipe FAQs
How to ensure the popsicle sticks stay securely attached to the cookies?
Insert the sticks into the blue dough layer before baking, then let the cookies cool completely on the baking sheet. The residual heat and setting fat anchor the stick firmly, preventing them from wobbling or falling out.
Can I use liquid food coloring instead of gel for the vibrant colors?
No, liquid food coloring will ruin the dough consistency. It adds too much water, which causes the dough to become sticky and compromises the structure needed to maintain those sharp, clean stripes.
How to prevent the red, white, and blue colors from bleeding into each other?
Chill the stacked dough in the refrigerator for at least 60 minutes before slicing. Keeping the fat cold ensures the distinct layers remain crisp and separated, similar to how we manage fat ratios for perfect structure in our classic vanilla layer cake.
How to tell when the cookies are finished baking?
Look for edges that are just set but not browned. Because these are meant to be bright and vibrant, you want to pull them out of the 350°F oven at exactly 12 minutes to maintain their color and prevent the sugar from caramelizing into a golden crust.
Is it necessary to sift the flour and baking powder together?
Yes, sifting is essential to avoid bitter baking powder "hot spots." It also aerates the flour, which helps achieve that soft, uniform texture required to stack the dough blocks properly.
How to store these cookies for the best freshness?
Keep them in an airtight container at room temperature for up to 5 days. Avoid stacking them too high, as the weight of the popsicle sticks can cause the lower cookies to crack under the pressure.
Is it true I can bake these at a higher temperature to save time?
No, this is a common misconception. Baking at higher temperatures will cause the edges to brown and ruin the vibrant red, white, and blue visual aesthetic, so stick strictly to 350°F.
Patriotic Bomb Pop Cookies
Ingredients:
Instructions:
Nutrition Facts:
| Calories | 176 calories |
|---|---|
| Protein | 1.9 g |
| Fat | 8 g |
| Carbs | 24.4 g |
| Fiber | 0.4 g |
| Sugar | 12.5 g |
| Sodium | 78 mg |
