Pan Fried Tilapia with Lemon Butter Sauce: Restaurant-Quality in 20 Minutes

- The Ultimate 20 Minute Meal: Crispy pan-fried Tilapia with Lemon Butter Sauce
- The Science of Perfect Texture: Achieving a Flawless Tilapia Crust
- Essential Ingredients for Pan Fried Tilapia with Lemon Butter Sauce
- Ingredient Prep: Getting Tilapia Ready to Fry
- How to Cook Crispy Tilapia with Lemon Butter Sauce: A Step-by-Step Guide
- Troubleshooting Tilapia: Chef’s Tips for a Flawless Result
- Storing and Reheating pan-fried Tilapia (Does it Keep Its Crispness?)
- Perfect Side Dishes to Serve with Lemon Butter Tilapia
- Recipe FAQs
- 📝 Recipe Card
The Ultimate 20 Minute Meal: Crispy pan-fried Tilapia with Lemon Butter Sauce
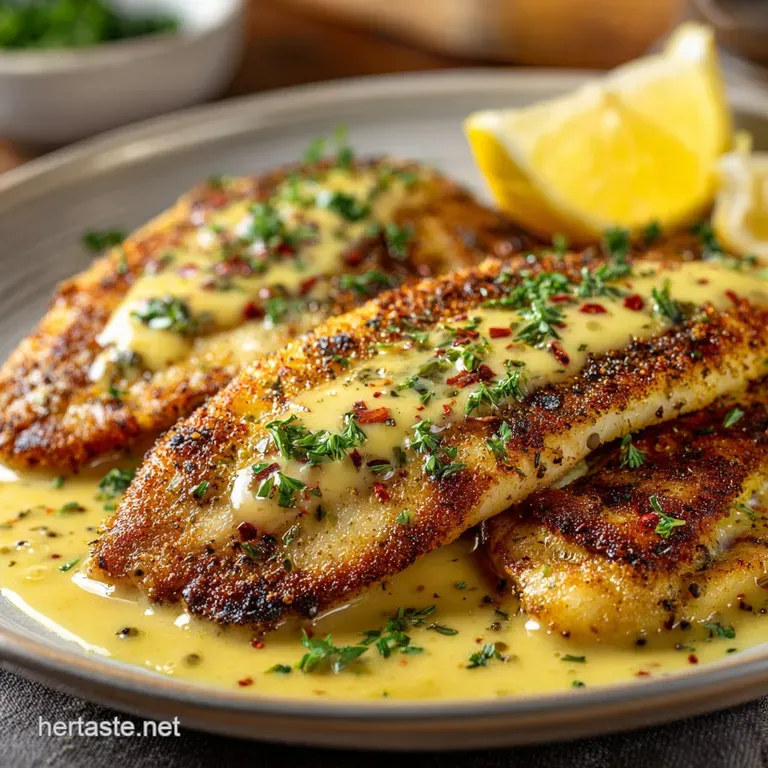
Close your eyes and imagine the sound: that beautiful, sharp sizzle of delicate fish hitting hot oil. When I tell you this pan-fried tilapia recipe is an absolute sensory triumph, I mean it; the golden brown crust gives way to perfectly tender flakes, all drenched in the brightest, zesty lemon butter sauce imaginable.
It smells so fresh and rich, you’ll swear you’re sitting seaside.
This recipe is my personal weeknight superhero, honestly. It’s incredibly fast, requires zero fancy equipment, and uses super budget friendly tilapia, which makes it perfect for when the grocery budget is tight.
You can have this entire restaurant quality dish plated and ready faster than you can order takeout, and the satisfaction of cooking something this elegant in 20 minutes is unmatched.
So grab your favorite skillet and let’s crack on! We are going to master the technique for truly crispy pan-seared tilapia today, ensuring that buttery, acidic sauce is perfectly emulsified and never, ever breaks.
The Science of Perfect Texture: Achieving a Flawless Tilapia Crust
Why Tilapia is the Ideal Weeknight Fish
Tilapia is fantastic because it’s a lean, mild white fish, making it incredibly versatile. It cooks exceptionally fast since the fillets are usually quite thin. This quick cooking nature is exactly why it’s ideal for over high heat techniques like pan-frying or quick sautéing, giving you that beautiful exterior without drying out the middle.
Beyond Basic: What Makes This Lemon Butter Sauce Zesty and Rich?
Anyone can melt butter and squeeze a lemon, but we are creating a proper pan seared tilapia with lemon butter sauce that clings to the fish like velvet. We build depth by first sautéing shallots in the flavorful residue left behind by the fish.
This simple step adds a crucial layer of savoury complexity beneath the bright acidity.
Restaurant Quality Made Effortless
You don't need years of training to achieve professional results at home. This preparation is a classic French technique, simplified for the home cook. We use high heat initially to develop that gorgeous crust, and then we leverage the hot pan to create the sauce immediately afterward.
It’s efficient, delicious, and minimizes cleanup (win-win!).
The Magic of the Flour Dredge (And Why It’s Crucial)
If you skip the dredge, your fish will still taste fine, but it won’t be crispy; it will just be sautéed. A light dusting of seasoned flour and I mean lightly —acts as insulation, protecting the delicate fish flesh from the intense heat of the oil.
This barrier allows moisture to escape slowly, resulting in a beautifully crispy pan-fried tilapia crust.
Emulsification 101: Creating a Stable Lemon Butter Sauce
This is the secret to a glossy, unctuous sauce instead of oily liquid. We use cold, cubed butter and whisk it vigorously into the reduced acidic liquid off the heat . The cold fat particles trap the liquid, creating a velvety emulsion that holds together beautifully.
If your pan is too hot, the sauce will break.
High Heat, Quick Cook: Preventing Dryness in Delicate Fish
Tilapia is lean and prone to drying out, so we need speed. Cooking it quickly over medium high heat ensures the exterior crisps immediately while the interior barely has time to reach maximum internal temperature before it's pulled from the pan. This technique keeps the flakes moist and tender.
Essential Ingredients for pan-fried Tilapia with Lemon Butter Sauce
The beauty of this recipe is how few ingredients you need for maximum impact. Quality matters here, especially when it comes to the acid. You absolutely need fresh lemon juice; bottled stuff just doesn't cut it.
Ingredient Prep: Getting Tilapia Ready to Fry
| Ingredient | Why We Need It | Substitution Tip |
|---|---|---|
| Tilapia Fillets | Mild, fast cooking protein. | Use Cod, Flounder, or Sole. |
| All-Purpose Flour | Creates the crisp crust. | Use Cornstarch or Rice Flour (gluten-free). |
| Unsalted Butter | Essential for flavour and emulsification. | Clarified butter (ghee) for frying, or half butter/half oil. |
| Fresh Lemon Juice | Provides essential acid and brightness. | Lime juice (different flavour profile) or white wine vinegar (use less). |
| Dry White Wine | Used to deglaze and concentrate flavor. | Chicken or vegetable stock, or water, if avoiding alcohol. |
Ingredient Prep: Getting Tilapia Ready to Fry
Selecting the Best Tilapia Fillets (Thickness and Quality)
Try to find fillets that are uniformly thin, around 1/2 to 3/4 inch thick. Consistency is key for even cooking. Thicker fillets will need longer in the pan and you risk burning the crust before the center is done.
The Role of Acid and Fat: Choosing Your Butter and Fresh Lemon Juice
Unsalted butter allows you to control the overall salinity of the dish, which is important since capers are also involved. Always use fresh lemons ; the oils in the zest are vital, and the flavor of fresh juice is infinitely cleaner than anything from a bottle.
It really does make a huge difference in the final pan seared tilapia with lemon garlic butter sauce.
Simple Swaps: Substituting Flour or Clarified Butter
If you're gluten sensitive, a cornstarch dredge works wonderfully and often results in an even lighter, crunchier crust. If you use clarified butter (ghee) for the frying stage, it handles heat better and browns less quickly than whole butter.
I personally like the flavor of adding a tablespoon of whole butter to the oil near the end of the initial fry, right before I put the fish in.
How to Properly Dry and Season Your Fish
This is the most critical step, so listen up. You must, must, MUST use paper towels to pat the tilapia absolutely bone dry. Any residual moisture will steam when it hits the hot oil, preventing that beautiful golden crust from forming.
Once dry, season liberally with salt and pepper right before dredging in the flour mixture.
How to Cook Crispy Tilapia with Lemon Butter Sauce: A step-by-step Guide
Step 1: Preparing the Tilapia for Maximum Crispness
After drying and seasoning, dredge the fillets in the flour mixture. Shake off all excess flour! You should have the thinnest veil of flour possible. A heavy coating creates a pasty texture, which we definitely do not want.
Step 2: Pan-Frying the Fish to a Golden, Crisp Finish
Heat your oil in a heavy bottomed skillet over medium high heat until shimmering. Add the first batch of fillets and let them cook undisturbed for 3 to 4 minutes. Do not touch them.
Once you see the edges turn opaque and the crust is deep golden, use a sturdy fish spatula to carefully flip them. Reduce the heat slightly to medium and cook for another 3- 4 minutes until the fish flakes easily.
Step 3: Mastering the Quick Lemon Butter Pan Sauce
Once the fish is resting, reduce the heat to medium low. Add the minced shallot to the pan drippings and cook until softened, scraping up all those beautiful brown bits (that’s the flavour!). Deglaze the pan with the wine and lemon juice, reducing the liquid by half. This concentrates the tartness.
Now, remove the pan from the heat and start whisking in the cold butter cubes, one at a time, until the sauce is thick and glossy.
Chef’s Note: My first attempt at a sauce like this resulted in oily, sad lemon water because I left the heat on too high. Always remove the pan entirely before you start adding the cold butter! It's the secret to achieving that perfect glossy sauce for your sauteed tilapia.
Step 4: Garnishing and Final Plating Presentation
Stir in your capers and chopped fresh parsley right at the end; the parsley adds a wonderful fresh bite that cuts through the richness of the butter. Spoon the sauce generously over the crispy pan-fried tilapia fillets. Serve immediately while everything is piping hot.
Troubleshooting Tilapia: Chef’s Tips for a Flawless Result
Avoiding the Breakup: Tips for Flipping Delicate Fillets
Tilapia is tender, so you need the right tool: a thin, flexible fish spatula. Crucially, don’t try to flip the fish before the crust has fully formed, otherwise it will tear. Once it releases easily from the pan bottom (it shouldn't be sticking), it’s ready to flip.
Why Is My Lemon Butter Sauce Breaking or Separating?
It's almost always heat. If the sauce gets too hot after the butter is incorporated, the emulsion fails and the butter fat separates into a greasy pool. If this happens, try adding a tablespoon of ice-cold water while whisking furiously to bring the temperature down and occasionally shock the emulsion back together.
The Internal Temperature Test: Knowing When Your Tilapia Is Cooked
You’ll know the fish is done when it is opaque throughout and flakes easily with a fork. If you want to be super precise, use an instant read thermometer. The recommended internal temperature for fish is 145°F (63°C). Since tilapia is thin, it will reach this quickly.
Storing and Reheating pan-fried Tilapia (Does it Keep Its Crispness?)
Best Practices for Refrigerating Cooked Tilapia Fillets
While fresh is best, cooked tilapia fillets store well in an airtight container in the fridge for up to 3 days. Store the lemon butter sauce separately. This prevents the sauce from immediately making the crust soggy.
Reheating pan-fried Fish Without Losing the Crisp Texture
Microwaving is a crime against crispness, so just don’t do it. The best method is popping the fish back into a preheated 350°F (175°C) oven or a toaster oven for about 8 to 10 minutes. This dries out the crust again, reactivating the crispiness.
Warm the sauce gently on the stovetop.
Can I Freeze Cooked Tilapia with Lemon Sauce?
I really don’t recommend freezing cooked fish, especially pan-fried fish. The texture suffers dramatically, becoming dry and mushy upon thawing. If you must, freeze the fillets separately from the sauce for up to one month, but honestly, it takes 20 minutes to make, so just cook it fresh!
Perfect Side Dishes to Serve with Lemon Butter Tilapia
Since the main dish is so rich and bright, pair it with something simple and green or something starchy to soak up all that gorgeous sauce. I love serving this sauteed tilapia alongside simple garlic roasted asparagus.
If I’m feeling like adding a textural component, I might make a bright, colourful salad to serve on the side. Something vibrant like my Raw Carrot Salad Recipe: Vibrant Moroccan Spice with Harissa Vinaigrette offers a great, spicy contrast. For a lighter approach, the citrus and fennel in a Winter Citrus Salad with Fennel: Vibrant Plant Based Recipe is totally divine next to the lemon butter.
If you’re hosting a dinner party and want another fish option that requires minimal work, try this technique on Baked Flounder Recipe: Easy Lemon Herb Bake with Crispy Crumb for a slightly different texture profile. Really, anything that involves a good dose of lemon works beautifully here!

Recipe FAQs
How do I ensure my tilapia gets a crispy, golden crust instead of being soggy?
The key to crispness is dryness and heat. Pat the fillets bone dry with paper towels before seasoning, as excess moisture prevents searing. Use medium high heat and ensure the pan and fat are smoking hot before adding the fish; do not overcrowd the pan, which lowers the temperature and steams the fish.
My tilapia turned out dry and rubbery. What did I do wrong?
Tilapia is very lean and cooks quickly, so dryness usually results from overcooking. Cook the fish for only 3-4 minutes per side, depending on the thickness, and remove it from the heat just before it reaches the target internal temperature of 145°F (63°C).
The fish will continue cooking slightly (carryover cooking) even after it is plated.
Can I use a different type of fish with this recipe and sauce?
Absolutely. This preparation and the zesty lemon butter sauce work beautifully with any mild white fish fillet similar in thickness, such as cod, flounder, snapper, or halibut. You may need to adjust the cooking time slightly based on the fillet's size to ensure a crispy exterior and fully cooked interior.
My lemon butter sauce separated (broke). How can I fix or prevent this?
Separation usually occurs if the heat is too high or the butter is added too quickly. To attempt fixing a broken sauce, take it immediately off the heat and whisk in 1 teaspoon of hot water or broth rapidly until the emulsion reforms.
Prevention involves keeping the temperature low and incorporating the chilled butter cubes one at a time while vigorously whisking.
I want to make this preparation dairy-free. What is the best substitute for butter?
For pan-frying, use a neutral high smoke point oil like avocado or grapeseed oil to ensure proper crisping. For the sauce, substitute the butter with a high-quality, unsalted vegan butter stick, following the exact same low-heat emulsification technique specified in the main recipe.
Avoid using margarine, which has a higher water content.
How should I store leftover pan-fried tilapia, and how can I reheat it?
Store leftovers in an airtight container in the refrigerator for up to 3 days, separating the fish from the sauce. To reheat, avoid the microwave, as it will ruin the texture; instead, warm the fillets gently in a 350°F (175°C) oven or in a skillet until just warmed through to help restore some crispness.
pan-fried Tilapia Lemon Butter

Ingredients:
Instructions:
Nutrition Facts:
| Calories | 207 kcal |
|---|---|
| Protein | 32.0 g |
| Fat | 8.0 g |
| Carbs | 2.0 g |
