How to Cook Steak in Oven: Reverse Sear
- Time: Active 10 minutes, Passive 1 hour, Total 1 hour 10 minutes
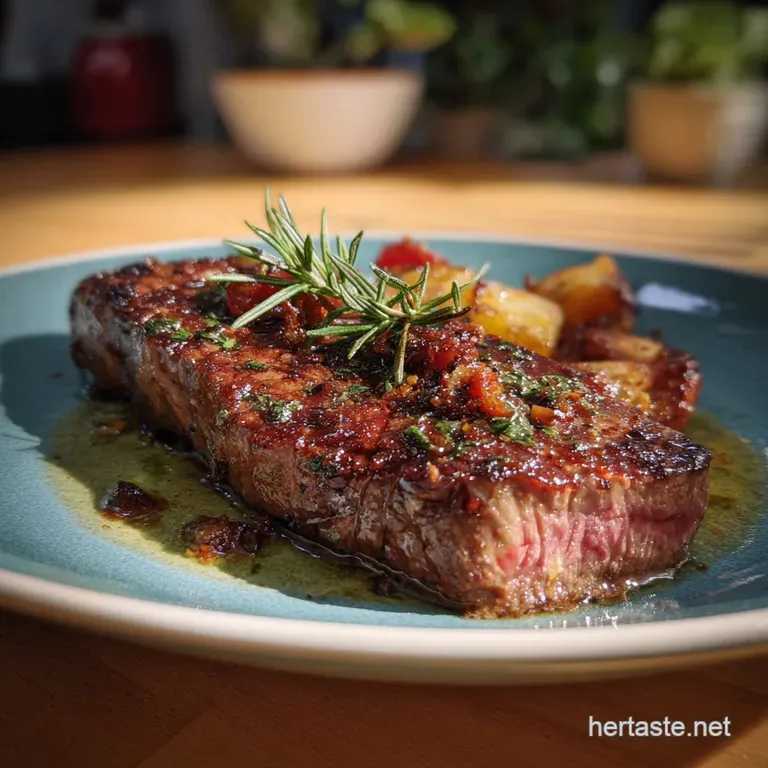
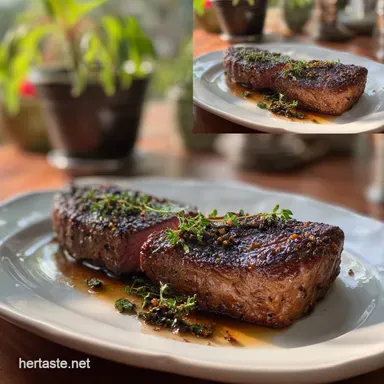
- Flavor/Texture Hook: Shatter crisp mahogany crust with a velvety, melt in-your mouth center
- Perfect for: Stress free date nights, impressing foodies, or conquering thick cut ribeyes
- Ultimate Guide On How To Cook Steak In Oven
- Why This Method Works Best
- Essential Recipe Specifications To Note
- Deep Dive Into Key Ingredients
- Necessary Kitchen Equipment For Success
- Bringing Everything Together Step By Step
- Solving Common Oven Steak Problems
- Adaptations For Different Dietary Needs
- Tips For Storage And Leftovers
- Presentation Tips For Elegant Serving
- Myths Regarding Oven Steaks
- Critically High in Sodium
- Recipe FAQs
- 📝 Recipe Card
Ultimate Guide On How To Cook Steak In Oven
I used to be terrified of expensive, thick cut steaks. I’d throw them in a screaming hot pan, the smoke alarm would go off, and I’d end up with a piece of meat that was charred black on the outside but basically raw and cold in the middle. It was heartbreaking and, frankly, a waste of a good ribeye.
Then I discovered the "low and slow" secret, and my kitchen life changed forever.
We’ve all seen those steaks at high end houses where the pink color goes perfectly from one edge to the other without that thick ring of overcooked gray meat. You don’t need a $1,000 sous vide setup or a professional broiler to get that at home.
You just need your oven, a wire rack, and a little bit of patience. This approach is about finesse rather than brute force heat, and the results are consistently better than what I’ve been served at many local steakhouses.
The magic here is in the contrast between the gentle heat of the oven and the aggressive, short lived heat of the pan at the very end. By reversing the traditional order, we solve the problem of surface moisture which is the enemy of a good crust.
Trust me, once you see that first steak come out with a crust that actually crackles when you tap it with a fork, you'll never go back to the old way.
Why This Method Works Best
The science behind this technique is honestly fascinating and explains why traditional pan frying often fails with thick cuts. When we talk about how to cook steak in oven properly, we are really talking about thermal management.
Most people sear first, which tightens the muscle fibers and pushes moisture to the surface, making it impossible to get a dry, crispy exterior without overcooking the inside.
- Enzymatic Tenderization: Cathepsins are natural enzymes in beef that break down connective tissue, and they are most active between 100°F and 120°F. The long stay in a over low heat oven maximizes this tenderizing window.
- Surface Evaporation: The dry environment of the oven acts like a dehydrator, removing moisture from the steak's surface so the Maillard reaction can happen instantly when it hits the pan later.
- Thermal Momentum: Because the meat is already warm throughout, you only need about 60 seconds of high heat to get a crust, preventing the heat from penetrating too deep and creating a gray band.
- Fat Rendering: The low heat slowly softens the intramuscular fat (marbling), turning it from waxy to buttery before the final sear.
For those who still enjoy a classic stovetop only approach for thinner cuts, you might want to look at my How to Cook recipe to see the difference in heat application.
Chef Tip
Freeze your 30g unsalted butter for about 10 minutes before the final sear. This allows the butter to melt slowly in the hot pan, giving it more time to brown and baste the meat without burning into acrid black specks.
Controlling Important Enzyme Activity
When the steak sits in that low 225°F or 250°F oven, it isn't just "cooking." It is undergoing a transformation where those cathepsin enzymes are working overtime.
In a fast sear scenario, the internal temp jumps past the 122°F mark so quickly that these enzymes are deactivated before they can do any real work. By keeping the meat in that "sweet spot" for 45 to 60 minutes, you essentially age the steak in fast forward, resulting in a texture that feels much more tender than the grade of meat might suggest.
Eliminating Excess Surface Moisture
If you take a steak straight from the fridge and put it in a pan, the heat has to first evaporate the surface water before it can start browning the proteins. This creates steam, and steam leads to gray, rubbery meat.
The oven method uses the circulating air to "pellicle" the surface, creating a dry, slightly tacky exterior that reacts almost violently with hot oil to create a shatter crisp crust.
Minimizing The Dreaded Gray Band
The gray band is simply overcooked meat. By the time the center of a cold steak reaches 130°F in a hot pan, the outer half inch has usually reached 160°F or higher.
By bringing the entire steak up to about 115°F in the oven first, the temperature differential is minimized. You only need a tiny burst of heat to finish it off, keeping that beautiful pink color consistent throughout the entire slice.
| Thickness | Internal Temp | Rest Time | Visual Cue |
|---|---|---|---|
| 1.5 inches | 115°F (Pre sear) | 5-10 mins | Surface looks matte/dry |
| 2.0 inches | 118°F (Pre sear) | 10 mins | Fat looks slightly translucent |
| 1.0 inch | 110°F (Pre sear) | 3 mins | Not recommended for this method |
A quick note on thickness: if your steak is less than an inch thick, don't use the oven. The internal temperature will rise too fast and you'll lose the benefit. Stick to the 1.5 to 2 inch range for the best results.
Essential Recipe Specifications To Note
To get this right, we have to be precise. This isn't a "wing it" kind of meal. We are using 2 thick cut steaks, roughly 12 oz each. I prefer a Ribeye because the fat rendering is spectacular, but a New York Strip works wonders too.
We use 15g avocado oil for the sear because it has a high smoke point, meaning it won't break down and taste bitter when the pan gets screaming hot.
| Ingredient | Science Role | Pro Secret |
|---|---|---|
| 10g Kosher Salt | Denatures proteins | Apply 24 hours early to season the meat to the core. |
| 15g Avocado Oil | Heat transfer medium | Wipe the pan with oil rather than pouring it in to prevent splattering. |
| 30g Unsalted Butter | Maillard enhancer | Add at the very end to create "nutty" flavor compounds via milk solids. |
One mistake I once made was using table salt. Don't do it. The grains are too small and it's easy to over salt. Stick to 10g coarse kosher salt (like Diamond Crystal) for that perfect distribution.
The 5g cracked black pepper provides a nice bite, but I actually prefer adding half of it after the sear so the pepper doesn't burn and turn bitter in the pan.
Deep Dive Into Key Ingredients
The ingredient list is short, which means quality matters. We aren't hiding behind heavy sauces here, though if you want to take things to a decadently rich level, you could certainly pair this with The Homemade Steak recipe for a classic steakhouse vibe.
- 2 thick cut steaks: 1.5 to 2 inches thick is mandatory. Why this? Provides enough thermal mass to prevent overcooking during the final over high heat sear.
- 15g avocado oil: Use a high smoke point oil. Why this? Won't smoke out your kitchen or add "burnt" flavors like olive oil does.
- 10g coarse kosher salt: For seasoning and moisture control. Why this? Larger grains dissolve slower, drawing out moisture then re absorbing for deeper flavor.
- 5g cracked black pepper: For foundational heat.
- 30g unsalted butter: For the finishing baste. Why this? Adds a velvety mouthfeel and helps the aromatics stick to the meat.
- 3 sprigs fresh thyme or rosemary: Woody herbs work best.
- 2 cloves garlic, smashed: For a subtle, savory perfume.
| Original Ingredient | Substitute | Why It Works |
|---|---|---|
| 15g Avocado Oil | 15g Beef Tallow | Same high smoke point with an extra boost of beefy flavor. |
| 30g Unsalted Butter | 30g Ghee | Higher smoke point than butter. Note: You lose the toasted milk solid flavor. |
| Fresh Thyme | Dried Thyme (1 tsp) | Adds flavor, but won't provide the same aromatic "oil" for basting. |
The flavor map for this dish is quite intentional. You have the savory, umami rich depth of the beef, the crisp, salty exterior, and the bright, earthy aroma of the thyme and garlic. It's a balance of rich fats and sharp seasonings that keeps you coming back for another bite.
Necessary Kitchen Equipment For Success
You don't need fancy gadgets, but a wire rack is the one "non negotiable" item here. If you put the steak directly on a sheet pan, the bottom won't dry out, and you'll end up with one side that's soggy. We want airflow around the entire piece of meat.
- Wire cooling rack: Essential for 360 degree airflow.
- Rimmed baking sheet: To catch any (minimal) drippings.
- Digital meat thermometer: This is your eyes and ears. Do not attempt this by "feel."
- Cast iron skillet: Retains heat better than stainless steel, ensuring the pan doesn't cool down when the meat hits it.
- Large spoon: For the butter basting stage.
Chef Tip
If you don't have a cast iron skillet, a heavy bottomed stainless steel pan will work, but you may need to let it reheat for 30 seconds between searing each side of the steak.
Bringing Everything Together step-by-step

Right then, let's crack on. This process is about timing and observation. Follow these steps exactly, and you'll have the best steak of your life in about 1 hours 10 mins.
- Prep the meat. Take your 2 thick cut steaks and pat them bone dry with paper towels. Note: Surface moisture is the enemy of the sear.
- Season heavily. Rub the 10g kosher salt and 5g pepper into every nook and cranny. Let them sit at room temp for about 30 minutes if you didn't dry brine them overnight.
- Set the stage. Preheat your oven to 225°F. Place the steaks on the wire rack over a baking sheet.
- Execute the low bake. Slide them into the oven. Cook until the internal temp hits 115°F for medium rare. This usually takes 45 to 60 minutes depending on the thickness.
- Rest before the sear. Remove the steaks and let them sit on the counter for 10 minutes. Note: This prevents the internal temp from skyrocketing when you sear.
- Heat the pan. Get your cast iron skillet over high heat. Add the 15g avocado oil and wait until it starts to shimmer and just barely smoke.
- Achieve the mahogany crust. Place steaks in the pan. Sear for 60 seconds without moving them until a dark, mahogany crust forms.
- Flip and flavor. Flip the steaks. Immediately add the 30g butter, 3 sprigs of thyme, and 2 smashed garlic cloves.
- Master the final finish. Tilt the pan and spoon the foaming butter over the steaks repeatedly for another 60 seconds. Sizzle until the garlic smells toasted but not burnt.
- The final rest. Move the steaks to a warm plate. Let them rest for 5 minutes before slicing.
Executing The Low and Slow Bake
During this hour, your kitchen won't smell like much, and the steaks will look a bit unappealing maybe a dull gray brown. Don't panic. This is exactly what we want. We are slowly raising the internal temperature without shocking the proteins. I usually start checking the temp around the 40 minute mark.
Every oven is different, and even a 10 degree variance in your oven's calibration can change the timing by 15 minutes.
Mastering The Finish
The butter basting stage (also called arroser) is where you add that restaurant level sheen and flavor. When you add the 30g butter, it will foam up. That foam is the water boiling off. Once it subsides and the butter turns a golden brown, you are basting with pure fat and toasted milk solids.
This is what gives the steak its velvety mouthfeel.
Solving Common Oven Steak Problems
Even with a solid plan, things can go sideways. The most common issue I see is people getting impatient with the pan heat. If the oil isn't hot enough, you'll end up "boiling" the steak in oil rather than searing it.
Why Your Steak Lacks Crust
If you pull the steak out and it's gray and soft, your pan wasn't hot enough or the steak was too wet. Most often, it's a heat issue. Avocado oil can handle high temperatures, so don't be afraid to let that cast iron get very hot. If you see the oil dancing and shimmering, you're ready.
Why Your Center Is Overcooked
If you followed the oven temp but it's still well done, you likely skipped the 10 minute rest before the sear. That rest allows the surface temperature to drop slightly, giving you a "buffer" so the high heat of the pan doesn't penetrate into the center of the meat.
| Problem | Root Cause | Solution |
|---|---|---|
| Gray, mushy exterior | Surface moisture or cold pan | Pat dry with paper towels; wait for oil to shimmer. |
| Bitter, burnt taste | Burned butter or pepper | Add butter only in the last 60 seconds; use coarse pepper. |
| Uneven cooking | Steak touching the pan bottom | Always use a wire rack for the oven phase. |
Common Mistakes Checklist
- ✓ Don't skip the wire rack: Air needs to hit the bottom of the steak to dry it out.
- ✓ Avoid "flair ups": Use avocado oil or tallow; extra virgin olive oil will smoke and turn acrid.
- ✓ Check your thermometer: Ensure the probe is in the thickest part of the meat, not touching bone or fat.
- ✓ Be patient with the rest: Cutting the steak too early will let all those velvety juices run onto the board.
- ✓ Use enough salt: 10g might seem like a lot, but much of it stays on the surface to create that crust.
Adaptations For Different Dietary Needs
This recipe is naturally keto and paleo friendly, but you can make a few tweaks if you're following specific protocols. For a dairy-free version, swapping the butter for ghee or even a bit of extra beef tallow keeps the richness without the lactose.
Infusing Keto Friendly Aromatics
If you want to vary the flavor profile while staying low carb, try adding a teaspoon of espresso powder to your salt rub. It sounds weird, but the bitterness of the coffee mimics the charred flavor of a grill and deepens the savory notes of the beef significantly.
Swapping Fats for Paleo Preferences
For strict Paleo, avocado oil is great, but rendered duck fat or wagyu tallow will give you a flavor that is out of this world. These fats have high smoke points and add a layer of complexity that plain oil just can't match.
Tips For Storage And Leftovers
Steak is always best fresh, but if you have leftovers, don't let them go to waste. Cold steak is actually a delicacy in my house. I love slicing it thin for salads or quick steak sandwiches.
- Fridge: Store in an airtight container for up to 3 days.
- Freezer: You can freeze cooked steak for up to 2 months, but the texture will suffer. If you do, use it for stews or fajitas later.
- Zero Waste: Never throw away the bone or the fat trimmings. Toss the bones into a freezer bag for your next beef stock. You can also render down the fat trimmings in a small pan to make "liquid gold" for roasting potatoes.
Reheating Tip: Avoid the microwave! It will turn your velvety steak into a rubber tire. Instead, reheat it in a 250°F oven until it's just warm to the touch, or slice it thin and toss it into a hot pan for 30 seconds just to take the chill off.
Presentation Tips For Elegant Serving
If you're making this for a special occasion, presentation is half the battle. I often serve this with my Juicy Steak with recipe for a full restaurant feel. The white sauce against the mahogany crust is stunning.
- Slicing Against the Grain: Look for the direction the muscle fibers are running and slice perpendicular to them. This shortens the fibers and makes every bite feel even more tender.
- The Final Flourish: Sprinkle a tiny pinch of flaky sea salt (like Maldon) over the slices just before serving. Those little salt crystals provide a lovely crunch and a pop of brightness.
- Board Sauce: Instead of a separate gravy, pour the leftover butter and juices from the resting plate back over the sliced meat. It’s pure flavor.
Decision Shortcut
- If you want Maximum Tenderness, salt the meat 24 hours in advance and use the 225°F oven setting.
- If you want The Best Crust, ensure you use a cast iron skillet and pat the meat dry multiple times before searing.
- If you want Speed, you can bump the oven to 275°F, but you'll lose a bit of that edge to edge pink consistency.
The Contrast of Flavors
This recipe thrives on the tension between different sensations. You have the sweetness of the caramelized proteins, the savory depth of the garlic infused butter, the crisp snap of the exterior, and the tender richness of the center.
It’s a complete sensory experience that proves you don't need a professional kitchen to eat like a king.
Myths Regarding Oven Steaks
There's a lot of old school "advice" out there that actually hinders your progress. Let's clear some of that up so you can cook with confidence.
Myth: Searing "seals in the juices." This is the biggest lie in the culinary world. Searing creates flavor through the Maillard reaction, but it doesn't create a waterproof barrier. In fact, high heat can squeeze juices out.
That's why we sear at the end to get the flavor while keeping the moisture inside where it belongs.
Myth: You must bring steak to room temperature for an hour. In reality, an hour on the counter barely changes the internal temperature of a thick steak. It’s much more important to ensure the surface is dry.
The oven phase of the reverse sear does a much better job of tempering the meat than sitting on a counter ever will.
Myth: Poking a steak with a fork will let all the juices out. While you shouldn't treat your steak like a pincushion, a quick poke with a thermometer or a fork isn't going to drain the meat. The "juice" is held within individual muscle cells, not in a giant balloon that pops.
Use your thermometer it's your best friend.

Critically High in Sodium
1940 mg mg of sodium per serving (84% of daily value)
The American Heart Association recommends limiting sodium intake to about 2,300mg per day.
Tips to Reduce Sodium in Your Steak Recipe
-
Reduce Salt by Half-25%
Halving the coarse kosher salt from 10g to 5g will significantly reduce the sodium content without sacrificing all the flavor. You can always add more at the table if needed.
-
Use a Salt Free Rub-15%
Consider using a pre-made salt free steak rub, or create your own blend of herbs and spices such as garlic powder, onion powder, smoked paprika, and chili powder, to replace some of the salt.
-
Unsalted Butter Alternative-5%
While the recipe uses unsalted butter, ensure the butter you are using is truly unsalted and does not contain any added sodium. Some butters can have added sodium.
-
Enhance with Herbs & Spices
Boost flavor with fresh herbs like thyme and rosemary, and freshly cracked black pepper. These add depth and complexity without adding any sodium.
Recipe FAQs
How long does it take to cook a steak in the oven?
About 45-60 minutes in the oven before searing. This is for a thick cut steak (1.5-2 inches) at 225°F, reaching an internal temperature of 115°F before the final sear.
Is it better to cook steak at 350 or 400 degrees?
Neither is ideal for thick cuts if searing last. For the reverse sear method, a lower temperature like 225°F is best to gently cook the interior before a quick, high heat sear. Higher oven temps risk overcooking the center before a good crust develops.
Can I cook steak in the oven at 400 degrees?
Yes, but it's not the best method for a thick, evenly cooked steak. Cooking at 400°F often results in a significant gray band from overcooking the outer layers before the center is ready. It's better suited for thinner steaks or if you plan to sear after a very short oven time.
How do you cook a steak in the oven without drying it out?
Use the reverse sear method and a meat thermometer. Start with a low oven temperature (around 225°F) to gently bring the steak up to your desired internal temperature, then finish with a quick sear in a hot pan. This preserves moisture and creates a tender interior.
What is the ideal oven temperature for cooking steak?
225°F is ideal for the reverse sear method. This low temperature allows the steak to cook evenly throughout, tenderizing it and minimizing the dreaded gray band before a final, quick sear for the crust.
How thick should a steak be for oven cooking?
At least 1.5 inches thick. Thicker cuts benefit most from the controlled, even heating of the oven, allowing the interior to reach temperature gently without overcooking the exterior.
Should I sear steak before or after oven cooking?
Sear after oven cooking for the best results. This "reverse sear" method dries the surface in the oven, promoting a superior crust when it hits the hot pan, while preventing the gray band that occurs with traditional sear first methods.
Oven Steak Recipe
Ingredients:
Instructions:
Nutrition Facts:
| Calories | 1045 kcal |
|---|---|
| Protein | 62 g |
| Fat | 88 g |
| Carbs | 1.2 g |
| Fiber | 0.3 g |
| Sugar | 0.1 g |
| Sodium | 1940 mg |
