Keto Chocolate Mousse Pie: the Decadent, No-Bake Sugar-Free Recipe
- The Velvet Hand: Introducing Your No-Bake Keto Chocolate Mousse Pie
- Essential Ingredients for Your Keto Chocolate Mousse Pie Base and Filling
- Achieving the Silky Mousse: The Science of Folding and Setting
- Crafting the Decadent Layers: Step-by-Step Method
- Troubleshooting Your Keto Chocolate Mousse Pie
- Extending the Life of Your Keto Mousse Pie: Storage & Freezing
- Perfect Pairings and Garnishings for Serving
- Recipe FAQs
- 📝 Recipe Card
The Velvet Hand: Introducing Your No-Bake Keto Chocolate Mousse Pie
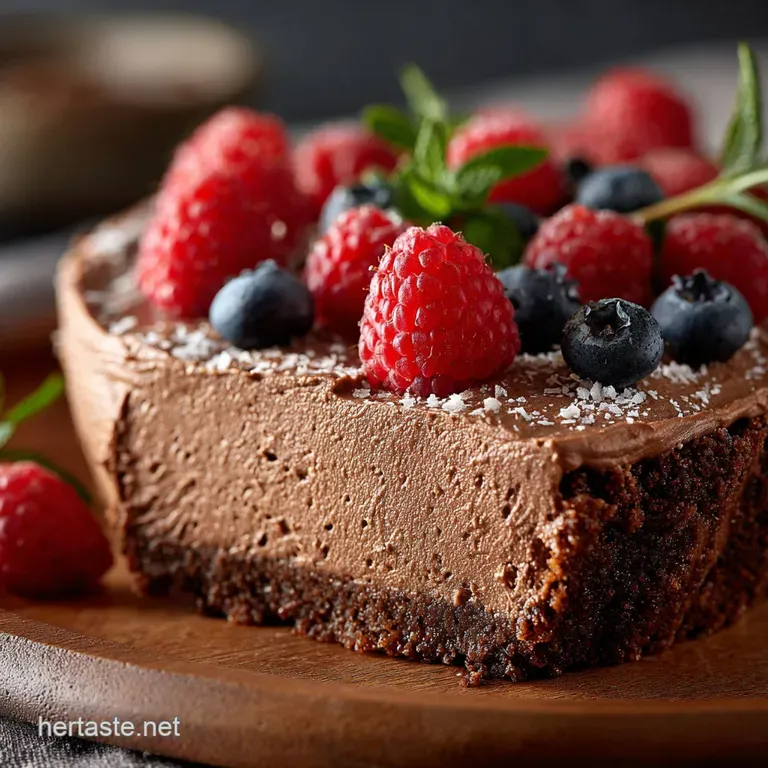
This pie, friends, is a miracle. It’s that deep, dark, intensely satisfying chocolate experience you crave, delivered with a texture so impossibly light it feels like eating a cloud.
When you first cut into that crisp cocoa crust and see the thick, silky, deep brown mousse filling, the aroma alone just hits differently.
Listen, I know the keto dessert world is full of complicated baking projects and weird chalky textures. This "Keto Chocolate Mousse Pie" is none of those things. It’s a lifesaver because it’s no-bake, uses easily sourced ingredients, and sets up perfectly in the fridge with zero drama.
So, ditch the guilt and prepare your freezer space. I’m going to walk you through the precise steps to achieve true, luxurious, sugar-free decadence without any of the usual low-carb disappointments. Let’s crack on.
The Decadence of Diet: Why This Luxurious Dessert Works
The magic here is structural engineering built on fat and air. We leverage high fat cream cheese for richness and stability, which allows us to fold in massive amounts of air from the whipped heavy cream.
This blending of soft cheese and light cream is what transforms the filling from a mere ganache into a lofty, airy mousse.
The reason this particular recipe excels is the calculated use of powdered sweetener. Granular sweeteners leave a terrifying, gritty texture that ruins everything. We avoid that disaster entirely by ensuring the sweetener dissolves fully into the soft cream cheese base before the cream is even introduced.
Medium Difficulty: Mastering the Chill Time for Optimal Texture
I rate this medium, not because the steps are hard, but because patience is a skill. The active prep time is quick, but the chill time is non-negotiable . Trying to cut this pie after three hours will result in sad, slumped slices.
You must give the mousse a full four hours, preferably overnight, for the fats to re-solidify and the proteins to stabilize. This waiting period is critical for developing that signature clean, firm slice.
Why No-Bake? Minimizing Faff, Maximizing Reward
Who wants to turn on the oven in July? Not me. The no-bake format saves massive time and eliminates the stress of potential crust shrinkage or the risk of burning expensive almond flour.
Plus, when you make the crust with melted butter and chill it, you get a dense, fudgy, and crisp base that actually holds up when sliced. It’s brilliant.
Essential Ingredients for Your Keto Chocolate Mousse Pie Base and Filling
The quality of your ingredients truly matters in a simple dessert like this. Since chocolate is the star, spring for the 85% or higher cacao bar the flavour depth is worth every penny.
We are primarily dealing with almond flour, cocoa powder, butter, high-quality dark chocolate, cold heavy cream, and cream cheese. Don't skimp on the cream cheese; use the full fat block kind, not the whipped tub version, or your pie structure will fail.
| Ingredient | Substitute (Must be Viable) | Notes |
|---|---|---|
| Almond Flour | Coconut Flour (reduce butter slightly!) | Coconut flour absorbs liquids aggressively. |
| Cream Cheese | Full Fat Mascarpone | Creates a slightly tangier, denser result. |
| Heavy Cream | Refrigerated Full Fat Coconut Cream | Use the thick, solid part from a chilled can. |
| Keto Powdered Sweetener | Granular Keto Sweetener (blended/pulsed) | Powdering prevents the mousse from being gritty. |
Achieving the Silky Mousse: The Science of Folding and Setting
Choosing the Best Low-Carb Sweeteners (Erythritol vs. Allulose)
If you want a truly silky, professional mousse texture, you must use powdered keto sweeteners. I prefer an erythritol/monk fruit blend, but allulose also works beautifully. If you only have granular sugar substitute, put it in a spice grinder or blender and pulse it until it’s the texture of powdered sugar.
This is the number one secret to a non-sandy low-carb dessert, trust me on this.
Perfecting the Cocoa Crust: Calculating the Ideal Fat Ratio
Too little fat in your crust, and it will crumble into a powdery mess when you try to press it. Too much fat, and it becomes a greasy, oily hockey puck. The ratio of 2 cups of almond flour to ⅓ cup of melted butter is absolutely perfect for a 9 inch pie plate.
Tip: Using dark or Dutch processed cocoa powder elevates the chocolate intensity of the crust, offering a fantastic contrast to the lighter mousse filling.
dairy-free Adaptations for the Mousse Filling
For a dairy-free version, replace the cream cheese with high-quality vegan cream cheese (Tofutti or Miyoko's work well) and substitute the heavy cream with the thick, solidified part of canned coconut cream. Make sure the coconut cream is ice cold before whipping it.
Tempering the Chocolate: Avoiding Graininess and Separation
This is a rookie mistake I made constantly when I started keto baking: adding hot chocolate to cold dairy. You melt the chocolate, and then you must allow it to cool slightly it should still be liquid, but only warm to the touch.
If you dump searing hot chocolate into the softened cream cheese, the fats will seize and separate, leaving you with a grainy, curdled mess. Let it cool for 5 to 10 minutes.
The Role of Cream Temperature in Achieving Maximum Volume
Your heavy cream needs to be frigid. Pull it out of the fridge just before you plan to whip it. When the cream is cold, the fat molecules stabilize quickly, allowing you to whip more air into the cream. More air means a lighter, fluffier final mousse.
Stabilizing the Mousse Without Relying on Gelatin
We rely on two things for structure: the high fat content of the cream cheese and the stiffness of the whipped cream. Because we’re not using eggs or gelatin, the technique of folding is everything.
If you want insurance, I sometimes add a quarter teaspoon of xanthan gum to the heavy cream during the last 30 seconds of whipping; it’s a brilliant binder.
Chef’s Note: Before adding the remaining whipped cream, always fold one-third of the cream into the chocolate base first. This "sacrificial" cream lightens the heavy base, making it easier to incorporate the rest without deflating the air you worked so hard to whip in.
Crafting the Decadent Layers: step-by-step Method
Phase 1: Pressing the Perfectly Crisp No-Bake Crust
Whisk your dry ingredients until fully homogenous. Then, pour in the melted butter and mix it until it looks like moist sand. Press it very firmly into your pie plate, ensuring the sides are even and compacted.
Transfer the crust to the freezer for a quick 20 minute chill; this sets the fat perfectly and prevents sogginess later.
Phase 2: Preparing the Rich, Intensely Chocolatey Base Mixture
Beat that room temperature cream cheese until it's super smooth no lumps allowed! Beat in your powdered sweetener and vanilla until the mixture is light and creamy. Pour in the slightly cooled melted chocolate and mix just until it’s uniformly brown.
Stop immediately; over mixing here develops gluten in the cream cheese (yes, really!) and makes it dense.
Phase 3: The Gentle Fold: Incorporating the Whipped Cream for Airiness
Whip your cold heavy cream in a separate bowl until you have firm, beautiful peaks. Now, the delicate part. Use a rubber spatula to gently fold the whipped cream into the chocolate base. Use an underhand motion, cutting down the center and sweeping up the side of the bowl, rotating the bowl as you go.
Stop folding as soon as the white streaks disappear.
Phase 4: Setting the Pie: The Critical Chilling Phase
Spoon the airy mousse mixture into the chilled crust. Smooth the top carefully. Cover the pie loosely I usually prop the plastic wrap up so it doesn't touch the surface and refrigerate for a minimum of four hours. Seriously, don't rush this. While you wait, you can always whip up a batch of Keto Peanut Butter Protein Balls: Easy 10 Min No-Bake Low Carb Snack to tide you over.
Troubleshooting Your Keto Chocolate Mousse Pie
Preventing a Soggy Crust: Lining and Prep Tips
The main culprit for a soggy crust is not chilling it long enough, or pouring a hot filling mixture onto it. The freezer chill (Phase 1) is absolutely essential. Also, if you live in a very humid environment, you can very lightly brush the chilled crust with melted cocoa butter before adding the filling; this creates a moisture barrier.
When Mousse Fails to Set: Common Errors and Quick Fixes
If your mousse is soft and refuses to set up, you likely committed one of two cardinal sins: either you added hot chocolate that melted the fats, or you over mixed the whipped cream during the folding stage, deflating all the necessary air.
The Fix: If it’s slightly soft, put it in the freezer for 30– 45 minutes just before serving. If it’s truly soupy, your only real fix is scooping it into small jars and relabeling it as "Keto Chocolate Pudding." Live and learn!
Achieving the Signature Glossy Finish
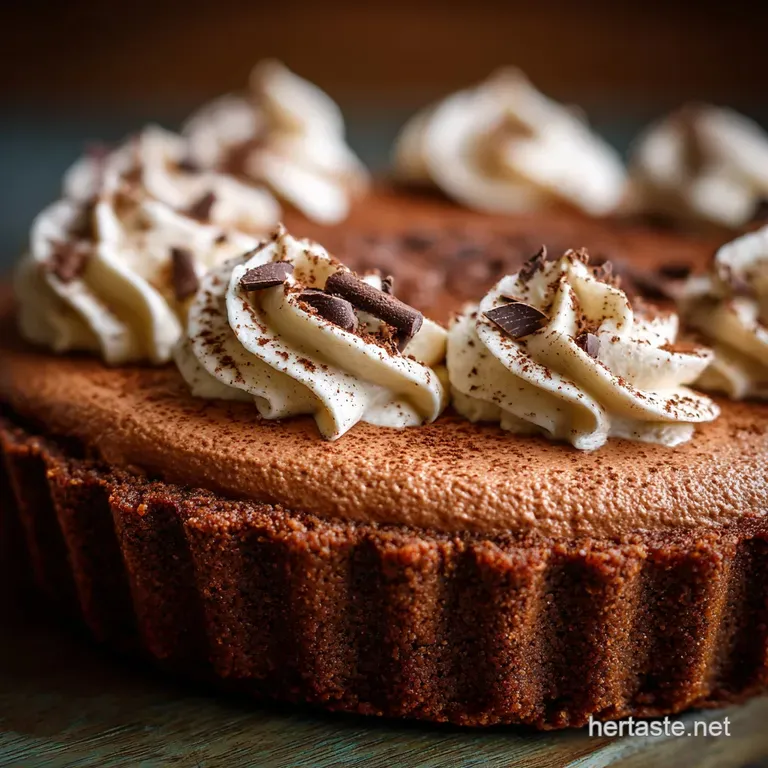
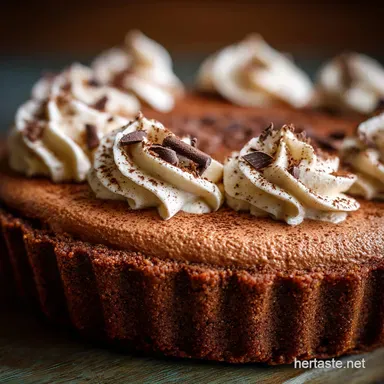
While the mousse itself will set matte, the trick for a beautiful presentation is the garnish. Dusting with a fine layer of cocoa powder right before serving gives that sophisticated velvety look. Or, for a beautiful contrast, use shaved dark chocolate or fresh sugar-free whipped cream piped around the edges.
Extending the Life of Your Keto Mousse Pie: Storage & Freezing
Optimal Refrigerator Storage Conditions
This pie is very happy in the fridge. Because of its high fat content, it should be kept covered, away from strong smelling foods (like garlic), for up to 5 days. After day five, the quality of the delicate mousse starts to diminish.
Guidelines for Freezing and Thawing Individual Slices
Yes, this freezes well! Wrap individual, already set slices tightly in plastic wrap, then place them in an airtight container. They keep beautifully for up to 2 months. To thaw, simply take a slice out and let it soften in the fridge for 2– 3 hours.
Do not microwave; it will ruin the texture instantly.
Perfect Pairings and Garnishings for Serving
Recommended Low-Carb Toppings (Shaved Chocolate vs. Cocoa Dust)
My preferred topping is simple, coarse shavings of high-quality dark chocolate (90% cacao). This adds a textural crunch that plays perfectly against the smooth mousse. If I’m serving this after a rich meal, a small side glass of SugarFree Keto Electrolyte Powder Recipe: Zesty 10 Minute Hydration Mix provides a brilliant, palate cleansing hydration boost.
For special occasions, you can pipe rosettes of fresh, stiffly whipped heavy cream around the edge, using a star tip. Dusting with cocoa powder is the fastest, easiest way to make it look instantly classy.

Recipe FAQs
Why is my mousse too runny and not setting properly?
The most common cause is under whipping the heavy cream or overmixing the chocolate mixture, which deflates the trapped air. Ensure the heavy cream holds stiff peaks before folding, and incorporate the chocolate gently in three separate stages using a spatula.
Adequate chilling time at least six hours or preferably overnight is critical for the gelatin free mousse to fully stabilize.
Can I substitute the erythritol/monk fruit blend for a different Keto sweetener?
Absolutely, you can use allulose or xylitol as effective 1:1 substitutes, though be aware that xylitol is highly toxic to pets. For the best, smoothest texture, powdered versions of any sweetener are strongly recommended over granular ones.
Granular sweeteners may not dissolve fully in the cold heavy cream, resulting in a slightly gritty final mousse.
How long will the pie keep, and can I freeze slices for later?
The finished pie, when covered tightly with plastic wrap or stored in an airtight container, will maintain excellent flavor and texture for 4 5 days in the refrigerator. Yes, you can freeze individual slices; wrap them tightly in plastic wrap, then foil, and thaw them overnight in the fridge before serving for the best quality.
My no-bake crust is crumbly. How do I get it to hold together firmly?
The key binding element is the melted butter; ensure you use the full specified amount and mix it thoroughly until the cocoa mixture resembles wet sand. After pressing it extremely firmly into the pie plate using the bottom of a glass, a minimum 30-minute chill is required to solidify the butter and create a sturdy, non-crumbly base.
If it still crumbles, slightly increase the melted butter next time.
I want a stronger flavor profile. Can I add coffee or mint to the chocolate mousse?
Yes, these additions beautifully complement the deep cocoa notes. For a mocha flavor, whisk 1 teaspoon of high-quality instant espresso powder into the melted chocolate mixture before folding it into the cream. For mint, add 1/2 teaspoon of food grade peppermint extract along with the vanilla extract.
Can I make this Keto Chocolate Mousse Pie dairy-free or vegan?
A dairy-free version is achievable by substituting canned full fat coconut cream (using only the chilled, solid white part) for the heavy cream and whipping it to stiff peaks. You must also use a high-quality, keto friendly dark chocolate that is confirmed dairy-free to ensure the entire mousse remains compliant.
The texture may be slightly denser than the dairy version.
What is the best way to slice and serve this rich, delicate pie cleanly?
Due to the pie’s velvety, delicate structure, the professional technique is to use a sharp knife dipped in hot water, wiping it completely dry between each cut. Allow the pie to sit at room temperature for about 10 to 15 minutes before attempting to slice, as this prevents cracking and ensures the mousse doesn't stick to the blade.
No Bake Keto Chocolate Mousse Pie
Ingredients:
Instructions:
Nutrition Facts:
| Calories | 321 kcal |
|---|---|
| Protein | 6.3 g |
| Fat | 29.2 g |
| Carbs | 7.5 g |
