Perfectly Thin Homemade Egg Roll Wrappers

Oh my gosh, let me tell you about the first time i tried to make egg roll wrappers from scratch .
I was feeling super ambitious one saturday afternoon, armed with flour, a rolling pin, and a dream of crispy, golden egg rolls.
Spoiler alert: the dough turned out more like a confused pancake than anything else! but hey, that’s how learning goes, right? i’ve always loved cooking because it’s like a little adventure.
And really, who doesn’t love biting into something crunchy and delicious?
But enough about my early failings in the kitchen let’s dive into why making homemade egg roll wrappers is totally worth it.
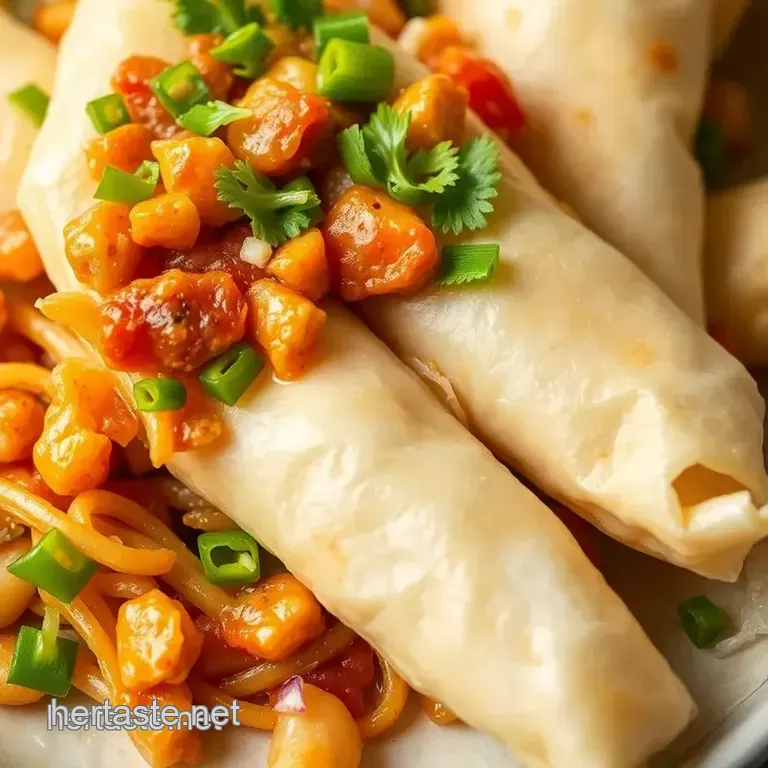
Imagine this: fresh egg roll wrappers, enveloping your favorite fillings, like savory veggies or spicy meats. they’re golden and crispy, and they make every meal feel special.
Seriously, these bad boys can turn a regular tuesday night dinner into a mini celebration.
Recipe Overview
Egg rolls have roots in chinese cuisine, dating way back to the 1930s when they started making waves in american chinese food.
They were a hit right away and have stuck around ever since, becoming a must have at parties or even just for some late night snacks.
Today, people are all about diy egg roll wrappers because who wouldn’t want to experience the magic of fresh and flavorful wraps?
Now, let's break it down a bit. making these wrappers is fairly easy i mean, i did it, and if i can, you totally can too ! you'll need about 15 minutes of prep time, some chilling ( 30 minutes while you binge watch your favorite show, perhaps?), and then about 5- 10 minutes of cooking, depending on how crispy you like them.
All in all, it’ll take you less than an hour, and with about 20 wrappers, they're perfect for meal prep.
Money wise, they won’t break the bank. With just a few basic pantry ingredients, you’ll find that it’s cheaper than buying those pre-packaged ones. Plus, they taste way fresher!
Key Benefits
Let’s talk health. these thin egg roll wrappers are much better for you than those greasy store-bought ones. when you make them at home, you control the ingredients.
Want a gluten-free version? go for it! craving a healthier twist? use whole wheat flour. seriously, the options are endless.
Eating homemade egg rolls isn’t just about the taste. they are perfect for special occasions like family dinners, super bowl parties, or even just when you want to impress your friends.
Trust me, pulling these out will earn you major cooking cred. and let’s be honest, making your own wrappers is a fun way to bond with family or friends it’s like a cooking party!
Not only do these egg roll wrapper variations taste better, but the satisfaction of rolling your own wrappers and frying those bad boys up is unbeatable.
And if you want a twist, you can try stuffed versions get creative with your egg roll filling ideas !
Overall, they beat out similar recipes any day. Why? Because when you make them from scratch, you’re adding a sprinkle of love that store-bought ones just can’t compete with.
So, ready to roll? Let’s get to the goodies! We need some egg roll wrapper ingredients for this adventure. Roll up those sleeves, folks. You're gonna want to stick around for this!
Essential Ingredients Guide for Perfect Egg Roll Wrappers
Oh my gosh, let’s dive into the world of homemade egg roll wrappers! if you want to whip up those crispy, delicious egg rolls right in your own kitchen, knowing your ingredients is super important.
Trust me, using the right ingredients makes all the difference. this guide will help you get the essentials down, so you can finally learn how to make egg roll wrappers that are truly something special.
Premium Core Components
First off, let’s chat about the key ingredients you’ll need for your egg roll dough and wrappers. You’ll want:
- 2 cups (240g) all-purpose flour : This is your main player. Look for flour that’s finely milled. The smoother, the better.
- 1 large egg : Fresh is best! It binds everything together and gives your wrappers that nice, chewy texture.
- ½ cup (120ml) water : Make sure it’s at room temperature. It mixes more thoroughly this way.
- ½ teaspoon salt : Just a bit for flavor.
Now, when you’re checking the quality indicators , go for the freshest eggs and make sure your flour isn’t clumpy.
It’s also a good idea to store your flour in an airtight container. well stored flour can last up to 8 months , while eggs should be used within 3 weeks of purchase for optimal freshness.
By the way, if you’re feeling adventurous and want to make it gluten-free, there are some great gluten-free flour blends out there.
Signature Seasoning Blend
While the dough itself is pretty minimalist, what about those yummy fillings? you can spice things up with some essential spice combinations or herb selections .
Think ginger, garlic, and maybe a splash of soy sauce for flavor. you can mix things up with regional variations, too like using sriracha for some heat or even adding fresh herbs like cilantro or scallions to your filling.
Smart Substitutions
Let’s face it, cooking isn’t always perfect. if you’re missing an ingredient or just need to make a dietary modification, don’t sweat it! for example, if you’re out of eggs, crushed flaxseeds can do the trick! you mix ¼ cup of flaxseed meal with ¾ cup water boom!
You’ve got a vegan version.
And if you’re planning on making easy asian recipes , remember that you can adapt the dough using whole wheat flour for a healthier twist.
Kitchen Equipment Essentials
For this adventure, you don’t need fancy tools. just go with the basics : a mixing bowl, rolling pin, and a clean surface will do.
Some people even use a pasta machine for rolling out that thin egg roll dough. genius, right? just remember: the thinner the wrapper , the crispier the result.
Pro tip? use non-stick spray on your surface to make life easier.
Wrap It Up!
So now you're ready to make those delicious homemade egg roll wrappers from scratch. just think about all the possibilities! you could stuff them with anything from savory veggies to succulent meats.
And don’t forget, chilling the dough for at least 30 minutes will help you roll it out easier without it springing back.
Craft those wrappers and fill them to your heart’s content! Whether you're into frying, baking, or even air frying your egg rolls, the right wrapper makes the entire dish come alive.
Next up, I can't wait to share the step-by-step instructions with you. Prepare to become a pro at rolling your own egg roll wrappers in no time! Get excited; your kitchen is about to smell amazing!
Mastering the Art of Egg Roll Wrappers: A DIY Journey
So, let’s talk about a little kitchen magic: making egg roll wrappers from scratch . honestly, there's nothing like biting into that crispy goodness, especially when it's filled with your favorite fillings.
Whether you're a seasoned chef or just figuring things out in the kitchen, this is a totally reachable adventure. who wouldn't want to roll their own egg roll wrappers, right? let’s dive into the important stuff.
Essential Preparation Steps
Alright, first things first: mise en place . french for a fancy kitchen setup, it just means you’ve got everything ready to roll (pun intended!).
Gather your egg roll wrapper ingredients : plain ol’ flour, an egg, some water, and a pinch of salt. i swear, having everything prepped saves you from moments of panic.
No more running around looking for stuff while your dough is turning into a sticky mess!
Now, time management is key. set a timer for your 30 minutes of chilling time after you make the dough.
Chill the dough helps relax the gluten. trust me, your wrappers will be more pliable and easier to roll out.
Also, keep your work area organized. the less chaos, the more zen you’ll feel while rolling that thin egg roll dough .
Oh, and let's not forget kitchen safety. when chopping or rolling, keep the knives out of reach of kids, stick to a clean surface, and don’t forget to wash your hands!
Step-by-step Process
Here’s how we get down to the nitty gritty. Follow these neat steps to create your homemade egg roll wrappers :
Prepare the dough: combine 2 cups of flour and ½ teaspoon of salt in a bowl. make a well in the center and add 1 egg and ½ cup of water .
Stir it up until you get a rough dough.
Knead: Time to channel your inner bread maker! Knead that dough on a floured surface for about 5 minutes . You want it to be smooth and stretchy.
Chill: Wrap it up in some plastic wrap and let it chill in the fridge for 30 minutes . This is where the magic happens!
Roll it out: divide the dough into four pieces, and roll each out as thinly as possible, aiming for a 6x6 inch square.
You want them to be crispy when cooked, so keep it thin!
Cut and cook: use a sharp knife to trim those edges, making those wrappers neat. if you're feeling fancy, you can lightly cook them in a non-stick pan for about 1 minute on each side .
This step is totally optional but adds a nice texture.
Expert Techniques
Now, let’s talk about how to nail this like a pro. one critical step is to keep the dough thin while you're rolling.
If you accidentally thick, you’ll end up with chewy egg roll wrappers instead of crispy ones. and nobody likes soggy wrappers!
While cooking, keep an eye on the temperature. if you’re frying, maintain your oil at around 350° f for the perfect crunch.
A little too hot, and you’ll burn the outside while the inside remains frozen. too low, and they’ll just soak up oil, instead of frying up nicely.
Oh, and if things don’t go as planned? that’s kitchen life! if your wrappers tear, don't sweat it. just grab a little water and stick it back together like putting a puzzle piece in place.
Success Strategies
Now, let’s dodge some common pitfalls. first off, don’t skip the chilling process. seriously, chill out! both the dough and fried egg rolls come out way better when you let the dough rest.
Also, trust your eyes! The perfect time to pull those egg rolls out of the oil is when they turn golden brown and crispy. For safety, always use tongs to avoid splashes.
Feel free to play around with those filling ideas too! i’m talking seasoned veggies, savory meats, or even gooey cheese.
Honestly, each time i make some, i add different fillings, and it’s like an adventure each time.
Lastly, if you want to prep ahead for a big gathering, make-ahead options are always a win! you can freeze the assembled egg rolls before frying them, and they cook just as well later.
So, whether you’re looking for easy asian recipes or just craving nostalgic takes on your favorite takeout, making your own egg roll wrappers at home is a game changer.
You get to control flavors and freshness, and, let’s be real, your friends will be so impressed!
Into Something More
Now that you’re all set to rock those homemade egg roll wrappers, how about we talk about what to do next? in the additional information section, i’ll share some delicious ways to fill your wraps, along with secrets to making the perfect egg roll dipping sauce .
Trust me; you won't want to miss it!
Additional Recipe Information
Pro Tips & Secrets
Oh my gosh, making homemade egg roll wrappers is such a game changer for your culinary skills! Here's what I've learned over the years.
First, don’t rush the chilling step! chilling the dough for at least 30 minutes is essential. it relaxes the gluten and makes rolling out the dough easier.
Trust me; you’ll thank yourself later when you’re not wrestling with the dough.
Next, when it comes to flavor enhancement , consider adding a pinch of garlic powder or even some finely minced ginger to the dough.
It gives your egg roll wrappers that extra kick. and don’t forget presentation! slice your egg rolls diagonally after frying for that photo worthy look.
Perfect Presentation
Speaking of presentation, let’s chat about plating! when serving these crispy delights, stack them on a nice plate. you can use a couple of fresh slices of cucumber or radish on the side for a pop of color.
Got some garnish ideas ? chop up some green onions or sprinkle sesame seeds on top. these little touches really elevate your dish.
Pair your egg rolls with a homemade dipping sauce to make your platter eye-catching and delicious.
Storage & make-ahead
Now, planning ahead? here’s what you need to know about storage. if you decide to make these egg roll wrappers from scratch ahead of time, simply wrap them in plastic wrap and refrigerate.
They should last about three days if stored properly.
For longer storage, consider freezing them. just separate the wrappers with parchment paper and store them in a freezer bag.
They’ll keep for about a month. when you’re ready to use them, let them thaw in the fridge overnight.
Reheating instructions are straightforward. If you have leftover egg rolls, pop them in the oven at 375° F for about 10– 15 minutes to get that crispiness back.
Creative Variations
Let's talk creative twists! one of my favorite things to do is to adjust the fillings based on the season.
In the fall, i love using sweet potatoes and spices for a hearty filling. you can also switch up the egg roll wrapper ingredients for different diets.
For a gluten-free option, just grab a good gluten-free flour mix.
Feeling adventurous? why not try rolling your own egg roll wrappers with a mix of flavors like curry powder or even using whole wheat flour for a healthier take? it’s all about making it work for you.
Complete Nutrition Guide
Now for the health nuts out there, i’ve got your back. making your own wrappers means you know exactly what’s going in.
An estimated 62 calories per wrapper is pretty clean! if you’re packing it with veggies, you'll boost the nutritional value even more.
Also, let’s keep an eye on the portions! Two to three rolls with a solid dipping sauce should be a perfect serving for an appetizer.
Expert FAQ Solutions
Stuck on a question? Here are some common ones!
A lot of people ask, “Can I make these wrappers a day before?” Absolutely! Just remember to store them in a cool place.
Another frequent query I get is about troubleshooting. If your dough is too sticky, don’t sweat it! Just sprinkle a little extra flour and knead it in.
Feeling overwhelmed? Remember, practice makes perfect. Each time you make these crispy egg roll wrappers , you’re getting better!
Wrapping Up
In the end, making egg roll wrappers from scratch is such a rewarding experience. you’ll be able to customize and enjoy the process of cooking.
Plus, you can impress family and friends with your diy skills like whipping up some killer egg roll filling ideas .
So roll up those sleeves, gather those ingredients, and let’s do this thing! Happy cooking, friends!
Make Egg Roll Wrappers From Scratch