Seasoned Snack Sticks: Crispy and Creamy
- Time: Active 15 minutes, Passive 12 minutes, Total 27 minutes
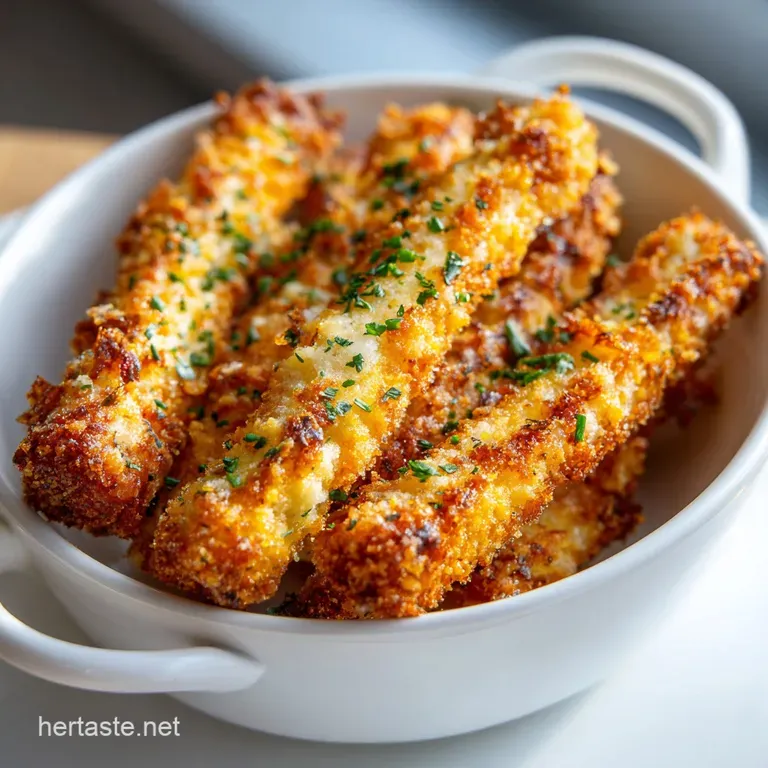
- Flavor/Texture Hook: Shattering cinnamon sugar crust with a silky, warm cheesecake center
- Perfect for: Last minute movie nights, kid friendly kitchen projects, or budget-friendly entertaining
- Why the Bread Stays Crispy and Firm
- Component Analysis for Maximum Crunch
- Selecting Your Elements for Maximum Flavor Impact
- Tools That Make the Rolling Process Seamless
- From Prep to Plate in Under Thirty Minutes
- Fixing Common Texture and Filling Issues Fast
- Swapping Ingredients for Your Specific Dietary Needs
- Keeping Your Leftover Treats Fresh and Crispy
- Dipping Sauces and Sides for the Best Experience
- Recipe FAQs
- 📝 Recipe Card
The first time I tried making these, I was skeptical that a regular loaf of white bread could ever become something this sophisticated. I remember the sound of the rolling pin hitting the counter that rhythmic thud as I flattened each slice until it was as thin as a crepe.
It felt wrong to squash the fluffiness out of the bread, but as the aroma of warm cinnamon and melting butter began to waft from the oven 12 minutes later, I knew I’d stumbled onto something brilliant.
You’re going to love how the granulated sugar creates a mahogany colored crust that literally crackles when you bite into it. It’s not just a sweet snack; it’s a textural experience that hits every note. We’ve all been there craving a fancy dessert but only having basic pantry staples.
This recipe is the answer to that specific Friday night prayer. It’s quick, it’s cheap, and it’s honestly a bit addictive.
We aren't just making "cinnamon toast" here. We are forging a completely different structure by compressing the bread fibers. This turns the bread into a dense, flexible pastry shell that protects the cream cheese filling while it aerates in the heat.
It’s a trick I use whenever I need a quick sweet fix without the hassle of making actual dough from scratch.
Why the Bread Stays Crispy and Firm
- Fiber Compression: Flattening the bread removes air pockets, creating a dense barrier that prevents the cream cheese moisture from turning the crust soggy.
- Fat Barrier: The melted butter coating acts as a waterproof seal, allowing the sugar to caramelize on the outside while keeping the bread interior dry.
- Sugar Recrystallization: As the granulated sugar heats and then cools slightly, it forms a rigid, glass like structure that provides that signature shatter.
- Protein Set: The cream cheese and powdered sugar mixture thickens as the heat evaporates tiny amounts of moisture, creating a stable, velvety center.
| Method | Prep Time | Texture Result | Best For |
|---|---|---|---|
| Standard Oven | 15 minutes | Deep mahogany, very crispy | Maximum crunch and traditional flavor |
| Air Fryer | 10 minutes | Light gold, extremely flaky | Fast snacks or small single batches |
| Toaster Oven | 15 minutes | Chewy edges, soft center | Minimal cleanup for two people |
Choosing the right method depends on how much "snap" you want in your snack. For this specific recipe, the standard oven at 350°F (175°C) for 12 minutes is the gold standard because it allows the heat to penetrate the center without burning the sugar coating.
If you use an air fryer, drop the temp to 325°F and check them at 6 minutes to avoid a charred mess.
While these are a sweet treat, if you're ever looking for a savory finger food for a party, you should definitely try these Potato Balls with cheese. They follow a similar "crispy outside, creamy inside" logic that always wins over a crowd.
Component Analysis for Maximum Crunch
| Ingredient | Science Role | Pro Secret |
|---|---|---|
| White Toast Bread | Structural Base | Use the cheapest "balloon" bread; it flattens better than artisanal loaves. |
| Cream Cheese | Moisture Anchor | Ensure it's fully softened to avoid "clump pockets" in the filling. |
| Granulated Sugar | Caramelization Agent | Use a larger grain sugar for a more dramatic textural contrast. |
| Unsalted Butter | Heat Conductor | Melt it slowly so the milk solids don't burn before the sticks finish baking. |
Selecting Your Elements for Maximum Flavor Impact
The heart of this dish is the bread, but not just any bread. You want the standard, square white sandwich bread the kind that's almost suspiciously soft. Why? Because it has a high moisture content and fine crumb that allows it to be rolled without snapping.
If you try to use a crusty sourdough or a hearty whole grain, it will fight you every step of the way and likely tear open in the oven.
- 8 oz (225g) cream cheese, softened: Why this? Provides the tangy, creamy contrast to the sweet cinnamon crust.
- Substitute: Mascarpone for a richer, less tangy flavor profile.
- 1/2 cup (60g) powdered sugar, sifted: Why this? Dissolves instantly into the cheese for a grit free, velvety texture.
- Substitute: Granulated sugar pulsed in a blender if you're in a pinch.
- 1 tsp (5ml) pure vanilla extract: Why this? Rounds out the sweetness and adds an aromatic depth.
- Substitute: Almond extract (use only 1/4 tsp) for a wedding cake vibe.
- 12 slices white toast bread: Why this? The "canvas" that becomes crispy and flexible when rolled thin.
- Substitute: Brioche slices for an even more decadent, buttery result.
- 1/2 cup (115g) unsalted butter, melted: Why this? Glue for the sugar and the key to the mahogany finish.
- Substitute: Coconut oil (refined) for a dairy-free outer coating.
- 3/4 cup (150g) granulated sugar: Why this? Creates the essential crystalline crunch on the exterior.
- Substitute: Brown sugar for a stickier, more toffee like coating.
- 2 tbsp (15g) ground cinnamon: Why this? Provides the warm, spicy aroma that defines the snack.
- Substitute: Pumpkin pie spice for a seasonal, autumnal twist.
Tools That Make the Rolling Process Seamless
You don’t need a professional pastry kitchen for these, but a few specific tools will save your sanity. A small serrated knife is non negotiable for trimming the crusts. If you use a dull chef's knife, you’ll end up squashing the edges of the bread before you even start rolling.
I also highly recommend a handheld mixer for the filling. You can do it by hand with a spatula, but you won’t get that aerated, velvety finish that makes the center feel like a cloud.
For the rolling part, a standard heavy rolling pin is best. You want to apply enough pressure so the bread becomes almost translucent and feels a bit like damp fabric. If you don't have a rolling pin, a smooth wine bottle works surprisingly well.
Just make sure to wash the label off first so you don't get paper bits in your dessert!
Chef's Tip: Freeze your butter for 10 minutes before melting it if you find it's getting too oily. Also, adding a tiny pinch of espresso powder to the cinnamon sugar doesn't make it taste like coffee it just makes the cinnamon taste "more like cinnamon."
From Prep to Plate in Under Thirty Minutes
- Trim the crusts off the 12 slices of white bread using a small serrated knife. Note: Save these for breadcrumbs later!
- Flatten each slice with a rolling pin until it is paper thin and flexible. until it looks like a thin tortilla.
- Whip the filling by beating the 8 oz softened cream cheese, 1/2 cup powdered sugar, and 1 tsp vanilla extract. until aerated and velvety.
- Apply the cream by spreading a thin layer onto each bread slice, leaving a 1/4 inch margin at the edges. Note: This prevents the filling from leaking out the ends.
- Roll them tightly to create the Seasoned Snack Sticks. until they form a secure cylinder.
- Prep the coating by combining 3/4 cup granulated sugar and 2 tbsp cinnamon in a shallow bowl.
- Dunk in butter by dipping each stick quickly into the 1/2 cup melted butter. until fully moistened but not dripping.
- Dredge in sugar immediately after the butter bath, rolling until every inch is covered in cinnamon sugar.
- Arrange for baking on a parchment lined sheet, making sure they aren't touching each other.
- Bake 12 minutes at 350°F (175°C) until the exterior is a mahogany colored mahogany and crispy.
Fixing Common Texture and Filling Issues Fast
The most common heartbreak with this recipe is a soggy bottom. This usually happens if you let the butter dipped sticks sit on the counter for too long before putting them in the oven. The butter starts to soak into the flattened bread fibers instead of staying on the surface to fry the sugar.
To avoid this, work in small batches or get someone to help you one person dips, one person rolls in sugar, and they go straight onto the tray.
Another thing to watch for is "blowouts," where the cream cheese escapes from the ends. This is almost always caused by overfilling. It's tempting to put a thick slab of cheese in there, but a thin, even layer is all you need. As the heat hits the center, the air you whipped into the cream cheese will expand.
If there's no room, it’s going to find the exit.
Why Your Sticks Are Sinking
If your sticks look flat rather than cylindrical after baking, your bread wasn't rolled thin enough. Thicker bread has more "spring" and will try to unroll or expand unevenly. When you flatten the bread, you are essentially destroying its memory of being a loaf.
If it feels like it’s fighting back, roll it harder!
| Problem | Root Cause | Solution |
|---|---|---|
| Filling leaks out | Too much filling or loose roll | Leave 1/4 inch margin; roll tightly like a cigar. |
| Soggy/Soft texture | Oven temp too low or over dipped | Ensure 350°F; only quick dip in butter, don't soak. |
| Burned sugar | Oven rack too high | Bake on the middle rack to ensure even heat distribution. |
Common Mistakes Checklist
- ✓ Flatten the bread until it's almost translucent to ensure a crisp snap.
- ✓ Sift the powdered sugar to avoid lumps in your velvety filling.
- ✓ Don't skip the parchment paper; the sugar will fuse to a bare metal pan.
- ✓ Let them cool for 3 minutes before eating the sugar needs a moment to harden.
- ✓ Use room temperature cream cheese; cold cheese will tear your delicate bread.
If you enjoy the process of making these "mock" pastries, you might want to try Soft Homemade Breadsticks next. They require a bit more dough work but provide that same satisfying handheld snack experience.
Swapping Ingredients for Your Specific Dietary Needs
If you need to make a smaller batch because you're flying solo, it’s incredibly easy to scale down. For 6 sticks, just cut every measurement in half exactly. Since we aren't using eggs, you don't have to worry about the "half an egg" dilemma.
For a tiny snack of 3 sticks, use 2 oz of cream cheese and a couple of tablespoons of butter.
Scaling Up for Parties
When you're making 24 or 48 of these for a crowd, the math changes slightly. You don't actually need to double the cinnamon. Spices are potent, so for a double batch, use 1.5x the cinnamon (3 tbsp) instead of 4 tbsp.
This keeps the flavor balanced without becoming overwhelming or "dusty." Also, work in batches for the butter dipping so the butter stays warm and fluid; if it cools down, it becomes too thick and you'll end up using twice as much.
gluten-free and dairy-free Adjustments
For my gluten-free friends, this recipe is actually quite doable. Use a high-quality gluten-free white bread (like Udi's or Canyon Bakehouse). These breads are often smaller, so you might need 14-16 slices to use up all the filling. Be extra careful when rolling, as GF bread tends to be more brittle.
Microwaving the slices for 10 seconds before rolling can help make them more pliable.
For a dairy-free version, swap the cream cheese for a firm almond based spread and use refined coconut oil instead of butter. Refined coconut oil has no coconut flavor and a high smoke point, which is perfect for getting that mahogany crust.
Keeping Your Leftover Treats Fresh and Crispy
Let's be honest, these are best about five minutes after they come out of the oven. However, if you have leftovers, do not put them in a plastic bag. The residual moisture from the cream cheese will turn the crispy crust into a sad, gummy mess within an hour.
Instead, keep them in a single layer in a glass container with the lid slightly ajar, or just cover them loosely with a paper towel.
- Fridge: Store in an airtight container for up to 3 days. They will lose their crunch, but the flavor remains excellent.
- Freezer: You can freeze the assembled, unbaked sticks for up to 2 months. Bake them directly from frozen at 350°F, adding about 4 minutes to the total cook time.
- Reheating: Avoid the microwave at all costs! It will turn the bread into rubber. Use a toaster oven or air fryer at 350°F for 3-5 minutes to bring back the shatter crisp texture.
Zero Waste Tip: Don't throw away those bread crusts! Toss them in a bowl with any leftover melted butter and cinnamon sugar, then bake them on a separate tray for 10 minutes. They make incredible "cinnamon croutons" for yogurt or ice cream. Nothing goes to waste in a smart kitchen.
Dipping Sauces and Sides for the Best Experience
While these Snack Sticks are a powerhouse on their own, a little dipping action never hurt anyone. A warm chocolate ganache or a simple caramel sauce takes these from a "quick snack" to a "restaurant style dessert." If you want to keep it simple, a bowl of maple syrup or even some slightly thinned down strawberry jam works wonders.
Myths About Bread Desserts
One big misconception is that you need "stale" bread for this. People often think that since French toast benefits from dry bread, this should too. Truthfully, stale bread is the enemy here. You need the moisture and elasticity of fresh bread to get those tight, seamless rolls.
If the bread is dry, it will crack and the filling will leak everywhere.
Another myth is that you can't get a "real" pastry crunch without puff pastry. By flattening the bread and sealing it with butter and sugar, we are creating a laminated style effect. The sugar essentially "fries" the outer layer of the bread, giving you a crunch that rivals any fried dough.
It's the ultimate budget smart hack for anyone who loves a good churro but hates deep frying.
Right then, you've got the science, the steps, and the secrets. These Seasoned Snack Sticks are waiting to happen. Just remember: roll thin, dip quick, and don't skimp on the cinnamon. Let's crack on and get that oven preheated!

Recipe FAQs
What is a crack stick?
It is a dessert snack made from flattened white bread. The bread is filled with sweetened cream cheese, rolled into a tight cylinder, brushed with melted butter, and baked until the exterior develops a mahogany, crackling sugar crust.
How long do crack sticks last?
They are best consumed immediately after baking. If you need to prepare them in advance, you can assemble the sticks and store them in the refrigerator for up to 24 hours before baking.
How to use crack stix?
Serve them warm as a finger food dessert. Because of their crisp texture, they work perfectly as a quick treat for movie nights or casual entertaining.
Why is it called crack cake?
This is a common misconception, as these are actually known as snack sticks. They likely earn the "crack" nickname due to the audible shattering sound of the mahogany colored sugar crust when you bite into them.
How to achieve the perfect crisp exterior?
Flatten the bread slices with a rolling pin until they are paper thin. This compression of the bread fibers is essential for structural integrity; if you enjoyed this technique of manipulating dough like textures, you can see how the same principle applies to traditional homemade matzah.
Should I use frozen bread for easier rolling?
No, this is a common misconception. Fresh white toast bread is much more flexible and will not crack or tear when you roll it tightly around the cream cheese filling.
How to ensure the filling stays inside?
Leave a small margin at the edges of the bread when spreading the cream cheese mixture. This prevents the filling from squeezing out the sides while you roll the bread into a tight stick.
Homemade Seasoned Snack Sticks

Ingredients:
Instructions:
Nutrition Facts:
| Calories | 271 kcal |
|---|---|
| Protein | 3.4 g |
| Fat | 14.9 g |
| Carbs | 31.5 g |
| Fiber | 1.3 g |
| Sugar | 18.3 g |
| Sodium | 176 mg |
