Garlic Butter Herb Roasted Turkey: Ultimate Crispy Skin and Succulent Meat
- Mastering the Holiday Centerpiece: Your Guide to Garlic Butter Herb Roasted Turkey
- The Science of Succulence: Why This Turkey Stays Juicy
- Essential Shopping List: Ingredients for Garlic Butter Herb Roasted Turkey
- Step-by-Step Guide: Preparing and Roasting the Perfect Turkey
- Expert Troubleshooting: Avoiding the Most Common Turkey Mistakes
- Maximizing Leftovers: Safe Storage and Freezing Methods
- Complete Your Feast: Essential Side Dishes and Pairings
- Recipe FAQs
- 📝 Recipe Card
Mastering the Holiday Centerpiece: Your Guide to Garlic Butter Herb Roasted Turkey
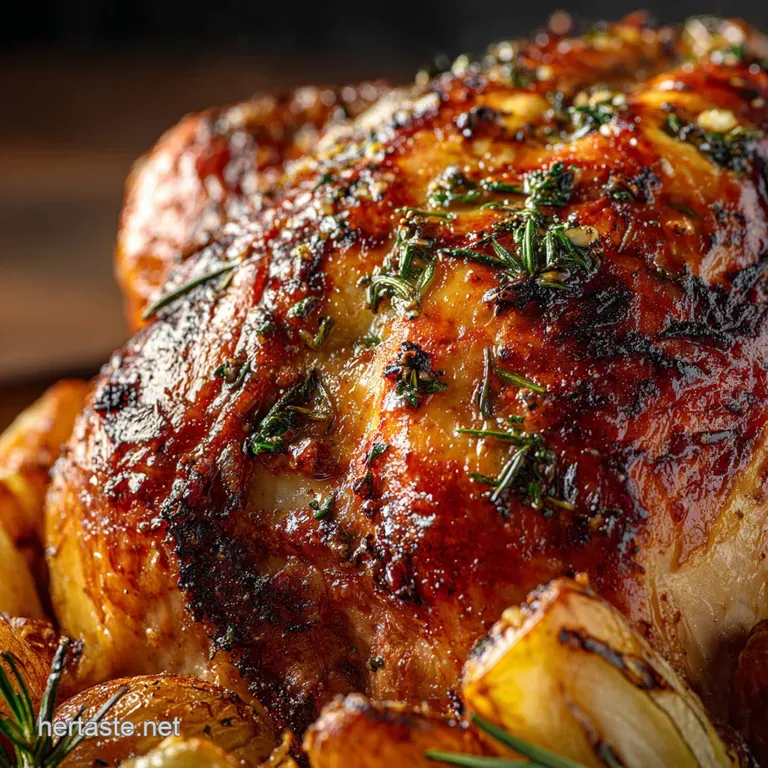
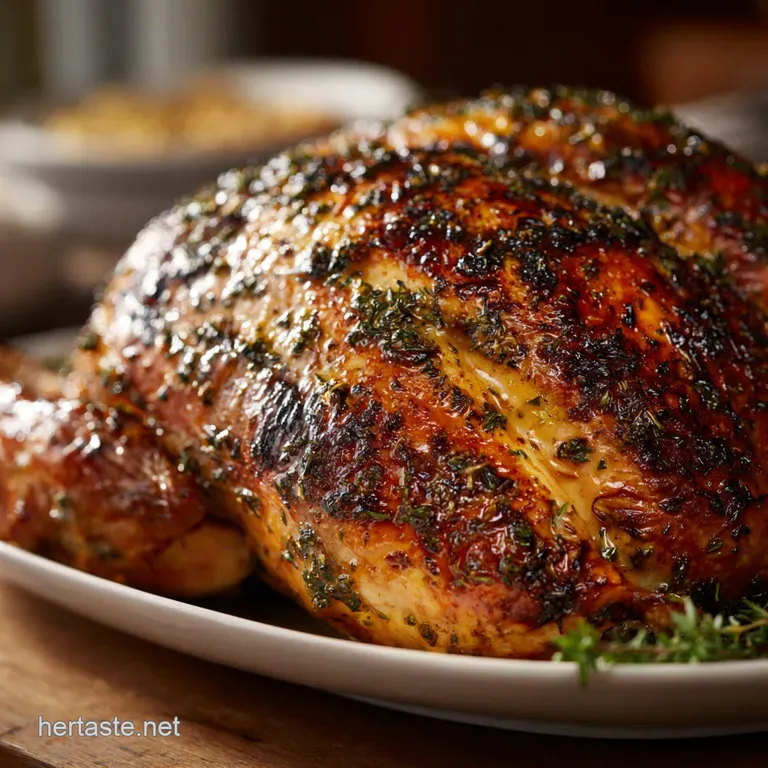
That magnificent moment when you yank the heavy roasting pan from the oven and the scent of roasting garlic, browned butter, and piney rosemary hits you? That's the feeling we are chasing here.
We're talking about a turkey that doesn't just look picture perfect golden brown; the skin is so crisp it practically shatters when you slice into it.
Forget the stress of elaborate brines, messy buckets, and constant fiddling. This garlic butter herb roasted turkey recipe is built for maximum flavor and moisture retention with minimal drama, making roast day totally manageable.
Our secret weapon is compound butter, applied precisely where it counts, ensuring every single bite of that large bird is succulent.
I used to accidentally dry out the breast meat every year, cursing the bird for being naturally difficult until I discovered the magic of subdermal butter application.
Seriously, learning how to handle the herb butter fundamentally changed my roasting game, and now I’m ready to share the fail proof secret with you. Let’s get this gorgeous, flavorful centerpiece ready for your table.
The Science of Succulence: Why This Turkey Stays Juicy
This recipe bypasses the complicated wet brining process that many people find intimidating and messy. Our moisture strategy relies on three simple, complementary techniques that guarantee a perfectly cooked, juicy turkey every single time.
Estimated Time and Preparation Checklist
You absolutely need to plan ahead for this recipe, mostly because the best technique for crispy skin requires time in the fridge. Active prep only takes about 30 minutes, but the resting and chilling time is crucial. Do not skip the chilling period.
Why We Skip the Brine (Focusing on Compound Butter Penetration)
Brining certainly adds moisture, but often requires specialized equipment and large containers. We achieve the same goal through what’s essentially a dry brine —seasoning the bird heavily and letting it rest uncovered in the fridge overnight.
This process draws moisture from the skin while allowing the salt to penetrate the meat, conditioning the muscle fibers to hold onto moisture while it roasts.
The Role of Fat: Basting vs. Subdermal Butter Application
Most home cooks baste, which is actually a mistake. Every time you open the oven door to pour drippings over the bird, you drop the oven temperature and introduce steam, which actively prevents the skin from crisping. We solve this by placing a thick layer of garlic and herb compound butter directly under the skin covering the breast meat. This means the meat is continuously basting from the inside out, keeping it juicy without ever opening the oven door unnecessarily. We use a similar principle when we make our incredible Baked Salmon with Lemon Garlic Butter: Easy 20 Minute Recipe .
Skin Deep Secrets: Achieving Maximum Crisping
Crispy skin is achieved through maximum dehydration. That’s why we dry the turkey off with paper towels, rub it with oil and salt, and let it sit uncovered in the cold fridge for up to 24 hours.
The initial blast of high heat (425°F/220°C) also helps set the skin fast, ensuring that beautiful golden color locks in before the temperature drops.
Resting Temperature: The Key to Retained Juices
The most overlooked step is resting the bird. When the turkey comes out of the oven, the muscle fibers are tense and the juices are pooled near the surface. Allowing the turkey to rest for at least 45 minutes, tented tightly, gives the muscle fibers time to relax and reabsorb all those beautiful garlic herb juices.
This resting time is non-negotiable for a perfect carve.
Essential Shopping List: Ingredients for Garlic Butter Herb Roasted Turkey
This is not a complicated ingredient list, but the quality of your fresh herbs makes a massive difference here. The measurements below are geared toward a standard 12 14 lb turkey.
| Ingredient | Amount (12 14 lb Turkey) | Substitution Notes |
|---|---|---|
| Whole Turkey | 1 (thawed) | Buy smaller breasts/thighs if you’re only serving 4 6 people; cooking time will vary wildly. |
| Unsalted Butter | 225 g / 8 oz (softened) | Use high-quality dairy-free butter substitute if needed. Avoid margarine, as it has too much water. |
| Fresh Garlic | 8 cloves (minced) | 2 tsp Garlic powder works in a pinch, but fresh is infinitely better for the aroma. |
| Fresh Herbs | Rosemary, Thyme, Sage | Use 1 tbsp dried herbs total if fresh are unavailable, but do not skip the fresh herbs if you can help it. |
| Lemon/Onion | 1 Lemon, 1 Onion | Oranges and carrots work beautifully as internal aromatics if you don't have these. |
| Chicken Stock | 1.25 cups (low sodium) | Any stock is fine, even plain water, but stock adds flavor to your pan drippings for gravy. |
Choosing the Right Bird: Fresh vs. Frozen Turkey Notes
If you buy frozen, plan ahead! A typical 14 lb turkey needs about three days to safely thaw in the refrigerator (never on the counter). Fresh is always easier, but if you must use frozen, start thawing early to avoid a panic.
Best Herb Combinations (Rosemary, Thyme, Sage Focus)
The classic blend of rosemary, thyme, and sage works because they are woody, pungent herbs that can withstand the long, over high heat cooking process without burning out. They infuse the butter with a deep, earthy flavor that complements the roasted garlic perfectly.
Butter Preference: Salted vs. Unsalted and Clarification Needs
I always prefer to use unsalted butter because it gives me control over the total salt content. You need to season the outside skin heavily, and mixing salted butter with an additional large dose of sea salt can easily lead to an over salted bird. No need to clarify the butter.
We want the milk solids because they help create that beautiful, nutty brown finish.
Flavor Boosters and Aromatics (Garlic, Shallots, Lemon)
Garlic is the star, obviously. Stuffing the cavity with quartered lemons, onions, and extra herb sprigs isn't for eating; they release steam and aromatics internally, giving the turkey flavor from the inside out. Shallots are also a great addition if you want a slightly milder, sweeter onion flavor.
step-by-step Guide: Preparing and Roasting the Perfect Turkey
This process starts the day before! Make sure you have at least 12 hours for the chill time.
Prepping the Bird: Thawing, Patting Dry, and Trussing
- Prep and Dry: Remove the turkey from its packaging and take out the giblets and neck from both cavities (I once forgot the neck bone; huge rookie mistake, don’t be me). Pat the entire exterior surface aggressively dry with paper towels. You want it bone dry.
- Make Compound Butter: In a small bowl, mix the softened butter with all the minced garlic, chopped fresh herbs (rosemary, thyme, sage), smoked paprika, 2 tsp salt, and pepper until it’s perfectly combined.
The Subdermal Butter Application Technique (Lifting the Skin)
- Lift the Skin: Starting at the neck end of the turkey, gently slide your fingers between the skin and the breast meat. Work slowly, creating a pocket over both breasts and pushing the pocket down toward the thighs.
- Butter Penetration: Take about two-thirds of the compound butter and push it deep into those pockets, spreading it evenly over the entire surface of the breast meat. Be generous! Rub the remaining butter over the outside skin.
- The Dry Chill: Drizzle the skin with a tiny bit of olive oil and sprinkle it with extra sea salt. Place the turkey, uncovered, on a rack in your roasting pan and put it in the fridge for 12– 24 hours.
Monitoring Internal Temperature for Precision Doneness
- Pre-Roast Prep: Remove the turkey from the fridge one hour before cooking. Preheat your oven to a blazing 425°F (220°C). Stuff the cavity loosely with the quartered onion, lemon, and herb sprigs. Truss the legs using kitchen twine if desired, just to keep things neat. Pour the stock into the bottom of the roasting pan.
- The Roast: Place the turkey in the preheated oven and roast at 425°F (220°C) for 30 minutes. This is our heat blast for color and crispness.
- Reduce Heat & Coast: Reduce the oven temperature immediately to 350°F (175°C). Continue roasting for 3 3. 5 hours, depending on size. Resist the urge to baste.
Crucial Chef’s Note: If the skin starts looking too dark before the internal temperature is reached (usually around 2 hours), loosely tent the breast meat with aluminum foil.
This shielding prevents burning while allowing the legs and thighs to continue cooking.
Expert Troubleshooting: Avoiding the Most Common Turkey Mistakes
Preventing Overcooked Breast Meat (Foil Shielding Techniques)
The breast cooks faster than the thigh. That is just turkey reality, but we can combat it. Once the skin is beautifully colored (typically 90 minutes to 2 hours into the 350°F roast), tear off a large sheet of aluminum foil and tent it loosely over the breast.
This slows down the cooking process for the breast while allowing the slower-to-cook thighs to catch up.
Monitoring Internal Temperature for Precision Doneness
You must use an instant read thermometer. Seriously, throw away the little pop-up button. Doneness is determined by temperature, not time.
- Insert the thermometer into the thickest part of the thigh (avoiding bone): Target 175°F (80° C).
- Insert the thermometer into the thickest part of the breast: Target 165°F (74° C).
The Critical Importance of Post Roast Resting Time
As soon as those temperatures are hit, pull the turkey out! Transfer it immediately to a clean cutting board and tent it tightly with foil. Let it rest, undisturbed, for a minimum of 45 minutes, up to one full hour.
I know it's hard to wait when everyone is hungry, but I promise you, rushing this step will result in dry meat as all the juices run out onto the board.
Maximizing Leftovers: Safe Storage and Freezing Methods
We always plan for turkey sandwiches, don't we? Proper storage is key to making sure those leftovers stay delicious and safe.
Refrigerating Roasted Turkey Safely (The Two-Hour Rule)
You must carve the turkey and get the meat cooled down quickly after resting. Never leave the carved turkey out for more than two hours. Once carved, place the turkey meat in airtight containers and store it in the coldest part of your refrigerator. It will keep safely for 3 to 4 days.
Reviving Day-Old Turkey: Reheating Techniques
To reheat without drying it out, slice the turkey, place the slices in an oven safe dish, and pour a small amount of leftover stock or gravy over the top. Cover the dish tightly with foil and heat in a 300°F (150°C) oven until just warmed through (about 20 minutes).
Low and slow heat with added moisture is the secret.
Gravy Perfection: Utilizing the Pan Drippings
Don't let those gorgeous, savory pan drippings go to waste! Pour all the drippings from the roasting pan through a fine mesh sieve into a separator or large measuring cup. Use the fat (or the clarified butter) to make a roux, then whisk in the reserved liquid stock to create the best garlic herb gravy you’ve ever tasted.
Complete Your Feast: Essential Side Dishes and Pairings
What is a perfect turkey without the perfect supporting cast? The savory richness of this garlic butter herb roasted turkey works best with sides that offer texture and acidity to balance the fat.
- Starchy Staples: Classic creamy mashed potatoes are mandatory.
- Vegetable Balance: Serve something green and vibrant, perhaps a crunchy salad with a sharp vinaigrette.
- Sweet Finish: If you’re planning a big holiday meal, you need an equally comforting dessert. If you want something incredibly buttery and sweet, try my recipe for Peppermint Meltaway Cookies: The Ultimate Buttery, Simple Holiday Recipe . Or, if you prefer something fudgy and decadent, I highly recommend the Banana Brownies with Peanut Butter Banana Frosting: Fudgy Banoffee Delight .

Recipe FAQs
Why is my turkey breast always dry despite following the cooking time?
Dryness usually results from overcooking the breast while waiting for the denser legs and thighs to finish cooking. To mitigate this, consider loosely covering the breast with aluminum foil halfway through the cook time to shield it from direct heat.
Always pull the turkey when the breast registers 160°F (71°C) internally, as it will continue cooking (carry over heat) to the safe 165°F (74°C) standard while resting.
Do I need to brine the turkey before applying the garlic butter rub?
While brining adds excellent moisture, it is not strictly necessary for this recipe due to the liberal application of the garlic butter compound under and over the skin. The fat acts as a powerful moisture barrier and flavour infuser, resulting in a naturally succulent bird.
If you do choose to brine, ensure you significantly reduce the added salt in the butter compound to prevent the finished product from becoming overly salty.
How do I prevent the turkey skin from burning before the internal temperature is reached?
If the skin is browning too rapidly, it indicates the surface temperature is too high relative to the interior cooking speed. Simply tent the entire turkey loosely with aluminum foil when the desired golden brown colour is achieved, typically about halfway through the total roasting time.
This insulation effectively deflects the direct heat while the interior continues to cook thoroughly.
What is the definitive way to know when the turkey is fully cooked?
The turkey is reliably finished when an instant read thermometer inserted into the thickest part of the thigh, without touching the bone, reads 165°F (74°C). While clear juices are a good indicator, temperature is the definitive safety standard.
Remember to allow the bird to rest undisturbed for 20-30 minutes before carving, which is essential for redistributing the juices.
What herbs work best if I don't have fresh rosemary and thyme available?
Sage is an incredibly traditional and robust alternative that pairs perfectly with turkey, garlic, and butter. You can also successfully substitute with marjoram, or a blend of dried herbs like Italian seasoning.
Note that dried herbs have a much stronger concentration, so use about one-third the amount specified for fresh herbs.
Can this recipe be adapted for a non-dairy diet?
Absolutely; you can substitute the butter with a high-quality vegan butter stick or block. Alternatively, you can use a neutral oil like olive oil, but mixing it with a tablespoon of softened coconut oil helps mimic the solid texture and richness of butter, ensuring the garlic and herbs adhere better.
Ensure your chosen substitute has a high smoke point suitable for roasting.
What is the best way to store and reheat leftover roasted turkey?
Store leftover turkey sliced or shredded in airtight containers in the refrigerator for up to 4 days, or freeze for 2 to 3 months. When reheating, place the turkey slices in an oven safe dish with a small amount of broth or gravy to prevent them from drying out.
Cover the dish and heat gently in a 300°F (150°C) oven until warmed through.
Garlic Butter Herb Roasted Turkey Recipe

Ingredients:
Instructions:
Nutrition Facts:
| Calories | 776 kcal |
|---|---|
| Protein | 99.0 g |
| Fat | 40.0 g |
| Carbs | 3.0 g |
