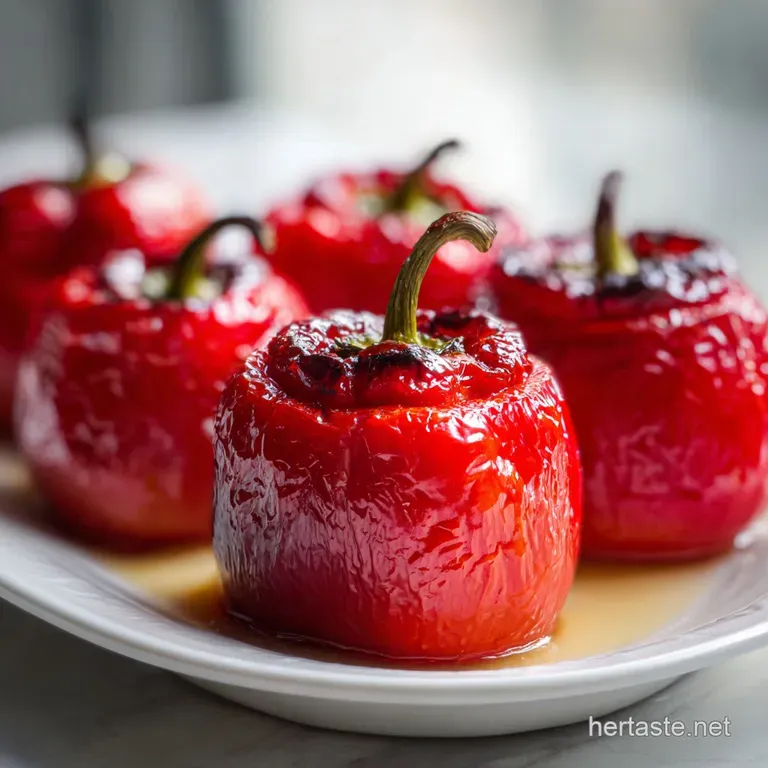
Roasted Red Peppers: Smoky and Silky
- Time: Active 5 minutes, Passive 15 minutes, Total 20 minutes
- Flavor/Texture Hook: Smoky, charred skin with a velvety, melt in-the mouth flesh
- Perfect for: Antipasto platters, sandwich toppers, or blending into creamy pasta sauces
Master Homemade Roasted Red Peppers
That distinct, crackling sound of pepper skin blistering under a hot flame is one of my favorite kitchen noises. It starts as a quiet hiss, then turns into a rhythmic popping that fills the room with a deep, earthy sweetness.
I used to rely on those jars from the supermarket, thinking they were a massive time saver, but I always found them a bit too vinegary or surprisingly mushy. One afternoon, I decided to toss a few bell peppers directly onto the rack under my broiler, and the difference was staggering.
The aroma alone is enough to convert anyone. When you make Roasted Red Peppers at home, you're not just cooking a vegetable; you're concentrating its sugars until they become almost candy like.
The skins turn pitch black and shatter like thin glass when you finally peel them away, revealing a vibrant, slippery interior that’s worlds away from the preserved stuff. It’s a simple transformation, but it’s one that will make your kitchen feel like a high end bistro for about twenty minutes of effort.
We've all been there, standing over the sink, desperately trying to pick tiny black flakes of burnt skin off a pepper while it burns our fingertips. I've made that mistake more times than I care to admit.
But after years of tinkering with temperatures and "steaming" tricks, I've found a way that makes the skins slide off in one satisfying sheet. Trust me on this, once you nail the char, you'll never go back to the jarred version again.
The Logic Of High Heat
Creating the perfect texture requires a bit of thermal manipulation to separate the skin from the flesh without turning the whole pepper into a puddle of goo.
- Thermal Expansion: Intense heat causes the moisture just beneath the skin to turn into steam, physically pushing the skin away from the flesh.
- Sugar Caramelization: High temperatures trigger the Maillard reaction, converting the natural starches in red peppers into complex, smoky sugars.
- Starch Gelatinization: Brief, intense heat softens the cell walls, creating that velvety mouthfeel while maintaining just enough structure to hold a shape.
| Method | Time | Texture Outcome | Best For |
|---|---|---|---|
| Broiler (High) | 12-15 minutes | Deeply charred, very soft | Purees, dips, and spreads |
| Stovetop Gas | 8-10 minutes | Maximum smokiness, firmer | Salads and grain bowls |
| Standard Bake | 30-40 minutes | Even sweetness, very tender | Long term marinating |
Choosing your method depends on your kitchen setup, but for the fastest results that mimic a professional kitchen, the broiler is king. It focuses the heat on the surface, which is exactly where we need it to blister the skin before the middle overcooks.
If you enjoy playing with fire, the gas burner method is incredibly rewarding for that true "fire roasted" essence.
Essential Components Analysis
To get the most out of this recipe, we need to understand how these few ingredients work together to create a balanced flavor profile.
| Ingredient | Science Role | Pro Secret |
|---|---|---|
| Red Bell Peppers | Sugar Source | Use heavy, thick walled peppers for the best flesh to skin ratio. |
| Balsamic Vinegar | Acid Balance | The acidity cuts through the charred notes and brightens the sweetness. |
| Extra Virgin Olive Oil | Lipid Carrier | Fat carries the fat soluble flavor compounds across your palate longer. |
Fresh Ingredients List
You only need a handful of items for this, so quality is everything here. Don't skip the fresh herbs if you can help it.
- 6 large red bell peppers Why this? They have the highest sugar content compared to green or yellow varieties.
- 1 tsp extra virgin olive oil Why this? Just enough to help the heat distribute evenly across the skin.
- 1 clove garlic, thinly sliced Why this? It infuses the oil without overpowering the delicate pepper flavor.
- 0.5 tsp sea salt Why this? Draws out moisture and enhances the natural sweetness.
- 1 tsp balsamic vinegar Why this? Adds a complex tang that mimics wood fired acidity.
- 1 tsp fresh oregano or thyme Why this? Earthy herbs ground the bright, sweet notes of the fruit.
| Original Ingredient | Substitute | Why It Works |
|---|---|---|
| Balsamic Vinegar | Sherry Vinegar | Provides a nutty, sharp acidity that is less sweet but very sophisticated. |
| Fresh Oregano | Dried Oregano | Use half the amount. Note: It's more pungent, so add it early to the oil. |
| Red Bell Peppers | Poblano Peppers | Same method, but adds a mild, earthy heat. Note: Skins are thinner. |
Detailed Cooking Process
- Prep the peppers. Wash and dry the 6 large red bell peppers thoroughly. Note: Excess water creates steam that can prevent a quick char.
- Oil the surface. Rub the 1 tsp extra virgin olive oil over the skins until they shimmer.
- Position the rack. Set your oven rack to the highest position, about 4 inches from the broiler.
- Blister the skins. Place peppers on a tray and broil for 15 minutes until the skins are blackened and bubbling.
- Rotate for evenness. Use tongs to turn the peppers every 4-5 minutes to ensure all sides are charred.
- The steam trap. Move the hot peppers into a large bowl and cover tightly with plastic wrap for 10 minutes.
- The final reveal. Gently pull the blackened skins away with your fingers; they should slide right off.
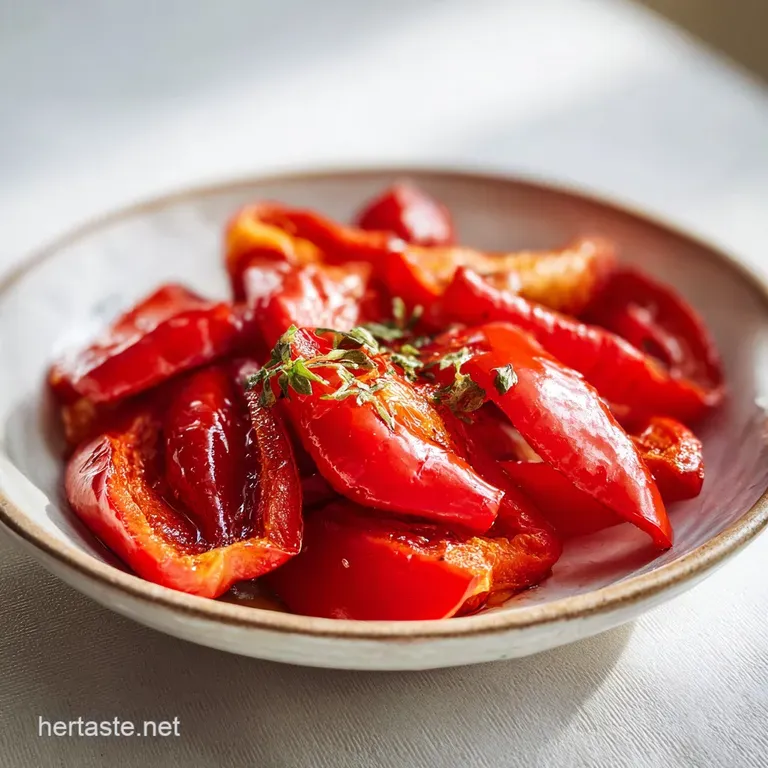
- Remove the core. Slice the peppers open, discard the seeds and stems, and cut into wide strips.
- Season the batch. Toss the strips with 0.5 tsp sea salt, 1 tsp balsamic vinegar, and the 1 clove garlic.
- Infuse with herbs. Finish by folding in the 1 tsp fresh oregano or thyme before serving.
Chef's Tip: Whatever you do, do not rinse the peppers under the tap to remove the charred bits. You'll wash away all those precious, smoky oils that make the dish special. Use a damp paper towel if you really need to wipe off a stubborn flake of skin.
Solving Common Problems
The biggest hurdle with Roasted Red Peppers is usually the peeling process, but a few small tweaks can fix almost any issue.
Skins Are Still Sticking
If the skin feels glued to the flesh, it usually means the pepper wasn't charred enough or wasn't steamed long enough. The "blacker" the skin gets, the easier it comes off. If you find yourself struggling, put them back under the heat for another 2 minutes or leave them in the covered bowl for an extra 5 minutes to let the steam do its job.
Peppers Are Too Mushy
This happens when you cook them at too low a temperature for too long. We want a fast, aggressive heat that attacks the skin while leaving the flesh with some integrity. If you're using a standard oven setting instead of the broiler, ensure it's at least 400°F (200°C) to keep things moving.
| Problem | Root Cause | Solution |
|---|---|---|
| Bitter Aftertaste | Too much black skin left | Gently wipe (don't wash) peppers with a paper towel. |
| Watery Sauce | Not drained well | Let peeled peppers sit in a colander for 5 minutes before seasoning. |
| Dull Flavor | Lack of acidity | Add an extra splash of balsamic or a squeeze of lemon juice. |
Common Mistakes Checklist
- ✓ Dry the peppers completely before adding oil to ensure the skin blisters instead of steams.
- ✓ Don't be afraid of the black color; the skin should look completely burnt and "ruined."
- ✓ Keep the bowl tightly sealed during the steaming phase to trap every bit of moisture.
- ✓ Slice the garlic as thinly as possible so it softens into the peppers rather than staying crunchy.
- ✓ Wait until the peppers are cool enough to handle so you don't burn your fingertips while peeling.
Scaling The Batch
If you’re hosting a big dinner, it’s incredibly easy to double or triple this recipe. Just be mindful of your tray space.
- Doubling (12 Peppers): Use two separate baking sheets. If your broiler isn't large enough, roast them in batches. Don't crowd them too much, or they will steam each other and lose that charred edge.
- Small Batch (2 Peppers): You can actually do this directly over a gas flame on the stove using tongs. It's much faster for a single serving and saves you from heating up the whole oven.
- Baking Large Batches: If you're doing 20+ peppers, lower the oven to 400°F (200°C) and roast for about 30-35 minutes, rotating once.
| Servings | Pepper Count | Oil Amount | Total Time |
|---|---|---|---|
| 2 People | 2 Large | 1/2 tsp | 15 mins |
| 6 People | 6 Large | 1 tsp | 20 mins |
| 12 People | 12 Large | 2 tsp | 35 mins |
Myths About Roasting
There are plenty of "rules" out there that just don't hold up when you actually get into the kitchen.
One common myth is that you need to grease the tray heavily. In reality, the oil on the peppers themselves is more than enough. Adding extra oil to the tray usually just results in a smoking kitchen and a greasy mess. Another one is that the peppers are "cooked" once they are soft.
Actually, the goal of roasting is the skin separation first, and the tenderness second. If they are soft but the skin is still red, they haven't seen enough heat.
Searing the skin doesn't "trap" the juices inside, either. That’s a total myth. The juices will actually pool in the bottom of your steaming bowl. Don't throw that liquid away! It's essentially liquid gold and should be poured right back over the peppers once they are peeled and sliced.
Storage And Waste
Once your peppers are seasoned and ready, you need to store them properly to maintain that silky texture.
Keep them in an airtight glass jar covered in a little extra olive oil. They will stay fresh in the fridge for up to 7 days. If you want to keep them longer, you can freeze the peeled, unseasoned strips in a single layer on parchment paper, then transfer them to a freezer bag for up to 6 months.
Don't toss those pepper seeds and stems into the trash immediately! If you're making a vegetable stock soon, the stems add a lovely, subtle sweetness. Even better, if you have any leftover skins that didn't get too charred, you can dehydrate them and grind them into a homemade smoky pepper powder.
It’s innovative, zero waste, and tastes better than any store-bought paprika.
Perfect Serving Ideas
These peppers are incredibly versatile, but I have a few favorite ways to use them that really let their flavor shine.
For a quick lunch, I love layering these over a pan-fried Tilapia recipe to add a smoky contrast to the delicate fish. They also make a fantastic addition to a Mediterranean grain bowl. If you're looking for a side dish to serve alongside them, the earthy notes in this How to Elevate recipe pair beautifully with the sweetness of the charred peppers.
- The Creamy Route
- Blitz the peppers with a splash of heavy cream and parmesan for a 5 minute pasta sauce.
- The Brunch Route
- Fold them into a fluffy omelet with some sharp goat cheese.
- The Party Route
- Top toasted baguette slices with a strip of pepper and a single anchovy for a classic tapa.
Roasted Red Peppers are one of those "building block" recipes that make everything else in your kitchen taste more intentional. Whether you're tossing them into a salad or eating them straight out of the jar with a fork, the effort of roasting them yourself is always worth it.
Enjoy the process, and don't worry about getting your hands a little messy!

Recipe FAQs
How long do red peppers need to roast?
12 to 15 minutes under high heat. You must expose them directly to the broiler until the skin is completely blackened and blistered on all sides for easy peeling.
What are the three basic steps to roasting red bell peppers?
Char the skin, steam them immediately, and then peel off the skin. The high heat char creates the smoky flavor, and the steam trapped in a sealed bowl loosens the skin for removal.
Are roasted red peppers the same as roasted red bell peppers?
Yes, they are effectively the same ingredient. "Red pepper" is often used casually, but the thick walled bell pepper is the standard vegetable roasted for texture and sweetness in savory applications.
How long to cook red pepper at 400 degrees?
Bake at 400°F for 30 to 35 minutes, rotating once. While the broiler is faster for charring the skin, a standard oven at this temperature cooks them through more gently, resulting in a very tender texture suitable for dips.
What happens if I don't steam the peppers after charring them?
The skin will be incredibly difficult to remove. Steaming traps moisture that contracts the flesh away from the skin, allowing it to peel off in large, satisfying sheets instead of forcing you to scrape tiny burnt flakes off.
Is it true that I must use a stainless steel baking sheet for roasting?
No, this is a common misconception. The tray material doesn't significantly affect the charring, but lighter colored sheets may reflect heat, so use whatever durable tray you have available.
Can I use the smoky flavor from roasted peppers in a creamy sauce?
Absolutely, the smokiness balances richness very well. When you master the technique of achieving a velvety flesh here, you can blend that flavor into cream bases, much like how acid balances fat in our Delicious Louisiana Chicken Pasta recipe.
Easy Roasted Red Peppers

Ingredients:
Instructions:
Nutrition Facts:
| Calories | 59 kcal |
|---|---|
| Protein | 1.7 g |
| Fat | 1.2 g |
| Carbs | 10.1 g |
| Fiber | 3.5 g |
| Sugar | 6.9 g |
| Sodium | 194 mg |
