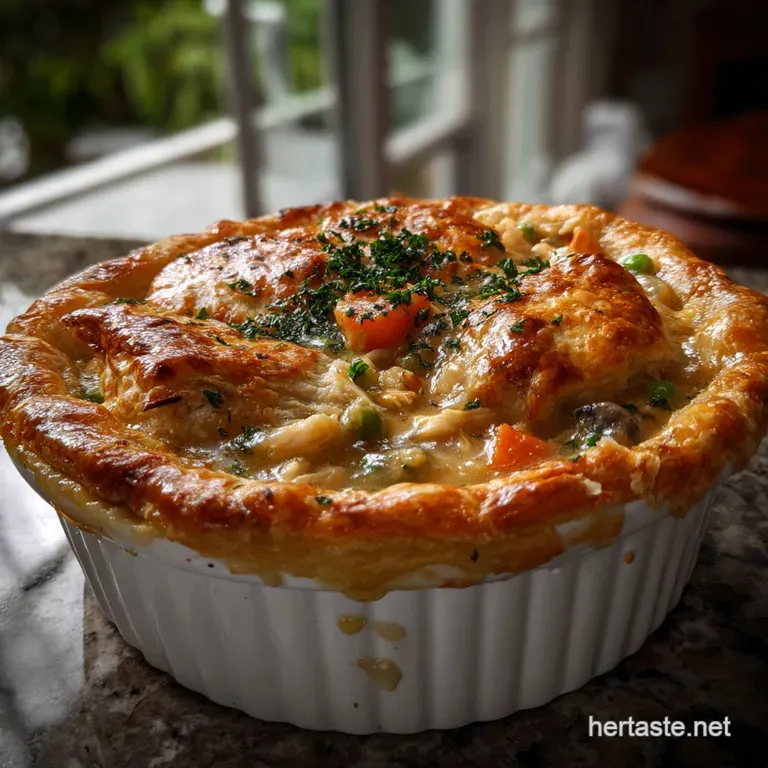
Bisquick Pot Pie: Rich Umami & Buttery Topping
- Effort/Time: 10 minute prep, 40 minute total.
- Flavor Hook: Rich chicken umami meets a buttery, biscuit-style finish.
- Perfect for: Busy-weeknight families and cold-weather comfort seekers.
- The Culinary Physics Behind a Flaky Bisquick Pot Pie
- Precision Metrics for This Savory Classic
- The Alchemy of Umami: Selecting Your Elements
- Essential Tools for Your Bisquick Pot Pie
- Execution Protocol: Engineering the Perfect Bisquick Pot Pie
- Why Your Crust Fails: Troubleshooting Common Mistakes
- Scaling Laws: Thermal Mass and Volume Logistics
- Flavor Architecture: Creative Variations
- Common Myths
- Thermal Stability: Storage & Zero Waste
- The Perfect Pairing: Completing Your Comfort Food Experience
- Recipe FAQs
- 📝 Recipe Card
We have all been there: the "swamp" pot pie. You pull it out of the oven, hoping for a structured masterpiece, only to find a runny, flavorless interior topped with a doughy, lead heavy lid that refuses to crisp. It is a technical heartbreak that turns a cozy evening into a chore of eating soggy starch.
I remember my first attempt at a Bisquick Pot Pie. I eyeballed the milk, ignored the egg, and ended up with a crust that had the structural integrity of a wet sponge and a filling that tasted like salt water. It was a failure of ratios and thermodynamics that I vowed never to repeat.
This masterclass is the engineering solution to that kitchen disaster. We are focusing on starch gelatinization and the precise CO2 release of your topping to ensure every bite provides a velvety mouthfeel and a mahogany, crisp finish. Let’s crack on and fix your dinner game forever.
The Culinary Physics Behind a Flaky Bisquick Pot Pie
This recipe relies on specific scientific triggers to transform basic pantry staples into a structural marvel. Understanding these mechanisms ensures consistency every time you preheat the oven.
- Starch Gelatinization: The modified corn starch in the cream of chicken soup absorbs the milk's moisture and the chicken's juices, swelling at 165°F to create a stable, non-runny suspension.
- Chemical Leavening: The sodium aluminum phosphate in the Bisquick Hearty Helper Mix reacts with the milk’s acidity and the egg’s moisture, releasing carbon dioxide bubbles that lift the crust.
- Protein Coagulation: The egg acts as a structural binder; as it heats, the proteins denature and bond, preventing the biscuit topping from dissolving into the liquid filling.
- Maillard Reaction: Amino acids in the chicken and sugars in the milk undergo a chemical reaction above 285°F, creating the signature mahogany color and nutty aroma.
Precision Metrics for This Savory Classic
To achieve the "Masterclass" result, you must adhere to these exact parameters. These figures are the foundation of your success.
| Metric | Value |
|---|---|
| Yield | 6 servings |
| Prep Time | 10 minutes |
| Cook Time | 30 minutes |
| Total Time | 40 minutes |
| Baking Temperature | 400°F (205°C) |
| Internal Doneness | 165°F (Filling bubbling at edges) |
The Alchemy of Umami: Selecting Your Elements
Selecting your ingredients is not just about shopping; it is about choosing the right chemical building blocks for flavor and texture.
| Ingredient | Chemical/Physical Role (Science) | The Pro Secret (Why This Matters) |
|---|---|---|
| Bisquick Hearty Helper Mix | Provides pre-measured leavening agents and shortening | Ensures a consistent rise without overworking the gluten. |
| Whole Milk | Fat-in-water emulsion and lactose source | The 3.25% fat content provides a richer mouthfeel and better browning via lactose. |
| Large Egg | Protein based structural binder | Creates a "lift" in the batter and prevents the topping from sinking into the soup. |
| Cream of Chicken Soup | Hydrocolloid thickening agent | Acts as the "glue" that keeps the vegetables and protein in a velvety suspension. |
Ingredient List & Substitutions
- 2 cups cooked chicken breast, cubed or shredded (approx. 300g): Why this? Lean protein provides bulk without adding excess rendered fat to the sauce.
- Sub: Leftover rotisserie chicken. (Adds more salt, so reduce seasoning).
- 1.5 cups frozen mixed vegetables (approx. 250g):
- Sub: Canned peas and carrots. (Drain thoroughly to avoid excess hydration).
- 10.5 oz cream of chicken soup (1 can): Why this? Contains modified starches that remain stable under high heat.
- Sub: Cream of Mushroom soup for a deeper, earthier umami profile.
- 0.5 tsp McCormick Onion Powder:
- Sub: Dehydrated onion flakes (adds a slight textural bite).
- 0.25 tsp Black Pepper:
- Sub: White pepper for a cleaner, hidden heat without black flecks.
- 1 cup Bisquick Hearty Helper Mix (120g): Why this? High ratio shortening content creates a tender crumb.
- Sub: Homemade biscuit mix (Flour, baking powder, salt, shortening).
- 0.5 cup Whole Milk: Why this? Fat content inhibits gluten development for a softer crust.
- Sub: 2% Milk (Yields a slightly tougher, less rich crust).
- 1 Large Egg:
- Sub: 1/4 cup heavy cream (Will be richer but lack the structural lift of egg protein).
Essential Tools for Your Bisquick Pot Pie
Using the right gear prevents uneven heat distribution, which is the primary cause of a "soggy bottom" in any Bisquick Pot Pie.
- Pyrex 9 inch Glass Pie Plate: Glass allows you to monitor the browning of the filling edges. It retains heat longer than metal, ensuring the center reaches 165°F.
- OXO Good Grips Whisk: Necessary for emulsifying the milk and egg into the Bisquick Pot Pie batter without leaving dry flour pockets.
- Lodge Cast Iron Skillet (Optional Alternative): If you want a more rustic, "shatter" crust on the bottom, use a preheated cast iron skillet to sear the filling before topping.
- Digital Instant Read Thermometer: The only way to guarantee the chicken and sauce are safely heated through the center.
Execution Protocol: Engineering the Perfect Bisquick Pot Pie
Follow these steps with surgical precision. Do not combine steps; the order of operations matters for the starch-to-liquid ratio.
- Preheat the oven to 400°F. Note: High initial heat is required to trigger the chemical leaveners immediately.
- Combine the 2 cups cooked chicken and 1.5 cups frozen vegetables in your Pyrex dish.
- Incorporate the 10.5 oz cream of chicken soup, 0.5 tsp onion powder, and 0.25 tsp black pepper into the chicken mixture.
- Smooth the filling into an even layer until the surface is flat, ensuring no vegetable peaks stick out to burn.
- Whisk 1 cup Bisquick Pot Pie mix, 0.5 cup milk, and 1 egg in a separate bowl until the batter is glossy and few lumps remain.
- Pour the batter over the filling until the chicken is completely submerged and the batter reaches the edges of the dish.
- Bake for 30 minutes until the crust is a deep mahogany brown and the filling sizzles at the edges.
- Monitor the aroma; a nutty, toasted fragrance should fill the kitchen at the 25 minute mark.
- Remove from heat and let rest for 5 minutes. Note: This allows for "carryover thickening" as the starches cool and set.
Chef's Tip: Freeze your Bisquick Pot Pie mix for 10 minutes before mixing. The cold fat in the mix creates steam pockets when it hits the hot oven, resulting in a significantly fluffier topping.
Why Your Crust Fails: Troubleshooting Common Mistakes

Most issues with a Bisquick Pot Pie stem from thermal mass problems or hydration imbalances.
Why Your Crust is Dense or Tough
If the topping feels like a brick rather than a cloud, you likely overworked the batter. Gluten forms when flour and liquid are agitated; too much mixing creates a tough network.
| Problem | Root Cause | The Fix | Pro Protocol |
|---|---|---|---|
| Tough Topping | Over mixing the batter | Stir only until just combined | Stop when you see the last streak of flour. |
| Sinking Crust | Filling was too cold | Use room temp chicken/veg | Microwave filling for 60s before topping. |
| Runny Center | Incomplete starch gelatinization | Short cook time | Use a thermometer to verify 165°F in the center. |
Why Your Filling is Runny
The filling needs to reach a specific temperature for the starches to "set." If the oven is too cold, the topping browns while the inside stays liquid. This is common if you're multitasking; if you're also making my Creamy CheddarPotato Soup recipe, ensure your oven rack is positioned in the center for even airflow.
Scaling Laws: Thermal Mass and Volume Logistics
Doubling a Bisquick Pot Pie is not as simple as multiplying by two. The physics of heat penetration change as the volume increases.
- The 1.5x Rule: When doubling the filling, only use 1.5x the salt/pepper. Spices accumulate non-linearly in larger volumes.
- Thermal Mass Warning: A double batch in a 9x13 pan has more "center" and less "edge." Expect the center to take 25 30% longer to cook.
- Pan Crowding: If you double the filling but don't increase the pan surface area, the steam from the vegetables will trapped, leading to a soggy crust.
- Halving: If making a personal sized portion, reduce the bake time by 20% and check doneness at 20 minutes.
Flavor Architecture: Creative Variations
While the classic Bisquick Pot Pie is a staple, you can manipulate the flavor profile by introducing new aromatic elements.
Herbs and Garlic Twist
Whisk 1/2 tsp of dried thyme and 1/4 tsp of garlic powder into the dry Bisquick mix. This creates a savory herb biscuit top that pairs beautifully with the chicken. This profile is similar to the aromatic complexity found in a high-quality Pumpkin Pie Spice recipe.
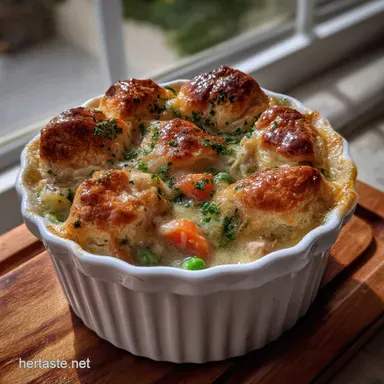
Cheesy Bisquick Chicken Pot Pie
Fold 1/2 cup of sharp cheddar cheese into the topping batter. The cheese will melt into the crust, creating "crispy lace" edges where it touches the glass dish.
Dietary Swap: gluten-free
Use the gluten-free Bisquick variety. Note: This version requires 5 10% more milk as GF flours are highly absorbent and can lead to a gritty texture if under hydrated.
Common Myths
- Myth: You must sauté the vegetables first.
- Truth: Frozen mixed vegetables are blanched before freezing. The 30 minute bake time at 400°F is more than enough to achieve a tender texture without turning them into mush.
- Myth: Pre-cooking the Bisquick batter is necessary.
- Truth: The "Impossible" style of this pie relies on the batter starting liquid so it can form a seal against the filling, trapping steam.
Thermal Stability: Storage & Zero Waste
A Bisquick Pot Pie is a great candidate for meal prep, but you must respect the degradation timeline of the crust.
- Fridge: Store in an airtight container for up to 3 days.
- Freeze: You can freeze the baked pie for up to 2 months. Wrap tightly in foil to prevent freezer burn.
- Reheating: Avoid the microwave for the whole pie. Reheat in a 350°F oven for 15 minutes to re-crisp the crust. The microwave will make the biscuit topping rubbery through rapid protein denaturation.
Zero Waste Philosophy: Don't discard the liquid at the bottom of the frozen vegetable bag. Transform: Whisk it into the soup mix. Science: This liquid contains water soluble vitamins and minerals (leached during blanching) that add subtle flavor depth to your filling.
The Perfect Pairing: Completing Your Comfort Food Experience
To balance the richness of the Bisquick Pot Pie, you need acidity or freshness. A crisp garden salad with a lemon vinaigrette provides the necessary palate cleanser.
If you are looking for a dessert to follow this savory meal, something with a high "shatter" factor like my Homemade Apple Pie Bars recipe provides a thematic bridge from dinner to dessert. The contrast between the soft pot pie filling and the crumbly bars makes for a texturally interesting meal.
Whether you're serving this to kids or a table of foodies, the Bisquick Pot Pie remains a masterclass in efficiency. By respecting the science of the batter and the temperature of the filling, you ensure a "velvety" interior and a "golden" top every single time.
Trust me, once you nail the 400°F sear, you’ll never go back to frozen pies again. Let's eat.

Recipe FAQs
Can I use fresh chicken instead of rotisserie?
Yes, but timing must change significantly. Pre-cooked chicken saves 25 minutes of simmering time necessary to fully tenderize raw poultry. If using raw, ensure internal temperature reaches 165°F before topping with Bisquick.
Can I make the filling ahead of time?
Yes, cool completely before assembly. Refrigerating the hot filling causes residual steam to condense, which can prematurely soak the bottom crust layer. If you are interested in faster cooking methods for comfort food bases, review our guide on mastering time via the Instant Pot Chicken Noodle Soup The 50Minute Classic Comfort Meal.
Why is my Bisquick topping dense and rubbery?
Overmixing the quick bread batter created excessive gluten structure. Overworking the flour hydrates gluten strands too rapidly, resulting in a tough, elastic matrix rather than a tender, biscuit crumb.
- Mix only until just combined
- Use cold milk for mixing
- Avoid pressing down the topping
Is Bisquick lighter than a traditional double crust pie?
Bisquick results in a significantly lighter texture. Traditional pie dough relies on layering solid fat and flour for flaky lift, whereas Bisquick utilizes chemical leaveners (baking powder/soda) for a biscuit like, cake like rise.
Can I use a sweet fruit filling instead?
Myth: Bisquick topping only suits savory dishes. Reality: The base chemistry works for fruit, but you must increase sugar content in the fruit base by 25% to balance the blandness of the topping.
Should I use salted or unsalted butter in the filling?
Unsalted butter offers precise sodium control for the roux. Because the broth and vegetables already introduce sodium, using unsalted fat ensures the final flavor profile doesn't become overly briny, unlike when using pre-salted varieties.
What is the correct internal temperature for doneness?
Rapid Fire:190°F for filling, 205°F for crust center.
Easy Bisquick Pot Pie Delight
Ingredients:
Instructions:
Nutrition Facts:
| Calories | 246 kcal |
|---|---|
| Protein | 19.3 g |
| Fat | 8.1 g |
| Carbs | 23.4 g |
| Fiber | 1.8 g |
| Sugar | 2.9 g |
| Sodium | 565 mg |
