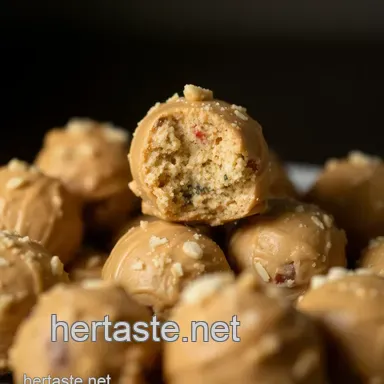
Decadent Butterfinger Balls
- Look into Into Decadence with Butterfinger Balls
- What's the Buzz About Butterfinger Balls?
- Why You'll Love These Butterfinger Balls
- Essential Ingredients Guide: Unlocking the Secrets of Sweet Delights
- Delicious Butterfinger Balls: Your New Favorite No-Bake Treat
- Pro Tips & Secrets for Butterfinger Balls
- Perfect Presentation
- Storage & Make-Ahead
- Creative Variations
- Complete Nutrition Guide
- Expert FAQ Solutions
- Encouraging Conclusion
- 📝 Recipe Card
Look into Into Decadence with Butterfinger Balls
Have you ever had one of those moments when you bite into something so good it takes you straight back to your childhood? for me, that happened last summer at a picnic.
There was this amazing dessert platter, and right smack in the center were these little treats that looked like they came straight from the candy universe: butterfinger balls .
I couldn’t resist! as i took my first bite, the sweet, buttery taste of the butterfinger candy bar hit all the right notes.
It was like a nostalgic trip down memory lane, bringing back those hot summer days devouring butterfinger bars to the last crumb.
🍫
Let me tell you, these little balls of happiness are a game changer and super easy to whip up. no baking required just classic no-bake recipes that give you the indulgent flavor combinations you crave without a ton of fuss.
They’re perfect for everything from kid-friendly recipes to potluck gatherings, and they take no more than 45 minutes to make.
You can grab your ingredients, and before you know it, you’ve got about 20 delightful balls chilling in the fridge.
Yep, that’s like a mini party in your mouth!
What's the Buzz About Butterfinger Balls?
Origin story : so, where did this deliciousness come from? butterfinger candy bars have been around since the 1920s. they've always been that unique blend of crunchy and creamy, making them irresistible.
And taking that iconic flavor and transforming it into a ball makes total sense it’s the ultimate retro dessert tie-in!
Modern day must have : today, butterfinger balls are all the rage, especially with the rise of easy dessert recipes that deliver big flavor without a lot of time in the kitchen.
These treats have become staples at parties and holidays. everyone loves a good, chocolate covered treat , especially when it’s homemade, right?
Time and cost efficiency : preparing these bad boys only takes about 15 minutes and just 30 minutes in the fridge to firm up.
That's it! they’re incredibly budget friendly too. most of the ingredients are kitchen staples. so, for roughly $10, you can treat your whole crew.
Talk about a win-win!
Why You'll Love These Butterfinger Balls
Health and happiness : now, you might be thinking, “what about the health angle?” honestly, it’s a sweet treat, so moderation is key.
But hey, homemade snacks give you control. you can substitute some ingredients if you want a lighter version. butterfinger balls are also big on flavor and small on guilt well, sort of.
The perfect throwback snack : they shine in special moments too. you know those small gatherings where you want to impress but still keep it chill? these are your go-to treats .
Plus, they make for fantastic conversation starters. everyone will ask, "what are these indulgent sweets?" and, of course, you'll tell them about the butterfinger candy bar inspiration behind it.
Better than the rest : why are these balls such a hit? well, they bring in that crunchy, creamy texture that most similar treats just can’t capture.
Whether you’re bringing them to a birthday party, holiday get-together, or just enjoying a quiet night in, they make you feel like a pro!
So, are you ready to whip up some butterfinger balls ? seriously, i can already feel the excitement in the air.
If my mouth is watering just writing this, just think what’ll happen when they’re actually made! now, let’s check out the ingredient list so you can get rolling on this sweet adventure…
Essential Ingredients Guide: Unlocking the Secrets of Sweet Delights
Okay, if you're anything like me, you love a good sweet treat. let's dive into the world of essential ingredients, focusing on how to whip up things like butterfinger balls .
Trust me, these little nuggets are not just delicious they're super easy to make, and you can already picture them at any party or casual gathering, right? let’s break it down!
Premium Core Components
First off, quality matters . When you're shopping for ingredients, pay attention to a few key details:
Measurements : for the filling of your butterfinger balls, you'll need 1 cup crushed butterfinger candy bars (that’s about 4 bars if you want to know), 1 cup creamy peanut butter , and a couple of other goodies.
In metric: 100g butterfinger, 240g powdered sugar, and so on.
Quality indicators : Look for fresh Butterfinger bars with a wrapper that's not damaged. For peanut butter, check that it doesn’t contain weird additives. Creamy is key for those perfect balls!
Storage guidelines : your butterfinger balls can hang out in the fridge in an airtight container for about a week , but good luck keeping them around that long! the bars can last several months if unopened.
Freshness tips : try to use ingredients that aren’t past their expiration dates. oh! and pro tip: check the peanut butter for oil separation.
If there’s a layer on top, it means it’s a bit older.
Signature Seasoning Blend
While Butterfinger balls are sweet enough, a little flavor boost is always nice. Think of essential spice combinations when necessary. For desserts, I like to stick with classic flavors.
Essential spices : Vanilla extract always enhances sweetness. A pinch of salt balances those flavors perfectly.
Herb selections : Okay, herbs can sound weird in desserts, but keep it light with a touch of mint sometimes. Just a hint, you know?
Flavor enhancers : besides vanilla, consider a smidge of cinnamon to jazz up your blah snacks. and if you're feeling bold, maybe even a bit of flavored extract like almond for a twist.
Regional variations : Don't be shy! In the South, using a splash of bourbon in your sweet treats is a thing. And why not? It enhances the experience!
Smart Substitutions
Now, let’s talk about improvisation because sometimes you just don’t have that one thing on hand. Here are some common substitutions:
Common alternatives : Can't find Butterfinger? Use any crunchy candy bar! Think of Snickers , or Twix for a nutty twist.
Dietary modifications : Need sugar-free options? Look for sugar-free chocolate or use an alternative sweetener in the mix, but watch the taste.
Emergency replacements : Out of chocolate? Don’t sweat it. Simply dip the balls in white chocolate or even caramel for a different flair.
Seasonal options : Grab pumpkin spice in the fall or peppermint for a holiday spin. Your Butterfinger balls can be dressed up for any occasion!
Kitchen Equipment Essentials
Before you start whipping up some Butterfinger balls, make sure you've got your kitchen gear ready. Here’s a quick checklist:
Must have tools : Mixing bowls are a must! An electric mixer makes mixing easy, but you can totally use a spoon if you’re feeling old school.
Alternative equipment options : Don’t have a double boiler? Pop your chocolate in a microwave safe bowl. It’s all good if you keep stirring and watching closely!
Preparation tips : Chill your balls before dipping them in chocolate. This makes everything neater.
Storage solutions : Put those beauties in a cute tin or container, and you’ve got yourself a fun gift or a treat for later!
So, whether it’s those candy bar recipes you’re after, or creating a butterfinger dessert just for the heck of it, you’re set! in the next section, we’ll get into the nitty gritty of actually making those magic butterfinger balls happen.
Get excited, because they’re as fun to make as they are to eat! you’re just a few steps away from a fantastic sweet snack idea that will have everyone reminiscing about those classic american desserts!
Delicious Butterfinger Balls: Your New Favorite No-Bake Treat
Oh my gosh, if you've ever bitten into a butterfinger candy bar , you know that delightful mix of creamy peanut butter and that crispy crunch.
Now, imagine that in a bite sized ball covered in luscious chocolate. yup, welcome to your newest obsession: butterfinger balls ! this easy dessert recipe is the perfect mix of nostalgia and indulgence.
And guess what? you don't even have to turn on the oven! let’s dive into the fun world of no-bake desserts.
Essential Preparation Steps
Mise en Place: Get Your Game Face On!
Before we start rolling our butterfinger balls, it’s all about that classic french term, ‘ mise en place ,’ which basically means putting everything in its place.
So, gather your ingredients: 1 cup crushed butterfinger bars , 1 cup creamy peanut butter , 2 cups powdered sugar , and 1/2 cup softened unsalted butter .
This prep makes everything smoother, trust me!
Time Management Tips: Stay Ahead of the Game
Time is of the essence in the kitchen! since this recipe takes about 15 minutes of prep time and 30 minutes of chilling , get everything organized.
While the mixture is chilling, you can clean up your space. less mess, more fun!
Safety Considerations: Always Better Safe Than Sorry
When melting chocolate for our coating, it’s crucial to use a microwave safe bowl and heat in 30-second increments to avoid burning.
Keep an eye on it, and stir until smooth. safety first, dessert second!
Step-by-step Process
Clear Instructions: Let’s Get Rolling!
- In your mixing bowl, combine 1 cup crushed Butterfinger bars and 1 cup peanut butter . Mix it up!
- Add 1/2 cup softened butter and stir until it’s all blended. Gradually sprinkle in 2 cups powdered sugar , mixing until well combined.
- Roll a tablespoon sized scoop into a ball and place on a parchment lined baking sheet. Chill for 30 minutes .
- Meanwhile, melt your 1 1/2 cups semi sweet chocolate chips in a microwave safe bowl using the 30-second intervals method.
- Dip each chilled ball into the melted chocolate and return it to the baking sheet. Chill again for 15- 20 minutes until set.
Temperature Control Points: Keep It Steady
When chilling, your fridge should be around 34° F to 40° F . This ensures that the Butterfinger balls set nicely without melting into a gooey mess.
Expert Techniques
Chocolate Dipping Tips: Get Your Coating Just Right
For a smoother coating, add 1 tablespoon of vegetable oil to your melted chocolate. this little trick helps achieve that glossy finish we all love.
Trust me, you want these to look as good as they taste!
Troubleshooting Tips: What If Things Go Awry?
If your chocolate is too thick, add a splash of vegetable oil or a little more chocolate until you reach that perfect dipping consistency.
No worries, it happens to the best of us in the kitchen!
Success Strategies
Common Mistakes to Avoid: Don’t Let Them Happen to You!
Let’s be real here; we've all made mistakes in the kitchen. don’t rush the chilling time! if your balls aren’t firm enough, coating them becomes a hot mess.
Take a deep breath and wait it out for those 30 minutes .
Quality Assurance Tips: Taste Test Time!
Once you've coated and chilled your Butterfinger Balls, do the ultimate taste test. Grab a bite and enjoy the combination of that crunchy texture with the creamy chocolate. Ah, bliss!
Final Thoughts
So there you have it! these butterfinger balls are not just a sweet snack idea; they’re perfect for parties, game nights, or just when you want to indulge a little.
They’re easy enough for the kids to help with, so go ahead and call them for some fun in the kitchen! plus, you get to feel like a pro with all these expert techniques in your back pocket.
These no-bake beauties make for wonderful homemade snacks and are guaranteed to bring a smile to anyone's face. so, what are you waiting for? get started, and in no time, you’ll have a delightful batch of these bite sized desserts to enjoy.
Honestly, nothing beats that feeling, right?
Stay tuned for the next section where I’ll share more Additional Information about ingredient swaps, storage tips, and variations to elevate your Butterfinger Balls to the next level!
Pro Tips & Secrets for Butterfinger Balls
Alright, let’s dive into the delicious world of butterfinger balls ! these little gems are honestly one of my favorite no-bake recipes .
They’re like a throwback to childhood, and trust me, everybody will love ’em. here are some of my personal insights and tips to make your candy making game strong.
Chef's personal insights: first off, i can’t stress enough the importance of using room temperature ingredients. it helps everything blend together effortlessly.
When you’re mixing that peanut butter and softened butter, it should come together like magic!
Time saving Techniques: If you’re in a rush, try using a food processor to crush those Butterfinger candy bars. It’s way faster than doing it by hand, and you can control the texture smooth or chunky, the choice is yours!
Flavor enhancement tips: thinking of adding a twist? consider a splash of vanilla extract in the filling for an extra layer of flavor.
Oh, and if you want to make it a little spicier, a pinch of sea salt can really highlight the sweetness of the chocolate.
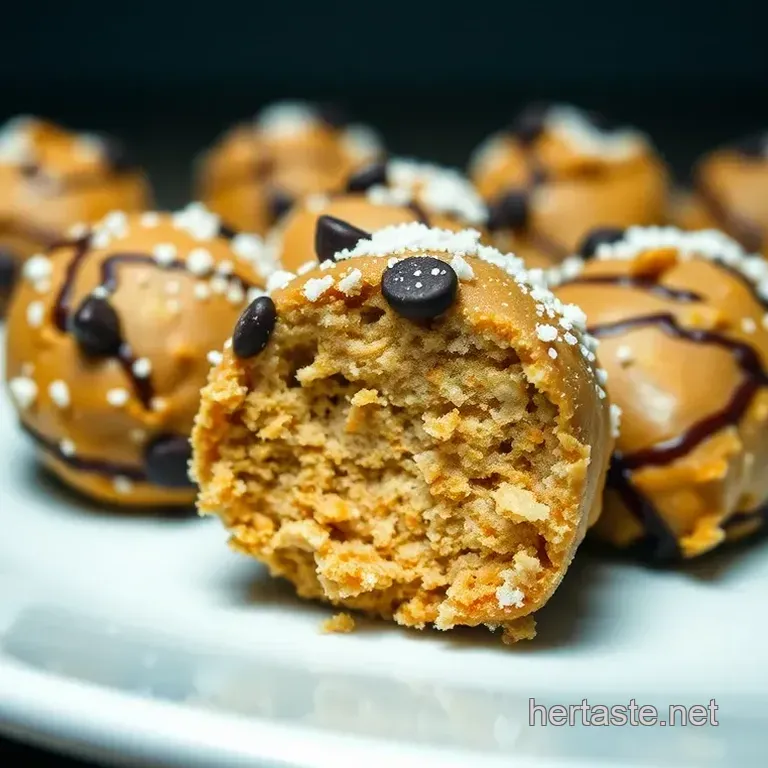
Presentation Advice: For a lovely presentation, dust some powdered sugar over your finished Butterfinger dessert before serving. It gives a nice contrast and makes the treats look super inviting.
Perfect Presentation
Speaking of presentation, let’s talk about how to make these Butterfinger Balls look as amazing as they taste. After all, we eat with our eyes first!
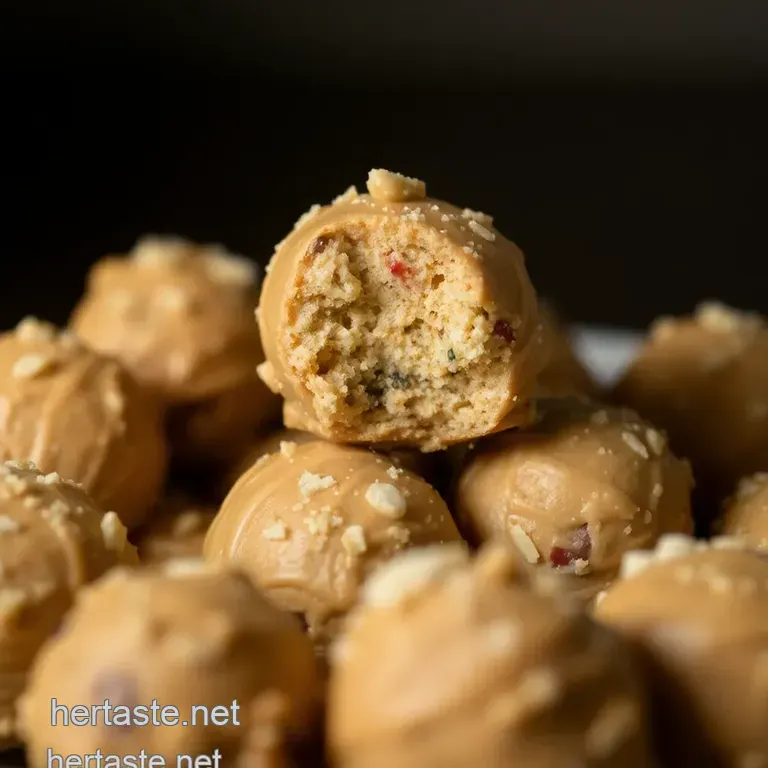
Plating Techniques: Use a nice platter and stack these babies up! You can even make mini dessert towers by layering them with parchment paper.
Garnish Ideas: A sprinkle of crushed peanuts or drizzles of melted chocolate on top can elevate the whole look. You could even add some colorful sprinkles for a festive vibe perfect for treats for parties !
Color Combinations: Think about contrast! The dark chocolate coating against the bright orange of the Butterfinger filling just screams delicious. Pair them with other vibrant desserts for a beautiful display.
Visual Appeal Tips: Don’t forget about the context. If you’re serving these at a holiday gathering, get creative with seasonal decorations. A little holiday themed plate can make all the difference!
Storage & make-ahead
Now, let’s chat about how to keep your Butterfinger Balls fresh and ready for whenever that sweet tooth hits.
Storage Guidelines: These lovely treats can be stored in an airtight container in the fridge for about one week . Just make sure they're well chilled before you stash them away.
Preservation methods: to keep them even longer, you can freeze them. just layer them with parchment paper and pop them in a freezer bag.
They'll last for about three months . perfect for a future indulgent sweet craving!
Reheating Instructions: No need for reheating, but if you want to enjoy that chocolate coating while it's a bit gooey, you can microwave them for just a few seconds.
Freshness Duration: After a week, they might start to lose that perfect texture, so try to enjoy them while they’re at their freshest!
Creative Variations
Let's get adventurous! These Butterfinger Balls are super versatile, and you can make them your own.
Flavor Adaptations: If you’re not feeling peanut butter, swap it out for almond butter or even a cookie butter for a totally different vibe.
Dietary Modifications: There are loads of options here! If you're going vegan, use non-dairy butter and chocolate definitely a win.
Seasonal Twists: For Halloween, add in some crushed pretzels for a spooky mix. During winter, consider a peppermint essence to really get into the holiday spirit!
Regional Variations: Why not go crazy and throw in some local flavors? If you’re based in the South, how about using pecan butter instead of peanut butter? It's a total game changer!
Complete Nutrition Guide
So, let’s talk numbers. It’s good to know exactly what those delicious Butterfinger Balls pack, right?
Per serving around one ball you’re looking at about 150 calories . that’s not too shabby for a sweet treat! they’re a decent source of energy, but watch the portions, especially if you’re enjoying them with a nice cold glass of milk.
Health Benefits: Just a little note there’s some protein from the peanut butter, and we all need that good fat, right?
Dietary Considerations: If you’re keeping track of sugar or dodging gluten, customize them to meet your needs!
Portion Guidance: These little bites are rich. I recommend one or two as a perfect after dinner sweet and trust me, they’re so satisfying!
Expert FAQ Solutions
I know you might have some burning questions. Let’s tackle a few of the most common things I get about these Butterfinger Balls .
Common Questions: "Can I make these without peanut butter?" Yes! Use sun butter if you have nut allergies.
Troubleshooting Guide: If your chocolate coating isn’t smooth, try adding a tbsp of vegetable oil to help it glide better.
Success Tips: Make sure your hands are slightly moistened when rolling the balls. It keeps the mixture from sticking and makes forming them a breeze!
Variations Explained: If you’re not using the Butterfinger candy bars, you can use any chocolate bar you like. Experiment with various flavors.
Encouraging Conclusion
There you have it! a complete guide to whipping up those mouth watering butterfinger balls that everyone will adore. just remember, cooking is all about having fun and getting creative in the kitchen.
So don’t stress too much about perfection. enjoy the process, and most importantly, enjoy the treats. now go whip up a batch and share them with your loved ones they’ll thank you for it!
Decadent Butterfinger Balls