Homemade Pizza Dough: the Cold-Proofing Masterclass for Crispy Crust
- Establishing the Foundation for the Ultimate Pizza Base
- The Science Behind the Perfect Cornicione and Deep Flavor
- Essential Components for Award-Winning Homemade Pizza Dough
- Adjusting the Recipe: Ingredient Substitutions and Variations
- Mastering the Technique: From Mixing Bowl to Bulk Fermentation
- Shaping and Cold Proofing Your Homemade Pizza Dough
- Troubleshooting Common Pizza Dough Errors
- Planning Ahead: Optimal Preservation and Freezing
- Serving Suggestions: Perfect Pairings for Your Finished Crust
- Recipe FAQs
- 📝 Recipe Card
Establishing the Foundation for the Ultimate Pizza Base
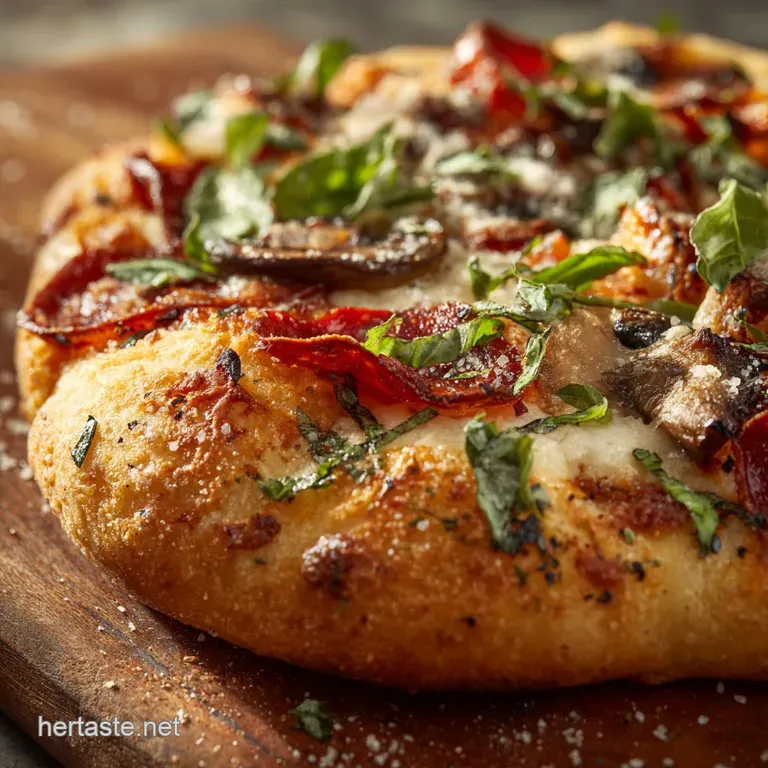
That smell! The yeasty, slightly sweet, earthy aroma when the raw dough finally hits the screaming hot oven is pure magic. Nothing beats it, absolutely nothing. That satisfying crackle from the first bite into a perfectly blistered crust, the cornicione , is truly a sign of culinary victory.
We’re chasing texture, flavor, and a truly professional result with this [Homemade Pizza Dough] recipe.
Look, I know making dough from scratch seems daunting, but this recipe is incredibly cheap and rewarding. Once you master the simple steps, pizza night stops being an expensive splurge and starts being a weekly tradition that you control.
Forget those dense, store-bought tubs that taste like sadness and cardboard; this [Best Homemade Pizza Dough Recipe] is totally manageable, promise.
I used to rush the process, trying to fit a two-day flavor development into a two-hour rise, and the result was always dense and disappointing. I was creating pizza base texture closer to a deep dish casserole, like the one in my recipe for Keto Low Carb Pizza Casserole: Ultimate Deep Dish Bake (6 Net Carbs!) , not actual, airy pizza. The secret to achieving that incredible taste? Time. Let’s dive into the ultimate guide that uses the power of high hydration and cold proofing.
The Science Behind the Perfect Cornicione and Deep Flavor
The secret isn’t some fancy ingredient; it's respecting the flour and the yeast. We are manipulating temperature and time to let the simple ingredients transform into something deeply complex. This method guarantees a crust that is both light and chewy.
Defining the High Hydration Advantage
More water equals more steam when the dough bakes, which in turn means more lift, more bubbles, and a lighter, crispier texture. We are using a high ratio of water to flour (over 65% hydration), which makes the dough sticky initially but guarantees an impossibly light and airy structure later on.
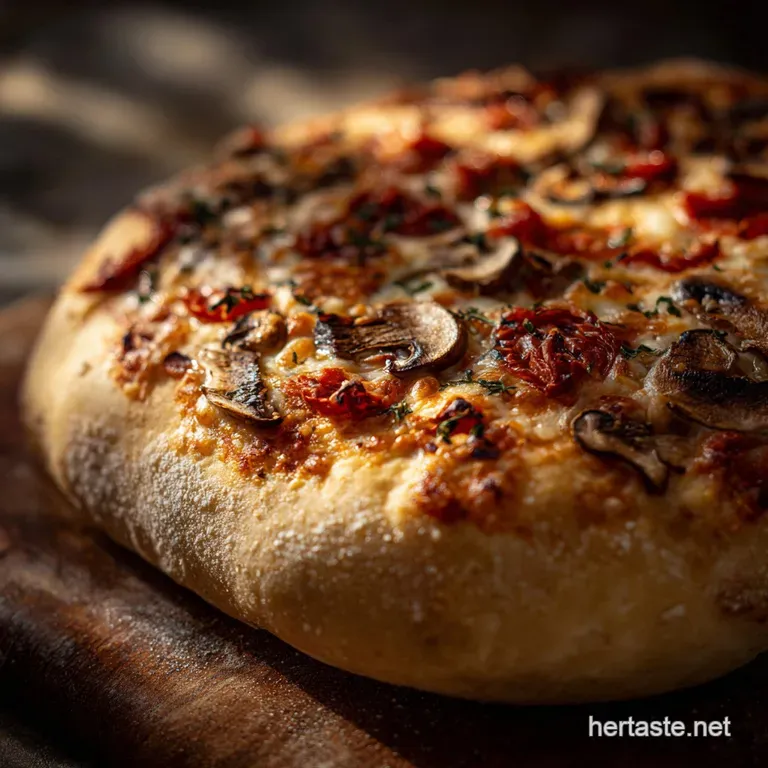
When you finally see those beautiful, uneven pockets in the crust, you know the high hydration worked its magic.
What is Cold Proofing and Why Does It Matter?
Cold proofing is the non-negotiable step for achieving superior flavor; you simply must not skip it. This slow, chilled fermentation allows complex proteins and sugars to break down gradually, resulting in a deeper, nutty, and more mature flavor profile that regular room temperature proofing cannot touch.
On top of that,, the cold environment relaxes the gluten structure, making the dough much easier to stretch without tearing when you finally shape it.
Maximizing Gluten Development Through Time, Not Effort
We are not going to spend twenty minutes aggressively wrestling the dough! By letting the high hydration dough rest periodically, a process sometimes called the Autolyse, the water naturally hydrates the flour’s proteins, kickstarting gluten development all on its own.
Time truly does the heavy lifting for us here, minimizing the need for strenuous kneading.
Flavor Depth: Converting Starches During Cold Fermentation
The enzymes within the flour are working overtime during that long, cold rest. They happily convert complex starches into simple sugars, and those simple sugars are what caramelize beautifully in your hot oven. This enzymatic process gives your crust that rich, slightly sweet char and is the exact same concept that makes the crust on my Homemade Apple Pie Bars: Easy Crumbly 9x13 Pie Bar Recipe so ridiculously golden brown.
Essential Components for Award Winning Homemade Pizza Dough
The list is short, which is exactly how a great dough recipe should look. However, the quality of the ingredients you choose truly makes a difference in the final taste and texture of your [Homemade Pizza Dough].
- Water: Lukewarm water activates the yeast efficiently.
- Instant Dry Yeast: Convenient, reliable, and powerful.
- High Protein Bread Flour: This is the structural hero; the higher protein content is essential for developing chewiness and supporting the high hydration.
- Fine Sea Salt: Crucial for controlling the yeast activity and, obviously, for flavor.
- Extra Virgin Olive Oil (EVOO): Adds elasticity and a lovely richness to the dough.
Adjusting the Recipe: Ingredient Substitutions and Variations
We all run out of things sometimes. It happens! Here are my trusted substitutions so you never have to put off pizza night.
| Ingredient | Substitution / Variation | Notes |
|---|---|---|
| Flour | high-quality All-Purpose (Plain) Flour | The result will be slightly less chewy due to lower protein, but perfectly acceptable. |
| Yeast | Active Dry Yeast | Use the same quantity, but dissolve it completely in the lukewarm water for 10 minutes until very frothy before adding the flour. |
| Oil | Neutral Oil (Canola/Vegetable) | Fine for texture, but you lose the olive oil flavor component. Melted butter also works if you like a richer base. |
| Water | Cold Water | You can use cold water, but you may need to increase the bulk fermentation time by 30- 45 minutes to compensate. |
Selecting the Right Flour (00 vs. Bread Flour)
High protein bread flour (around 12 14% protein) is fantastic for home ovens because it gives you structure and chew. "00" flour, traditional for Neapolitan pizza, has a softer protein structure and is better suited for extremely over high heat pizza ovens (400°C+).
For most home cooks, high protein bread flour is the practical winner for the best crust.
Calculating Hydration Ratios: Water Temperature is Key
We are aiming for about 65% hydration by weight (325g water to 500g flour). Using lukewarm water (around 40°C/105°F) is important as it quickly wakes up the yeast and ensures your dough starts rising promptly. Too hot, and you'll kill the yeast; too cold, and it stays dormant.
Choosing the Best Yeast (Active Dry vs. Instant)
I prefer instant dry yeast because you can just throw it straight into the dry ingredients without worrying about "blooming" it first. It’s a huge time saver! If you only have active dry, just bloom it in the water until it's foamy before adding the flour, otherwise your dough might not rise at all.
Whole Wheat Ratio Adjustments for Texture
Want some whole wheat flavor? Substitute up to 30% of the bread flour with whole wheat flour (150g). Whole wheat absorbs liquid faster, though, so you will definitely need to add an extra tablespoon or two of water to maintain the elasticity. Be prepared for a slightly denser crumb.
Oil vs. No-Oil Dough: Impact on Crispiness
Oil adds richness, elasticity, and helps brown the crust nicely in a home oven. Traditional Neapolitan dough often uses no oil, relying solely on flour, water, yeast, and salt, which results in a crisper, more delicate structure that requires extreme heat to bake properly.
Since most of us aren't hitting 500°C, the olive oil is a helpful addition for us home cooks.
Mastering the Technique: From Mixing Bowl to Bulk Fermentation
The Initial Mix: Autolyse or Immediate Integration?
I usually skip the formal, separate Autolyse phase for simplicity. I combine the water, yeast, and flour until shaggy, then add the salt and oil later during the kneading phase.
Mixing this way ensures the salt doesn't interfere with the initial yeast activity, which can happen if you add them too early.
The Stretch and Fold Method for High Hydration Dough
If you’re mixing by hand, this high hydration dough will feel sticky that’s okay! Instead of aggressive, floured kneading, use the stretch and fold method. Wet your hands slightly, lift a section of the dough, stretch it gently upwards, and fold it over the center, rotating the bowl 90 degrees each time.
Repeat this four to five times every 20 minutes during the first hour of the bulk rise to build structure gently.
Dividing and Balling the Dough
Do not punch down the dough after the bulk rise. We want to preserve all that lovely gas! Turn the dough out gently, divide it using a scraper into four equal portions, and then work on shaping those dough balls.
Use a gentle tucking motion, rolling the portion briefly on the counter with a cupped hand until the surface is smooth and tight; this creates essential surface tension.
Shaping and Cold Proofing Your Homemade Pizza Dough
Extended Cold Fermentation Schedule (12 to 72 Hours)
Twelve hours is the minimum for complex flavor, but 24 hours is where the magic truly happens. If you plan far ahead, 48 hours in the fridge is peak flavor territory! Just be sure your containers are airtight so the dough doesn't dry out.
Chef's Note: If you want a bubbly, charred crust, the cold proofing step is not optional. It’s what creates the signature flavor complexity of superior pizza bases.
The Tempering Phase: Bringing Dough to Room Temperature
This is the most overlooked step in the whole process. A cold dough is stiff, resistant, and nearly impossible to stretch properly without tearing. You MUST allow at least one hour of resting time, covered, at room temperature before you start shaping. The dough should feel soft and relaxed, not cold and firm.
Expert Stretching Techniques (No Rolling Pins Allowed)
A rolling pin is your enemy here because it flattens out all the precious air bubbles we worked so hard to create during fermentation. Use gravity and your fingertips instead. Gently press from the center outward, leaving the outer rim untouched to form your cornicione .
Then carefully stretch the dough over your knuckles or forearms until it reaches your desired size.
Troubleshooting Common Pizza Dough Errors
Why Your Dough is Too Sticky (The Fix for Slack Dough)
High hydration dough is sticky, but if it's soupy, you likely measured your flour incorrectly. Always weigh your flour. If it's merely sticky after rising, use semolina flour instead of wheat flour for dusting your workspace.
Semolina prevents sticking and adds a wonderful subtle crunch to the base without being absorbed by the dough.
Preventing Tough or Dry Bases
Toughness usually comes from one of two culprits: adding too much flour during the kneading or shaping process, or trying to stretch the dough when it hasn't rested long enough. If your dough springs back aggressively when you try to stretch it, cover it up and let it rest for another 15 minutes.
It's just stressed and needs a little break.
Essential Tools: Dough Scrapers and Proofing Containers
A bench scraper is cheap and totally indispensable for managing and dividing this sticky, high hydration dough. For cold proofing, using individual, airtight containers is far better than a single sheet pan, as they maintain necessary humidity and prevent the individual dough balls from sticking together.
Planning Ahead: Optimal Preservation and Freezing
Life happens, and sometimes you make too much dough. Don’t worry; this [Homemade Pizza Dough] freezes like a dream.
Freezing Ball Dough for Later Use
After the initial bulk rise (Stage 2), skip the cold proof entirely. Shape the balls, let them rest on the counter for 30 minutes, then lightly brush them with oil and flash freeze them on a baking tray.
Once they are rock solid, transfer them to heavy duty freezer bags, squeezing all the air out. They maintain excellent quality for up to 3 months.
Reanimating Frozen Dough Safely
Thaw the frozen dough balls very slowly in the refrigerator overnight while they are still in their bags. Once thawed, proceed immediately to the Tempering Phase (Stage 4, Step 11), allowing them to warm up for a full hour before shaping.
Crucially, never attempt to thaw dough rapidly at room temperature or it will over proof, collapse, and taste overly sour.
Recommended Sauce and Cheese Loadings
Listen, the goal is crispy, not soggy. Don't overload the base with wet ingredients. Too much sauce or cheese prevents the dough from cooking through and results in that deeply depressing soggy bottom. Aim for about 1/2 cup of sauce and no more than 4 oz of fresh cheese per 12 inch pizza. It's about balance!
Serving Suggestions: Perfect Pairings for Your Finished Crust
Once you have your perfect base, the topping possibilities are endless. I love keeping things simple so the crust flavor really shines.
- The Ricotta Option: If you’re looking for something that really celebrates the texture of a crisp crust, try a white pizza instead of a traditional red sauce base. It’s light, creamy, and lets that beautiful char shine kind of like my Ghostly Pizza: Creamy White Ricotta Pie for Easy Halloween Fun recipe!
- The Salad Counterpoint: A simple, crisp Rocket (Arugula) Salad dressed only with lemon juice, quality olive oil, and a shaving of Parmesan is the ideal fresh, peppery counterpoint to the richness of a baked dough.
- The Beverage: Pair your creation with a crisp, hoppy Italian Lager (I love Peroni or Moretti) or, if you're feeling adventurous, a light, slightly bubbly glass of chilled Lambrusco.

Recipe FAQs
What is the secret to making good pizza dough?
The primary secret lies in slow, cold fermentation (cold proofing) combined with high-quality flour. This process allows the yeast to work slowly, developing complex flavour profiles and resulting in a strong dough structure.
Cold proofing is key to achieving a light, airy crumb (cornicione) and making the dough easy to stretch.
I followed the recipe, but my dough is tough and snaps back when I try to stretch it. What went wrong?
This issue indicates that the gluten network is too tight; the dough simply needs more time to relax before stretching. Ensure you allowed at least 30 minutes of undisturbed bench rest time after shaping the individual dough balls.
If it resists, cover it again for 10 15 minutes and then gently stretch, letting gravity assist the process.
What is the ideal temperature for baking this dough?
To achieve the closest results to a professional pizza oven, you must use the highest temperature your home oven allows, typically 500°F (260°C) or higher. Preheating a pizza steel or stone for a minimum of one hour is essential, as this maximizes the heat transfer directly to the bottom of the crust for excellent oven spring and crispness.
Can I make this pizza dough without commercial yeast?
Yes, you can substitute the dry active yeast with an equivalent amount of active sourdough starter (levain) for a deeper, tangy flavor profile, though proofing times will vary significantly.
For a quick, non-yeasted dough, you would need to use baking powder and baking soda, but it will lack the light, airy structure this cold proofed method guarantees.
How long can I safely store this dough, and can I freeze it?
The dough improves with age and can be safely kept cold in the refrigerator for 3 to 5 days, developing richer flavors. You can definitely freeze individual dough balls wrapped tightly in plastic wrap and a freezer bag for up to three months; remember to thaw them slowly overnight in the fridge before proofing at room temperature.
What type of flour should I use for the best results?
We highly recommend using high protein bread flour (around 12.5% to 14% protein) because the long, cold fermentation requires a strong gluten structure to trap air effectively. While All-Purpose flour will work, bread flour is the key to achieving that desired light, chewy crust and the fantastic oven spring we aim for in this masterclass recipe.
Is this considered an authentic Italian or Neapolitan pizza dough recipe?
This recipe is a high hydration hybrid, drawing strongly from authentic Italian cold proofing techniques to develop flavor and lightness. While true Neapolitan dough has strict ingredient ratios and requires high heat wood fired ovens, this recipe captures the spirit while being optimized for achieving superior crispness and flavour in a standard home oven setup.
Cold Proof Homemade Pizza Dough

Ingredients:
Instructions:
Nutrition Facts:
| Calories | 547 kcal |
|---|---|
| Protein | 13.0 g |
| Fat | 8.8 g |
| Carbs | 98.5 g |
