Dump Cake Recipe: the Effortless Cherry-Pineapple 3 Ingredient Classic
- The Effortless Elegance: Cheerful Cherry-Pineapple Dump Cake (The "No-Fuss" Pudding)
- The "Dump Cake" Phenomenon: Why This Dessert Never Fails
- The Culinary Science: Why Dumping Works (Texture & Flavour Deep Dive)
- Essential Elements: Ingredients for the Perfect Cherry-Pineapple Dump Cake
- The Simple "Dump and Bake" Method: Step-by-Step Guide
- Troubleshooting Your Bake: Expert Tips for a Flawless Finish
- Making it Last: Storing and Reheating Your Dump Cake
- Presentation Perfection: Serving Suggestions and Pairings
- Recipe FAQs
- 📝 Recipe Card
The Effortless Elegance: Cheerful Cherry Pineapple Dump Cake (The "No-Fuss" Pudding)
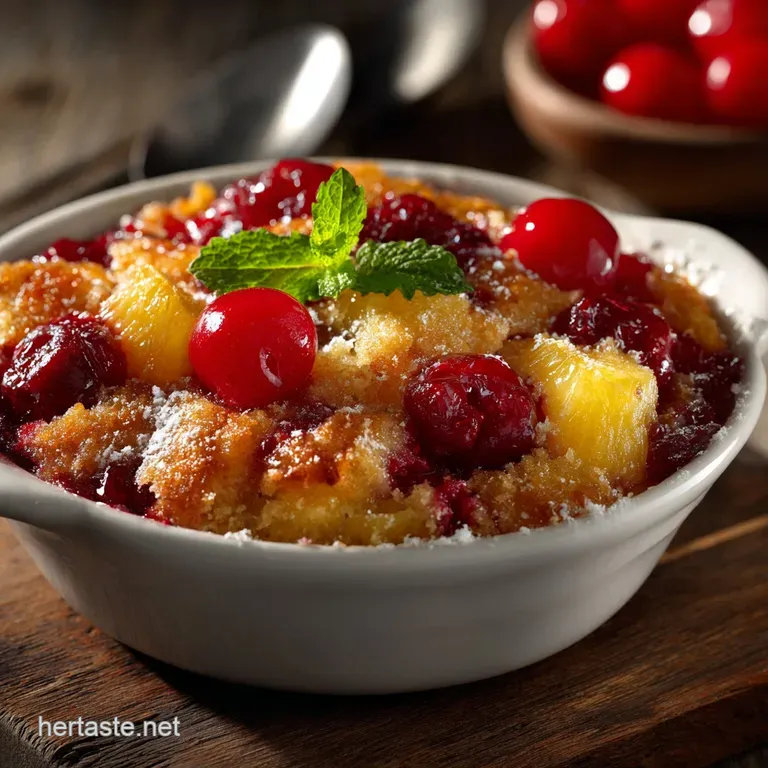
When that warm, buttery scent wafts out of the oven, smelling distinctly of baked pineapple and toasted sugar, you know life is good. That crispy golden crust forming over a bubbling, jewel toned filling is just the most comforting thing imaginable, honestly.
It smells like a holiday and a Tuesday afternoon rolled into one perfect dessert.
Forget fancy layered cakes that take all afternoon and require you to wash ten different bowls; this "Dump Cake" is the ultimate culinary superhero. You literally dump the ingredients into a single pan and then walk away, making it the fastest, easiest, and cheapest dessert in my entire rotation.
This recipe guarantees maximum flavour for minimal effort, and yes, it tastes better than it sounds.
I’ve definitely made my share of soggy bottoms and sandy tops over the years while experimenting, but I finally figured out the critical secrets to the perfect, shatteringly crispy Dump Cake. Grab your canned fruit and your cake mix we're about to dive into this gorgeous, buttery cherry pineapple dream.
The "Dump Cake" Phenomenon: Why This Dessert Never Fails
Why does something so incredibly simple taste so sophisticatedly good? It all comes down to chemistry, specifically the way the dry cake mix interacts with the liquid fruit base and the fat. This dessert relies entirely on the magic of controlled moisture and distinct layers.
You're basically creating an instant cobbler/crumble hybrid, and I promise you, it never disappoints.
The Culinary Science: Why Dumping Works (Texture & Flavour Deep Dive)
We aren't creating a batter here, we are creating a delicious, thick crust by saturating dry powder with pure butter. If you understand the texture requirements, you’ll never mess this up again.
The History of the Humble Convenience Dessert
This brilliant recipe popped up around the 1950s, right when boxed mixes and canned goods became staples of the American kitchen. It was born out of convenience, a fast answer for feeding a crowd without fuss. It’s truly an enduring classic that proves sometimes the easiest road is the tastiest.
Defining the Perfect Crumb-to-Fruit Ratio
If you stir the dry mix into the wet fruit, you’ll end up with something dense, rubbery, and gluey. The key here is maintaining distinct layers. We want the crunchy, cakey crumble on top to protect the juicy, steaming, gooey filling below.
Meet the Cherry Pineapple Combination: Tropical Comfort
The tartness of the cherry pie filling is perfectly balanced by the bright, acidic punch and sweetness of the crushed pineapple. It’s a sublime combination of flavours, giving you that rich, comforting warmth contrasted with a little tropical zip. If you are into those kind of fruity desserts, you might also adore my Caramel Apple Cheesecake Bars: Silky Autumn Squares with Salted Caramel which use a similar layering technique.
The Butter Barrier: Achieving the Ultimate Golden Crust
The butter isn't just for flavour it’s the liquid fat that activates the cake mix, essentially transforming it into a cookie like crumble as it bakes. You must ensure every single bit of the dry cake mix is covered in fat.
If not, that little patch will remain dry flour powder, and no one wants that in their pudding.
Moisture Control: Preventing a Soggy Bottom
This recipe is built on the liquid contained in the pineapple can. We actually need all that fruit juice to properly hydrate the cake mix powder as the dessert bakes and the moisture steams upwards. Draining your fruit is the quickest way to end up with a dessert that tastes like sand, so please skip the strainer!
Essential Elements: Ingredients for the Perfect Cherry Pineapple Dump Cake
This truly is an Easy Dump Cake 3 Ingredients recipe at its core, but adding butter and a few nuts makes it truly spectacular.
Choosing Your Cake Mix: Yellow vs. White Options
I usually grab the Yellow Cake Mix because it has a slightly richer, buttery flavour profile which plays beautifully with the pineapple. However, a White Cake Mix works perfectly too and often results in a slightly lighter, fluffier crust. Either option guarantees a fantastic result, so don't stress over it.
Handling the Fruit: Draining vs. Undrained Cans
CRITICAL WARNING: Use the entire can of crushed pineapple, liquid and all. You want it swimming a little bit. The cherry pie filling is thick enough on its own, but the pineapple juice is necessary to properly create the gooey fruit base and hydrate the dry mix.
dairy-free and Vegan Butter Alternatives
This recipe is highly adaptable. I’ve had huge success swapping out standard butter with high-quality vegan sticks or stick margarine. Just make sure the plant based butter is solid when you slice it, or melt it entirely before drizzling.
| Ingredient | Substitution Tip |
|---|---|
| Yellow Cake Mix | Use a gluten-free Yellow Cake Mix for a GF version. |
| Pecans/Walnuts | Omit entirely, or substitute with flaked almonds or shredded coconut. |
| Unsalted Butter | Use dairy-free margarine or plant based butter alternatives (ensure they are solid). |
| Cherry Pie Filling | Use 2 cans of canned tart cherries, but whisk in 1/4 cup sugar and 1 Tbsp cornstarch first. |
The Simple "Dump and Bake" Method: step-by-step Guide
This is where the magic happens. Remember: We are not stirring!
Prepping the Pan and Layering the Fruit Base
Preheat your oven to 350°F (175°C). Grab your 9x13 inch dish, lightly grease it if you feel nervous, and then get dumping. Start by pouring the entire can of cherry pie filling directly into the dish and spreading it out evenly.
Follow that with the entire can of crushed pineapple, including all the glorious juice. Spread it out gently, trying not to swirl the two layers too much; distinct layers matter here.
The Art of the Scatter: Distributing the Dry Mix Evenly
Next, open up the box of dry cake mix and simply sprinkle the powder evenly over the entire fruit surface. You want wall-to-wall coverage, but keep that layer dry. Do not mix it in. If you’re using nuts, sprinkle those over the dry powder now.
Chef's Note: Think of the dry cake mix as your parchment paper. It needs to be a continuous, even blanket to absorb the fat and moisture correctly. Avoid dumping huge piles in one spot.
Slicing and Drizzling: The Final Butter Application
You have two options here, and I've successfully used both. You can slice chilled butter into very thin coins and arrange them tightly across the entire surface of the dry mix. Or, melt the butter completely and slowly drizzle it over the top, making sure every inch of the powder is saturated.
I prefer the sliced method; it seems to give a slightly crispier, more defined topping.
Optimal Baking Time and Temperature Check
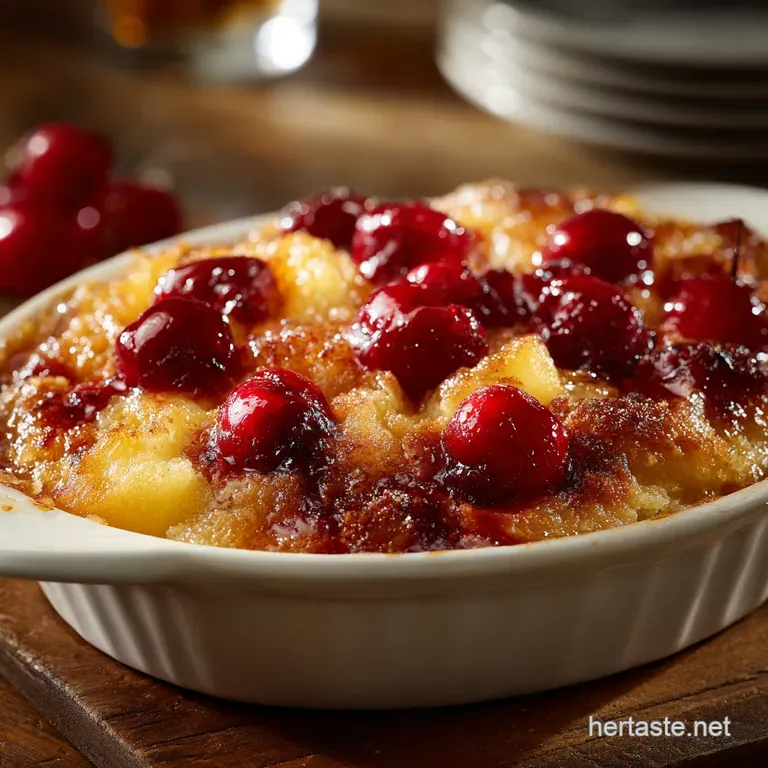
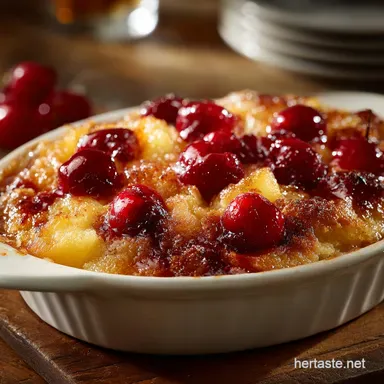
Place the dish into the preheated oven and bake for 45 to 50 minutes. The dump cake is ready when the top crust is a deep golden brown, slightly crispy looking, and the fruit filling around the edges is bubbling vigorously.
You’ll definitely smell a beautiful, nutty aroma when it is nearing perfection.
Troubleshooting Your Bake: Expert Tips for a Flawless Finish
We want a perfect golden crust and a steaming, gooey interior every time.
Dealing with Uneven Browning
Sometimes ovens are tricky and one corner of the cake browns faster than the rest. If the crust is getting too dark before the 40 minute mark, just loosely tent the entire baking dish with aluminum foil.
This blocks the direct heat from the top element and allows the filling to finish bubbling without burning the crust.
The Importance of Resting Time Post Bake
When you pull the dump cake out, it will look liquidy and incredibly hot. Give it 10 to 15 minutes to rest on a cooling rack before serving. This pause allows the bubbling fruit filling to cool down enough to thicken and set, preventing a runny mess when you scoop it out.
Mistake Check: Avoiding the Pockets of Dry Flour
The biggest failure point in any dump cake recipe is leaving pockets of dry flour. If you see white streaks after the cake has baked, it means that section wasn't covered by butter.
Fix it next time: Ensure you distribute the cake mix and the butter more meticulously, especially along the edges and corners of the pan.
Making it Last: Storing and Reheating Your Dump Cake
This dessert is best served warm, but I promise you, leftovers are a major win.
Shelf Life: Refrigerated vs. Room Temperature Storage
Because of the fresh fruit and butter content, this should not sit out on the counter for more than a few hours. Once cooled completely, cover the baking dish tightly with plastic wrap or aluminum foil and store it in the fridge. It keeps beautifully for up to 5 days.
Best Practices for Reheating Individual Servings
The best way to enjoy leftovers is by reheating individual servings. Scoop a portion into a small, microwave safe bowl and heat for 30 to 60 seconds until warm and gooey again. If you're reheating the whole pan, cover it with foil and place it in a 300°F (150°C) oven for about 15 minutes.
Can You Freeze Dump Cake? (Spoiler: Yes, with caveats)
You bet! Dump Cake freezes surprisingly well. Bake it completely, let it cool entirely, and then wrap the whole dish tightly (or slice it into individual servings and wrap those). It freezes well for up to 3 months.
To reheat from frozen, thaw it overnight in the fridge and then warm it in the oven using the whole pan instructions above.
Presentation Perfection: Serving Suggestions and Pairings
This rich, comforting dessert absolutely begs for a cold, creamy contrast.
My favourite way to serve it is warm with a huge scoop of high-quality vanilla bean ice cream that melts into the hot fruit filling. If I'm feeling fancy or serving it during the holidays, I might pair it with something decadent like a dollop of whipped cream cheese frosting, reminiscent of the topping on my Thanksgiving Desserts: The Sticky Toffee Bourbon Cheesecake Showstopper .
If you love this easy dessert structure, you absolutely have to try my Pumpkin Spice Dump Cake: The Easiest Recipe for a Creamy Custard Base next! It follows the same principle but uses a delicious seasonal twist.

Recipe FAQs
Why is my cake dry and sandy on top instead of forming a crispy crust?
A dry, sandy top often means the butter was not distributed evenly or there wasn't enough of it to saturate the cake mix. Ensure you slice or drizzle the melted butter thoroughly over all the dry cake mix before baking, aiming for near complete saturation to create that desired golden, buttery crust.
Can I use fresh fruit instead of canned fruit for this Dump Cake?
Using fresh fruit is possible, but it significantly alters the texture and liquid content required for the recipe. Canned fruit provides the critical liquid (juice) needed to hydrate the dry cake mix underneath, ensuring it cooks properly.
Do I need to mix the cake mix with any ingredients before dumping it into the pan?
No, the beauty of the Dump Cake is that you simply pour the dry mix straight from the box onto the fruit layer. The liquid from the canned fruit and the melted butter drizzled on top are what hydrate and bake the cake mix directly in the pan.
My finished cake is too soupy and gooey at the bottom; what went wrong?
This usually happens if the fruit layer has too much liquid or if the cake was slightly underbaked. Try letting the cake cool completely after baking, as the residual heat continues to set the gooey bottom layer, or consider baking for an extra 10 to 15 minutes next time.
Can this Dump Cake recipe be made vegan or dairy-free?
Yes, you can substitute the dairy butter with a solid vegan baking stick or coconut oil, which provides a similar fat content for the crust. Also, be sure to verify that your chosen boxed cake mix does not contain any dairy products or eggs, as many brands are surprisingly "accidentally vegan."
How should I store leftover Dump Cake, and does it freeze well?
Leftovers should be stored covered tightly in the refrigerator for up to 3 to 4 days; reheat portions briefly in the microwave for the best texture. While you can freeze the cake, the fruit layer often becomes slightly mushy upon thawing, so it is best enjoyed refrigerated.
Can I use oil or margarine instead of butter for the topping?
The butter is crucial for the desired flaky, crispy, and rich crust texture. While margarine can be used in a pinch, oil is not recommended as it will yield a dense, greasy, or flat result rather than the proper cake topping characteristic of this dessert.
Cherry Pineapple Dump Cake Recipe
Ingredients:
Instructions:
Nutrition Facts:
| Calories | 639 kcal |
|---|---|
| Protein | 7.1 g |
| Fat | 56.7 g |
| Carbs | 32.4 g |
