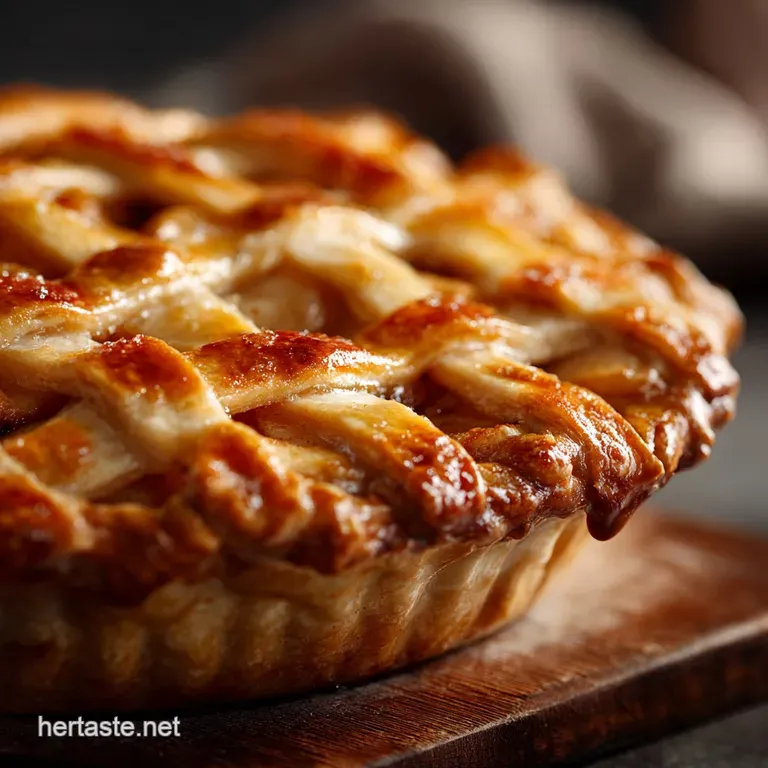
The Great British Apple Pie: Flaky Crust Tart-Sweet Filling
Establishing the Benchmark: Why This Apple Pie Recipe Is Different
Right then, let's talk about the undisputed champion of comfort desserts: Apple Pie . Everyone has a recipe, but honestly, most fall into one of two traps: a crust that tastes like cardboard, or a filling that runs all over the plate because it’s basically hot apple soup.
We’re not doing that today. We are aiming for a proper, rustic pie one that looks slightly messy, with a flaky, buttery crust and a filling that perfectly balances tartness and spice.
This is the Best Apple Pie Recipe Ever because it focuses on three non and negotiable points: temperature management, mixed apples, and a mandatory cooling period. If you ignore the cooling period, I will cry.
Achieving the Perfect Flaky Pastry: The Cold Butter Secret
This is where I used to mess up, year after year. I would try to be too neat, incorporating the butter completely until the dough was smooth. Wrong! The secret to a truly flaky crust is keeping the butter in distinct, pea and sized chunks.
Think about it: when those chunks hit the hot oven, the water in the butter evaporates rapidly, creating steam pockets. Those pockets push the flour apart, resulting in those glorious, shatteringly crisp layers. That’s flakiness, baby.
I keep the butter cubes in the freezer until the very last minute. I mean ice and cold. If your hands are warm, use a pastry cutter. If you feel like the dough is getting sticky while you work it (meaning the butter is melting), just stop. Wrap it up and shove it back into the fridge. It needs a nap.
Trust me, patience here directly equals pastry perfection.
The Ideal Filling Balance: Tartness Meets Spice
My benchmark for the perfect apple pie filling is simple: sweet enough to feel like dessert, but tart enough to cut through the richness of the butter crust and any accompanying ice cream. Most recipes rely too heavily on cinnamon and brown sugar, making the pie taste flat and heavy.
Our secret weapon? Lemon juice. Seriously, a couple of tablespoons of fresh lemon juice brightens the entire filling. It makes the cinnamon pop, it balances the sugar, and it keeps the apples from oxidizing while you prep the dough.
If you’re asking yourself, "What is the secret to a good apple pie?" the answer is acid. It gives the pie character. We’re also using a blend of Apple Pie Spice that includes nutmeg don't skip the nutmeg. It adds a warmth that cinnamon alone can't touch.
Essential Tools for the Home Baker’s Apple Pie
You don’t need a fancy stand mixer for this. But there are a couple of things that make life significantly easier, especially when dealing with pastry dough that wants to warm up immediately.
| Tool | Why I Love It |
|---|---|
| Deep and Dish Pie Plate | Stops spillover and allows for maximum filling. |
| Pastry Blender | Keeps your warm hands off the butter when cutting it into the flour. |
| Baking Sheet | You must bake this pie on a lined sheet. It catches the bubbling filling that inevitably leaks out, saving you a smoke and filled oven cleanup. |
Sourcing Your Ingredients: Quality is Non and Negotiable
A fantastic pie starts with fantastic ingredients. Since we’re making Homemade Apple Pie , we should treat our ingredients with the respect they deserve.
The Definitive Guide to the Best Apples for Baking
If you use soft, sweet apples (like Red Delicious, bless their mushy hearts), you’ll end up with apple sauce inside a crust. We want texture. We need apples that hold their shape and offer that essential tartness. I always use a mix. This blend ensures complexity of flavour and structure in the final product.
I recommend a 2:1 ratio: two and thirds firm and tart, one and third softer and sweeter.
- Firm & Tart (The Structure): Granny Smith, Bramley, Honeycrisp. These are the workhorses.
- Softer & Sweet (The Flavour): Fuji, Golden Delicious (if they are firm!), or Gala.
Don't bother peeling them too thinly. You want substantial slices, about ¼-inch thick. The last thing you want is a pie that collapses when you cut it.
Pantry Staples for the Spiced Apple Filling
For the thickener, I am firmly in the cornstarch camp, though plain flour works in a pinch. Cornstarch gives you a clear, slightly glossy filling that looks professional and slices cleanly. Flour, conversely, can sometimes make the filling look cloudy or slightly pasty.
The other key component is the spice ratio. I like to bump up the nutmeg because I think cinnamon often overpowers everything.
- Cornstarch vs. Flour: Cornstarch offers better clarity and thickness.
- Brown Sugar: Use light brown sugar, packed. It adds a hint of molasses that elevates the flavour far beyond simple white sugar.
- The Salt: Never forget the pinch of salt. It doesn’t make the pie taste salty; it makes everything else taste more like itself. It's the essential flavour enhancer.
Must and Have Equipment Before You Start Rolling
I already mentioned the baking sheet, but let’s talk specifically about the pie plate. A deep and dish, 9 inch plate is ideal. Why? Because we have 3 lbs of apples here. This is a pie of substance, not some sad, flat pastry dish. You need that depth. Also, make sure you have plastic wrap (cling film) ready.
Dividing and chilling the dough is mandatory. No exceptions.
Related Recipes Worth Trying
- Apple Pie: The Chefs Perfect Classic Flaky Crust Recipe — Our Apple Pie recipe guarantees a shatteringly flaky, all-butter crust and perfectly spiced filling. Master this Classic Apple Pie with our chef tested...
- Apple Pie: The Ultimate Crumb Freezing All-Butter Deep Dish Recipe — This Apple Pie recipe delivers the best homemade apple pie experience with professional tips. Master the flaky, all-butter pastry and perfect spiced apple...
- Mini Pumpkin Pies: Recipe for the best individual spiced fall dessert — Mini Pumpkin Pies are the ultimate individual Thanksgiving desserts. This easy recipe uses blind baked shells for a perfectly crisp crust, ideal for a crowd.
Step and by-Step Instructions: Mastering the Classic Apple Pie
Preparing and Chilling the Butter Pastry Dough
Remember the rule: cold, cold, cold.
When adding the ice water, stop adding liquid the very second the dough comes together. You should still see flecks of butter throughout the mixture. If it looks uniform and smooth, you’ve overworked it and your pastry will be tough.
Once you form the two discs, press them flat (which helps them chill faster) and get them into the fridge for at least an hour. This resting time relaxes the gluten, making it much easier to roll later. Trying to roll warm, unchilled dough is an exercise in frustration. Don't do it.
Mixing the Apple Pie Filling and Preventing a Soggy Bottom
This is the point where you combine the sliced apples, sugars, lemon juice, salt, and cornstarch. Toss it gently until everything is coated. You might notice some liquid starting to pool at the bottom of the bowl the sugar is drawing moisture out of the apples. That’s fine. The cornstarch will manage it.
CRITICAL WARNING: To truly prevent a soggy bottom, do not let your mixed apple filling sit for more than 15 minutes before assembling the pie.
If you let it sit too long, too much liquid will weep out, overwhelming the thickener, and you will end up with a watery mess on the bottom crust.
Once the filling is in the shell, dot the top with those little cubes of butter. It melts down and creates little pockets of richness inside the filling.
Expert Techniques for Crimping and Ventilation
I prefer a simple fork crimp for sealing, but whatever you choose, make sure the seal is tight! You want the juice to bubble inside the pie, not leak out onto your baking sheet.
For ventilation, I cut four or five decent slits not tiny pinpricks. The steam needs to escape. If you don't ventilate enough, the steam builds up and pushes the whole top crust off the pie, which is highly undignified.
If you’re feeling fancy, use a cookie cutter to cut a shape (like a star or a leaf) in the center.
Achieving the Golden Bake: Temperature and Timing
The high and low temperature technique is what makes this Apple Pie Recipe consistently perfect.
- Start Hot (220°C/425° F): This initial blast of heat shocks the cold pastry, quickly setting the structure and ensuring the butter pockets puff up before they melt completely. This is key for that flaky texture.
- Drop Low (175°C/350° F): After the crust has set and begun to brown (about 20 minutes), you drop the temperature. If you kept it high, the crust would burn before the apples had a chance to soften completely. This slow, low heat finishes cooking the apples perfectly and ensures the thickener does its job without burning the top.
The pie is done when the crust is deeply golden brown and you can see thick, happy bubbles of apple juice popping through the vents.
Baker’s Notes, Storage, and Troubleshooting
Serving Suggestions and Optional Toppings
If I’m serving this in the depths of winter, it must be accompanied by hot English custard. Anything less is a crime. But since we are aiming for the ultimate crowd and pleaser, here are a few suggestions based on seasonality:
- Autumn/Winter: Piping hot custard or whipped double cream.
- Spring/Summer: Vanilla bean ice cream, maybe a scoop of cinnamon swirl or salted caramel ice cream for contrast.
If you don't have custard, use a really high and quality vanilla ice cream. The cold, creamy vanilla against the warm, spicy filling is a textural experience you need in your life.
How to Store Leftover Homemade Apple Pie
If you manage to have leftovers (a rare occurrence in my house), they store beautifully.
For short and term storage (2 days), the pie can be left at cool room temperature, covered loosely with foil or a cake dome. If it's humid or if you need to keep it longer (up to 4 days), wrap it tightly and store it in the refrigerator.
To reheat, slice individual servings and warm them in the microwave for 30 seconds, or put the slice in a 180°C (350°F) oven for about 10 minutes. The crust will crisp up nicely in the oven.
Frequently Asked Questions About Apple Pie Preparation
Do you cook apples before putting them in a pie?
No, absolutely not for a classic double and crust pie. Pre and cooking the apples (par and cooking) is usually done if you are concerned about the apples shrinking too much during baking, or if you are using an extremely thick filling (like an apple butter pie).
For this recipe, since we slice the apples thinly and use a deep and dish plate, they soften perfectly during the long, slow bake. Pre and cooking would risk them turning mushy. Stick to raw, firm slices. They will be perfect.
Can I freeze the pie dough ahead of time?
Yes! This is a great time and saver. Wrap the discs tightly in two layers of plastic wrap and store them in the freezer for up to three months. Thaw them overnight in the fridge before rolling.
My edges are burning, what do I do?
This is common, especially during the over high heat start. Keep some strips of aluminum foil or a pie shield handy. Once the edges are golden (around the 20 minute mark), quickly cover just the crimped edges of the pie loosely with the foil, creating a shield for the crust.
This allows the center to continue cooking while protecting the delicate edges.

Recipe FAQs
Oh dear, how do I avoid that dreaded 'soggy bottom' on my Apple Pie?
To banish the 'soggy bottom' for good, place your pie dish on a preheated pizza stone or a dark baking sheet when it goes into the oven, which transfers instant heat to the base; also ensure you chill the assembled pie for 15 minutes before baking.
There are so many apples! Which varieties are best for this Great British Apple Pie?
The best filling is a proper mix: use two-thirds firm, tart apples, like Bramley or Granny Smith, which hold their shape and provide essential acidity, and one-third sweeter apples like Fuji or Honeycrisp for depth of flavour.
Can I make the pastry or the filling ahead of time to save a bit of fuss before the Sunday roast?
Absolutely, the pastry discs can be wrapped tightly and kept in the fridge for up to three days, or you can mix the filling (minus the sugar and starch) and keep it chilled overnight, adding the remaining ingredients just before assembly.
My filling is runny when I slice it; how long must I really wait before serving?
Patience, old sport, is key: you must allow the pie to cool for a minimum of two hours, as this time is crucial for the cornstarch to fully hydrate and set the liquid into a sliceable, perfect filling.
I want a twist on tradition; what’s a simple but impressive variation I can try?
For a fantastic change, try adding 1 cup of blackberries to the mix for a tart Blackberry & Apple Pie, or substitute the top crust for a simple streusel (crumble) topping for a rustic English feel.
British Apple Pie Flaky Crust
Ingredients:
Instructions:
Nutrition Facts:
| Calories | 420 kcal |
|---|---|
| Protein | 4.0 g |
| Fat | 18.0 g |
| Carbs | 63.0 g |
