Bake Ribs in Oven Recipe with Bbq Sauce
- Time: Active 15 minutes, Passive 2 hours 45 mins, Total 3 hours
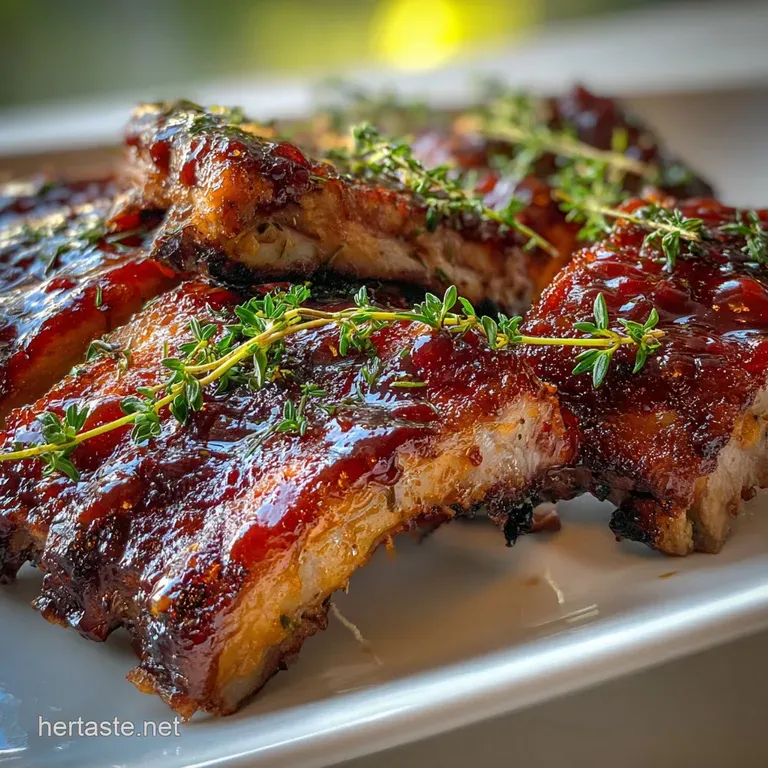
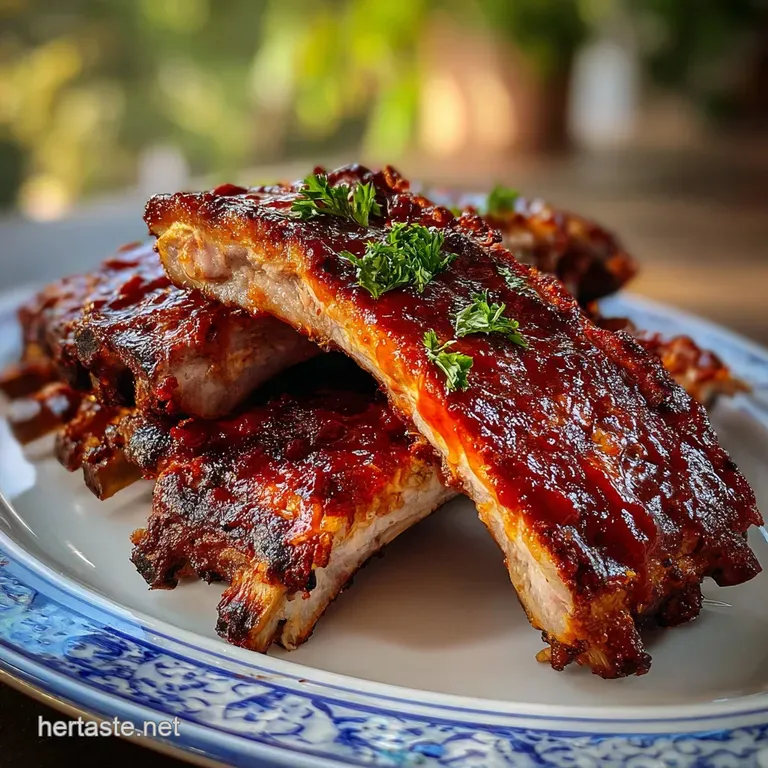
- Flavor/Texture Hook: Sticky, mahogany glazed exterior with a tender, smoky interior
- Perfect for: Weekend family dinners or a stress free backyard style feast
- Mastering the Bake Ribs in Oven Recipe with BBQ Sauce
- Understanding the Key Techniques for Tender Ribs
- Technical Breakdown of This Recipe Specifications
- Sourcing and Analyzing the Essential Building Blocks
- Essential Gear for This Oven-Roasted Rib Method
- Step-by-Step Evolution from Prep to Final Plate
- Professional Solutions for Common Oven Rib Obstacles
- Smart Adaptations for Various Dietary Preferences
- Methods to Store and Keep Leftovers Fresh
- Flavorful Pairings to Complete the Dining Experience
- Very High in Sodium
- Recipe FAQs
- 📝 Recipe Card
Mastering the Bake Ribs in Oven Recipe with BBQ Sauce
The first time I tried to cook ribs, I basically made leather. I thought high heat was the answer to that charred, backyard flavor, but all I got was a smoky kitchen and a very disappointed dog who couldn't even chew the leftovers. It was a total disaster.
But that failure sent me on a quest to figure out how to get that "fall off-the bone" texture without owning a thousand dollar offset smoker. This bake ribs in oven recipe with BBQ sauce delivers fall off-the bone deliciousness right from your standard kitchen setup.
We are going to focus on a two stage process that is honestly foolproof once you see the logic. First, we wrap. Then, we lacquer. The aroma that fills your house around the two hour mark is better than any candle you could buy - a mix of sweet maple, pungent garlic, and that deep, earthy scent of smoked paprika.
It makes the wait feel like a countdown to a holiday.
You don't need to be a pitmaster to pull this off. We’re going to use common pantry staples like tomato paste and apple cider vinegar to build a sauce that rivals anything in a bottle.
By the time we’re done, you’ll have a rack of ribs that is so tender, the bone practically slides out with a gentle tug. Let's get into the details of why this specific method is so effective.
Understanding the Key Techniques for Tender Ribs
Many people wonder how long to bake ribs in oven to get them soft without them turning into mush. The secret isn't just time, it's the environment. We aren't just baking, we are braising in a dry rubbed cocoon.
The Collagen Melt: At temperatures around 160°F to 180°F, tough collagen begins to turn into gelatin, which gives the meat its silky mouthfeel.
Keeping the oven at 300°F or 350°F allows the internal temp to stay in this "sweet spot" long enough for a total transformation.
Acidic Pre Treatment: Using apple cider vinegar in the wrap helps weaken the muscle fibers on the surface. This ensures the seasoning doesn't just sit on top but actually works its way into the meat.
| Thickness of Rack | Internal Temp Target | Rest Time | Visual Finished Cue |
|---|---|---|---|
| Standard (1.5 inches) | 195°F - 203°F | 15 minutes | Meat pulls back 1/2 inch from bone |
| Thick (2+ inches) | 195°F - 205°F | 20 minutes | Rack bends easily without snapping |
| Thin (under 1 inch) | 190°F - 198°F | 10 minutes | Surface looks tight and glossy |
You want to make sure you're checking the "bend" of the rack. If you pick it up with tongs and it curves into a U shape and the meat starts to crack, you’ve hit the jackpot. This is much more reliable than just looking at a clock, especially since every oven has its own personality and hot spots.
Technical Breakdown of This Recipe Specifications
Before we start rubbing and roasting, let's look at the numbers. Precision helps you plan your day so you aren't serving dinner at midnight. If you've ever used a Homemade Rib Rub recipe, you know that the balance of salt and sugar is what creates that beautiful crust, often called the bark.
The Humidity Factor: Inside that foil pouch, the moisture from the 2 tbsp of apple cider vinegar turns into steam. This steam prevents the surface from hardening too early, which allows the heat to penetrate deep into the center of the 3 lbs of pork spare ribs.
| Component | Science Role | Pro Secret |
|---|---|---|
| Coconut Sugar | Hygroscopic sweetener | Draws moisture to the surface to create a sticky glaze |
| Smoked Paprika | Phenolic compounds | Provides the "fire roasted" flavor without an actual fire |
| Apple Cider Vinegar | Acetic Acid | Breaks down proteins and balances the heavy fat of the pork |
The 1 tsp of liquid smoke is our little cheat code. It provides the concentrated aroma of hardwoods like hickory or mesquite. Without it, oven ribs can sometimes taste a bit like "pot roast," but with it, they take on that distinct barbecue identity that we all crave.
Sourcing and Analyzing the Essential Building Blocks
When you head to the store, look for a rack of pork spare ribs that has good marbling. You want those little white flecks of fat throughout the meat because that fat will render down and baste the ribs from the inside out. If the rack is too lean, it will end up dry.
- 1 rack Pork Spare Ribs (3 lbs): The foundation. Look for a "St. Louis cut" if you want a cleaner rectangle, or full spare ribs for more meat.
- Smoked Paprika & Garlic Powder: These provide the savory backbone. Why this? Smoked paprika is non negotiable for that authentic outdoor flavor profile.
- Coconut Sugar & Maple Syrup: Our dual action sweeteners. Why this? Maple syrup adds a floral note that white sugar simply cannot match.
- Tomato Paste & Worcestershire Sauce: These provide the umami and body for our glaze.
If you can't find coconut sugar, brown sugar is a perfect 1:1 swap. It actually has a bit more moisture which helps the rub stick to the meat. For the acid, if apple cider vinegar is too sharp for you, try a splash of pineapple juice - it contains bromelain, an enzyme that tenderizes meat even faster, though be careful not to over marinate or it will get mushy.
| Original Ingredient | Substitute | Why It Works |
|---|---|---|
| Coconut Sugar | Brown Sugar | High molasses content provides a similar deep, caramel like sweetness |
| Maple Syrup | Honey | Similar viscosity. Note: Honey burns slightly faster, so watch the broiler |
| Smoked Paprika | Liquid Smoke + Chili Powder | Provides the heat and the smoke separately if the spice is missing |
Using a quality base is similar to how you'd build a The Homemade Steak recipe where the depth comes from layering savory and sweet elements. This recipe uses tomato paste instead of ketchup to give you more control over the sugar levels and a thicker, more velvety sauce.
Essential Gear for This oven-roasted Rib Method
You don't need much, but a few specific items make the cleanup way easier. Trust me, scrubbing burnt BBQ sauce off a naked baking sheet is a chore you want to avoid at all costs.
First, grab a heavy duty rimmed baking sheet. The rim is vital because as the fat renders out of those 3 lbs of ribs, it needs somewhere to go. If you use a flat cookie sheet, you'll end up with a grease fire on the bottom of your oven. Second, get the "heavy duty" aluminum foil.
The thin stuff tears too easily when you're trying to flip the rack, and if the steam escapes, your ribs will toughen up.
A pastry brush or even a large spoon is needed for the glazing phase. You want to be able to paint on that sauce in thick, even layers. Finally, a sharp chef's knife or a pair of kitchen shears will make slicing between the bones much cleaner once they've rested.
step-by-step Evolution from Prep to Final Plate
Right then, let's get cooking. Pre heat your oven to 300°F. This lower temp is the key for how to cook ribs in the oven fast enough for dinner but slow enough for quality.
Phase 1: Preparing the Rack
- Remove the membrane. Flip the ribs bone side up. Use a butter knife to pry up the silver skin (membrane) on one corner, then grab it with a paper towel and pull it off. Note: This allows the rub to actually touch the meat on the back.
- Apply the dry rub. Mix the smoked paprika, garlic powder, onion powder, cayenne, salt, pepper, and coconut sugar. Rub this mixture until every inch of the meat is coated.
- Seal the pouch. Place the rack on a large piece of heavy duty foil. Pour 2 tbsp of apple cider vinegar over the meat. Wrap it tightly, ensuring there are no holes.
Phase 2: The Low and Slow Roast
- Bake the rack. Place the foil wrapped ribs on your baking sheet. Slide them into the oven for 2 hours and 15 minutes.
- Whisk the sauce. While the ribs roast, combine the tomato paste, remaining apple cider vinegar, maple syrup, liquid smoke, and Worcestershire sauce in a small bowl.
- Check for tenderness. After the time is up, carefully open a corner of the foil. The meat should be pulling away from the bone ends.
Phase 3: The Sticky Glaze Finish
- Apply the first coat. Remove the ribs from the foil and lay them directly on the baking sheet. Brush a generous layer of sauce over the top.
- The final blast. Increase the oven heat to 350°F (or use the broiler if you're brave). Bake for 15-20 minutes until the sauce is bubbling and tacky.
- Rest the meat. Remove from the oven and let the rack sit for 15 minutes. This is crucial so the juices redistribute instead of running out on the cutting board.
- Slice and serve. Cut between the bones and serve with any extra sauce on the side.
Professional Solutions for Common Oven Rib Obstacles
Even with a solid plan, things can go sideways. The most common complaint is that the ribs aren't as tender as expected. Usually, this means the foil wasn't sealed tight enough, or the rack was exceptionally thick and just needed another 20 minutes.
Why Your Ribs Are Still Tough
If the meat is clinging to the bone like its life depends on it, the collagen hasn't fully converted to gelatin yet. This usually happens if the oven temp was a bit low or the rack was cold when it went in.
Why Your Sauce Is Burnt
Sugar burns at 350°F. If you leave the ribs under the broiler for too long, that beautiful maple syrup will go from "caramelized" to "carbonized" in about thirty seconds. Always stay in the kitchen during the last 5 minutes of glazing.
| Problem | Root Cause | Solution |
|---|---|---|
| Dry, crumbly meat | Overcooked or no foil seal | Reduce cook time by 15 mins next time; check foil for leaks |
| Rub didn't stick | Meat was too wet | Pat the rack completely dry with paper towels before seasoning |
| Sauce is too thin | Not enough tomato paste | Simmer the sauce on the stove for 5 mins to reduce before brushing |
Common Mistakes Checklist
- ✓ Forgetting to remove the membrane (leads to chewy, plastic like texture)
- ✓ Not sealing the foil tightly (steam escapes and dries the meat)
- ✓ Slicing the ribs immediately out of the oven (loses all the moisture)
- ✓ Using "active" wood chips in an indoor oven (just use liquid smoke instead!)
- ✓ Overcrowding the baking sheet if doing multiple racks (impedes heat flow)
Smart Adaptations for Various Dietary Preferences
If you're cooking for someone with specific needs, this recipe is surprisingly flexible. Since we're making our own sauce from scratch, we avoid the hidden corn syrup and preservatives found in many store-bought bottles.
For a Keto Friendly Feast
Swap the coconut sugar in the rub for a brown sugar replacement (like Erythritol) and replace the maple syrup in the sauce with a sugar-free maple alternative or just add a bit more liquid smoke and a pinch of stevia. The fat content of the spare ribs is perfect for a keto lifestyle.
For a Nightshade Free Rub
If you can't do peppers (paprika and cayenne), swap them out for a mix of ground cumin, toasted coriander, and a bit of extra black pepper. You'll lose that red color, but the flavor will be earthy and delicious in a whole new way.
For a Balanced High Fiber Plate
Serve these ribs with a big side of vinegar based slaw and some grilled asparagus. The acidity of the greens cuts through the richness of the pork spare ribs perfectly without adding heavy carbs.
Methods to Store and Keep Leftovers Fresh
If you somehow have leftovers, you're in luck. Ribs actually reheat surprisingly well because of that high fat and gelatin content. In the fridge, they’ll stay good in an airtight container for about 4 days.
If you want to keep them longer, wrap individual ribs in plastic wrap and then foil before tossing them in a freezer bag; they’ll last 3 months that way.
To reheat, don't use the microwave if you can help it - it turns the meat rubbery. Instead, wrap the ribs in foil with a tiny splash of water or apple juice and pop them in a 300°F oven for about 15 minutes. They’ll taste almost as good as the day you made them.
For zero waste, save those bones! Even though they’ve been roasted, you can toss them into a slow cooker with some onion scraps, carrots, and water to make a smoky pork stock. It’s a brilliant base for a split pea soup or a hearty bean stew.
Flavorful Pairings to Complete the Dining Experience
A heavy meat dish like this needs some contrast. I love serving these with something bright and crunchy. A classic coleslaw is the standard for a reason - the cold, creamy crunch is the perfect foil to the hot, sticky ribs.
For a Classic Southern Experience
Go all out with some jalapeño cornbread and a side of stovetop mac and cheese. If you want to keep the oven theme going, some roasted sweet potato wedges seasoned with the leftover dry rub are a total win.
Decision Shortcut
- If you want extra smoky flavor, add a teaspoon of smoked salt to the rub.
- If you want more heat, double the cayenne pepper and add a splash of hot sauce to the glaze.
- If you want faster cleanup, line your baking sheet with parchment paper under the foil.
Honestly, the best part about this bake ribs in oven recipe with BBQ sauce is how much it impresses people for how little work you actually do. You spend fifteen minutes prepping, and then you just let the oven do the heavy lifting while you go about your day.
By the time the timer dings, you've got a restaurant quality meal that didn't require a smoker or a degree in barbecue science. Right then, let's get those ribs in the oven!

Very High in Sodium
2580 mg mg of sodium per serving (112% % of daily value)
The American Heart Association recommends limiting sodium intake to no more than 2,300mg per day for most adults. This recipe significantly exceeds that limit.
Tips to Reduce Sodium in Your Ribs
-
Reduce Salt Added-25%
Eliminate or significantly reduce the 1 tbsp of sea salt in the dry rub. Taste and adjust seasonings after cooking, if necessary.
-
Worcestershire Swap-20%
Replace the 1 tbsp of Worcestershire sauce with a low-sodium alternative or a homemade version using soy sauce alternatives with no salt added.
-
Tomato Paste Options-15%
Use fresh tomatoes when possible. For the 0.5 cup of unsweetened tomato paste, opt for a no-salt added tomato paste, or dilute regular tomato paste with water to reduce sodium concentration.
-
Maple Syrup Amount-10%
Reduce the 3 tbsp of maple syrup to 1.5-2 tbsp. It will lower sweetness and sodium from added ingredients.
-
Vinegar Moderation-5%
While apple cider vinegar is relatively low in sodium, reducing the total amount of apple cider vinegar (2 tbsp + 0.25 cup) by a quarter can contribute to a small reduction without significantly affecting flavor.
-
Spice It Up!
Enhance flavor with sodium free herbs and spices like smoked paprika (use generously), garlic powder, onion powder, cayenne pepper, black pepper, and other aromatics to compensate for reduced salt.
Recipe FAQs
Should I put barbecue sauce on ribs before cooking in the oven?
No, not before the main cooking phase. Apply BBQ sauce during the last 15-20 minutes of baking, or even after cooking, to prevent burning. This allows the ribs to tenderize first, then the sauce caramelizes beautifully.
How to bake pork ribs with barbecue sauce?
Season ribs, wrap tightly in foil with a liquid (like apple cider vinegar), and bake at 300°F for about 2 hours. Then, unwrap, brush with BBQ sauce, and bake uncovered at 350°F for another 15-20 minutes until glazed and bubbly. If you're mastering techniques, see how flavor layering works in our The Homemade Steak recipe.
How long do you cook ribs in the oven for?
Typically, 2 to 2.5 hours total. Start by baking them wrapped in foil at 300°F for about 2 hours, then unwrap and bake uncovered at 350°F with sauce for another 15-20 minutes. Always check for tenderness; the meat should easily pull back from the bone.
Should I cook my ribs covered or uncovered in the oven?
Cover them first, then uncover. Start by wrapping the ribs tightly in foil to steam and tenderize them (covered), then remove the foil for the final 15-20 minutes to allow the BBQ sauce to caramelize and the ribs to crisp up (uncovered).
What temperature should I bake ribs in the oven?
Start low, then increase. Begin baking the ribs wrapped in foil at 300°F for about 2 hours to tenderize them slowly. Then, increase the temperature to 350°F for the final glazing and caramelization stage.
Can I use a dry rub on ribs before baking?
Yes, definitely. Applying a dry rub before wrapping and baking infuses the meat with flavor throughout the cooking process. This is an essential step before wrapping them in foil to steam.
How do I ensure my oven baked ribs are tender?
Low and slow cooking, wrapped tightly, is key. Baking them at a lower temperature (300°F) inside a sealed foil packet for a significant amount of time allows tough connective tissues to break down into gelatin. If you enjoyed mastering low-and-slow texture here, see how that same principle applies to slow cooked meats in our Proper Beef & Veal Meat Stock recipe.
Bake Ribs Oven Recipe

Ingredients:
Instructions:
Nutrition Facts:
| Calories | 942 kcal |
|---|---|
| Protein | 51.2 g |
| Fat | 71.4 g |
| Carbs | 23.8 g |
| Fiber | 2.1 g |
| Sugar | 17.6 g |
| Sodium | 2580 mg |
