Classic Vanilla Butter Cake
- A Slice of Nostalgia: Bake Classic Vanilla Butter Cake Now!
- What’s the Deal with Vanilla Butter Cake?
- Why You’ll Love Classic Vanilla Butter Cake
- Transform Your Baking Game!
- Your Go-To Essential Ingredients Guide for Baking
- Professional Cooking Method: Unlocking the Secrets to a Classic Vanilla Butter Cake
- Pro Tips & Secrets to Perfecting Your Cake
- Perfect Presentation: Make Your Cake Shine
- Storage & Make-Ahead Magic
- Creative Variations for Your Vanilla Cake Adventure
- Complete Nutrition Guide: No Cake Guilt Here!
- Wrapping It All Up
- Frequently Asked Questions
- 📝 Recipe Card
A Slice of Nostalgia: Bake Classic Vanilla Butter Cake Now!
You ever have one of those days when you crave something sweet and comforting? i remember the first time i attempted to bake a classic vanilla butter cake .
I was about twelve, standing on a stool to reach the kitchen counter, feeling like a total baking rock star.
I threw ingredients together like a mad scientist and ended up with a cake that tasted like pure magic. it was dry let me tell ya but it was mine.
That's the beauty of baking! you learn by doing. so, if you're ready to whip up yours, bake classic vanilla butter cake now!
What’s the Deal with Vanilla Butter Cake?
The classic vanilla cake recipe has been around longer than my grandma’s favorite cat. seriously, this cake has roots in the victorian era when folks first went wild for desserts that showcased rich flavors and simple ingredients.
Fast forward to today, and it’s as modern as your favorite bakery down the street. this cake has toned down a bit, making it easier to bake for everyone, not just the pros.
With this easy vanilla butter cake , you'll find it’s lurk proof.
Time to Bake:
- Prep Time: 15 minutes. I can’t even pour a bowl of cereal in that time!
- Cook Time: 30 to 35 minutes.
- Total Time: Under an hour perfect for a last minute dessert!
And the cost? well, this beauty doesn’t break the bank. most ingredients are pantry goodies: flour, sugar, butter, and eggs.
And, guess what? you’ll get about 8 slices , plenty to share or not!
Why You’ll Love Classic Vanilla Butter Cake
Okay, let’s talk about the good stuff. Why should you put your apron on right this second? Here are some key benefits:
Health factors: sure, we know cake isn’t salad, but using quality ingredients means you get a decent dose of energy without all the junk.
Plus, it offers a relatively low-calorie treat compared to fancy pastries packed with sugars.
Versatile Perfection: Whether it’s a birthday, a casual afternoon chill session, or even the holidays, this cake is the perfect go-to. Dress it up or keep it simple your call!
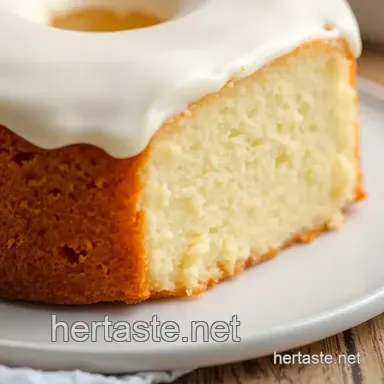
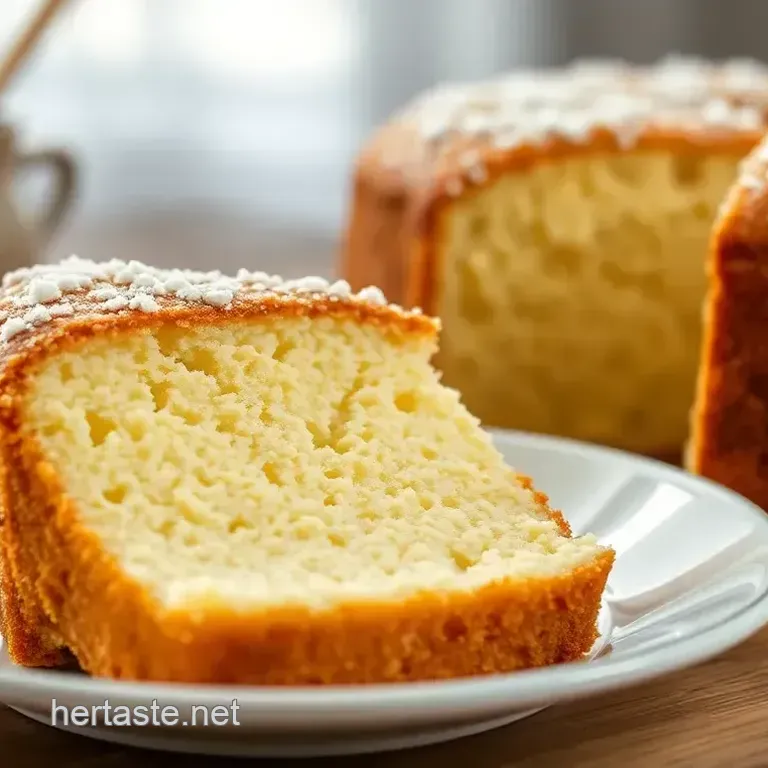
Soft and Light Vanilla Cake Texture: There’s nothing like that fluffy goodness that just melts in your mouth. Seriously, you might hear angels sing with every bite.
Unique selling points: unlike other cakes that might leave you feeling heavy, this one just makes you feel warm inside without weighing you down.
The moist vanilla cake texture is unlike anything else out there.
Transform Your Baking Game!
When you’re ready to bake for beginners , you’ll want to have the right ingredients on hand. let’s get a tiny bit technical because who doesn’t love a good baking tip? grab your room temperature ingredients for better mixing.
Seriously, it makes a difference in achieving that fluffy butter cake texture everyone drools over.
Also, think about elevating your cake with some simple decorating ideas. ditch the fondant and go for vanilla cake with fresh berries and a light whipped cream topping! honestly, it doesn’t just look good; it takes the flavor to another level.
Now that you’ve got a taste of the goodness ahead, let’s move on to the star of the show: the ingredients! trust me, you’re going to love this.
Grab your mixing bowl, and let's get started on this journey to the best vanilla cake ever!
Your Go-To Essential Ingredients Guide for Baking
Hey there, fellow cake lover! today we’re diving into a treasure trove of info that’ll seriously upgrade your baking game.
Whether you're a newbie just figuring out how to bake a classic vanilla cake or a seasoned pro trying to perfect that moist vanilla cake, the right ingredients make all the difference.
So buckle up and let's get into the nitty gritty!
Premium Core Components
First up, let’s talk about those premium core components of the best vanilla cake recipe you'll ever find. we’re talking about good ol’ fashioned measurements.
A winning cake starts with 1 ¾ cups (220 g) of all-purpose flour , 1 ½ teaspoons of baking powder , and ½ teaspoon of salt.
And don't forget the butter gotta have that ½ cup (115 g) unsalted butter that’s at room temperature for that famous fluffy butter cake texture.
In terms of quality indicators , always choose ingredients that look and smell fresh. For instance, flour should be free from lumps, and good butter should have a creamy consistency.
Storage Guidelines and Freshness Tips
You know that moment you reach for baking powder and it’s expired? ugh! keep your baking essentials stored in a cool, dry place and sealed tight to maximize their shelf life .
Most spices last about 1-3 years , while baking powder is good for about 6 months after opening.
For freshness, make sure your vanilla extract is pure. A cheap imitation will totally ruin your cake. And tip: check the expiration dates. Trust me; it’s worth it!
Signature Seasoning Blend
Now, let’s sprinkle in some signature seasoning magic! to enhance the flavors in your easy vanilla butter cake , think about using a combo of ground nutmeg and cinnamon .
Seriously, just a pinch can elevate your cake to the next level.
And don’t forget about those herb selections . While vanilla is the star here, a hint of lavender or rosemary can add a sophisticated twist if you're feeling adventurous.
Smart Substitutions
Okay, let’s keep this real. what if you’re out of butter? no worries use margarine or even avocado (yes, i said it!).
Do you need a gluten-free vanilla cake recipe? swap that all-purpose flour for a 1:1 gluten-free baking blend . it’s a lifesaver!
When you're in dire straits and last minute baking emergencies hit coconut oil can replace butter. Just be cautious with the amount; you'll usually need slightly less.
Kitchen Equipment Essentials
So, what about those baking tools for cakes ? you need a sturdy mixing bowl and a solid electric mixer.
No mixer? a good old-fashioned whisk will do. just prepare your arms for a workout!
If you’re making a layered cake, go for a 9 inch round cake pan or two if you're feeling fancy. and don’t skimp on a rubber spatula trust me, it’s a game changer when you’re transferring batter.
Final Thoughts
Alright, cake buddies, now that you’ve got your ingredients and tools lined up, it's time to put this knowledge to use.
Remember, the secret to a soft and light vanilla cake is all in the mixing and patience. you’ll want each ingredient to blend together seamlessly.
So go ahead, Bake Classic Vanilla Butter Cake Now! Your family and friends will thank you for a slice of delicious nostalgia, perfect for any celebration or a cozy afternoon treat.
Stay tuned as we dive into detailed instructions next. We’re about to make some cake magic happen together!
Professional Cooking Method: Unlocking the Secrets to a Classic Vanilla Butter Cake

When you bite into a slice of classic vanilla butter cake , it should make you feel warm and fuzzy inside, right? this treat is like a hug from your grandma, and learning how to bake it perfectly can take a little finesse.
I remember the first time i tried to bake this cake; honestly, it felt like an episode of a cooking show gone wrong! but with a bit of practice, it became my go-to for any occasion.
So, let’s walk through the essentials of baking one of the best vanilla cakes ever and nail that dreamy, moist texture.
Essential Preparation Steps
First things first mise en place ! this french term just means “everything in its place.” get all your vanilla cake ingredients flour, sugar, butter, eggs, and those secret flavor enhancers laid out.
It makes the process smoother. trust me; fewer things will go wrong when your workspace is organized!
Time management is key, too. prepping takes about 15 minutes , plus 10 minutes for mixing. while your cake bakes in the oven at 350° f ( 175° c) for about 30- 35 minutes , you can clean up or whip up some frosting.
Organization is all about having the right tools. grab your mixing bowls, measuring cups, and that trusty electric mixer. keeping everything at arm’s reach adds to your kitchen flow.
And let’s not forget about safety keep that kitchen tidy and be careful with those hot pans. we’re going for delicious, not disaster!
Step-by-step Process
- Preheat the Oven: Start by preheating your oven to 350° F ( 175° C) . Think of it like warming up for a workout you want to be ready.
- Prepare the Pan: Grease and flour your 9 inch round cake pan . This helps the cake slip out easily later.
- Mix Dry Ingredients: In a bowl, whisk together 1 ¾ cups of flour, 1 ½ teaspoons of baking powder, and ½ teaspoon of salt . Set aside like it’s a cool kid in class.
- Cream Butter and Sugar: In another bowl, beat ½ cup of unsalted butter with 1 cup of granulated sugar until it’s light and fluffy (about 3- 4 minutes ). Seriously, let it get fluffy. This step is gold.
- Add Eggs and Vanilla: Mix in those 3 large eggs one by one, then stir in 2 teaspoons of vanilla extract . It should smell heavenly!
- Combine Wet and Dry Ingredients: Alternate adding your dry mix with ½ cup of whole milk . Start with the dry, end with the dry. Mix until just combined; no need to overdo it!
- Transfer to Pan: Pour the batter into your prepared pan, smoothing the top. Think of it as making a cake canvas.
- Bake: Slide it into the oven and bake for 30- 35 minutes . You know it’s done when a toothpick comes out clean.
- Cool: Let it sit for 10 minutes before moving it to a wire rack to cool completely. Patience is key here; the cooling game is strong.
Expert Techniques
Getting to the next level means mastering a few key techniques. Keep an eye on timing baking is a science as much as it’s an art.
- Quality Checkpoints: Check for that golden brown top and moist crumbs on your toothpick. If you see raw batter, give it more time.
- Troubleshooting Tips: If your cake sinks, it might’ve been underbaked or overmixed. Don't fret; you can always turn it into cake pops!
Success Strategies
Let’s avoid some common mistakes. overmixing can lead to dense cake nobody wants that. stick to the rule of thumb: mix until just combined.
Keep your ingredients at room temperature for a smooth, fluffy texture.
Need make-ahead options? You can bake the cake a day in advance and wrap it tightly. Just remember to let it cool completely first to lock in that moisture.
Cake decorating ideas? simple icing or a sprinkle of powdered sugar can turn a plain cake into a showstopper. or pile on fresh berries and top it with some whipped cream for a delightful finish .
So, are you ready? bake classic vanilla butter cake now! this recipe isn’t just a step-by-step; it’s a ticket to cozy afternoons and dessert table glory.
Can’t wait to dive into the next delicious adventure? let’s explore some additional information that will keep you inspired and motivated in your baking journey!
Pro Tips & Secrets to Perfecting Your Cake
When diving into the world of baking, i can’t stress enough how personal insights from seasoned home chefs can make a difference.
My grandma always said, “baking is like a science; just a pinch off and you might end up with a rock instead of a fluffy butter cake.
” i’ve learned that using room temperature ingredients, especially butter and eggs, makes your cake rise better. trust me; i’ve forgotten this step, and my cakes turned out more like bricks!
And hey, if you're in a time crunch, check out some time saving techniques . pre-measuring ingredients and keeping them lined up makes the process smoother.
I sometimes do a little dance while mixing music really gets the creative juices flowing. also, flavor enhancement tips ? add a bit of almond extract or a splash of milk when creaming the butter.
It can change the game!
Finally, let’s talk presentation advice . remember, we eat with our eyes first! i like to serve my cake on a colorful plate, making it pop.
If you’re feeling fancy, drizzle some melted chocolate or a simple glaze over the top. you’ll impress your friends without breaking a sweat.
Perfect Presentation: Make Your Cake Shine
Oh my gosh, plating is everything! a well presented cake can steal the show. for a plating technique , i often slice while the cake is still slightly warm and serve it on a big, beautiful wooden board.
And speaking of garnishes, fresh mint leaves or a scattering of fresh berries add color and freshness that really ups the wow factor.
Consider color combinations too! If you have a golden vanilla cake, pair it with deep red raspberries or vibrant green mint. It’s all about keeping things visually appealing.
And let’s not shy away from being artsy try vertical layers of cake and whipped cream topping for that ultimate Instagram ready look!
Storage & make-ahead Magic
Now, what about storage? to keep your homemade vanilla butter cake fresh for days, store it in an airtight container .
It’s seriously crucial for preserving that moist vanilla cake magic. if you're planning to make-ahead , you can bake the cake a day or two in advance.
Wrap it tightly in plastic wrap it helps lock in moisture and flavors.
Got leftovers? to reheat, pop a slice in the microwave for about 10 seconds. just enough to warm it up! but, don’t leave it in there too long; we’ve all had that soggy cake experience.
Trust me, no one likes that!
How long does it last? Well, if stored right, it should stay fresh for 4-5 days, but good luck not devouring it before then!
Creative Variations for Your Vanilla Cake Adventure
Now let’s spice things up literally! there are so many flavor adaptations for a classic vanilla cake recipe . for summer, why not add some lemon zest for a lemon vanilla butter cake ?
Or for the chocolate lovers, swirling in melted chocolate creates a chocolate marble cake that feels like a gift from heaven.
Dietary modifications ? no problem! opt for a gluten-free vanilla cake recipe by using a simple flour blend. it tastes delicious! plus, with so many traditional vanilla cake bases, you can get super creative based on the season.
Think pumpkin spice in the fall or coconut in the summer.
Complete Nutrition Guide: No Cake Guilt Here!
Let’s be real cakes can feel guilty, but they don't have to be. understanding that complete nutrition guide can reassure you.
Each slice of this dreamy cake absorbs all the love you put into it, making it a nourishing treat too.
Monitoring your portions is key. This recipe yields about 8 servings, so you can share and savor without overdoing it. Each slice is around 320 calories, so enjoy it mindfully!
Plus, if you want to create healthy vanilla cake options , replacing some sugar with applesauce or using yogurt can give it a nutritious twist.
Listen, your taste buds won’t know what hit ‘em!
Wrapping It All Up
So, you ready to bake classic vanilla butter cake now ? this recipe is not just about a slice of cake; it’s about creating memories.
Sharing with loved ones, enjoying cozy afternoons, and indulging in that rich, buttery flavor there’s nothing quite like it. have fun exploring your baking journey, and remember, even if it doesn’t come out perfect, it’s still delicious! enjoy the process and those heavenly bites.
Happy baking, friends!
Frequently Asked Questions
How long should I bake the Classic Vanilla Butter Cake?
The bake time for the Classic Vanilla Butter Cake is typically between 30-35 minutes at 350°F (175°C). To check for doneness, insert a toothpick into the center; it should come out clean or with a few moist crumbs.
Can I bake Classic Vanilla Butter Cake Now in advance?
Yes, you can bake the cake in advance! Once cooled, wrap it tightly in plastic wrap and store it at room temperature for up to 3 days, or refrigerate it for up to a week. You can also freeze it for longer storage; just ensure it’s well wrapped to prevent freezer burn.
What are some variations I can try with this butter cake recipe?
There are plenty of fun variations! You can add lemon zest for a citrus flavor, swirl in chocolate for a marble effect, or even try a gluten-free option using a 1:1 gluten-free baking blend. Each variation adds a unique flair to this classic recipe.
What is the best way to store leftover Vanilla Butter Cake?
To keep your leftover Vanilla Butter Cake fresh, store it in an airtight container at room temperature for a few days, or refrigerate if you’d like to keep it longer. For maximum freshness, wrap slices in plastic wrap and freeze them if needed.
Can I use substitutes in the Classic Vanilla Butter Cake recipe?
Absolutely! If you need alternatives, you can use margarine or a dairy-free butter for a dairy-free option. Additionally, coconut sugar or a sugar substitute can serve as a lower sugar alternative, while non-dairy milk can replace whole milk.
Why is it important to have ingredients at room temperature?
Using room temperature ingredients, such as butter, eggs, and milk, helps to create a smoother batter and ensures better emulsification. This results in a lighter and fluffier cake, leading to the best texture in your Classic Vanilla Butter Cake.
Bake Classic Vanilla Butter Cake Now