Shell Shockingly Good Authentic Mexican Conchas Bread
- Unlocking the Magic of Pan Dulce: Why Conchas Bread Steals the Show
- The Anatomy of the Perfect Shell Topping: A Baker’s Delight
- Assembling Your Arsenal: What You Need for Heavenly Conchas Bread
- The Two Halves: Dough Components Versus the Signature Streusel
- The Dough Dance: Mixing, Kneading, and the First Proof
- Sculpting the Shells: Shaping and Topping Your Conchas
- The Final Ascent: Proofing and Achieving Golden Perfection
- Troubleshooting Common Conchas Bread Pitfalls
- Recipe FAQs
- 📝 Recipe Card
Unlocking the Magic of Pan Dulce: Why Conchas Bread Steals the Show
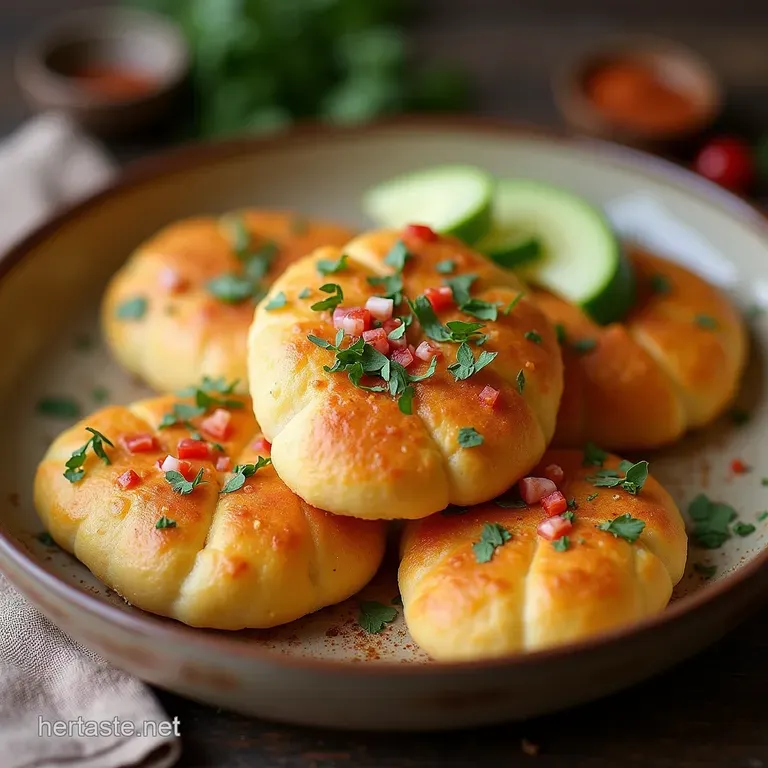
There’s a warmth, a comforting sweetness, that emanates from any bakery specializing in pan dulce . Among this treasured category of Mexican pastries, one item reigns supreme in its visual appeal and delightful texture: the Conchas Bread.
Named for the distinct, shell like pattern adorning its top— concha literally meaning shell this bread is more than just a breakfast item; it’s a cultural staple, an icon of Mexican kitchens across the globe.
Learning the Conchas Bread Recipe is your invitation to partake in this tradition. These are beautifully soft, slightly enriched, brioche like Sweet Bread Rolls crowned with a delicate, sugary crust.
The contrast between the tender, yielding bread and that crisp, vanilla scented topping is what makes these Mexican Sweet Breads utterly irresistible, especially when dunked into your morning café .
If you are looking to master authentic Postres Mexicanos , mastering the Conchas Recipe in English is an essential first step.
The Anatomy of the Perfect Shell Topping: A Baker’s Delight
The defining feature of the Conchas Bread is undoubtedly its topping. It isn’t a glaze or a frosting; it’s a specific, crumbly streusel that must be firm enough to hold its shape during baking but tender enough to yield under the slightest pressure.
Achieving this duality requires precision in temperature the dough must be soft, but the topping’s fat component must be fiercely cold. This careful balance dictates the visual success of the final product.
Understanding the interplay between the dough's richness and the topping's crispness is crucial to replicating true Mexican Pastries in your home kitchen.
Why This Recipe Delivers True Mexican Sweet Bread Authenticity
When developing this recipe, the focus remains firmly on achieving that classic, slightly tangy, tender crumb characteristic of authentic panadería offerings.
We utilize whole milk and a generous portion of butter in the dough, mirroring the rich base that allows the bread to remain wonderfully soft even the next day. On top of that,, the topping formula mandates cold butter (or a mix of butter and shortening for extra stability), ensuring that the sugar mixture doesn't melt prematurely into the dough, thus preserving that beloved, defined shell pattern.
This attention to textural detail ensures your Conchas Bread Pronounce correctly as "authentic."
The Essential Coffee Pairing: Dunking Rituals Explained
One cannot truly appreciate a Conchas Bread without acknowledging its primary companion: coffee. In Mexico, these are often enjoyed dipped quickly into strong, hot coffee or champurrado (a thick chocolate corn masa drink).
The light structural integrity of the soft bread, combined with the sugar content of the topping, allows it to absorb just enough liquid without dissolving entirely. This ritualistic dunking is where the bread’s softness truly shines.
It transforms the experience from merely eating a pastry to participating in a cherished daily moment.
Patience Rewarded: Understanding the Rise Time
These enriched doughs require respect for the proofing stages. Unlike lean, quick doughs, the butter and milk content slows down yeast activity. Therefore, this recipe calls for a minimum of three hours dedicated purely to resting and rising.
This lengthy, patient process is not merely waiting time; it is fermentation time, which develops the complex, subtly sweet flavour that distinguishes quality Sweet Bread Rolls from their quick bake counterparts. Rushing the rise directly translates to a dense, heavy finished product.
Assembling Your Arsenal: What You Need for Heavenly Conchas Bread
Baking these beauties requires more than just standard pantry staples; it demands an organized approach to ingredient temperature. We are managing two very different textures simultaneously a supple, enriched dough and a cold, crumbly streusel.
Therefore, having room temperature ingredients ready for the dough (like eggs and butter) while keeping the topping fats ice-cold is paramount to success.
The Two Halves: Dough Components Versus the Signature Streusel

The beauty of the Conchas Bread Recipe lies in its dual nature. We must treat the enriched dough and the topping paste as two separate baking projects that only converge just before entering the oven. Separating these processes allows for meticulous control over each texture.
Mastering the Enriched Dough Base: Essential Milk & Butter Ratios
The foundation of our Conchas Bread must be tender enough to feel almost like a soft dinner roll, yet strong enough to support the topping. To achieve this signature richness, we rely on a high ratio of fat (butter) and liquid (whole milk) relative to the flour, enriched further by eggs.
The warm milk (ideally between 105– 115° F) is necessary to awaken the active dry yeast, kickstarting the long rise required for flavour development.
The butter should be incorporated slowly after the initial dough structure has formed, allowing the gluten network to develop elasticity before the fat weighs it down.
Crafting the Crumbly Topping: Sugar, Flour, and Flavor Balance
The topping paste is where the Conchas Bread Flavors truly stand out. It’s generally a simple ratio of flour, sugar, and fat (butter, often supplemented with a little shortening for texture insurance). The key here is maintaining cold temperatures.
The fat must be cut into the dry ingredients until they resemble coarse sand. If the mixture feels warm to the touch, the topping will spread during baking rather than holding that iconic shell structure. A splash of good vanilla extract in this paste ensures that wonderful, aromatic counterpoint to the plain bread.
Equipment Check: Tools for Non-Stick Success
While a stand mixer with a dough hook is highly recommended for the 8– 10 minutes of kneading required, it is possible to manage by hand if you are prepared for a decent workout.
Essential non-mixer tools include parchment paper or silicone baking mats, as these enriched doughs can stick easily. You will also need a bench scraper or a very sharp knife, which is non-negotiable for achieving the clean scoring that defines the shell pattern.
Related Recipes Worth Trying
- Best Ever Moist Banana Bread Recipe Easy Loaf — Forget dry loaves This easy banana bread recipe uses sour cream for the most perfectly moist crumb Its the comforting homemade banana bread youve been...
- Mexican Pizza Copycat Recipe El Fuego Fiesta Flatbread — Craving Taco Bells Mexican Pizza This El Fuego Fiesta Flatbread copycat recipe elevates it Crispy tortillas spiced beef and a tangy sauce Get ready for a fiesta
- OoeyGooey Cheesy Garlic Breadsticks My PullApart Recipe — Best Cheesy Garlic Breadsticks OoeyGooey ready in under 2 hours Fluffy homemade cheese bread dough perfect for sharing Get my quick breadsticks recipe
The Dough Dance: Mixing, Kneading, and the First Proof
The initial mixing phase involves proving the yeast in the warm milk with a touch of sugar until it foams robustly a visual guarantee that your yeast is active. Once combined with the flour, salt, eggs, and vanilla, the mixture will look shaggy.
The true work begins when the softened butter is added incrementally. Knead until the dough passes the "windowpane test," meaning you can gently stretch a piece thin enough to see light through it without tearing. This gluten development is the structure supporting the sweet dough.
Once smooth, the first proof requires a warm, draft free spot for roughly 1.5 to 2 hours, until it has doubled in volume.
Sculpting the Shells: Shaping and Topping Your Conchas
After the first rise, gently deflate the dough and divide it into 12 equal portions. Shape each piece with gentle tension into tight, smooth balls. These balls need a brief 30-minute rest (bench rest) to relax the gluten before you attempt the topping application.
While the dough rests, your pre-chilled topping mixture should be divided into 12 smaller balls and gently flattened. Place one topping disk directly onto the surface of each rested dough ball.
This is where technique matters most: use a sharp implement to score the topping in a crosshatch pattern, mimicking the segmentation of a shell, ensuring you press only through the topping and lightly indent the dough beneath, but do not cut through the bread itself.
The Final Ascent: Proofing and Achieving Golden Perfection
The final stage of rising is perhaps the most critical for texture. Once the shells are formed, they must be covered loosely and allowed to proof for another 30 to 45 minutes.
This second rise allows the yeast to work one last time, creating those airy pockets that result in a soft interior, while simultaneously setting the topping structure just before baking begins.
Activated Yeast Secrets: Ensuring a Vigorous Dough Rise
If your yeast mixture in the initial step fails to foam, your dough will never achieve the necessary volume. Always ensure your milk is warm but not hot, as excessive heat will kill the yeast instantly.
If you suspect your yeast is old, use slightly more than called for, or use instant yeast mixed directly with the dry ingredients to bypass the proofing step altogether.
The Gentle Art of Applying the Streusel Topping Without Smudging
The moment the topping meets the dough is tense. Handle the dough balls gently during shaping to preserve the air. When placing the streusel disk on top, use light pressure. The scoring must happen immediately after placement.
If you wait too long, the dough underneath will expand too much, causing the topping to crack unevenly or lift off entirely rather than sitting snugly on the dome.
Baking Temperatures That Guarantee a Soft Interior
We preheat the oven to 375° F ( 190° C). This moderate heat is high enough to set the sugars in the topping relatively quickly, preventing them from dissolving, but gentle enough to allow the enriched dough to bake through evenly without drying out.
The goal is a rich golden brown bottom crust and a topping that has baked through without becoming overly dark. Expect them to take between 18 and 22 minutes, rotating the trays halfway through for even coloration.
How to Score the Classic Shell Pattern Deeply
The scoring is the visual signature. Think of scoring a pie: you are drawing intersecting lines. Most bakers start by scoring one line straight across the dome, and then score lines perpendicular to the first, creating square segments across the top. Be decisive but gentle.
A light touch ensures you mark the topping; a deep cut will cause the dough to burst through the pattern when it rises in the oven, distorting the shell look.
Troubleshooting Common Conchas Bread Pitfalls
Even with the best intentions, baking can present challenges. Knowing how to diagnose a problem mid-process can save your batch of Conchas Bread .
Fixing a Flat Dough: What To Do If Your Rise Fails
If your dough has rested for the full time but has only slightly increased in volume, it usually points to one of two things: dead yeast or a cold environment. If you are certain the yeast was active, try transferring the bowl to a warmer spot (like an oven with just the light on) and allow it another hour.
If it still refuses to budge, very gently knead in half a teaspoon of fresh yeast mixed with a teaspoon of sugar and a tablespoon of warm milk, and allow a third, shorter rise.
Storing Leftover Conchas for Maximum Freshness
These Mexican Sweet Breads are best eaten the day they are baked, but they store well for 2-3 days. Store them in an airtight container at room temperature. Do not refrigerate them, as the cold temperature will rapidly stale the enriched bread component.
To refresh, microwave a concha briefly (10-15 seconds) or warm it gently in a low oven.
Flavor Twists: Adding Chocolate or Cinnamon to the Streusel
To introduce variation in your Conchas Bread Flavors , you can easily adapt the topping. For rich chocolate shells ( Conchas de Chocolate ), substitute 2 tablespoons of the flour in the topping mixture with high-quality unsweetened cocoa powder.
For a warm spice note, add 1 teaspoon of ground cinnamon to the main dough mixture before the first knead.
Quick Guide: Freezing and Reviving Your Sweet Breads
Conchas Bread freezes beautifully, especially if you freeze them unbaked after the final shaping and scoring. Place the shaped, topped loaves on a sheet pan, flash freeze until solid, then transfer them to a freezer bag.
To bake from frozen, simply place them on a baking sheet, allow them to thaw slightly on the counter for 30 minutes, and bake at 375° F ( 190° C), adding about 5- 7 minutes to the total bake time.
Alternatively, baked loaves can be frozen once completely cool; thaw overnight before reviving them in a warm oven.

Recipe FAQs
What’s the secret to getting that perfect shell pattern on my Conchas Bread?
The secret lies in the topping preparation and the scoring timing! Make sure the butter for the topping is ice cold; this keeps the paste firm so it doesn't merge with the dough when baking.
Crucially, only score the shell pattern into the topping just before the final proofing stage, right before they go into the oven.
My Conchas dough won't rise properly; is it because I rushed the proving stages?
Ah, yeast can be a bit temperamental it’s not one of those quick recipes! Yes, rushing the rise is the most common culprit. Ensure your milk is warm (not hot, or you’ll kill the yeast) and find a cosy spot for them to double in size; think of it as giving them time to have a proper cuppa.
A slow rise equals better flavour and texture, just like a proper slow cooked stew!
How long will these Conchas Bread keep fresh, and what’s the best way to store them?
These are best enjoyed the day they are baked, frankly! However, they should keep reasonably well for 2-3 days stored in an airtight container at room temperature. If you are worried about them going stale, pop them in a freezer bag and freeze them; when you fancy one, just reheat it gently in a low oven or microwave to bring that softness back.
Can I make these Conchas ahead of time, maybe by doing the dough the day before?
Absolutely, you can give yourself a massive head start! After you complete the initial kneading and the first rise (Phase 1), you can pop the dough into the fridge overnight for a slow, cold fermentation.
Just remember to bring it back to room temperature for about an hour before you shape it and apply the topping, otherwise, the cold dough will fight you.
The topping seems too crumbly to stick to the dough balls; what am I doing wrong?
That often happens if your butter was too warm when you mixed the topping, or if you’ve overworked the paste slightly. If it’s too dry to adhere, gently knead in half a teaspoon of milk at a time until it just comes together like playdough.
You want it pliable, but still stiff enough to hold its shape when scored.
Authentic Conchas Bread Recipe

Ingredients:
Instructions:
Nutrition Facts:
| Calories | 59 kcal |
|---|---|
| Protein | 1.4 g |
| Fat | 0.3 g |
| Carbs | 1.3 g |
| Fiber | 0.0 g |
| Sodium | 2000 mg |
