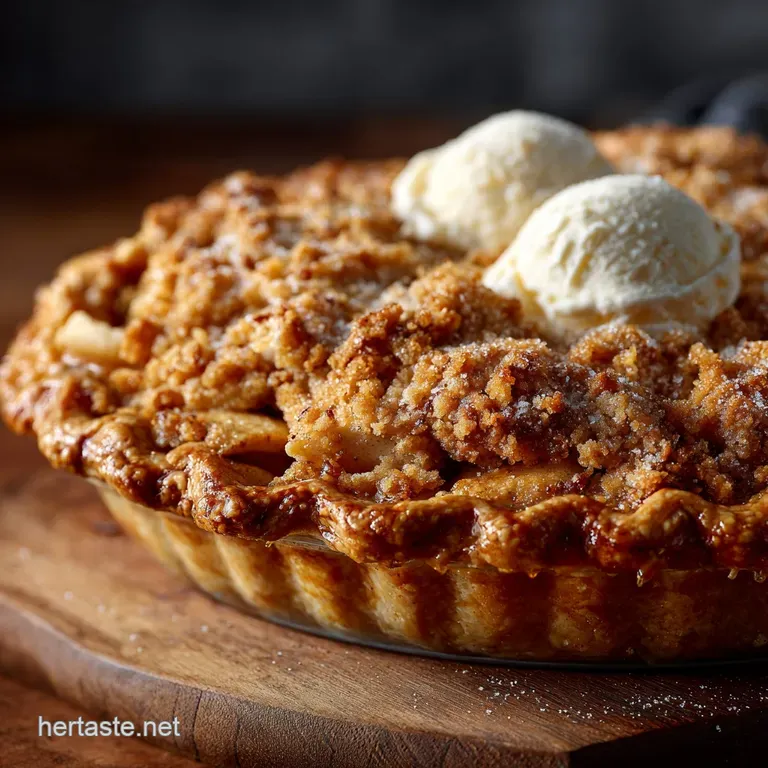
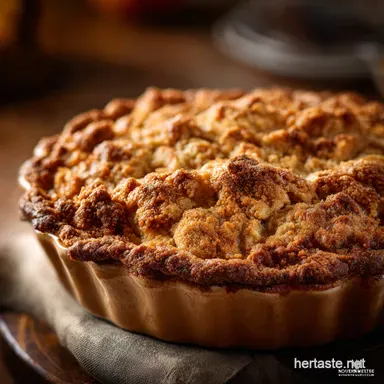
Apple Pie: the Ultimate All-Butter Deep Dish Showstopper
- Mastering the Golden Ratio: Why This Deep and Dish Apple Pie Reigns Supreme
- Setting the Stage for Success: An Overview of the Baker's Journey
- Sourcing Your Symphony: Essential Components and Preparation Steps
- Crafting the All and Butter Shortcrust: From Flour to Form
- Assembling Your Edible Masterpiece: The Deep and Dish Structure
- Achieving the Golden Glory: Oven Temperature and Timing
- Troubleshooting Your Bake: Common Pitfalls and Expert Fixes
- Maximizing Shelf Life and Flavor: Storage and Serving Suggestions
- Adapting the Recipe: Variations on the Classic Apple Pie
- Recipe FAQs
- 📝 Recipe Card
Mastering the Golden Ratio: Why This Deep and Dish Apple Pie Reigns Supreme
Right then, let’s talk pie. Not the wimpy, flat, store and bought excuses, but a proper, majestic, deep and dish apple pie that demands respect. This recipe is the result of years of trial and error (mostly error, frankly, in the early days).
I have ruined more bottom crusts than I care to admit, but I finally cracked the code, and it all comes down to two things: volume and vitality. We need heaps of fruit and a crust that shatters, not crumbles, when you cut it.
The biggest game and changer for me wasn't a fancy ingredient (though the apples matter, we'll get there). It was realizing that a great homemade apple pie needs structure, both from the depth of the pan and the quality of the all and butter shortcrust. We’re aiming for gold here.
We want that perfect balance where the tart, spiced filling cuts beautifully against the sweet, flaky pastry.
Setting the Stage for Success: An Overview of the Baker's Journey
Baking this beauty is a marathon, not a sprint. The good news? Most of the time is hands and off chilling. This process isn't just about mixing things; it's about temperature control and patience.
We’ll spend 30 minutes making the dough, an hour letting the fridge work its magic, and then another 20 minutes getting the fruit ready. It's a relaxed, rhythmic process.
If you rush the dough, the dough will rush you right into a bland, tough pastry disaster.
The Secret to Flaky Pastry: Temperature and Technique
This is non and negotiable: butter must be cold. Ice cold. When those little pockets of firm butter hit the high heat of the oven, they release steam. That steam creates separation within the layers of dough, giving you that incredible, ethereal flakiness we crave.
If your butter is soft, it just blends into the flour, resulting in a dense, cookie and like crust. I made that mistake my first five times. Don’t be me. Keep the kitchen cool, handle the dough as little as possible, and seriously, use ice water. It’s brilliant.
A Chef’s Guide to Preparing Your Baking Station
Before you even touch the flour, set yourself up. You need space to roll. Clear your counter entirely. Grab a small bowl of ice water and keep your cubed butter resting in the freezer until the absolute last second.
If you use a food processor (highly recommended for speed and minimal butter warming), have it assembled. A well and organized station means less stress, less heat exposure, and therefore, better pastry.
Visualizing Perfection: A Quick Tutorial Preview
Our journey is simple: Pastry, then Apples, then Assembly, then Heat. We start by quickly making the all and butter shortcrust dough and getting it chilling. While that’s resting, we prep the apples, slice them uniformly, and toss them with that perfect blend of spices.
Finally, we stack the pie high (because apples shrink, remember?), seal the edges tight so those lovely juices stay put, and then send it off for a hot blast before finishing low and slow. See? Totally manageable.
Sourcing Your Symphony: Essential Components and Preparation Steps
You can have the best technique in the world, but if your ingredients aren't right, the pie suffers. This is especially true for the star of the show: the apples. We need apples that hold their shape.
CRITICAL WARNING: If you use soft apples (like McIntosh or Red Delicious), they will turn into applesauce inside the pie. You will open the oven to find a soup housed in a flimsy crust. Don't risk it.
Selecting the Best Culinary Apples for Structure and Flavor
For the best homemade apple pie, you need complexity. I almost always use a blend. Granny Smith is essential for its tartness; it cuts through the sugar and keeps the filling lively. But they can be a bit one and note.
So, mix them with something firm and slightly sweeter Braeburns, Honeycrisp, or, if you're in the UK, a magnificent Bramley cooking apple works wonders. Slice them about a quarter and inch thick. Uniformity is key here so they all cook at the same rate.
Defining Your Butter Strategy: Cold, Grated, or Cubed?
I prefer the cubed and slightly flattened method for my all and butter shortcrust, often using a food processor for the initial incorporation. However, an even surer way to guarantee coldness (if you're making this in a warm kitchen) is to freeze the butter entirely and then grate it on a box grater directly into the flour mixture.
It maximizes cold surface area and results in incredibly flaky layers. Just toss the grated butter with the flour before adding the liquid.
Measurement Conversions and Ingredient Notes
I know most of you are working with cups, but trust me, baking by weight (metric) is far more reliable, especially for the flour in this apple pie recipe. A slight over and measurement of flour can completely dry out your pastry.
If you're using cups, spoon the flour into the measuring cup and level it off; don't scoop directly from the bag. Also, never skip the salt in the pastry dough. It doesn't make it taste salty; it actually enhances the sweetness of the fruit and the richness of the butter.
The Perfect Pie Dish: Choosing Depth and Material
We are making a deep and dish apple pie, remember? This isn't just semantics; it affects the bake time. Use a 9 inch ceramic or glass pie plate with a good deep lip (at least 1.5 inches). Metal heats up faster, which can lead to rapid edge browning before the centre is cooked.
Ceramic or glass distributes heat more evenly, giving the filling time to bubble and set.
Crafting the All and Butter Shortcrust: From Flour to Form
Let's make some magic. When you combine the flour, salt, sugar, and the cold butter, you want the mixture to look like coarse sand with visible, pea and sized chunks of butter still present. We are not aiming for a smooth dough yet.
When you add the ice water (start slow!), use a light touch. Drizzle it in a tablespoon at a time, mixing minimally until the dough just holds together when pinched. If you add too much water, the gluten develops too much, and your crust will be tough.
If you overwork it by kneading it like bread dough, you melt the butter and also develop the gluten. The result? Flaky pastry turns into boot leather. Turn it out, divide it, flatten it into discs, wrap it tightly, and get it chilling.
That rest time allows the gluten to relax, which means when you roll it, it won't snap back at you.
Related Recipes Worth Trying
- Mini Pumpkin Pies: Recipe for the best individual spiced fall dessert — Mini Pumpkin Pies are the ultimate individual Thanksgiving desserts. This easy recipe uses blind baked shells for a perfectly crisp crust, ideal for a crowd.
- Apple Crisp Mini Cheesecakes: Easy Recipe for Fall Cheesecake Bites — Our individual Apple Crisp Mini Cheesecakes are the ultimate make-ahead fall dessert. This creamy, elegant mini apple cheesecake recipe features a buttery...
- Instant Pot Spiced Apple Cider The Bonfire Brew Ready in 35 Minutes — Instant Pot Spiced Apple Cider extracts deep warm flavour from whole spices quickly This homemade infusion ready in 35 minutes is the ultimate hot spiced...
Assembling Your Edible Masterpiece: The Deep and Dish Structure

Once the dough is cold, roll out the bottom crust. Try to keep it consistent thickness (about 1/8 inch) and large enough to completely line your deep dish, with about an inch of overhang. Carefully lay it in the plate.
Now for the filling. Remember how we let those apples sit for 15 minutes? They should look beautifully glossy and a little liquid should have pooled at the bottom. Do not pour that liquid into the pie! You only want the coated apples.
Pile them high, mounding them in the center, since they will collapse as they cook. Then, scatter those little dots of cold butter over the top of the fruit. This steam bath of butter melts down and gives the filling an unbelievable sheen and richness. Finally, top it with the second crust, trim, and seal the deal.
Achieving the Golden Glory: Oven Temperature and Timing
This is where many home cooks go wrong. They bake at one temperature. We need two.
The 'Rubbing In' Method for Superior Flakiness
If you’re making the dough by hand (no food processor), the traditional 'rubbing in' method is excellent. You use your cold fingertips to rub the butter into the flour. The key is speed; lift your hands high as you rub, allowing air to circulate. This keeps the fat cold and the mixture aerated.
It should still look uneven and shaggy when done.
Preparing the Apple Filling and Balancing the Sweetness
My best advice for the apple pie filling recipe is to taste your apples before you decide on the sugar quantity. If you use pure Granny Smiths, you'll need the full 3/4 cup of sugar. If you use Honeycrisp, maybe dial it back to 1/2 cup. It’s all about balance.
The lemon zest is a must; it elevates the entire flavour profile beyond just cinnamon and sugar.
Sealing the Deal: Crimp Techniques That Prevent Leaks
A poorly sealed pie will leak its precious juices onto the bottom of your oven, burning instantly and creating a smoky mess. When you marry the top and bottom crusts, gently fold the top crust underneath the bottom crust overhang.
Then, use your thumb and forefinger (or a fork) to press and seal firmly all the way around the edge. Make sure your vents are clear, too; steam needs an escape route!
Shielding the Crust: Preventing Premature Browning
The edges of your beautiful apple pie often brown faster than the centre, especially on a deep and dish structure. After about 30 minutes in the oven, check the edges.
If they are already deep golden brown, take strips of aluminum foil and carefully wrap them around the exposed edges (the crimp), essentially creating a little shield. This allows the centre to continue baking until done.
The Telltale Sign: Knowing When Your Apple Pie is Truly Done
Don't pull the pie out just because the crust looks golden. That's a rookie mistake. A truly finished pie must have filling that is visibly and vigorously bubbling up through the vents.
If you insert a sharp knife or skewer through a vent, it should glide through the apples with no resistance, and the released liquid should be thick and syrupy, not watery. If you're unsure, give it another 10 minutes.
Troubleshooting Your Bake: Common Pitfalls and Expert Fixes
We all have pie disasters. I once tried a pre and made crust and the whole thing melted into a puddle. Lesson learned: make your own!
- The Crust is Shrinking: You didn't chill the dough long enough before rolling, or you didn't chill the assembled pie before baking. Fix: Roll the dough slightly bigger next time, and always, always give the fully assembled pie a 15 minute freezer nap.
- The Filling is Runny: You didn't use enough thickener (flour/cornstarch), or you didn't let the pie cool completely. Fix: Make sure the filling includes the right amount of flour, and seriously, let it rest for three hours. It’s the hardest part, but mandatory.
- The Bottom Crust is Pale: Your oven might be slightly cooler than indicated, or your pie dish material is preventing direct heat transfer. Fix: Try baking the pie on the lowest rack of the oven for the first 30 minutes, right on top of a preheated baking steel or heavy baking tray.
Maximizing Shelf Life and Flavor: Storage and Serving Suggestions
This amazing homemade apple pie keeps beautifully. At room temperature, wrapped loosely, it's generally good for two days. If you keep it in the fridge, it will last 4 to 5 days, though the crust texture will soften slightly.
The flavour actually deepens the day after baking. The spices marry with the apples, and the texture of the filling becomes perfect.
To Serve: The pie must be warm, but not piping hot. Reheat slices for 10 minutes in a 350°F (180°C) oven to refresh the crust's crispness.
Adapting the Recipe: Variations on the Classic Apple Pie
Once you master this base apple pie recipe easy, feel free to experiment with flavours.
- Add 1/2 cup of dried cranberries or raisins to the filling for extra complexity.
- Substitute half the white sugar for packed brown sugar for a molasses depth.
- Toss in a teaspoon of black pepper to the filling for a surprising, sharp warmth (trust me, it works).
Why Your Bottom Crust Is Soggy (And How to Fix It Next Time)
The infamous soggy bottom. It happens when moisture from the apple pie filling recipe leaks into the unbaked dough. Next time, try this:
- The Crumb Barrier: Sprinkle 1 2 tablespoons of fine, unseasoned breadcrumbs or crushed gingersnap cookies evenly over the bottom crust before adding the filling. They absorb the moisture instantly.
- Pre and Bake Glaze: Brush the entire bottom crust with a beaten egg white right after placing it in the dish. It bakes into a waterproof seal.
Serving Temperature and Suggested Accompaniments
Serve this beauty barely warm. Hot pie is too runny. Paired with vanilla bean ice cream (homemade if you’re feeling ambitious) or a generous ladle of warm custard, you have the ultimate comfort dessert.
I personally love it with a sharp, mature cheddar cheese slice on the side it’s an unexpectedly brilliant pairing.
Freezing Unbaked or Baked Apple Pie for Later Enjoyment
You can absolutely freeze this pie!
- Unbaked: Assemble the entire pie, but skip the egg wash. Freeze until solid (about 4 hours). Wrap tightly in cling film and then foil. It keeps for up to 3 months. To bake, unwrap and brush with egg wash, then bake frozen, adding about 20– 30 minutes to the total baking time.
- Baked: Cool completely, then wrap tightly and freeze. Thaw overnight in the fridge and reheat in a 350°F oven until warmed through.
Vegan Adaptations for the All and Butter Crust
If you need a vegan crust, substitute the dairy butter with a high and quality, solid vegetable shortening or a block and style vegan butter (the stick kind, not the tub kind). Keep the ratio the same. Shortening results in an incredibly flaky crust, actually, though it lacks the complex flavor of real butter.
Skip the egg wash entirely and brush with a plant and based milk (like soy or almond) before sprinkling with sugar.

Recipe FAQs
How do I stop the dreaded 'soggy bottom' on my Apple Pie?
It's a national tragedy when that happens! Ensure your pastry is well chilled before baking, and try brushing the bottom crust with a thin layer of beaten egg white or fine breadcrumbs before adding the filling to create a crucial moisture barrier.
Which apples make the best filling for a proper Apple Pie?
A mix is usually best; combine tart, firm varieties like Bramley or Granny Smith for structure and tang, with a sweeter apple like Braeburn or Honeycrisp for a perfectly balanced flavour and texture.
My filling always seems a bit runny after cooling, what am I doing wrong?
You must allow the pie to cool for at least three hours after baking, as this is the crucial time when the flour or cornstarch thickener fully sets the juices; patience is a virtue here!
How long does homemade apple pie keep, and is it best kept in the fridge?
A fully cooled pie is fine stored loosely covered at cool room temperature for up to two days, but if you want to stretch it further, pop it in the fridge for up to four days, and simply reheat slices before serving.
What’s the ultimate way to serve this British classic, perhaps with a cheeky twist?
Nothing beats it served warm with thick, flowing custard (the classic choice), but for a proper savoury depth, try adding 1/4 cup of grated mature Cheddar cheese into your pastry dough it’s brilliant, honestly.
Ultimate All Butter Deep Dish Apple Pie
Ingredients:
Instructions:
Nutrition Facts:
| Calories | 379 kcal |
|---|---|
| Protein | 2.8 g |
| Fat | 17.7 g |
| Carbs | 55.4 g |
