The Ultimate Thin Mint Whoopie Pies Recipe
- Ultimate Guide to Thin Mint Whoopie Pies
- The Anatomy of the Perfect Chocolate Mint Whoopie Pie
- Essential Ingredients and Substitutions
- Nutrition Information
- How to Bake & Assemble Decadent Chocolate Mint Whoopie Pies
- Troubleshooting & Expert Tips for Whoopie Pie Success
- Storage and Freezing Guidelines
- Recipe FAQs
- 📝 Recipe Card
Ultimate Guide to Thin Mint Whoopie Pies
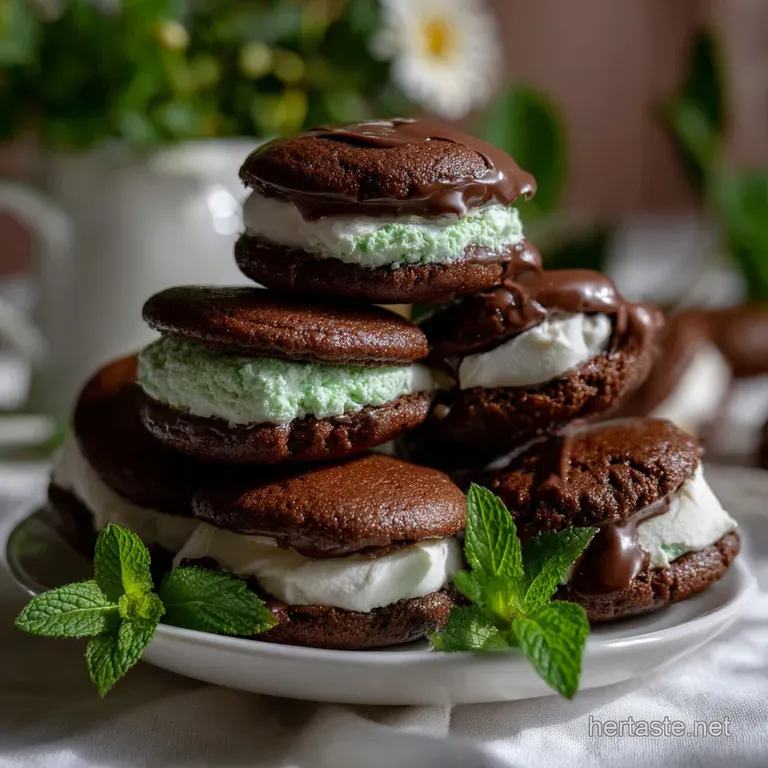
You know that incredible, sharp blast of peppermint followed by the deep, dark richness of chocolate? That’s what baking these Thin Mint Whoopie Pies smells like a cross between your favorite seasonal cookie and a bakery level chocolate dessert sandwich.
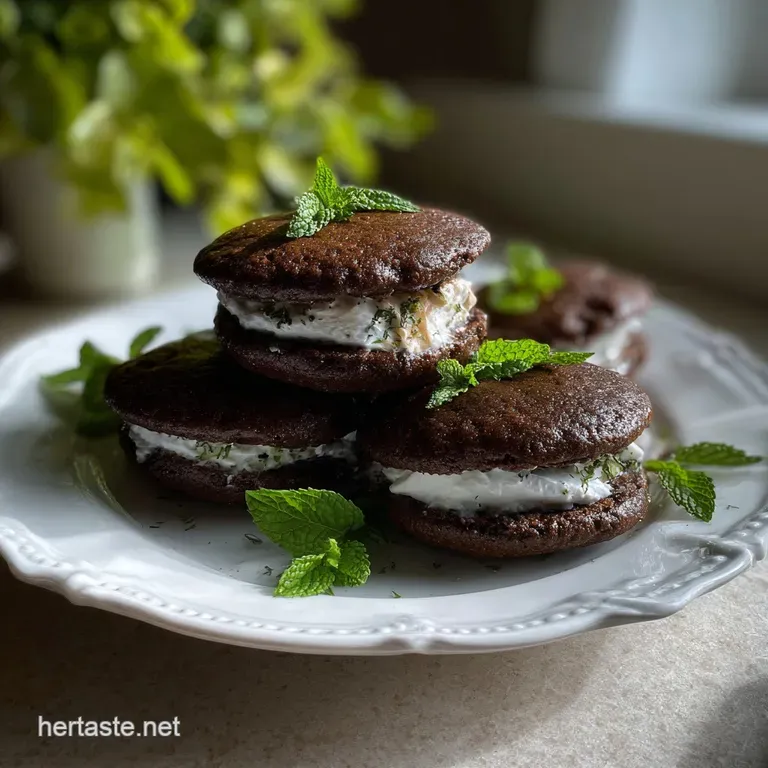
Forget those dry, crumbly versions you might have tried before. We are making cloud like, intensely dark chocolate shells that perfectly hug a vibrant, velvety mint buttercream filling.
This recipe is fast you’ll be holding 18 of these decadent beauties in your hands in just about 45 minutes total. I've broken down all the science and the secrets so your batch of mint chocolate whoopie pies comes out perfect, every single time.
This isn’t just a simple dessert; it’s a revelation. Seriously, if you love that crisp, cool mint flavor contrasted with deep cocoa, stop scrolling right now. You need this specific recipe for the best homemade Thin Mint Whoopie Pies .
The Anatomy of the Perfect Chocolate Mint Whoopie Pie
What Exactly Is a Chocolate Mint Whoopie Pie?
A whoopie pie is technically a "gookie" a cakey cookie but I like to think of it as the ultimate dessert sandwich. Instead of a crunchy cookie base, you have two soft, dome shaped cakes, glued together by a thick, stable filling.
Our version uses a rich, dark cocoa batter for the shells and a signature peppermint buttercream, making it an undeniable replica of the classic flavor combo.
Why These Homemade Treats Beat the Boxed Cookie
The boxed cookies are amazing, but they are crunchy . This Thin Mint Whoopie Pie recipe delivers the same iconic flavor profile but upgrades the texture to pillowy softness.
We are using buttermilk to create a tender crumb and high-quality cocoa for that deep, almost black chocolate color. Plus, you control the filling thickness. I don’t mess around; the filling ratio here is generous!
Recipe Difficulty and Estimated Time Commitment
I rate this recipe as easy medium. The mixing is fast, but piping the shells takes a little finesse.
Achieving the Intensely Dark Chocolate Shell
The secret to that beautiful dark, almost black shell is a combination of black cocoa powder (or high-quality Dutch process cocoa) and the acid in the buttermilk. Dutch process cocoa is alkalized, meaning it’s treated to neutralize the acidity, resulting in a smoother flavor and much darker color.
The Role of Buttermilk in Creating a Pillowy Texture
Buttermilk is non-negotiable here. When baking soda hits the acid in the buttermilk, it immediately creates carbon dioxide, which gives our whoopie pies that immediate, lofty lift in the oven. The result is a shell that is moist, light, and perfectly domed not flat or dense.
Mastering the Fluffy, Vibrant Mint Buttercream Filling
For the filling, stability is key. You must use softened (but not melted!) butter and heavy cream or milk to achieve that perfect velvety texture. And here's a crucial tip: use just a tiny drop of green food coloring if you want the vibrant minty look; otherwise, the mint extract will still give you all the flavor you need.
Essential Ingredients and Substitutions
To make 18 delectable Thin Mint Whoopie Pies , you'll need standard pantry staples.
| Item | Quantity | Notes |
|---|---|---|
| Flour | 2 cups | All-Purpose |
| Cocoa Powder | 1/2 cup | Dutch process or Black Cocoa for color |
| Baking Soda/Powder | 1 teaspoon each | Leavening |
| Salt | 1/2 teaspoon | Balances sweetness |
| Butter | 1/2 cup (1 stick) | Unsalted, softened |
| Brown Sugar | 1/2 cup | Moisture and richness |
| Egg | 1 large | Binder |
| Vanilla Extract | 1 teaspoon | Flavor depth |
| Buttermilk | 3/4 cup | Essential for texture |
| Powdered Sugar (Filling) | 3 cups | For volume and sweetness |
| Butter (Filling) | 1/2 cup (1 stick) | Unsalted, softened |
| Milk/Cream (Filling) | 1 2 tablespoons | Liquid binder |
| Mint Extract | 1 teaspoon | Use pure extract, not flavoring |
Ingredient Swaps: Getting Your Ratios Right
If you run into an ingredient shortage, here is how you can adjust the recipe without ruining the delicate balance of these Thin Mint Whoopie Pies .
| Original Ingredient | Best Substitute | Why It Works |
|---|---|---|
| Buttermilk (3/4 cup) | Milk (3/4 cup) + 3/4 tsp White Vinegar | The acid is vital for activating the baking soda, ensuring the shells rise properly. Texture Note: May be slightly less tender than true buttermilk. |
| Dutch Process Cocoa | Natural Unsweetened Cocoa | Scientific Function: Will still provide chocolate flavor, but the shells will be lighter brown, not dark black. You may need to add 1/4 tsp extra baking soda to counteract natural cocoa's acidity. |
| Brown Sugar | Granulated Sugar | Works for sweetness. Honest Trade Off: Brown sugar adds moisture; shells made with granulated sugar might be marginally drier. |
| Mint Extract (1 tsp) | Peppermint Oil (1/4 tsp) | Peppermint oil is highly concentrated. Use far less and taste as you go to prevent overpowering the delicate chocolate flavor. |
Nutrition Information
| Nutrient | Amount |
|---|---|
| Calories | 258 cal |
| Protein | 2.6 g |
| Fat | 11.6 g |
| Carbs | 38.2 g |
| Sugar | 28.5 g |
How to Bake & Assemble Decadent Chocolate Mint Whoopie Pies
This quick cooking process is why this whoopie pie recipe works so well. We are aiming for set, puffy shells in just 10 minutes.
Step 1: Preparing the Chocolate Whoopie Pie Batter
- Dry Mix: Whisk together the 2 cups All-Purpose Flour, 1/2 cup Dutch process Cocoa Powder, 1 teaspoon Baking Soda, 1 teaspoon Baking Powder, and 1/2 teaspoon Salt in a medium bowl. Make sure the cocoa is fully incorporated so you don’t end up with streaks later.
- Cream Butter and Sugar: In a separate large bowl, use a stand mixer (or hand mixer) to cream the 1/2 cup Unsalted Butter, softened (for shells) and 1/2 cup Brown Sugar, packed until light and fluffy. This should take about 3 minutes. Scrape down the sides.
- Wet Mix: Beat in the 1 large Egg and 1 teaspoon Vanilla Extract until just combined.
- Combine: Alternately add the dry ingredients and the 3/4 cup Buttermilk, starting and ending with the dry. Mix on low speed only until combined. The batter will be thick, almost like dense pancake batter.
Pro Tip: Do not overmix! Overmixing develops the gluten, resulting in tough, chewy whoopie pie shells. For another deep, dark chocolate treat, try my recipe for [Better Than Anything Brownies: Fudgy Shiny Crinkle Top]!
Step 2: Piping Uniform Shells for Consistent Baking
- Preheat & Prep: Preheat your oven to 350°F (175°C). Line two baking sheets with parchment paper or silicone mats.
- Scoop/Pipe: Transfer the batter to a large piping bag (using a large round tip is easiest) or use a small cookie scoop (about 1.5 tablespoons) for consistency.
- Shape: Pipe or drop circles of batter about 1.5 inches wide, spaced 2 inches apart. You should get 36 shells total (18 sandwiches).
- Bake: Bake for 9– 10 minutes. The edges will be set, and the center will spring back slightly when gently touched. Do not overbake! They should still be very soft.
- Cool: Let them cool on the baking sheet for 5 minutes before moving them to a wire rack to cool completely. Cooling is essential before adding the filling.
Step 3: Whipping Up the Mint Buttercream Filling
- Cream: Beat the remaining stick of 1/2 cup Unsalted Butter, softened (for filling) until smooth and fluffy (about 2 minutes).
- Add Powdered Sugar: Gradually add the 3 cups Confectioners' Sugar, one cup at a time, mixing on low to prevent a sugary explosion. Once fully incorporated, add the 2 tablespoons Heavy Cream, 1 teaspoon Peppermint Extract, and a tiny drop of green food coloring (optional).
- Whip: Increase the mixer speed to medium high and whip for 3- 5 minutes until the frosting is light, airy, and velvety smooth. This aggressive whipping step ensures your filling isn't gritty.
Step 4: Pairing and Filling the Thin Mint Whoopie Pies
- Pair: Once the shells are completely cool, flip half of them over (the flat side facing up) and match them by size.
- Fill: Pipe or spread the mint buttercream generously onto the flat side of one shell.
- Sandwich: Gently press the second shell on top, creating the ultimate Thin Mint Whoopie Pie dessert sandwich. Repeat until you have 18 glorious sandwiches.
Troubleshooting & Expert Tips for Whoopie Pie Success
If your shells are spreading too much or your filling is gritty, don't worry these are the two most common hurdles when making whoopie pies.
| Common Mistake | Root Cause | The Fix |
|---|---|---|
| Shells Spread Too Thinly | Batter was too warm, too much liquid, or overmixed, which deflated the structure. | Chill the batter for 20 minutes before piping. Ensure your baking soda/powder is fresh. Check liquid measurements (especially buttermilk). |
| Filling Tastes Gritty | Powdered sugar didn't dissolve properly into the fat. | After adding all ingredients, whip the buttercream on medium high speed for a full 4– 5 minutes. The aeration will smooth out the sugar crystals, giving you a velvety finish. |
| Shells are Dry/Crumbly | Overbaked or substituted the buttermilk with plain milk. | Bake for exactly 9– 10 minutes. Use true buttermilk, or the vinegar/milk substitute outlined above, to maintain moisture. |
Storage and Freezing Guidelines
These Mint Chocolate Whoopie Pies are best enjoyed fresh, but they store beautifully.
Storing Filled vs. Unfilled Whoopie Pie Shells
- Filled: Store filled Thin Mint Whoopie Pies in an airtight container in the refrigerator for up to 5 days. Since the filling is buttercream, they handle refrigeration well, though they taste best if brought to room temperature for 15– 20 minutes before serving.
- Unfilled Shells: The shells can be stored at room temperature in an airtight container for 3 days, or frozen (see below).
Freezing Baked Whoopie Pies for Later Enjoyment
Whoopie pies freeze beautifully, making them perfect for holiday prep! If you are looking for more fun holiday desserts, be sure to check out my [Peppermint Meltaway Cookies: The Ultimate Buttery, Simple Holiday Recipe].
- To Freeze Shells: Place cooled shells on a baking sheet and flash freeze for 1 hour. Transfer to a freezer safe bag or container. They last up to 3 months. Thaw at room temperature before filling.
- To Freeze Filled Pies: Freeze the assembled pies on a baking sheet first, then wrap each individually in plastic wrap, and store them in a large freezer bag. They maintain texture for about 6 weeks. Thaw overnight in the refrigerator.
Creative Ways to Serve Your Chocolate Mint Treats
- Mini Ice Cream Sandwiches: Freeze the assembled Thin Mint Whoopie Pies completely, then serve them right out of the freezer for a delicious mint chocolate moon pie experience.
- Dipped Finish: Melt dark chocolate chips with a teaspoon of coconut oil and dip the edges of the assembled pies for a shiny, crackling chocolate shell finish.
- Pairing: These are magical with a tall glass of cold milk, or an iced coffee!

Recipe FAQs
Why are my Thin Mint Whoopie Pie shells dry or crumbly instead of cloud like?
This usually happens due to overmixing the batter or incorrect oven temperature calibration. Ensure you mix only until just combined to maintain the cloud like texture, as overdeveloping the gluten creates toughness. Also, check your oven thermometer, as excessive dry heat quickly leaches moisture.
Can I use standard peppermint extract instead of the specific extract recommended?
Yes, you can generally substitute standard peppermint extract, but use it sparingly as it is often much stronger than specialized baking extracts. Start with half the amount called for and taste the filling before adding more to prevent the mint flavor from becoming overwhelmingly harsh.
How can I achieve the vibrant, velvety texture in the mint buttercream filling?
The velvety texture is achieved by properly creaming the butter until very pale and fluffy before gradually adding the powdered sugar and liquid components. For a less sweet variation that achieves similar richness, you might explore techniques used for tangier fillings, such as in our Pumpkin Cheesecake Whoopie Pies Soft Spiced Shells Tangy Cream Cheese Filling.
What is the best way to store finished Thin Mint Whoopie Pies to maintain freshness?
Store the assembled whoopie pies in an airtight container at cool room temperature for up to two days, or refrigerate for up to five days. Keep them slightly separated with parchment paper if stacking, as the mint buttercream can soften and stick to the chocolate shells.
Can these be made ahead of time for a party, and should I freeze the shells or the whole pie?
It is best to freeze the baked chocolate shells unfrosted for the longest shelf life, up to three months. Thaw the shells completely at room temperature before filling them with the buttercream; assembling them before freezing can cause the filling to weep when thawed.
My chocolate shells are spreading too much during baking; how can I prevent this next time?
Spreading is often caused by butter that is too warm or by using too much leavening agent. Ensure your butter is softened but still cool, and double check your baking soda/powder measurements against the recipe precisely; inconsistent ratios drastically affect spread, much like in delicate pastries such as Foolproof Keto Pecan Pie Tarts SugarFree Low Carb Mini Pies.
Thin Mint Whoopie Pies Recipe

Ingredients:
Instructions:
Nutrition Facts:
| Calories | 258 cal |
|---|---|
| Protein | 2.6 g |
| Fat | 11.6 g |
| Carbs | 38.2 g |
| Sugar | 28.5 g |
