Red Enchilada Sauce: Velvety and Earthy
- Time: Active 5 minutes, Passive 10 minutes, Total 15 minutes
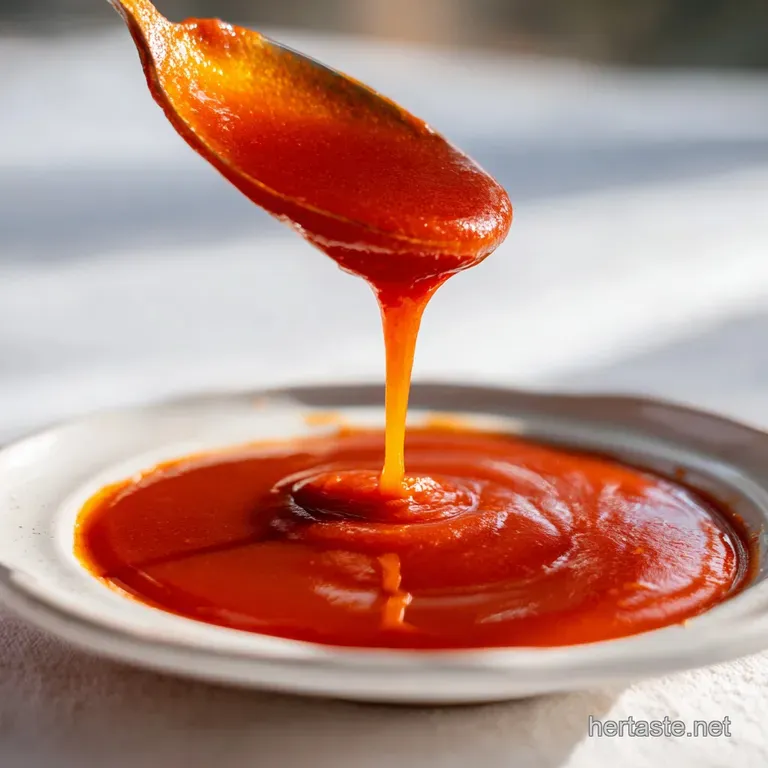
- Flavor/Texture Hook: Smoldering, earthy heat with a velvety, spoon coating finish
- Perfect for: Weeknight dinners, freezer friendly meal prep, or beginner cooks
- Creating the Most Authentic Red Enchilada Sauce at Home
- Mastering the Fundamental Science of the Bloom
- Choosing the Best Cooking Method for Success
- Breaking Down the Essential Components for Flavor
- Gathering the Necessary Ingredients and Smart Substitutes
- Essential Minimalist Tools for a Smooth Sauce
- Step-by-Step Guide to Crafting Your Velvety Sauce
- Solving Common Kitchen Mishaps and Texture Issues
- Adjusting Your Recipe for Larger Family Gatherings
- Exploring Creative Flavor Variations and Dietary Adjustments
- Keeping Your Sauce Fresh and Minimizing Waste
- Best Ways to Use Your Homemade Sauce
- FAQ
- Troubleshooting Common Issues
- Recipe FAQs
- 📝 Recipe Card
Creating the Most Authentic Red Enchilada Sauce at Home
The first time I smelled chili powder hit hot oil, I knew my kitchen would never be the same. There's this brief, heart stopping moment when the raw, dusty scent of the spices vanishes and is replaced by a deep, toasted aroma that fills every corner of the room.
It’s a warm, heavy scent that promises a meal with actual soul, unlike the metallic, thin liquid we often find in those supermarket cans.
We've all been there, standing in the aisle, settling for convenience because a "from scratch" sauce sounds like a weekend project. But honestly, if you have 15 minutes and a whisk, you're already halfway to the best meal of your week.
This recipe isn't about laboring over dried pods for hours, it’s about using smart techniques to coax maximum flavor out of simple ingredients you probably already have in the back of your cupboard.
You’re looking for that specific texture, a sauce that clings to the tortilla rather than soaking through it and turning your dinner into a soggy mess. By forging a quick roux and blooming the spices, we’re creating a base that is thick, smoky, and carries just enough acidity to cut through heavy melted cheese.
It's a total win for anyone who wants restaurant quality results without the restaurant level dishes.
Mastering the Fundamental Science of the Bloom
The secret to a complex sauce lies in how you treat your dry spices before the liquid ever touches the pan. This isn't just about mixing ingredients, it's about changing their chemical structure to release flavors that are otherwise locked away.
- Lipid Soluble Extraction: Many flavor compounds in chili powder are fat soluble, meaning they only release their full potential when heated in oil rather than water.
- Starch Gelatinization: As the flour in the roux heats up, the starch granules swell and burst, creating a stable network that thickens the broth into a velvety consistency.
- Maillard Reaction: Toasting the flour and spices together creates new, nutty flavor compounds that add a "cooked all-day" depth in just a few minutes.
- Acid Balance: The apple cider vinegar provides a sharp contrast to the earthy cumin, brightening the entire flavor profile and preventing the sauce from feeling "muddy" on the palate.
Choosing the Best Cooking Method for Success
| Method | Time | Texture | Best For |
|---|---|---|---|
| Roux Based (This Recipe) | 15 minutes | Thick, velvety, and stable | Quick weeknight dinners and baked trays |
| Dried Chili Soaking | 1 hour | Thin, rustic, and very intense | Weekend projects and traditionalists |
| Blender Tomato Style | 10 minutes | Grainy and bright | Tacos or quick drizzling |
If you love deep, savory bases like the one found in our Meat Sauce Recipe, you'll appreciate how the roux here creates a similar velvety mouthfeel. The consistency is key to ensuring your tortillas don't disintegrate under the weight of the fillings during the baking process.
Breaking Down the Essential Components for Flavor
| Ingredient | Science Role | Pro Secret |
|---|---|---|
| Neutral Oil | Flavor carrier | Use avocado oil for a cleaner taste that lets the spices shine |
| All Purpose Flour | Structural binder | Toast it until it smells like popcorn to avoid a "raw flour" aftertaste |
| Chili Powder | Primary aromatic | high-quality blends contain oregano and silicon dioxide for better flow |
| Apple Cider Vinegar | Acidity regulator | Adds a fermented tang that mimics the natural acidity of dried chilies |
Gathering the Necessary Ingredients and Smart Substitutes
This list is designed to be accessible, but the quality of your chili powder will dictate the final result. If your spice jar has been sitting there since the last presidential election, it's time for a fresh one.
- 3 tbsp neutral oil: I usually go with avocado or canola. Why this? High smoke point allows the spices to bloom without burning.
- Substitute: Melted lard or beef tallow for a much richer, traditional flavor.
- 3 tbsp all purpose flour: This is your thickening power.
- Substitute: White rice flour for a gluten-free version that stays silky.
- 1/4 cup high-quality chili powder: The main event.
- Substitute: A mix of smoked paprika and ancho powder for a milder, sweeter heat.
- 1 tsp ground cumin: Provides that essential "taco" earthiness.
- Substitute: Toasted cumin seeds crushed in a mortar for a punchier aroma.
- 1/2 tsp garlic powder: Distributes flavor more evenly than fresh garlic in this fast cook.
- Substitute: 2 cloves of fresh garlic, finely minced and sautéed in the oil first.
- 1/2 tsp dried Mexican oregano: More citrusy and savory than Mediterranean varieties.
- Substitute: Regular dried oregano with a tiny pinch of lemon zest.
- 1/4 tsp salt: Enhances all the other notes.
- Substitute: Smoked salt to double down on the campfire vibes.
- 2 cups low sodium chicken or vegetable broth: The liquid base.
- Substitute: Beef broth for a deeper, darker sauce that pairs well with steak.
- 1 tsp apple cider vinegar: The finishing touch.
- Substitute: Fresh lime juice for a zingier, brighter finish.
Essential Minimalist Tools for a Smooth Sauce
You don't need a pantry full of gadgets to nail this. A medium saucepan is your primary vessel, ideally one with a heavy bottom to prevent the spices from scorching.
A silicone coated whisk is also non negotiable here; it gets into the corners of the pan to ensure no flour clumps are left behind.
I also recommend having a heat resistant spatula nearby to scrape the sides. Since we're working with a roux, those bits of flour can sometimes hide near the edges and burn while you're focusing on the center.
If you're doubling the batch, use a larger pot than you think you need to avoid splashes when the broth hits the hot oil.
step-by-step Guide to Crafting Your Velvety Sauce
- Heat the oil. Place your saucepan over medium heat and add the 3 tbsp neutral oil. Note: Wait until it shimmers slightly.
- Whisk in flour. Add the 3 tbsp all purpose flour to the oil. Whisk constantly for 1-2 minutes until it smells nutty and looks like light sand.
- Add the spices. Dump in the 1/4 cup chili powder, 1 tsp cumin, 1/2 tsp garlic powder, 1/2 tsp Mexican oregano, and 1/4 tsp salt.
- Bloom the aromatics. Stir the spices into the roux for 30-60 seconds until the color darkens to a deep mahogany and the scent is fragrant.
- Pour broth slowly. Gradually add the 2 cups broth, whisking vigorously as you pour. Note: Start with a splash to create a paste, then add the rest.
- Simmer and thicken. Increase heat slightly to bring the mixture to a gentle bubble.
- Monitor the consistency. Cook for 5-7 minutes until the sauce thickens enough to coat the back of a spoon.
- Add the finish. Remove from heat and stir in the 1 tsp apple cider vinegar.
- Taste and adjust. Dip a piece of tortilla in and check for salt or heat; add a pinch more salt if the flavors feel flat.
- Cool or use. Allow the sauce to sit for 5 minutes to fully set before assembling your enchiladas.
Solving Common Kitchen Mishaps and Texture Issues
Fixing a Bitter Sauce Taste
Sometimes, if the chili powder is toasted a few seconds too long, it can develop a sharp, bitter edge. This also happens with lower quality chili powders that contain a lot of pith.
You can neutralize this by adding a tiny pinch of sugar (about 1/4 teaspoon) or a small splash of heavy cream to round out the harsh notes.
Dealing with Stubborn Flour Lumps
If you added the broth too quickly, you might see small white beads of flour floating around. Don't panic. You can save this by pouring the entire mixture through a fine mesh strainer into a clean bowl, then returning the smooth liquid to the pan.
Alternatively, a quick 10 second blast with an immersion blender will fix it instantly.
Adjusting Sauce Thickness
If the sauce looks more like a gravy than a glaze, it has reduced too much. Simply whisk in an extra tablespoon of broth or water at a time until it reaches a pourable consistency. If it's too thin, keep simmering it on medium low; the starch needs heat to reach its full thickening potential.
| Problem | Root Cause | Solution |
|---|---|---|
| Grainy Texture | Spices didn't hydrate | Simmer for an extra 3 minutes with a lid on |
| Thin/Watery | Not enough simmering time | Increase heat slightly and whisk until it coats a spoon |
| Very Dark/Burnt Smell | Heat was too high during bloom | Start over; burnt spices will make the whole dish acrid |
Common Mistakes Checklist
- ✓ Ensure the oil is hot before adding the flour to prevent a greasy roux.
- ✓ Whisk the broth in slowly at first to avoid a lumpy mess.
- ✓ Don't skip the vinegar; the acidity is what makes the sauce taste "bright."
- ✓ Use a low sodium broth so you can control the final saltiness yourself.
- ✓ Keep a close eye on the spices - they can go from toasted to burnt in 10 seconds.
Adjusting Your Recipe for Larger Family Gatherings
Scaling this recipe up for a party is straightforward, but you need to watch your moisture levels. If you're doubling it (to 16 servings), use 6 tbsp oil and 6 tbsp flour. However, when it comes to the liquids, I recommend starting with 3.5 cups of broth instead of a full 4 cups, then adding more if needed.
Larger volumes of liquid evaporate slower, so you might end up with a thinner sauce if you use the exact 2x ratio.
For spices, use a 1.5x multiplier for the salt and cumin initially. You can always add more at the end, but spices can become overwhelming in large batches. If you are making this for a crowd, the "make-ahead" factor is your best friend.
The flavors actually meld and deepen after 24 hours in the fridge.
Exploring Creative Flavor Variations and Dietary Adjustments
If you prefer a heat profile that’s more complex, consider the technique used in our Creamy Cajun Shrimp recipe, where different peppers create layers of warmth. You can easily adapt this sauce to fit various needs without losing that signature smoky punch.
- If you want it spicy: Add 1/2 tsp of cayenne pepper or a chopped chipotle in adobo sauce during the simmering stage.
- If you want it creamy: Stir in 2 tbsp of sour cream or Greek yogurt after removing the sauce from the heat.
- If you want it smoky: Swap half of the chili powder for smoked paprika (Pimentón).
| Original | Alternative | Impact |
|---|---|---|
| All Purpose Flour | Cornstarch Slurry | Glossier finish, thinner mouthfeel. |
| Chicken Broth | Tomato Juice | Much sweeter and more "American style" flavor. |
| Neutral Oil | Butter | Adds a rich, French style silkiness to the sauce. |
Keeping Your Sauce Fresh and Minimizing Waste
This sauce is a meal prepper's dream. It stays vibrant in the fridge for up to 5 days when kept in an airtight glass jar. If you find yourself with leftovers, don't just let them sit.
This liquid gold is incredible when drizzled over fried eggs in the morning or used as a base for a quick Mexican inspired shakshuka.
For long term storage, you can freeze the sauce for up to 3 months. I like to freeze it in silicone ice cube trays; once solid, pop the cubes into a freezer bag. This way, you can grab exactly what you need to flavor a quick bowl of rice or a single taco.
When reheating, the sauce might thicken up considerably. Just add a splash of water or broth and whisk it over low heat to bring back that original velvety texture.
Best Ways to Use Your Homemade Sauce
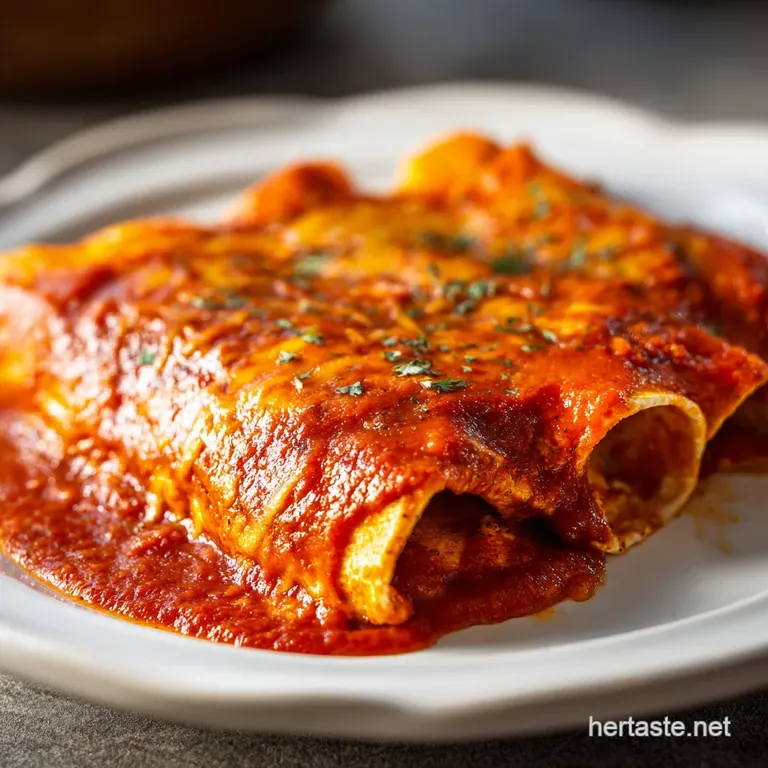
While the classic use is obviously rolling it into corn tortillas with shredded chicken and Monterey Jack, this sauce is far more versatile than its name suggests. Use it as a poaching liquid for white fish, or stir a few spoonfuls into a pot of black beans to add instant depth.
It also makes a killer base for a "wet" burrito.
If you have a bit of sauce left in the pan, don't wash it away. Toss in some leftover cooked rice and a handful of corn to soak up every last drop of that smoky flavor. It’s an easy way to ensure nothing goes to waste while creating a side dish that actually tastes intentional.
Trust me, once you've had this version, those yellow cans at the store will look like a distant, dusty memory.
FAQ
Troubleshooting Common Issues
| Issue | Solution |
|---|---|
| Make this sauce ahead of time | Yes, this Red Enchilada Sauce is actually better when made a day in advance as the spices have more time to meld. Store it in an airtight container in the refrigerator for up to 5 days. |
| Enchilada sauce bitter | Bitterness usually comes from over toasting the chili powder or using a low quality spice blend. To fix it, add a tiny pinch of sugar or a splash of cream to balance the flavors. |
| Make this gluten-free | Absolutely. Substitute the all purpose flour with a 1:1 gluten-free flour blend or use a cornstarch slurry (1 tbsp cornstarch mixed with 1 tbsp cold water) added at the end of the simmering process. |
| Thicken the sauce if it's too watery | If the sauce is too thin, continue to simmer it over medium low heat for an additional 3-5 minutes. The starch in the flour needs time and heat to reach its full thickening potential. |
| Freeze this sauce | Yes, it freezes beautifully. Place it in a freezer safe bag or container for up to 3 months. Thaw in the fridge overnight and whisk well while reheating on the stovetop. |
 : PIN FOR LATER")
Recipe FAQs
Can I make this sauce ahead of time?
Yes, make it ahead. This sauce is actually better when prepared a day in advance because the spices have time to fully bloom and meld together in the broth.
How do I make this red enchilada sauce gluten-free?
Substitute the flour with cornstarch. Whisk 1 tablespoon of cornstarch with 2 tablespoons of cold water to create a slurry, and stir this mixture into the simmering sauce near the end until it thickens.
What is the primary cause of a bitter taste in homemade enchilada sauce?
Over toasting the chili powder is the main culprit. If the dry spices burn for even a few seconds during the bloom phase, it introduces harsh, acrid notes that are difficult to mask, so keep the heat low during that step.
How do I adjust the sauce consistency if it ends up too thick?
Whisk in additional liquid gradually off the heat. Start by adding one tablespoon of low-sodium chicken broth or water at a time, whisking constantly until the velvety texture returns; you don't want to shock the roux with too much cold liquid at once.
How long can I safely store leftover enchilada sauce?
Store refrigerated for up to five days. Keep it in a tightly sealed glass jar; if you find the flavor dulling, a tiny fresh squeeze of lime juice will instantly brighten it, similar to the technique for balancing acidity in our RestaurantStyle Homemade Salsa recipe.
What is the best way to deepen the smoky flavor profile?
Replace half the standard chili powder with smoked paprika. This substitution provides an intense, wood fired essence without drastically changing the overall spice balance of the sauce.
Can I freeze leftover red enchilada sauce for later use?
Yes, freezing is highly recommended for meal prep. Pour the cooled sauce into ice cube trays and freeze completely; once solid, transfer the cubes to a zip-top freezer bag for up to three months for easy portioning.
Red Enchilada Sauce In 15 Min

Ingredients:
Instructions:
Nutrition Facts:
| Calories | 71 kcal |
|---|---|
| Protein | 1.0 g |
| Fat | 5.8 g |
| Carbs | 4.2 g |
| Fiber | 1.1 g |
| Sugar | 0.4 g |
| Sodium | 135 mg |
