The Twoingredient Wonder Quick Rustic Unleavened Flatbreads
- The Timeless Appeal of Fundamental Flatbreads
- Why This Speedy Recipe Trumps Long Proofs
- Essential Components for Instant Dough Creation
- Gathering Your Minimal Toolkit
- Mastering the Mix: From Dry Goods to Dough Ball
- The Heat Application: Transforming Dough into Edible Perfection
- Elevating Your Rustic Creation: Serving Suggestions and Pairings
- Caring for Leftovers: Storage and Revival Techniques
- Recipe FAQs
- 📝 Recipe Card
The Timeless Appeal of Fundamental Flatbreads
Unleavened bread holds a unique place in culinary history. It is arguably the purest expression of baking a testament to how few ingredients are needed to create something profoundly satisfying.
When we talk about this ancient staple, we are often referencing traditions spanning millennia, from the matzah of Passover celebrations to the simple hearth breads baked by shepherds across the Mediterranean.
The beauty of this Unleavened Bread Recipe lies in its stripped down nature; it requires no waiting, no fermentation, and absolutely no yeast. It connects us directly to the very origins of cooking, offering a wonderfully Rustic Unleavened Bread experience that is both humbling and deeply rewarding.
Why This Speedy Recipe Trumps Long Proofs
In our modern, fast paced world, the idea of waiting hours for dough to rise can feel prohibitive. That’s precisely where this Easy Unleavened Bread shines. We bypass the biological complexity of yeast entirely, resulting in a final product ready for the table in under half an hour.
This speed makes it the ultimate pantry hero when unexpected guests arrive or when you suddenly realize your planned meal requires something sturdy to soak up delicious juices. This Simple Unleavened Bread isn't just fast; it’s reliably delicious every single time you prepare it.
Anchoring Your Meal: The Sturdy Role of Unleavened Bread
Unlike airy sandwich loaves, this Unleavened Flatbread Recipe yields a bread with substance. It possesses a pleasing chewiness and a structural integrity that makes it ideal for heartier applications.
Think of it as the perfect culinary sponge firm enough to hold thick dips like hummus or rich stews like tagine, yet tender enough to fold into a satisfying wrap. It’s the unsung hero that supports the main flavours of the plate without competing with them.
Embracing Simplicity: A Chef’s Ode to Minimal Ingredients
As a chef, I find immense satisfaction in recipes that require true restraint. This particular iteration of Unleavened Bread Examples proves that incredible flavour doesn't rely on an extensive shopping list.
We rely on the quality interaction between just flour, water, salt, and a touch of oil to create texture. The result is a clean, slightly nutty flavour profile that truly lets the accompaniments dictate the culinary direction of the meal. This is the essence of Homemade Unleavened Bread .
Perfecting the Pantry Hero: Quick Fixes for Any Cuisine
Because the flavour base is so neutral, this versatile dough transitions seamlessly across global menus. Whether you are serving it alongside an Indian curry, using it to scoop up Greek tzatziki, or referencing its historical role as Passover Unleavened Bread , its adaptability is unmatched.
It truly deserves its status as a fundamental, must have item in any well stocked pantry.
Essential Components for Instant Dough Creation
To achieve this quick turnaround, our ingredient list is intentionally short. We are aiming for elasticity and a subtle richness that prevents the final bread from being overly brittle. Remember, the goal is a pliable flatbread, not a cracker.
Gathering Your Minimal Toolkit
While the ingredient list is minimal, the right tools ensure success. You don't need a stand mixer or a professional deck oven to make wonderful flatbreads; however, one piece of equipment is non-negotiable for achieving that signature texture.
The Sacred Duo: Flour and Water Ratios Explained
For this Quick & Rustic Unleavened Flatbreads recipe, we begin with 2 cups (250g) of all-purpose flour, which provides the necessary gluten structure without becoming too heavy. This is balanced by ¾ cup (180ml) of warm water.
Using water that is merely warm, rather than hot, ensures the dough comes together smoothly without cooking the starches prematurely. A crucial addition is 1 teaspoon of fine sea salt to enhance the inherent flavour of the grain.
Optional Enhancements for Flavor Depth
While the base recipe stands proudly with just two main components, adding 1 tablespoon of olive oil to the dough mixture is highly recommended. This fat coats the flour particles, lending the final bread a beautiful tenderness and preventing it from drying out too quickly.
If you prefer a heartier bite, you can substitute up to half of the white flour with whole wheat flour for a nuttier, denser loaf.
Necessary Gadgets for Perfect Flattening and Firing
Your most important cooking instrument will be a large, heavy bottomed skillet, ideally cast iron. This material retains and distributes heat exceptionally well, which is critical for creating those desired blisters and char marks.
Alongside this, you'll need a rolling pin though I’ve successfully used a clean wine bottle in a pinch! and a clean tea towel for resting the finished product.
Related Recipes Worth Trying
- Authentic Effortless Passover Unleavened Bread Recipe Matzah Masterclass — Forget bland brittle Matzah Learn how to make authentic Passover Unleavened Bread that snaps perfectly This easy unleavened bread recipe is ready in 30...
- The Pilgrims Loaf How to Make Bread Jesus Ate — Go back to basics with this ancient bread recipe similar to the Khobz Jesus ate Its unleavened easy and cooks in minutes
- The Quick Crisp Traditional Homemade Matzah Unleavened Bread — Learn how to make perfectly crispy Unleavened Bread Matzah with this simple foolproof recipe Achieve that satisfying snap every timegreat for Passover...
Mastering the Mix: From Dry Goods to Dough Ball
The process begins by whisking your dry ingredients flour and salt in a large bowl to ensure even distribution. Next, create a well in the centre and pour in your measured warm water and the olive oil. Use a sturdy wooden spoon to bring the mixture together until it forms a shaggy mass.
At this point, you turn the mixture out onto a lightly floured work surface.
The Art of the Knead (And Why It’s Short Here)
Because we are crafting Unleavened Bread , the kneading time is intentionally brief. We are not developing the robust network needed for a tall yeast bread.
Simply work the dough for about 3 to 5 minutes until it transforms from ragged to smooth and elastic, feeling pliable, much like an earlobe. Any longer, and you risk creating bread that is too stiff.
Achieving Uniform Thickness for Even Cooking
Once kneaded, cover the dough and allow it to rest for about 15 minutes. This resting period lets the gluten relax, making the next step significantly easier. After the rest, divide the dough into 8 equal portions.
Roll each portion out individually into circles roughly 6 to 7 inches wide, aiming for a consistent thickness of about 1/8 of an inch. Uniformity here guarantees that all your flatbreads cook at the same rate.
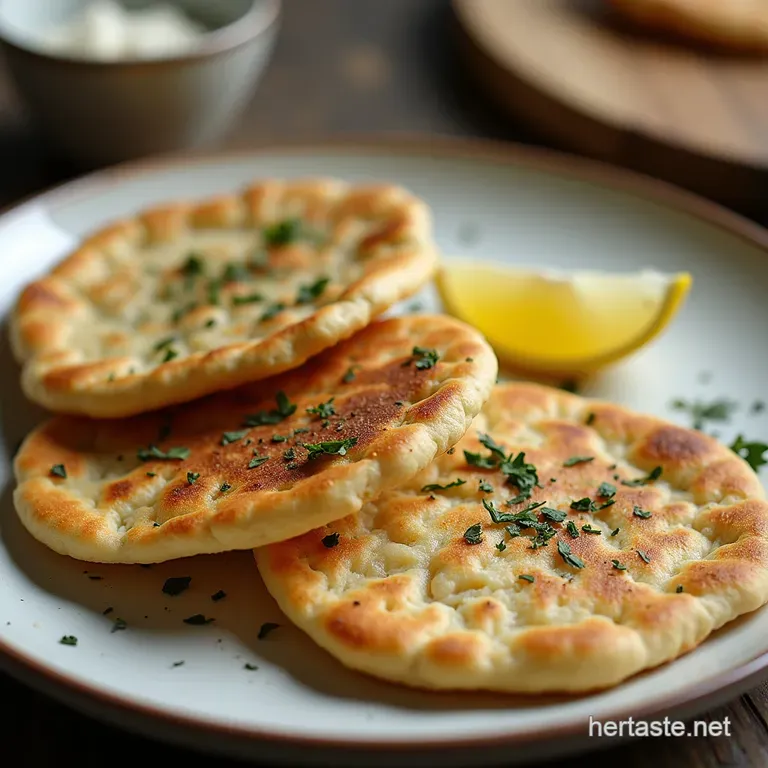
The Heat Application: Transforming Dough into Edible Perfection
This phase is where the magic happens, turning raw dough into beautifully textured flatbread. The key to success in making Unleavened Bread Bible Recipe -inspired flatbreads isn't complicated; it's all about temperature management.
Skillet Sizzle: How to Achieve Pockets and Char on Your Unleavened Bread
Place your heavy skillet over medium high heat. Add a thin film of olive oil just enough to coat the surface lightly and let it heat until it shimmers slightly. When you place the first rolled dough into the hot pan, you should hear an immediate, satisfying sizzle.
This rapid application of heat causes the small pockets of moisture in the dough to turn to steam, puffing the bread up beautifully. This technique is the cornerstone of a successful Unleavened Flatbread Recipe .
When to Pull It Off the Heat: Visual Cues for Doneness
Cook the first side for about 60 to 90 seconds until small bubbles rise to the surface and the underside reveals light golden brown spotting. Flip the bread and cook the second side for another minute. If you see the entire disc puff up like a balloon, you have achieved perfection!
Immediately remove the bread from the pan; leaving it too long will dry it out.
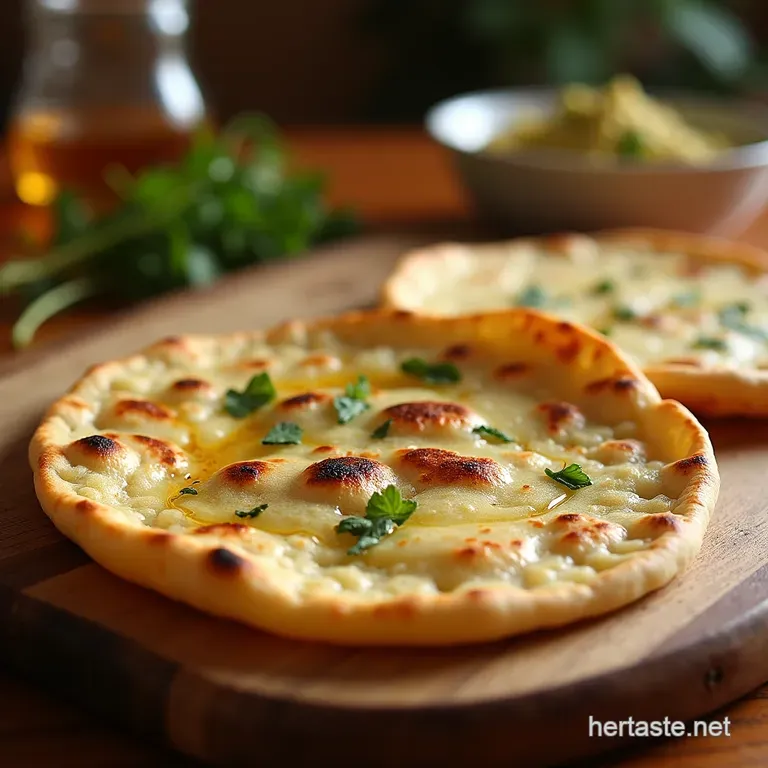
Elevating Your Rustic Creation: Serving Suggestions and Pairings
These fresh, warm flatbreads are incredible straight from the tea towel nest. They are fantastic simply dipped into high-quality extra virgin olive oil seasoned with flaky sea salt and herbs.
For a more substantial pairing, use them to scoop up vibrant vegetarian dishes, like a smoky baba ghanoush, or serve them alongside grilled meats where their sturdy texture can handle robust sauces.
Caring for Leftovers: Storage and Revival Techniques
While these breads are best consumed immediately, knowing how to store and reheat them ensures you enjoy your Homemade Unleavened Bread experience over several days.
Flavor Variations: Infusing Herbs and Spices into the Mix
To introduce variety, incorporate dried herbs directly into the flour mixture before adding the wet ingredients. Dried oregano, rosemary, or even a pinch of smoked paprika can transform the flavour profile.
For Middle Eastern flair, mix in Za'atar spice blend for a wonderful aromatic depth that pairs beautifully with chickpeas or feta cheese.
Nutritional Snapshot of This Basic Formula
This recipe is inherently wholesome, primarily consisting of complex carbohydrates and a small amount of healthy fat from the olive oil. It offers clean energy without the density often associated with yeast leavened loaves, making it a great choice for balancing any meal structure.
Extending Shelf Life: Storing Your Finished Flatbreads Safely
To store leftovers, allow the Unleavened Bread to cool completely. Stack the flatbreads and wrap them tightly in plastic wrap, then place them in an airtight container or zip-top bag. Stored this way at room temperature, they will remain pliable for 2 to 3 days.
Freezing is an excellent option for longer term storage; wrap individually before placing them in the freezer for up to three months.
Beyond the Basics: Using Unleavened Bread in Global Dishes
Don’t let these breads sit idle! Day-old, slightly drier flatbreads are excellent when broken into pieces and toasted further to create croutons for salads, or even crumbled into soups for texture.
They can also be used as the base for quick, open faced snacks topped with soft cheese and sliced tomato, providing a satisfying crunch reminiscent of traditional flatbread appetizers.

Recipe FAQs
Can I use baking powder or baking soda instead of yeast for this Unleavened Bread recipe?
That’s a good question, but you don’t need either! This recipe is intentionally unleavened, meaning we rely only on steam and heat to create any lift or puffiness. Adding leavening agents would change the texture into something more like a quick biscuit or soda bread.
My flatbreads are coming out hard and cracker like, not soft. What am I doing wrong?
The most common culprit is rolling them too thin or letting them sit uncovered after cooking. Make sure you roll them to about 1/8 inch thick, and immediately wrap the cooked bread in a clean tea towel this traps the steam, which is the secret to keeping them pliable. Also, ensure your pan is seriously hot!
Can I prepare the dough for this Unleavened Bread ahead of time and cook it later?
Yes, you absolutely can! You can mix the dough, wrap it tightly, and store it in the fridge for up to 24 hours. Just remember to take it out about 30 minutes before you plan to roll and cook it, as cold dough is a real pain to work with.
What’s the best way to store leftovers if I make a big batch?
For short term storage (a day or two), keep them sealed in a plastic bag at room temperature. For longer storage, you can freeze them! Stack them with parchment paper between each one, place them in a freezer bag, and they’ll keep for a month or two. Just reheat them quickly in a dry, hot skillet to refresh them.
I don't have a cast iron skillet; can I use a regular frying pan or bake them in the oven?
A heavy bottomed pan is highly recommended as it holds the heat necessary for blistering. If you must use a regular non-stick pan, just make sure it's screaming hot before the dough goes in. Baking them isn't ideal; they tend to dry out and become uniformly crisp rather than puffing up nicely in spots.
Are these breads healthy, and can I swap out the white flour?
They are generally quite healthy since they have minimal ingredients and no added fats besides a touch of olive oil. You can easily swap up to half the all-purpose flour for whole wheat flour for a bump in fibre and a nuttier flavour profile. Just know that whole wheat dough might require a tiny bit more water.
Quick Rustic Unleavened Bread

Ingredients:
Instructions:
Nutrition Facts:
| Calories | 98 kcal |
|---|---|
| Protein | 2.0 g |
| Fat | 1.1 g |
| Carbs | 19.4 g |
| Fiber | 0.0 g |
| Sodium | 5052 mg |
