Indulgent Peanut Butter Protein Ball with Dark Chocolate
- Time: Active 15 minutes, Passive 30 minutes, Total 45 minutes
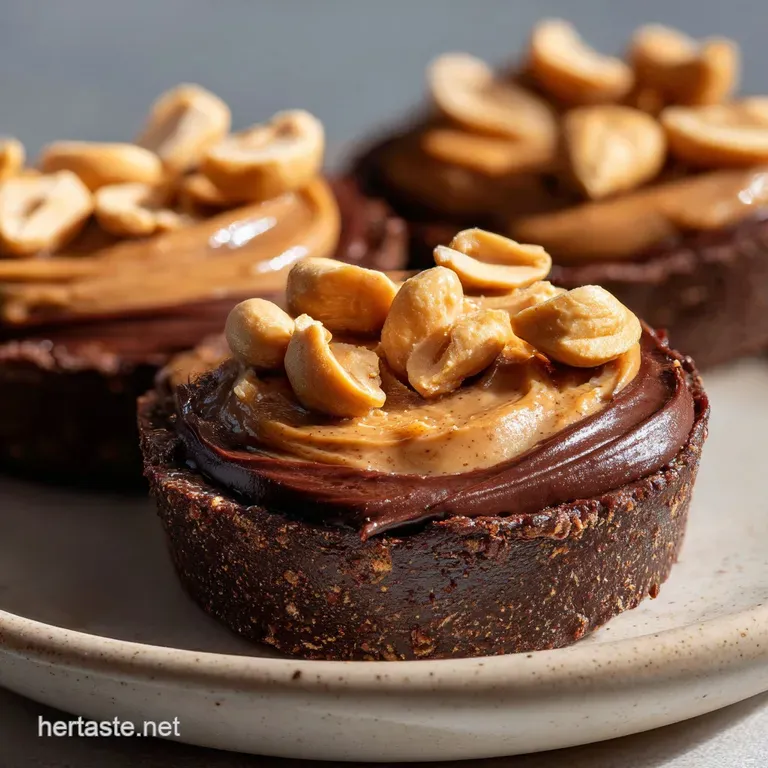
- Flavor/Texture Hook: A velvety, salty nut butter core encased in a bittersweet, shattering chocolate crust.
- Perfect for: Post workout recovery, mid afternoon energy slumps, or a guilt free late night treat.
- The Ultimate Indulgent Peanut Butter Protein Ball with Dark Chocolate
- The Science Behind Fudgy Texture
- Ingredient Component Analysis
- Selecting Your Flavor Layer Essentials
- Tools for Achieving Silkiness
- Step-By-Step From Prep to Plate
- Solving Common Texture Issues
- Simple Variations and Flour Substitutions
- Scaling Guidelines for Large Batches
- Dispelling Common Nutrition Myths
- Storage and Zero Waste Strategies
- Flavor Pairings and Serving Ideas
- Recipe FAQs
- 📝 Recipe Card
The Ultimate Indulgent Peanut Butter Protein Ball with Dark Chocolate
Imagine standing in your kitchen, the air heavy with the toasted aroma of roasted peanuts. You take a bite, and there's that unmistakable snap of cold, dark chocolate followed immediately by a center so creamy it feels like a truffle.
This article unveils an irresistible recipe for an Indulgent Peanut Butter Protein Ball with Dark Chocolate that you'll crave. It is a far cry from those chalky, sawdust textured "health" snacks we've all suffered through in the name of fitness.
I remember my first attempt at making these years ago. I thought I could just mix protein powder and peanut butter and call it a day. I ended up with a mixture so dry it literally crumbled into sand before it even hit my mouth.
It took a lot of messy counters and sticky fingers to realize that making a truly indulgent snack requires a bit of science and a lot of respect for moisture balance. We are going for a texture that stays soft in the fridge but doesn't melt in your hands.
This version is all about the layers. We start with a base that is salt forward and nutty, then we introduce a protein that absorbs just enough moisture to create a chew. The final dip in molten chocolate isn't just for show it seals the moisture inside, ensuring every bite is as fresh as the first.
You'll never look at store-bought bars the same way again once you see how easy it is to create professional grade snacks at home.
The Science Behind Fudgy Texture
The secret to that "melt in-your mouth" feeling lies in the Lipid Protein Matrix. When you combine the healthy fats from the 1 cup creamy natural peanut butter with the protein powder, you are creating a stable emulsion that traps moisture between protein strands.
Protein Denaturation: As the protein powder hydrates, it creates a structure that mimics gluten in baking, providing a satisfying, bouncy chew without the need for heat.
This prevents the balls from becoming a literal puddle at room temperature while keeping them soft enough to bite through effortlessly.
| Method | Time | Texture | Best For |
|---|---|---|---|
| Room Temp Mix | 5 mins | Soft, tacky, and spreadable | Immediate eating or dipping |
| Quick Chill | 15 mins | Firm, fudge like, and stable | Rolling uniform spheres |
| Full Freezer Set | 30 mins | Solid, dense, and cold | Dipping in hot chocolate |
When you are working with protein powders, they act as high capacity sponges. If you don't balance them with enough fat and liquid, they will pull moisture from your mouth as you eat, leading to that "chalky" sensation.
By using exactly 1 cup creamy natural peanut butter and 3 tbsp maple syrup, we ensure the 0.5 cup protein powder is fully saturated. This creates a luxurious mouthfeel rather than a dry one.
One trick I learned from making my How to Make recipe is that the type of powder matters immensely. Whey isolate tends to be smoother, while plant based powders (like pea or brown rice) require slightly more hydration. If you find your mixture is a bit too stiff, a tiny splash of almond milk can save the day, but usually, the natural oils in the peanut butter do all the heavy lifting for us.
Ingredient Component Analysis
Understanding what each part brings to the table is the difference between a "okay" snack and a "wow" moment. We aren't just mixing things; we are building a structural masterpiece.
| Ingredient | Science Role | Pro Secret |
|---|---|---|
| Coconut Flour | Hydroscopic binder | Absorbs 4x its weight; prevents the balls from sweating oil. |
| Maple Syrup | Hygroscopic sweetener | Keeps the center moist by attracting water molecules from the air. |
| Dark Chocolate | Lipid barrier | The high cocoa butter content creates a clean "snap" when chilled. |
The 2 tbsp coconut flour might seem like a small amount, but it is the "glue" that keeps everything together. Without it, the peanut butter oil would eventually separate, leaving you with a greasy mess. The flour absorbs that excess oil and turns it into a structural component.
This is similar to the starch gelatinization we see in traditional baking, but here it happens through cold hydration.
Selecting Your Flavor Layer Essentials
Before we get to the mixing, let's talk about what is actually going into your bowl. Quality matters when you only have a handful of ingredients.
- 1 cup creamy natural peanut butter (250g): Look for the kind where the only ingredients are peanuts and salt. Why this? Natural oils provide a much better texture than the stabilized, sugary commercial versions.
- Substitute: Almond butter or cashew butter (Expect a milder flavor).
- 0.5 cup protein powder (60g): Use a high-quality whey or plant based isolate. Why this? Isolates mix cleaner and have a less "grainy" texture than concentrates.
- Substitute: Collagen peptides (Note: Result will be stickier).
- 3 tbsp maple syrup or honey (60g): This provides the "sticky" factor needed for binding. Why this? Liquid sweeteners integrate better than granulated sugar in no bake recipes.
- Substitute: Agave nectar or sugar-free maple syrup.
- 2 tbsp coconut flour (15g): This is our structural hero. Why this? It provides fiber and unique absorption that regular flour can't match.
- Substitute: 6 tbsp almond flour (Note: Texture will be softer and less stable).
- 0.25 tsp fine sea salt (1.5g): Essential for cutting through the richness. Why this? Fine grains distribute evenly throughout the dough.
- Substitute: Standard table salt (Use slightly less).
- 4 oz dark chocolate, 70% cocoa (115g): For the decadent outer shell. Why this? High cocoa content balances the sweetness of the center.
- Substitute: Semi sweet chocolate chips (Will be much sweeter).
- 1 tsp coconut oil (5g): Thins the chocolate for a professional coating. Why this? Keeps the chocolate from cracking too aggressively when you bite.
- Substitute: Unflavored vegetable oil.
- 1 pinch flaky sea salt: The final aesthetic and flavor punch. Why this? Large flakes provide a concentrated burst of saltiness.
Tools for Achieving Silkiness
You don't need a professional pastry kitchen, but a few specific tools will make your life much easier. I used to try and roll these with just my hands, but they would get too warm and lose their shape.
- Small Cookie Scoop (1 tablespoon size): This ensures all 13 servings are exactly the same size, which is key for consistent chocolate dipping.
- Silicone Spatula: Essential for scraping every last bit of that 1 cup creamy natural peanut butter out of the measuring cup.
- Microwave safe Glass Bowl: For the chocolate melting process. Glass holds heat better than plastic, keeping your chocolate liquid for longer.
- Parchment Paper: Do not skip this! These balls will stick to a bare plate like superglue.
- Fork or Dipping Tool: To lift the balls out of the dark chocolate while letting the excess drip off.
Chef's Tip: Freeze your cookie scoop for 5 minutes before you start. The cold metal prevents the tacky dough from sticking to the inside of the scoop, giving you a perfectly round sphere every single time.
step-by-step From Prep to Plate
Let's get into the mechanics. The goal here is to keep the dough cool and the chocolate lustrous. If the dough gets too warm, the balls will flatten into discs which still taste great, but aren't the "balls" we're after.
- Combine the wet base. In a medium bowl, whisk together the 1 cup creamy natural peanut butter, 3 tbsp maple syrup, and 0.25 tsp fine sea salt until the mixture is glossy and uniform. Note: This ensures the salt doesn't clump in one spot.
- Add the dry binders. Fold in the 0.5 cup protein powder and 2 tbsp coconut flour using a sturdy spatula.
- Mix until tacky. Continue stirring until a thick, dough like consistency forms that pulls away from the sides of the bowl.
- Initial chill. Place the dough in the fridge for 10 minutes. Note: This allows the coconut flour to fully hydrate, making rolling much easier.
- Shape the spheres. Scoop the dough and roll between your palms into 13 balls. Place them on a parchment lined tray.
- Flash freeze. Pop the tray into the freezer for 15 minutes until the balls are firm to the touch.
- Prepare the obsidian coating. Melt the 4 oz dark chocolate and 1 tsp coconut oil in 30 second bursts in the microwave, stirring between each, until the liquid is silky and flows like a ribbon.
- The coating process. Use a fork to dip each chilled ball into the chocolate. Tap the fork against the side of the bowl to remove the excess.
- The final touch. Place the ball back on the parchment and immediately sprinkle with a tiny pinch of flaky sea salt until the chocolate begins to dull and set.
- Final set. Refrigerate for another 15 minutes until the shell is hard and makes a "clink" sound against a plate.
If you love the process of melting chocolate, you might enjoy the technique used in this Foolproof Dark Chocolate recipe. It uses a similar principle of balancing fat and cocoa for a smooth finish.
Solving Common Texture Issues
Even with a straightforward recipe, things can go sideways. Peanut butter is a biological product, and its oil content varies by brand. Protein powder is even more unpredictable.
Why Your Protein Balls Are Crumbly
If your mixture looks like wet sand and won't hold its shape when squeezed, the protein to fat ratio is off. This usually happens if you used a very dry protein powder or if your peanut butter was from the bottom of the jar where it's less oily.
| Problem | Root Cause | Solution |
|---|---|---|
| Dough is falling apart | Too much protein powder or dry PB | Add 1 tsp of maple syrup or warm water at a time until it binds. |
| Chocolate is thick/clumpy | Water got into the chocolate (seizing) | Add 1/2 tsp of coconut oil and stir vigorously; keep moisture away. |
| Balls are flattening | Dough is too warm or oily | Add 1 tsp more coconut flour and chill for 20 minutes before rolling. |
Why Your Chocolate Shell Is Streaky
If you see white streaks on your chocolate after it sets, it's called "bloom." This happens when the cocoa butter separates. To prevent this, don't overheat your chocolate. Stop microwaving when there are still a few small lumps left and stir them until they melt from the residual heat.
Common Mistakes Checklist:
- ✓ Using "no stir" peanut butter with added palm oil (this changes the setting point and makes them waxier).
- ✓ Forgetting to chill the balls before dipping (the warm dough will mix with the chocolate, creating a mess).
- ✓ Adding the flaky salt too late (if the chocolate is already hard, the salt will just bounce off).
- ✓ Using a bowl that is too wide for dipping (a narrow, deep bowl is much better for full coverage).
- ✓ Microwaving the chocolate for 1 minute straight (it will burn and become bitter).
Simple Variations and Flour Substitutions
This recipe is a canvas. Once you master the base of the Indulgent Peanut Butter Protein Ball with Dark Chocolate, you can start playing with the "flavor layers." I've tried everything from adding espresso powder to mixing in mini chocolate chips.
If you want to try something different, consider my My Peanut Butter Cookies recipe which uses similar ingredients but adds the magic of the Maillard reaction through baking.
| Original Ingredient | Substitute | Why It Works |
|---|---|---|
| Peanut Butter | Sunflower Seed Butter | Nut free alternative. Note: May have a slightly bitter aftertaste; add 1 tsp extra syrup. |
| Maple Syrup | Pitted Medjool Dates | Natural fiber and caramel notes. Note: Must be blended with the PB first. |
| Dark Chocolate | White Chocolate | Creamier, sweeter finish. Note: Melts at a lower temperature, be careful! |
Formulating Keto Peanut Butter Chocolate Protein Balls
To make these keto friendly, replace the maple syrup with a monk fruit or erythritol based liquid sweetener. Ensure your protein powder is a zero carb isolate and use 85% or 90% dark chocolate for the coating. The coconut flour is already keto approved, making this a very easy transition.
Crafting Vegan Peanut Butter Protein Balls Dark Chocolate
The base is already vegan if you use maple syrup! Just ensure your protein powder is plant based (pea protein works beautifully here) and check your dark chocolate labels to ensure no milk solids were added. Most high-quality dark chocolates over 70% are naturally vegan.
Scaling Guidelines for Large Batches
When you're making these for a party or a week of meal prep, doubling the recipe is easy, but there are some physics to keep in mind.
- To double (26 servings): Use 2 cups peanut butter, 1 cup protein powder, etc. You can mix this in a standard stand mixer such as a KitchenAid with the paddle attachment to save your arms.
- To triple or more: Be careful with the chocolate. Melt it in batches. If you melt 12 oz of chocolate at once, it might start to set before you get to the 30th ball.
- Baking adjustment: Do not attempt to bake these! The protein powder will become rubbery and the coconut flour will dry out completely. These are strictly no bake.
| Feature | Small Batch (13) | Large Batch (26+) | Change |
|---|---|---|---|
| Mixing Method | Hand / Spatula | Stand Mixer | Save time and effort |
| Chilling Time | 15 mins | 25 mins | Core takes longer to cool |
| Chocolate Need | 4 oz | 7.5 oz | Efficiency increases with volume |
Dispelling Common Nutrition Myths
One common misconception is that "protein powder is only for bodybuilders." In reality, adding protein to a snack like this lowers the glycemic index of the maple syrup, preventing a blood sugar spike and keep you full for hours. It’s about satiety, not just muscles.
Another myth is that "natural peanut butter is too runny for protein balls." While it is liquid at room temperature, the addition of the 2 tbsp coconut flour acts as a stabilizer. Once chilled, natural peanut butter becomes incredibly firm and provides a much "cleaner" flavor than the brands loaded with hydrogenated oils.
Finally, don't believe the myth that "dark chocolate is bitter." When paired with the salt and the sweetness of the maple syrup, the 70% cocoa takes on a rich, fruity profile. The fat in the peanut butter actually coats your tongue, mellowing out the tannins in the chocolate.
Storage and Zero Waste Strategies
Because these contain no eggs or dairy (if using vegan powder), they have a fantastic shelf life.
- Fridge
- Keep them in an airtight container for up to 2 weeks. The texture actually improves after the first 24 hours as the flavors meld.
- Freezer
- These are amazing as "frozen truffles." They stay good for 3 months. You can eat them straight from the freezer for an extra firm snap.
- On the-go
- They can stay at room temperature for about 4 hours before the chocolate starts to soften significantly.
Zero Waste Tips: Don't throw away the leftover melted chocolate in your bowl! Stir in some extra peanuts or a handful of oats to make "cluster" treats. If you have a tiny bit of peanut butter left in the jar that you can't scrape out, pour your warm maple syrup into the jar, shake it up, and use that "peanut maple liquid" as the base for your next batch.
Even the crumbs of the protein powder can be tossed into a morning smoothie.
Flavor Pairings and Serving Ideas
These protein balls are stars on their own, but they play well with others. If you're serving these as a dessert tray, pair them with fresh raspberries. The tartness of the berry cuts right through the dense peanut butter.
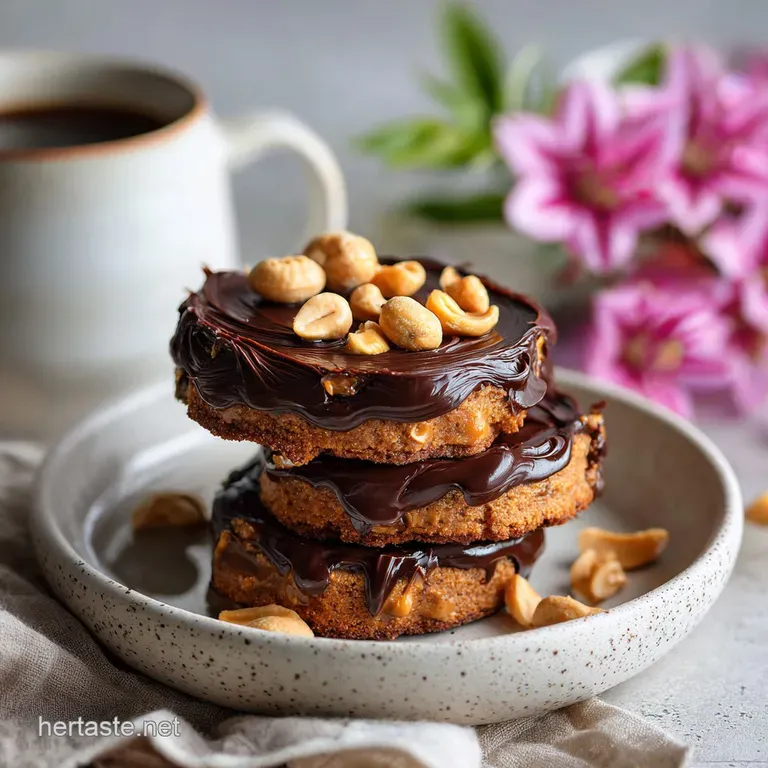
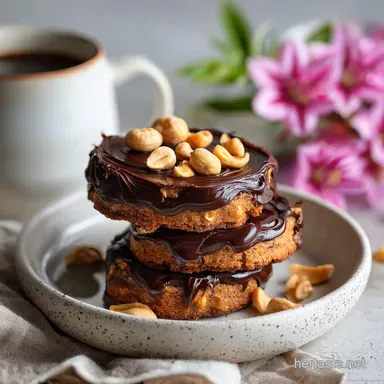
For a mid day boost, I love having one alongside a cold brew coffee. The bitterness of the coffee highlights the toasted notes of the peanuts. If you want a more decadent experience, serve them slightly chilled with a glass of oat milk. The creaminess of the milk mirrors the velvety center of the ball.
I've even seen people crumble these over a bowl of Greek yogurt or oatmeal. It’s an easy way to add a "crunch" and a chocolate hit to a standard breakfast. Whatever you do, make sure you don't skip that final sprinkle of flaky salt it is the bridge that connects the sugar, the fat, and the cocoa into one cohesive, indulgent experience.

Recipe FAQs
Can I substitute almond flour for coconut flour?
Yes, but adjust the quantity. Almond flour is less absorbent than coconut flour; you'll likely need about 6 tablespoons of almond flour for every 2 tablespoons of coconut flour, and the texture might be slightly softer.
Why are my protein balls crumbly?
The fat-to-protein ratio is likely off. This usually happens with very dry protein powders or peanut butter with low oil content. Try adding a teaspoon of maple syrup or warm water at a time until the mixture binds.
What causes the chocolate shell to be streaky or white?
This is likely chocolate bloom, caused by temperature fluctuations or moisture. To prevent it, melt your chocolate gently, avoid getting water in it, and ensure the protein balls are fully chilled before dipping.
How do I make these keto friendly?
Swap the sweetener and chocolate. Replace maple syrup with a keto friendly liquid sweetener like monk fruit or erythritol, use a zero carb protein powder, and opt for 85% or 90% dark chocolate.
Can I make these vegan?
Yes, the base recipe is easily made vegan. Ensure you use a plant based protein powder and check that your dark chocolate is dairy-free; most high percentage dark chocolates are naturally vegan.
How long do these protein balls last?
They last well in the fridge for up to two weeks. For longer storage, freeze them for up to three months; they're fantastic eaten straight from the freezer for an extra firm snap.
Are these protein balls good for post workout recovery?
Yes, they are an excellent post workout snack. The protein aids muscle repair, and the natural fats and sweetness provide quick energy replenishment, similar to the recovery benefits you'd get from something like Creamy Homemade Dog Ice Cream Cups Peanut Butter Banana.
Peanut Butter Protein Balls Dark Chocolate
Ingredients:
Instructions:
Nutrition Facts:
| Calories | 203 kcal |
|---|---|
| Protein | 9.4 g |
| Fat | 14.0 g |
| Carbs | 11.8 g |
| Fiber | 2.6 g |
| Sugar | 6.8 g |
| Sodium | 112 mg |
