Chicken and Rice No Peek Bake
- Time: Active 10 minutes, Passive 1 hour 15 mins, Total 1 hour 25 mins
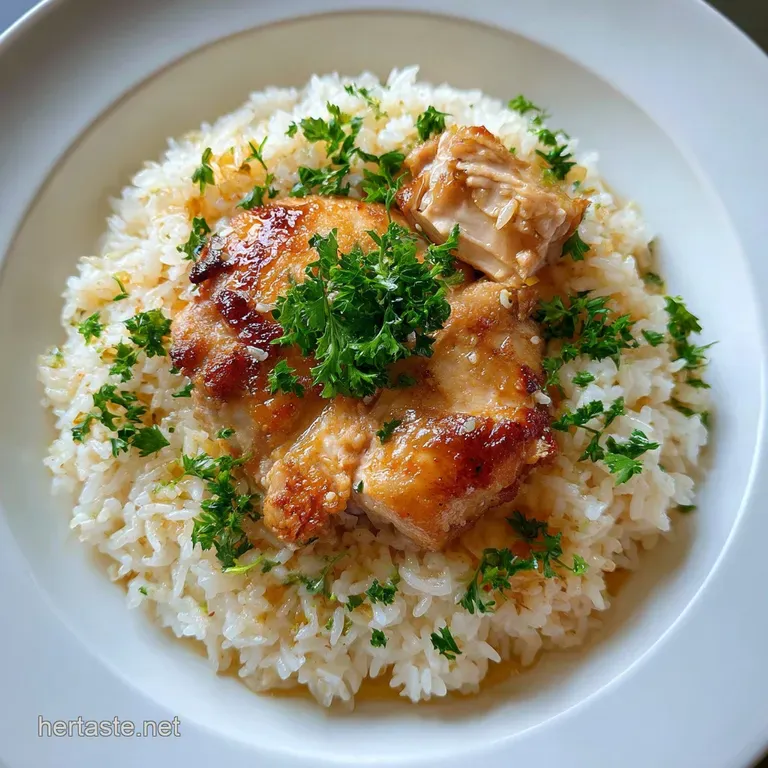
- Flavor/Texture Hook: Savory, onion infused cream sauce with melt in-your mouth chicken
- Perfect for: Stress free weeknight dinners or hands off meal prep
- Unlock the Steam Sealed Secret of Traditional Chicken and Rice
- The Science of the Vapor Lock
- Essential Stats for This Savory Comfort Food Casserole
- Selecting the Building Blocks for Ultimate Flavor Profiles
- The Essential Gear for a Low Stress Kitchen Setup
- Step by Step Method for a Successful Oven Bake
- Solving Textural Hurdles for the Most Succulent Results
- Strategic Adjustments for Large or Small Batches
- Kitchen Wisdom and Popular Misconceptions
- Preserving Freshness and Reducing Food Waste at Home
- Garnishing Strategies for a Restaurant Quality Visual Appeal
- High in Sodium
- Recipe FAQs
- 📝 Recipe Card
Unlock the Steam Sealed Secret of Traditional Chicken and Rice
The moment you peel back that heavy duty foil, a cloud of savory steam hits your face, carrying the scent of toasted onions and rich, concentrated chicken essence. It’s that specific, comforting aroma that fills the whole house, signaling that dinner is finally ready without you having to stir a single pot.
I remember the first time I tried making a no peek chicken and rice recipe; I was so skeptical that I kept lifting the corner of the foil to check the progress. Big mistake the rice ended up crunchy, and the chicken was lackluster because I let all that precious moisture escape.
That failed attempt taught me the most important lesson about this dish: the "no peek" rule isn't just a catchy name, it's a fundamental requirement for the physics of the bake. We are essentially creating a mini pressure cooker inside your 9x13 inch pan.
Once I learned to trust the seal, the results shifted from a grainy disappointment to a lush, velvety experience where the rice absorbs every drop of the seasoned broth.
We’ve all been there, staring at a box of rice and wondering how to make it feel like a "real" meal rather than just a side dish. This recipe is the answer to those tired Tuesday nights when you want something hearty but your brain is too fried to manage multiple burners.
It’s about smart assembly, layering flavors, and then letting the oven do the heavy lifting while you actually get a minute to sit down. Trust me on this once you nail the ratio, you'll never go back to the stovetop version.
The Science of the Vapor Lock
Thermal Equilibrium: The heavy foil creates a closed system where steam stays trapped, ensuring the rice hydrates evenly at a constant temperature without drying out.
Starch Gelatinization: By keeping the lid sealed, the rice grains reach the exact 200°F required for starches to fully absorb the liquid, resulting in a plump, tender texture.
Enzymatic Breakdown: The long, slow bake allows the connective tissue in the thighs to break down into gelatin, adding a silky mouthfeel to the surrounding sauce.
| Thickness | Internal Temp | Rest Time | Visual Cue |
|---|---|---|---|
| 1 inch Thigh | 175°F | 5 minutes | Juices run clear when pierced |
| 1.5 inch Thigh | 175°F | 8 minutes | Meat pulls apart with a fork |
| 0.5 inch Cutlet | 165°F | 3 minutes | Opaque center with no pink |
Similar to the technique I use in my The Creamy Classic recipe, the key here is maintaining moisture levels. If the steam escapes, the proteins tighten up and the starches stay hard.
Essential Stats for This Savory Comfort Food Casserole
| Ingredient | Science Role | Pro Secret |
|---|---|---|
| Long grain Rice | Structural Base | Don't rinse it; the surface starch helps thicken the sauce into a velvety coating. |
| Chicken Thighs | Fat & Flavor | Use bone in for more flavor, but boneless skinless for faster, more even cooking. |
| Onion Soup Mix | Flavor Catalyst | The dried onions rehydrate in the steam, releasing deep, toasted umami notes. |
Chef's Tip: Before you start, rub the 1 tbsp of softened unsalted butter all over the bottom and sides of your baking dish. It doesn't just prevent sticking; it browns slightly during the long bake, adding a nutty "fond" flavor to the bottom layer of rice.
For another way to use up poultry in a totally different flavor profile, you might want to look at an Addictive Char Siu recipe; it uses similar cuts but with a completely different heat based technique.
Selecting the Building Blocks for Ultimate Flavor Profiles
- 1.5 cups Long grain white rice, uncooked: Why this? Holds its shape better than short grain during the long 75 minute bake. (Substitute: Basmati rice for a more floral aroma).
- 10.5 oz Condensed cream of mushroom soup: Why this? Provides the thick, emulsified fat base for the sauce. (Substitute: Cream of celery for a lighter, more herbaceous vibe).
- 10.5 oz Condensed cream of chicken soup: Why this? Doubles down on the poultry flavor and salt content. (Substitute: Golden Mushroom soup for a deeper color).
- 1 cup Low sodium chicken broth: Why this? Adds necessary hydration without over salting the dish. (Substitute: 1 cup water with a bouillon cube).
- 0.5 tsp Cracked black pepper: Why this? Cuts through the richness of the cream bases. (Substitute: White pepper for a subtle, floral heat).
- 2 lbs Boneless, skinless chicken thighs: Why this? High fat content keeps them succulent during the long cook time. (Substitute: Chicken breasts, but reduce cook time by 15 minutes).
- 1 oz Dry onion soup mix: Why this? The "all in-one" seasoning that provides salt, onion, and beef stock depth. (Substitute: Mix of garlic powder, onion powder, and dried thyme).
- 1 tbsp Unsalted butter, softened: Why this? Enhances the "crust" on the bottom rice layer. (Substitute: Olive oil, though you lose the buttery aroma).
The Essential Gear for a Low Stress Kitchen Setup
Right then, let's talk gear. You don't need a high tech kitchen to pull off the peek chicken and rice, but a few specific items make it much easier. You’ll definitely want a heavy 9x13 inch ceramic or glass baking dish.
Avoid thin metal pans if you can, as they tend to scorch the bottom rice layer before the center is fully cooked.
The most critical piece of "equipment" here is actually the aluminum foil. You need the heavy duty stuff. Standard foil is prone to tearing, and even a tiny pinhole will let out the steam, leaving you with parched grains.
If you only have thin foil, use two layers and crimp the edges tightly around the rim of the pan like your life depends on it.
I also highly recommend using a large mixing bowl to whisk your soups and broth together before they hit the pan. If you try to mix them directly in the baking dish with the rice, you’ll end up with clumps of cold soup and "bald" spots of dry rice.
A simple whisk ensures a homogeneous sauce that coats every single grain of rice.
step-by-step Method for a Successful Oven Bake

- Preheat the oven to 350°F. Note: This ensures the pan starts cooking the moment it enters the chamber.
- Grease the pan. Rub the 1 tbsp of softened unsalted butter across the bottom and sides of your 9x13 dish.
- Whisk the liquids. In a large bowl, combine the 10.5 oz cream of mushroom soup, 10.5 oz cream of chicken soup, and 1 cup chicken broth. Whisk until the mixture is smooth and pale yellow.
- Incorporate the rice. Stir the 1.5 cups long grain white rice and 0.5 tsp cracked black pepper into the soup mixture.
- Assemble the base. Pour the rice and soup mixture into the prepared baking dish, spreading it into an even layer.
- Place the poultry. Lay the 2 lbs boneless skinless chicken thighs on top of the rice. Listen for a slight squelch as they settle into the sauce.
- Season the top. Sprinkle the 1 oz dry onion soup mix evenly over the chicken. The aroma of dried leeks and salt should be immediate.
- Seal it tight. Cover the dish with heavy duty aluminum foil, crimping it firmly around the edges to prevent steam from escaping.
- Bake for 1 hour 15 mins. Place in the center rack. The kitchen will begin to smell like roasted poultry and savory cream halfway through.
- The reveal. Remove from the oven and let it sit, still covered, for 5 minutes. Carefully lift the foil to release a massive, fragrant cloud of steam.
- Fluff and serve. Use a fork to gently fluff the rice around the chicken before plating.
| Feature | Fresh Method (From Scratch) | Shortcut Method (This Recipe) |
|---|---|---|
| Prep Time | 35 minutes | 10 minutes |
| Complexity | High (Making roux/velouté) | Very Low (Whisk & Pour) |
| Consistency | Variable based on sauce thickness | Reliable & thick every time |
Solving Textural Hurdles for the Most Succulent Results
To Fix Crunchy Rice
If you open the foil and find the rice is still hard, it usually means your seal wasn't tight enough and the liquid evaporated too quickly. To fix this, splash an extra 1/4 cup of hot broth over the rice, reseal it tightly, and pop it back in the oven for another 10-15 minutes.
The residual heat and the new moisture will finish the hydration process.
To Fix a "Soupy" Consistency
Sometimes, if the chicken releases more water than expected, the rice might look a bit submerged. Don't panic. Leave the foil off and let the dish sit on the counter for 10 minutes.
The rice is incredibly thirsty and will continue to absorb that extra liquid as it cools slightly, turning that soup into a thick, luxurious gravy.
| Problem | Root Cause | Solution |
|---|---|---|
| Scorched bottom | Oven rack too low or pan too thin | Move to middle rack; use ceramic dish |
| Bland flavor | Used plain water instead of broth | Stir in a teaspoon of poultry seasoning |
| Tough chicken | Used chicken breasts for too long | Switch to thighs or pull 15 mins early |
Common Mistakes Checklist
- ✓ Never use "Minute Rice" or instant rice; it will turn into mush during the 75 minute bake.
- ✓ Don't skip the buttering step; it’s the difference between a clean scoop and a stuck on mess.
- ✓ Resist the urge to peek! Every time you lift the foil, you add 5-10 minutes to the cook time.
- ✓ Use low sodium broth because the onion soup mix and canned soups already carry a heavy salt load.
- ✓ Ensure the chicken is in a single layer; stacking them leads to uneven cooking.
Strategic Adjustments for Large or Small Batches
If you're cooking for a smaller crowd, you can easily halve this no peek chicken and rice recipe. Use an 8x8 inch square baking dish instead of the 9x13. You’ll want to beat one egg and use half of it if you were doing a bound recipe, but here, just use half the soup cans (you can freeze the other halves!).
Keep the bake time roughly the same, maybe checking at 1 hour, because the depth of the rice layer is what dictates the hydration time.
Scaling up for a party is a bit trickier. If you double the recipe, don't just put it all in one giant pan. The center will never cook through before the edges are ruined. Instead, use two separate 9x13 pans.
When doubling the spices and onion mix, I usually only go to 1.5x the amount of salt/seasoning to avoid an "over seasoned" result, as the flavors concentrate during the bake.
If you’re looking for a healthier alternative while scaling, you could try My Cauliflower Fried recipe, which handles large volumes well without the heavy cream base issues.
Kitchen Wisdom and Popular Misconceptions
One of the biggest myths I hear is that you must brown the chicken before putting it in the casserole to "lock in juices." In reality, searing meat doesn't seal anything; it just adds flavor through the Maillard reaction.
In this specific dish, the chicken "poaches" in the cream sauce, which keeps it incredibly tender. The onion soup mix on top provides plenty of savory "browned" flavor without the extra step of pan frying.
Another misconception is that rinsing the rice is mandatory. For a fluffy pilaf, yes, rinse away! But for this creamy casserole, we actually want that surface starch. It acts as a natural thickener, binding the chicken juices and soups into a cohesive, velvety sauce that clings to every grain.
- If you want a crispy top, remove the foil for the last 10 minutes of baking and turn on the broiler.
- If you want more vegetables, stir in a cup of frozen peas or chopped broccoli florets during the last 15 minutes.
- If you want it spicy, add a teaspoon of red pepper flakes to the soup mixture before whisking.
Preserving Freshness and Reducing Food Waste at Home
Storage: This dish keeps remarkably well. Place leftovers in an airtight container in the fridge for up to 4 days. In fact, the flavors often deepen by day two as the rice continues to absorb the seasoning.
When reheating, add a tiny splash of milk or water to loosen the sauce back up, as the rice will have tightened in the cold.
Freezing: You can freeze the cooked casserole for up to 3 months. I recommend freezing it in individual portions. To reheat, let it thaw in the fridge overnight, then microwave or bake at 350°F until steaming.
Zero Waste: If you have leftover sauce but no chicken, use it as a base for a quick soup by adding more broth and some sautéed veggies. If you have extra dry onion soup mix, stir it into sour cream for an instant dip.
Don't throw away the chicken bones if you used bone in thighs; toss them into a freezer bag to make stock later!
Garnishing Strategies for a Restaurant Quality Visual Appeal
Since this is a "brown and beige" dish (the hallmark of true comfort food), a little pop of color goes a long way. I love finishing the pan with a generous dusting of fresh chopped chives or flat leaf parsley. The green contrast makes the dish look vibrant rather than heavy.
For a bit of textural contrast, you can crush up some butter crackers or fried onions and sprinkle them over the top during the last 5 minutes of baking. It adds a "shatter" effect to an otherwise soft and velvety dish.
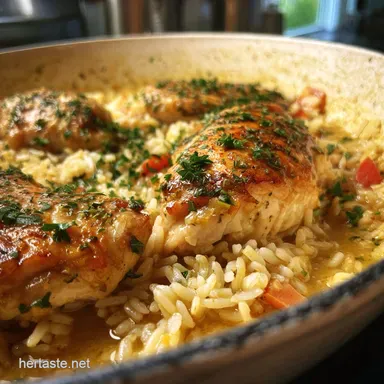
A light sprinkle of smoked paprika can also add a beautiful reddish hue and a subtle hint of woodsmoke that complements the onion mix perfectly. Serve it straight from the baking dish for that rustic, home cooked feel that everyone loves.
Honestly, don't even bother with the low-fat versions of the soups here. You need that fat to keep the rice from becoming a gummy block. Stick to the full fat versions, trust the "no peek" process, and you’ll have a meal that feels like a warm hug in a bowl. Enjoy!

High in Sodium
1085 mg mg of sodium per serving (47% % of daily value)
The American Heart Association recommends limiting sodium intake to about 2,300mg per day for most adults.
Sodium Reduction Tips
-
Broth Swap-30%
Replace the low sodium chicken broth with unsalted chicken broth or homemade broth. This can significantly reduce the sodium content.
-
Soup Selection-20%
Choose reduced sodium or no-salt added versions of condensed cream of mushroom and cream of chicken soups. Look for soups with significantly lower sodium content per serving.
-
Onion Mix Alternative-20%
Eliminate the dry onion soup mix entirely or replace it with a homemade blend of dried onions, garlic powder, onion powder, and other herbs and spices to control sodium levels. Even reduced sodium mixes still contain a lot of sodium.
-
Spice It Up!
Instead of relying on salt, enhance the flavor with sodium free herbs and spices like garlic powder, onion powder, smoked paprika, or a dash of cayenne pepper.
-
Fresh is Best-10%
Opt for seasoning the chicken thighs with fresh herbs and spices instead of relying on sodium heavy ingredients. Use fresh garlic, rosemary, and thyme.
-
Butter Control-5%
While unsalted butter is used, consider using even less or substituting with a small amount of olive oil for added flavor and reduced fat. The small amount contributes minimally to sodium, but every bit helps.
Recipe FAQs
Can I use instant rice instead of long grain white rice?
No, definitely avoid instant rice. Instant rice grains are pre-cooked and will turn to mush during the extended bake time required for this recipe.
Do I need to brown the chicken thighs before adding them?
No, browning is not necessary for this dish. Searing the chicken adds flavor through the Maillard reaction, but in this recipe, the chicken poaches in the sauce, keeping it tender, and the onion soup mix provides plenty of savory flavor.
What should I do if my rice is still crunchy after baking?
Add a little more liquid and bake longer. If the rice is hard, it likely means the steam seal wasn't tight enough. Splash in about 1/4 cup of hot chicken broth, reseal tightly, and bake for an additional 10-15 minutes.
Can I make this recipe with chicken breasts instead of thighs?
Yes, but adjust the baking time. Chicken breasts are leaner and can dry out quickly. If using breasts, reduce the covered baking time by about 15 minutes to prevent them from becoming tough.
Why shouldn't I rinse the rice for this recipe?
The surface starch is essential for thickening. For a creamy casserole like this, we want the starch on the rice grains. It acts as a natural thickener, helping to create that velvety sauce that coats the rice and chicken.
How can I add more vegetables to this dish?
Stir in frozen vegetables during the last 15 minutes. Peas, corn, or chopped broccoli florets are great additions. Add them during the final stage of baking so they cook through without becoming mushy.
How do I make a crispy top for my chicken and rice?
Remove the foil and broil for the final minutes. If you prefer a crispy topping, take the foil off for the last 10 minutes of baking and turn on the broiler. Watch it closely to prevent burning.
No Peek Chicken And Rice
Ingredients:
Instructions:
Nutrition Facts:
| Calories | 489 kcal |
|---|---|
| Protein | 33.8 g |
| Fat | 15.4 g |
| Carbs | 50.2 g |
| Fiber | 1.4 g |
| Sugar | 2.1 g |
| Sodium | 1085 mg |
