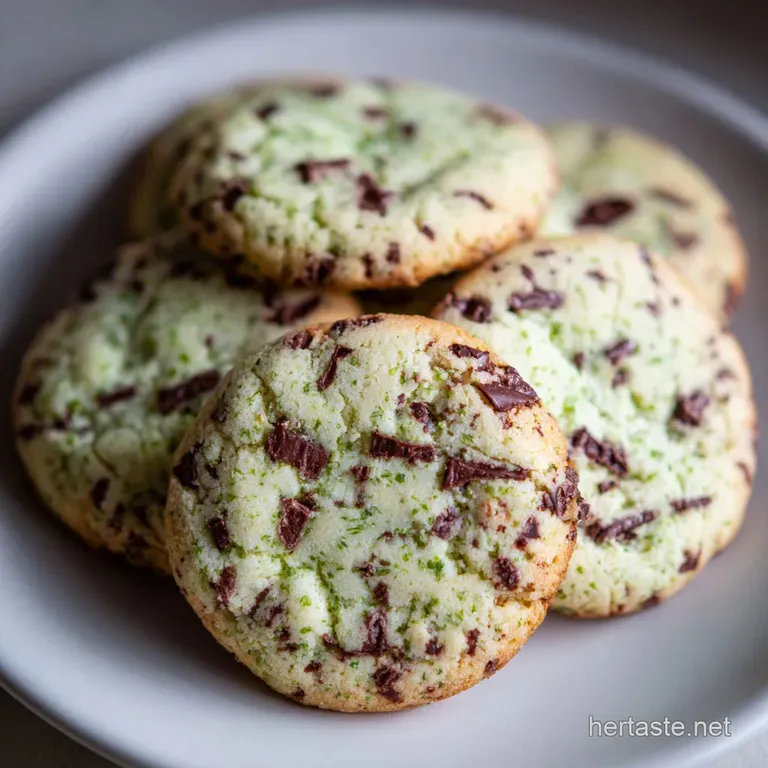
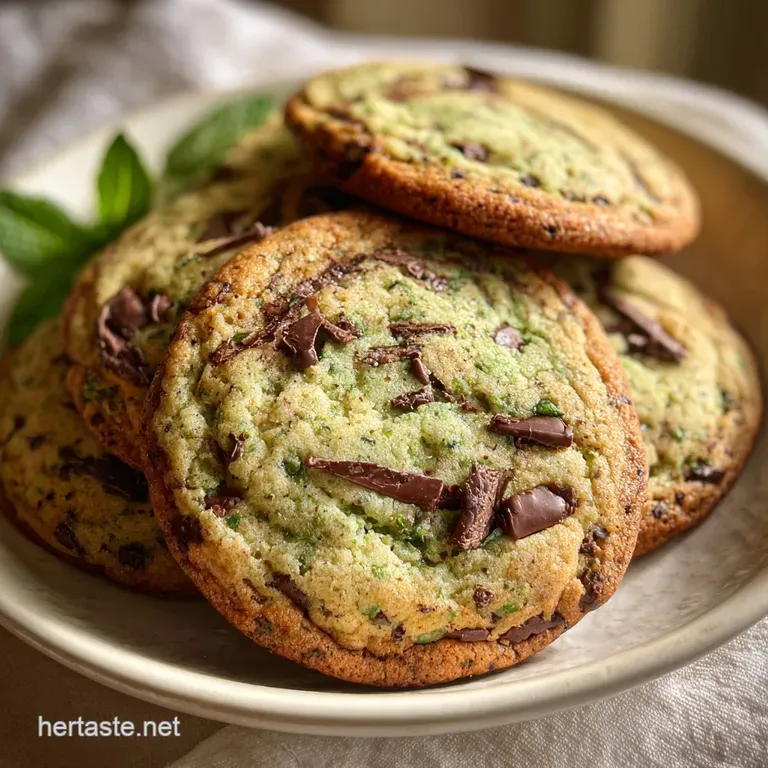
Mint Chocolate Chip Cookies
- Time: Active 15 minutes, Passive 10 minutes, Total 25 minutes
- Flavor/Texture Hook: Shatter crisp edges with a fudgy, mint infused center
- Perfect for: Holiday parties or a refreshing late night snack
- Crafting the Best Mint Chocolate Chip Cookies
- The Science of the Snap
- Ingredient Science and Hidden Roles
- Essential Elements and Smart Swaps
- The Tools You Need
- Step-by-Step Instructions for Success
- Solving Your Baking Issues
- Creative Flavor and Mix In Swaps
- Storage and Freezing Guide
- Perfect Pairings to Try
- Mint Chocolate Chip Cookie FAQs
- 📝 Recipe Card
Crafting the Best Mint Chocolate Chip Cookies
That sharp, icy aroma of peppermint extract hitting the warm, buttery air in my kitchen is a smell I never get tired of. It's a scent that immediately makes me think of winter holidays, but honestly, I crave these in the middle of July just as much.
The first time I tried making these, I went way too heavy on the green dye they looked like radioactive moss, and I almost threw the whole batch out. But that first bite? It was a total shift in how I thought about cookies.
We’ve all had those store-bought mint cookies that taste a bit like a dental office visit. This recipe isn't that. We're going for a sophisticated balance where the semi sweet chocolate chips provide a dark, earthy base that makes the mint feel bright rather than medicinal.
By using a mix of peppermint extract and chopped Andes Mints, we get two different layers of "cool" that melt at different rates on your tongue.
I’ve spent months tweaking the ratio of brown sugar to granulated sugar to make sure these don't just spread into a flat green puddle. We want height, we want a soft baked center, and we want those beautiful cracks on top that reveal the melting chocolate inside.
Trust me, once you see that first tray come out of the oven, you'll see why I'm so obsessed with the texture of this specific dough.
The Science of the Snap
Starch Gelatinization: Cornstarch acts as a tenderizer by interfering with gluten formation, creating a velvety crumb that stays soft for days.
Maillard Reaction Control: The high ratio of brown sugar provides moisture and acidity, which reacts with baking soda to create a lift and a deep, caramelized flavor profile.
Peppermint Volatility: Menthol, the active compound in peppermint, evaporates quickly under high heat, so we use a cool room temperature butter to keep the emulsion stable and the flavor locked in.
| Method | Time | Texture | Best For |
|---|---|---|---|
| Classic Chill | 2 hours | Thick, chewy, deep flavor | The ultimate bakery look |
| Fast Bake | 10 minutes | Thinner, crispier edges | Quick cravings |
| Frozen Dough | 14 minutes | Maximum height, fudgy center | Prep ahead batches |
Choosing the right method depends on how much patience you have today. While the fast bake is great, letting the dough rest in the fridge allows the flour to fully hydrate, which stops the cookies from being gritty and gives you that professional, crinkly top.
Ingredient Science and Hidden Roles
The secret to a great cookie isn't just about mixing things together; it's about how the molecules play together. When we talk about Mint Chocolate Chip Cookies, the fat content of the butter needs to be just right to support the heavy mix ins like Andes Mints.
| Component | Science Role | Pro Secret |
|---|---|---|
| Cornstarch | Softens gluten | Keeps them from getting "bready" |
| Egg Yolk | Emulsifier | Adds fat for a fudgy, rich bite |
| Peppermint Extract | Essential oil | Add it to the fat first to lock in scent |
| Brown Sugar | Hygroscopic | Pulls moisture from the air to stay soft |
Using the egg yolk in addition to the whole egg is a trick I learned after too many batches turned out cakey. The extra fat in the yolk provides a luxurious mouthfeel that pairs perfectly with the cooling sensation of the mint.
Essential Elements and Smart Swaps
To get the results I'm promising, you'll need to stick to these specific weights. Measuring flour by the cup is a recipe for a dry, crumbly disaster always use a scale if you can. If you're out of something, check the table below for a safe switch.
- 360g all purpose flour: Why this? Provides the structural foundation without being too heavy.
- 1 tsp baking soda: Why this? Reacts with brown sugar for lift and browning.
- 0.5 tsp salt: Why this? Cuts through the sugar to make the mint pop.
- 1 tbsp cornstarch: Why this? The secret to that professional "soft baked" texture.
- 225g unsalted butter: Why this? Slightly cool room temp prevents the dough from being too greasy.
- 150g granulated white sugar: Why this? Gives the edges that necessary "shatter" crunch.
- 150g light brown sugar: Why this? Adds moisture and a hint of molasses depth.
- 1 large egg + 1 yolk: Why this? The yolk ensures a dense, rich center.
- 1.5 tsp peppermint extract: Why this? The soul of the cookie. Don't use "mint" extract, use "peppermint."
- 0.5 tsp vanilla extract: Why this? Rounds out the sharp edges of the peppermint.
- 3-5 drops green gel food coloring: Why this? Visual cue for the flavor. Use gel, not liquid.
- 175g semi sweet chocolate chips: Why this? Darker chocolate balances the sweet dough better than milk chocolate.
- 130g chopped Andes Mints: Why this? Creates pockets of melting mint cream throughout.
| Original Ingredient | Substitute | Why It Works |
|---|---|---|
| Unsalted Butter | Vegan Butter Sticks | Use sticks, not tub butter. Keep very cold as it melts faster. |
| Light Brown Sugar | Dark Brown Sugar | Adds more molasses. Note: Result will be darker and chewier. |
| Andes Mints | Mint Aero or Mint Chips | Any mint flavored chocolate works, just chop it into chunks. |
If you are looking for a more traditional base to practice your dough skills, you might want to try The Homemade Chocolate recipe before adding the mint complexity.
The Tools You Need
You don't need a professional bakery setup, but a few specific items make this much easier. A stand mixer or electric hand mixer is pretty much required here to get the butter and sugars properly aerated.
You also really want a cookie scoop (the medium #40 size is my go to) to ensure every cookie is the same size so they bake evenly.
Don't forget the parchment paper or a silicone baking mat. Because these cookies have Andes Mints in them, they can get a bit sticky on the bottom where the mint cream melts. A non stick surface is the difference between a beautiful cookie and one you have to scrape off the tray in pieces.
step-by-step Instructions for Success
- Whisk dry ingredients. Combine the 360g flour, baking soda, salt, and cornstarch in a medium bowl until no lumps remain.
- Cream butter and sugars. Beat the 225g butter with both sugars for 3 full minutes until light and fluffy. Note: This creates the air pockets for the baking soda to expand into.
- Incorporate the eggs. Add the whole egg and the extra yolk one at a time, beating well after each.
- Flavor and color. Mix in the peppermint extract, vanilla, and the green food coloring. Stop when the color is a uniform pastel green.
- Combine wet and dry. Turn your mixer to the lowest setting and slowly add the flour mixture. Stop the moment you see no more white streaks.
- Fold in mix ins. Use a spatula to stir in the 175g chocolate chips and 130g chopped Andes Mints by hand.
- Scoop and chill. Portion the dough into balls (about 2 tablespoons each) and place them on a plate. Chill in the fridge for at least 30 minutes.
- Preheat and prep. Set your oven to 175°C (350°F) and line your baking sheets.
- Bake the cookies. Space them 5cm apart and bake for 10 minutes until the edges are set but the centers still look slightly soft.
- The Rest Phase. Let them sit on the hot pan for 5 minutes before moving to a wire rack. This allows the carryover heat to finish the center.
Chef's Tip: For that "bakery look," save a handful of chocolate chips and press them into the tops of the dough balls right before they go into the oven.
Solving Your Baking Issues
Even the best of us have bad bake days. Usually, it comes down to temperature either the oven or the butter. If things aren't looking right, don't panic. Most cookie issues can be fixed by simply chilling the dough or adjusting your oven rack.
Why Your Cookies Spread Too Much
If your cookies look like flat pancakes, your butter was likely too warm when you started. When butter is too soft, it doesn't hold the air bubbles you create during creaming. The dough just collapses in the heat of the oven.
Always aim for butter that is "cool room temp" it should dent when you press it but not be greasy or shiny.
To Fix a "Soap" Taste
If your cookies taste like soap or toothpaste, you've likely overdone the peppermint extract. high-quality peppermint oil is very strong. Always measure it exactly and never "eyeball" it. Also, make sure you're using "Peppermint" and not "Spearmint," which has a much more medicinal, herb heavy profile.
| Problem | Root Cause | Solution |
|---|---|---|
| Cookies are dry/crumbly | Too much flour | Use a scale; don't pack the flour into a measuring cup. |
| Bottoms are burning | Oven is too hot or dark pan | Use a light colored baking sheet or double up the pans. |
| No green color after baking | Liquid dye faded | Use gel food coloring; it's heat stable and won't fade. |
Common Mistakes Checklist
- ✓ Don't overmix the flour - stop as soon as it's incorporated to keep them tender.
- ✓ Chill the dough for at least 30 minutes; it prevents spreading and deepens the flavor.
- ✓ Use "Large" eggs; using "Jumbo" adds too much liquid and makes the dough cakey.
- ✓ Check your baking soda's expiration date - old soda won't give you any lift.
- ✓ Let the baking sheet cool completely between batches so the next round of dough doesn't start melting instantly.
Creative Flavor and Mix In Swaps
Once you have the base down, you can really start playing with the "contrast" theme. I love adding a pinch of flaky sea salt to the top of these right when they come out of the oven. The salt makes the mint feel even colder and the chocolate feel even richer. It’s a total flavor trip.
If you're looking for a different texture entirely, you might try a Classic Recipe for something like peanut butter, though obviously, don't mix mint and peanut butter that’s a combination I haven’t quite mastered yet!
- The Double Chocolate Twist: Replace 50g of the flour with high-quality cocoa powder for a "Grasshopper" style cookie.
- White Chocolate Mint: Swap the semi sweet chips for white chocolate for a much sweeter, creamier experience.
- The Crunch Factor: Add 50g of crushed candy canes if you're making these during the holidays for an extra textural pop.
Decision Shortcut
- If you want super soft cookies, add an extra egg yolk and underbake by 1 minute.
- If you want crispy edges, replace half the brown sugar with more white granulated sugar.
- If you want maximum mintiness, use mint flavored chocolate chips instead of standard semi sweet.
| Feature | Regular Batch | Double Batch |
|---|---|---|
| Flour | 360g | 720g |
| Butter | 225g | 450g |
| Bake Time | 10 minutes | 12 minutes (if crowded) |
| Pan Size | Standard Sheet | Two Standard Sheets |
Storage and Freezing Guide
These cookies stay remarkably soft thanks to the cornstarch and brown sugar. You can keep them in an airtight container at room temperature for about 4 to 5 days. If they start to get a little firm, pop a slice of plain white bread into the container; the cookies will pull the moisture from the bread and soften right back up.
For freezing, I highly recommend "flash freezing" the individual dough balls. Put them on a tray in the freezer for an hour, then toss them into a freezer bag. They’ll stay good for up to 3 months.
When you're ready to bake, just take out as many as you want and bake them directly from frozen just add 2 minutes to the total bake time.
Zero Waste Tip: If you end up with "cookie crumbs" at the bottom of your container, don't throw them away! They are incredible as an ice cream topper or mixed into a milkshake.
Common Myths Debunked
"Searing the dough in a hot oven locks in the moisture." This isn't true for cookies. Moisture loss is what creates the structure. A higher temp actually helps set the edges before the middle gets too hot, which is why we use 175°C (350°F).
Another myth is that you can't overbeat the sugar and butter you actually can. If you beat them for 10 minutes, you'll incorporate too much air, and the cookies will puff up and then collapse into a wrinkled mess. Stick to 3 minutes.
Perfect Pairings to Try
These cookies are quite rich, so you want something that can cut through that buttery film. A cold glass of whole milk is the classic choice, but if you're feeling fancy, a cup of Earl Grey tea is surprisingly good. The bergamot in the tea plays really nicely with the peppermint.
If you’re serving these at a party, try putting out a small bowl of fresh raspberries. The tartness of the berries against the cool mint and dark chocolate is a world class combination.
Or, if you want to go full dessert mode, sandwich a scoop of vanilla bean ice cream between two of these for the ultimate mint chocolate chip ice cream sandwich.
Precision Checkpoints
- Butter Temp: 18°C (should be cool to the touch, not oily).
- Internal Temp: 68-70°C (if using a probe, this is the sweet spot for a soft center).
- Rest Time: 12 minutes (total time on the pan and cooling rack before eating for best texture).

Mint Chocolate Chip Cookie FAQs
Can I use mint extract instead of peppermint extract?
No, stick with peppermint. Mint extract often has a more herbaceous, spearmint flavor that can taste medicinal in cookies, unlike the clean, cool taste of peppermint.
How do I prevent my mint chocolate chip cookies from tasting like toothpaste?
Balance the flavors carefully. Use a high-quality peppermint extract and pair it with rich ingredients like brown sugar and dark chocolate chips to ground the mint flavor.
How do I get my cookies to have a fudgy center?
Use an extra egg yolk and don't overbake. The extra fat from the yolk adds richness, and pulling the cookies when the edges are set but the center still looks soft ensures they finish cooking on the pan.
Can I use artificial peppermint flavoring?
No, opt for natural peppermint extract. Artificial flavorings can produce an overly chemical or "soap like" taste that detracts from the intended refreshing flavor.
How do I ensure my cookies bake evenly?
Scoop uniform dough balls and use parchment paper. Consistent size means consistent baking. Parchment paper or a silicone mat prevents the bottoms from burning and sticking.
Should I chill the dough before baking?
Yes, chilling is highly recommended. Chilling allows the flour to hydrate fully, preventing spreading and developing a deeper flavor profile for a chewier cookie.
What's the best way to store leftover mint chocolate chip cookies?
Store in an airtight container at room temperature. For longer freshness, you can add a slice of plain bread to the container to maintain moisture, similar to how moisture is managed in recipes like our Salted Chocolate Pecan Toffee: Crunchy, Buttery Homemade Candy.
Mint Chocolate Chip Cookies

Ingredients:
Instructions:
Nutrition Facts:
| Calories | 238 calories |
|---|---|
| Protein | 2.5g |
| Fat | 11.9g |
| Carbs | 32.5g |
| Fiber | 0.9g |
| Sugar | 21.2g |
| Sodium | 104mg |
