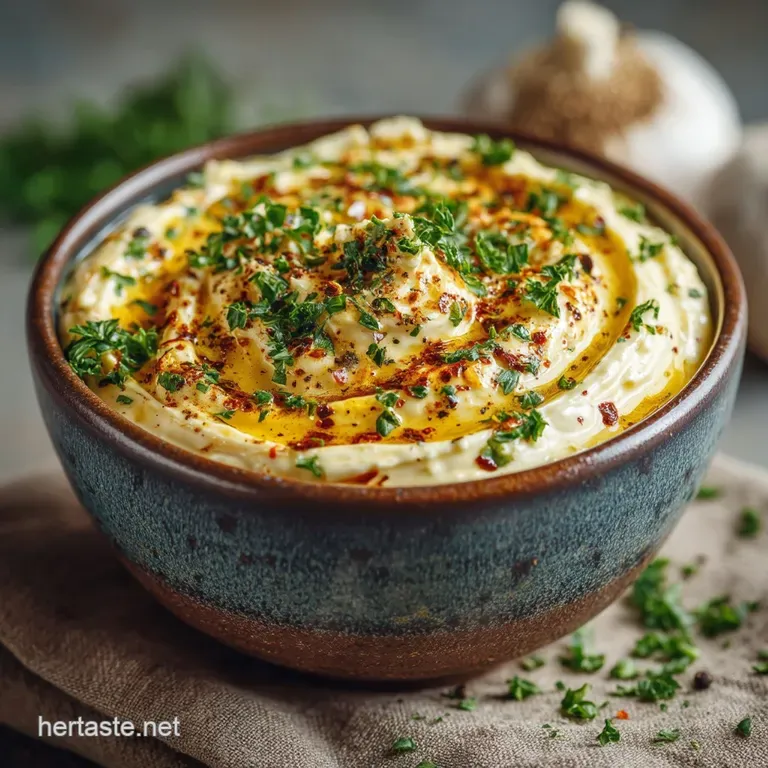
The Mediterranean Marvel Foolproof 5Minute Garlic Aioli
Ditch the Whisk: Mastering Effortless Emulsion
For centuries, the classic French and Spanish garlic aioli recipe was seen as a test of culinary patience, requiring a slow, steady drizzle of oil and constant, vigorous whisking to avoid the dreaded "split." This fear of failure has long steered home cooks toward inferior, jarred products.
However, modern kitchen innovation has provided an elegant solution that guarantees a thick, glossy, and perfectly stable sauce every time. We are abandoning the whisk entirely and embracing speed and mechanical force to achieve emulsion mastery.
The Secret Weapon: Leveraging the Immersion Blender
The key to achieving this flawlessly smooth texture lies in harnessing the power of the immersion blender (or stick blender) within a very specific, confined space. Traditional methods rely on manual shearing, which is laborious and prone to error if the oil is added too quickly.
The immersion blender, in contrast, creates a high velocity vortex that draws the oil molecules through the base ingredients the egg yolk, mustard, and lemon juice at hyper speed.
This ultra fast process ensures immediate and thorough binding, delivering a robust and reliable texture that simply can't be matched by hand or even by a standard food processor. It’s the ultimate hack for crafting Quick Garlic Aioli .
Faff Free Flavor: The Promise of Punchy Homemade Aioli
The entire process, from peeling the cloves to achieving a perfectly thick sauce, takes less than five minutes of active time. This speed means we are maximizing the punchiness of the fresh ingredients.
Unlike pre-packaged sauces, which are often stabilized with gums and preservatives and diluted with vegetable oils, our Homemade Garlic Aioli Sauce is pure, concentrated flavor.
It provides a creamy, acidic, and highly fragrant counterpoint to nearly any dish, proving that high-quality, authentic cooking doesn't need to be time consuming.
Sourcing the Essentials for Superior Flavor
Achieving the perfect texture is only half the battle; the flavor profile of this Simple Aioli Recipe depends entirely on the quality and preparation of your components. Every ingredient serves a crucial purpose, from the binding agents to the liquids.
The Crucial Oil Choice: Neutral vs. Olive Intensity
While true aioli is traditionally made using only olive oil, incorporating 100% extra virgin olive oil often results in a final product that tastes bitter or overly intense, particularly when using robust varieties.
To achieve a stable, clean canvas that allows the fresh garlic and lemon to shine, we employ a crucial blend: three parts neutral oil (such as grapeseed or sunflower) to one part high-quality extra virgin olive oil.
The neutral oil provides the necessary stability and mild flavor foundation, while the measured addition of EVOO introduces that signature, fruity Mediterranean depth required for authentic Garlic Aioli .
Temperature Matters: Preparing Your Eggs for Maximum Creaminess
This step cannot be overstated: cold ingredients are the enemy of emulsion. For the egg’s lecithin the natural emulsifier found in the yolk to effectively bind the oil molecules, the egg must be at room temperature.
If the egg is cold, the oil will resist incorporation, leading to a thin, loose, or completely split sauce. Therefore, ensure the egg is taken out of the refrigerator at least 30 minutes before blending, allowing it to warm slightly and cooperate fully with the oil for maximum creaminess.
The Required Toolkit: Why the Tall Jar is Non-Negotiable
Forget blending this sauce in a wide bowl or standard blender cup. The geometry of your vessel is perhaps the most critical technical detail. You must use the narrow, straight sided cup that typically accompanies your immersion blender.
This configuration creates the necessary vacuum and prevents the oil and base mixture from escaping the immediate blending zone. This concentrated area of high shear force is what allows the oil to emulsify almost instantaneously when the blender head is held securely at the bottom.
Related Recipes Worth Trying
- The Best OnePan Garlic Butter Chicken and Broccoli 30 Minute Meal — This backpocket Garlic Butter Chicken and Broccoli is a weeknight champion Get tender chicken breast and crisp broccoli in a rich velvety garlic sauce A...
- Properly Golden Garlic Butter Roasted Sweet Potatoes Recipe — Tired of soggy roasties These Easy Roasted Sweet Potatoes are fluffy inside crisp outside and drenched in flavourful garlic butter Your new favourite side dish
- Easy Baked Rainbow Trout with Fiery Cajun Garlic Butter Sauce — Need a simple fish dinner midweek This easy rainbow trout recipe delivers flaky baked trout fillet smothered in the best Cajun garlic butter sauce Ready in...
The Rock Solid Technique for Perfect Garlic Aioli
Once all your ingredients are measured and at the correct temperature, the blending process is incredibly fast. We are relying on precision timing and placement to transform simple ingredients into a thick, glossy sauce.
Initial Blast: Whipping the Base Ingredients into a Homogenous Paste
Before introducing the bulk of the oil, the binding agents need to be perfectly prepared. Place the peeled and roughly chopped garlic cloves, the room temperature egg, Dijon mustard (a powerful stabilizer), lemon juice, salt, and pepper into the bottom of the narrow blending vessel.
Insert the immersion blender and give it a quick, one-second pulse. This initial burst serves two functions: finely mincing the raw garlic into a paste and creating a fully homogenous base mixture, free of lumps, ready to receive the oil.
The Slow Lift: Creating the Classic Thickening Ribbon
Now, pour the entire measured quantity of blended oil directly on top of the base ingredients. Do not stir. The oil should sit as a distinct layer on the surface. Next, insert the blender head fully to the bottom, ensuring it completely covers the egg and garlic mixture.
Turn the blender on its highest speed and hold it perfectly steady for 15 seconds. You will observe a dramatic transformation a thick, white, stable emulsion will form beneath the oil layer. This is your cue: slowly, steadily, and without breaking the vortex, lift the blender head upwards.
This gradual movement draws the remaining oil down into the newly created sauce, thickening the whole batch and leaving you with a glorious, pale ribbon of perfect Garlic Aioli .
Final Adjustments: Seasoning and Flavor Balancing
Remove the blender and scrape down the sides using a spatula. At this stage, tasting is essential. The intensity of the raw garlic will likely be high, but the flavor will mellow significantly as the aioli chills. Adjust the seasoning with additional fine sea salt and, crucially, fresh lemon juice.
A touch more acid can brighten the entire sauce and cut through the richness of the oil. If the sauce is too thick for your intended use (perhaps as a dressing), you can pulse in a teaspoon of hot water to slightly loosen the consistency without breaking the emulsion.
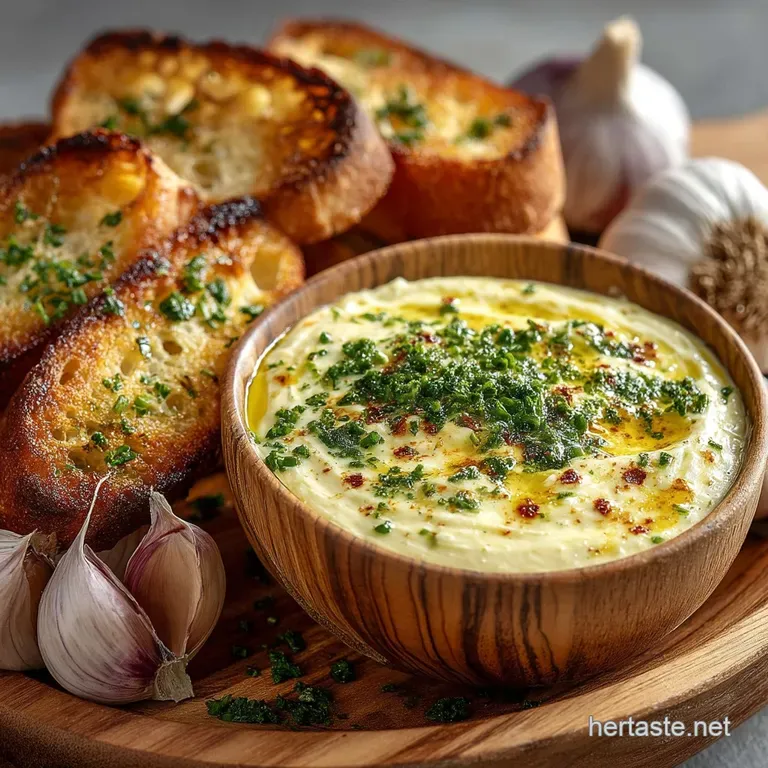
Pairing Perfection: Creative Ways to Utilize Homemade Garlic Aioli
This exceptionally creamy, punchy sauce is far too versatile to be relegated only to serving alongside chips. Its robust flavor profile makes it a spectacular enhancement for virtually any savory dish.
For instance, when upgrading your summer grilling menu, a generous schmear of this Garlic Aioli for burgers acts as the perfect rich and sharp condiment, far superior to standard mayonnaise. It also elevates simple grilled fish, acting as a luxurious dipping sauce for prawns or calamari.
For a unique appetizer, try spreading a layer of the finished sauce onto sliced baguette and toasting it lightly an instant Aioli Garlic Bread Recipe that boasts maximum flavor.
Unlike basic garlic aioli with mayo , which often feels oily, this sauce maintains a strong acidic balance that makes it fantastic for dipping, dressing, and spreading.
Maximizing Shelf Life and Flavor Variations
Successfully creating a batch of pristine Homemade Garlic Aioli Sauce is just the first step. Knowing how to preserve it and customize it ensures you get the most out of your effort.
Beyond the Fries: Inspired Applications for Dipping and Dressing
The beauty of a basic Simple Aioli Recipe is its ability to accept modifications beautifully. If you seek a deeper, more savory profile, swap out the raw garlic for an equal amount of softened, roasted garlic to create a sweeter, nuttier Roasted Garlic Aioli.
Alternatively, for a smoky, spicy kick ideal for tacos or grilled meats, stir in one to two teaspoons of adobo sauce from a can of chipotle peppers after the emulsion is complete. For everyday freshness, finely chopped chives or dill stirred through turns this foundation into an instant herby dressing perfect for salads.
Troubleshooting 101: Reviving a Failed Batch of Aioli
If, despite your best efforts, your aioli breaks meaning it separates into an oily liquid with curdled solids do not despair and do not throw it away. The fix is simple and almost magical. Take a clean bowl or a fresh blending vessel and place either one teaspoon of Dijon mustard or a fresh egg yolk inside.
Start the blender or whisking mechanism, then very slowly, drizzle or pulse the broken aioli into this new stabilizing base. The fresh binding agent will seize the oil from the split sauce, bringing it back together into a smooth emulsion.
Keeping it Fresh: Optimal Storage for Your Sauce
Because this recipe utilizes fresh, raw egg, proper food safety is crucial. Once prepared, the Garlic Aioli should be transferred to an airtight container and refrigerated immediately. It maintains its peak quality and freshness for up to 4 to 5 days.
Ensure the container is tightly sealed, as the powerful garlic aroma can easily transfer to other items in the fridge.
Quick Tweaks: Transforming Classic Garlic Aioli into New Sauces
The finished aioli serves as a magnificent starting point for numerous derivative sauces. For a quick variation, incorporate a generous pinch of smoked paprika and a dash of cayenne for a Spanish inspired sauce perfect with chorizo.
For a gourmet touch, stir in a teaspoon of high-quality white truffle oil for an earthy richness. By keeping the basic Quick Garlic Aioli recipe solid, you have an entire repertoire of gourmet condiments at your fingertips.

Recipe FAQs
My sauce has split! I've had a proper kitchen nightmare. How do I save my broken Garlic Aioli?
Don't chuck it down the drain; this is fixable! A split happens when the oil is added too quickly or if the ingredients were too cold initially. To rescue it, start with one fresh egg yolk and 1 teaspoon of warm water in a clean bowl or vessel.
Blend this base quickly, and then slowly drizzle the broken aioli into the new mixture while continuously blending. It usually comes back together like magic, though you might need an extra dash of lemon juice to balance the flavour it works a treat!
My aioli is a bit too pungent. Is there a trick to making the raw garlic flavour milder?
That raw garlic heat can be intense, especially when it’s freshly blended! For a milder flavour, try blanching your peeled garlic cloves quickly in boiling water for 30 seconds before incorporating them; this knocks back some of the sharper punch.
Alternatively, the ultimate variation is to use slow roasted garlic instead of raw. Roasting the cloves sweetens and deepens the flavour profile, resulting in a much silkier, nuttier, and less aggressive sauce.
Does this keep? How long can I store homemade aioli in the fridge?
As this recipe uses raw egg, safety is paramount. You must treat it like a premium, fresh product and store it immediately in an airtight container in the fridge once made.
Aim to consume your homemade Garlic Aioli within 3 to 4 days, maximum. If it looks or smells dodgy after day four, don't risk it better safe than sorry!
Right, down to brass tacks: Can I make this Garlic Aioli vegan friendly?
Absolutely! The immersion blender technique works brilliantly for vegan alternatives. Simply substitute the egg with 3 tablespoons (45 ml) of cold Aquafaba (the viscous liquid drained from a can of chickpeas).
Follow the immersion blender instructions exactly: place the aquafaba, lemon, and seasonings at the bottom, pour the oil on top, and blend from the bottom up. It produces a perfectly smooth, plant based version that holds its shape.
Foolproof 5minute Garlic Aioli

Ingredients:
Instructions:
Nutrition Facts:
| Calories | 379 kcal |
|---|---|
| Protein | 3.6 g |
| Fat | 3.3 g |
| Carbs | 19.7 g |
| Fiber | 7.4 g |
| Sodium | 5203 mg |
