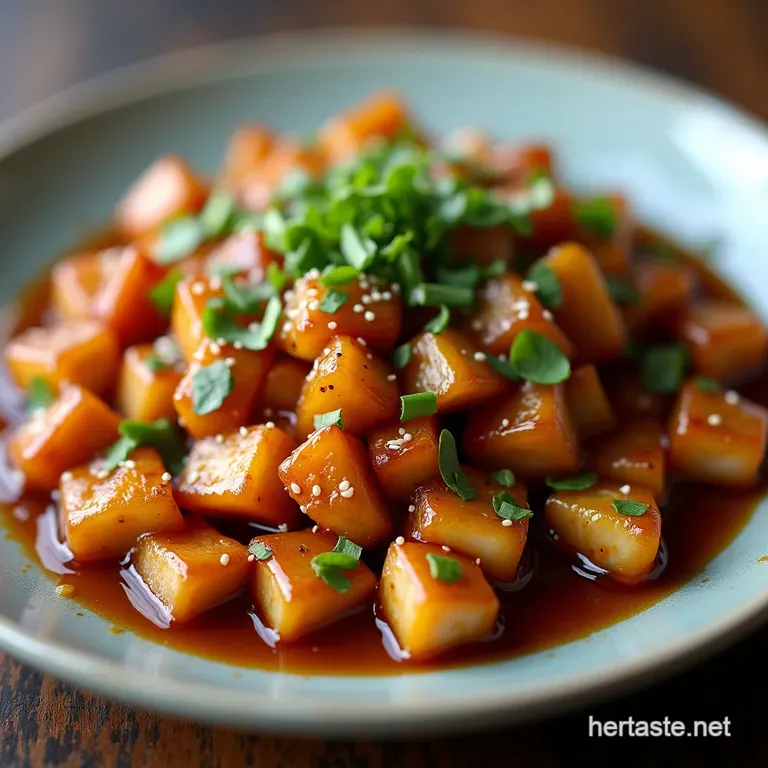
Better Than Takeaway the Fiveminute Silkysmooth Homemade Teriyaki Glaze
- Ditching the Bottle: Why Homemade Teriyaki Sauce Reigns Supreme
- The Golden Ratio: Understanding the Pillars of Authentic Teriyaki Flavour
- Gathering Your Essential Teriyaki Sauce Components: Precision Matters
- The Swift Science: Cooking Down Your Perfect Teriyaki Glaze
- Achieving Optimal Viscosity: When to Know Your Sauce is Ready
- Beyond Chicken: Creative Applications for Your Fresh Teriyaki Sauce
- Longevity and Preservation: How Long Your Homemade Glaze Lasts
- Troubleshooting Common Teriyaki Sauce Setbacks
- Recipe FAQs
- 📝 Recipe Card
Ditching the Bottle: Why Homemade Teriyaki Sauce Reigns Supreme
Ah, Teriyaki. This classic Japanese staple is all about balance the salty depth of soy meeting the caramelised sweetness of mirin and sugar, all thickened to a glossy, clinging glaze.
For years, many of us relied on store-bought bottles that often taste overwhelmingly salty or unnervingly sweet, lacking that authentic depth. Originating as a simple grilling marinade (the word teri means ‘luster’ or ‘shine’), our version cuts the usual sodium without sacrificing that essential umami punch.
It’s rich, complex, and ready faster than you can decide what to watch on Netflix. Forget those thin, watery supermarket versions; we’re going to whip up a proper glaze that sticks to your chicken or salmon like a barnacle on a boat.
This recipe is designed to be straightforward, making it the best teriyaki sauce recipe you’ll ever try.
The Golden Ratio: Understanding the Pillars of Authentic Teriyaki Flavour
The magic behind a genuinely memorable homemade teriyaki sauce lies in the harmonious blend of four key flavour profiles: salty, sweet, acidic, and aromatic. When you control these elements yourself, you move far beyond any bottled product.
This recipe is fundamentally easy requiring only about 5 minutes of prep and 10 minutes of simmering making it achievable even if you usually shy away from cooking complex sauces.
The Secret to That Restaurant Quality Sticky Finish
That tell tale, mirror like sheen you see coating perfectly grilled teriyaki sauce for chicken isn't accidental; it’s a carefully controlled chemical reaction.
This gloss comes primarily from the sugar caramelising alongside the reduction of the rice wines (mirin and sake), which are rich in natural sugars. We then use a small, precise amount of starch to lock in that viscosity, ensuring the sauce clings beautifully rather than pooling thinly beneath your protein.
Unpacking the 'Teriyaki' Philosophy: Glazing vs. Marinating
Historically, teriyaki was a process where food was brushed with the glaze while grilling, allowing the heat to build the shine layer by layer. While this recipe creates a fantastic marinade base, remember its true purpose is glazing.
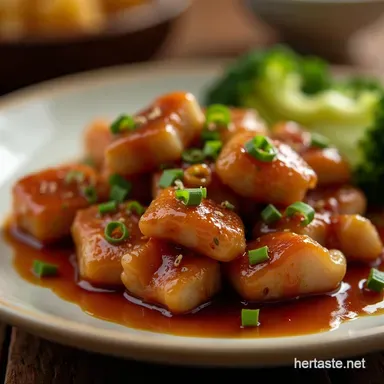
Using the finished sauce during the final minutes of cooking will achieve that deep mahogany colour and sticky texture, transforming your bland chicken breast or tofu into something spectacular.
Who This Recipe is For (Even if You Burn Water)
If you can operate a stove and own a whisk, you can master this. We’ve broken down the steps into simple actions combine, heat, thicken. This recipe is perfect for weeknight dinners because it comes together in under 15 minutes total time.
It yields about 1 cup, which is generally enough to generously coat 1.5 lbs of protein, whether you are preparing teriyaki sauce for salmon or vegetables.
Gathering Your Essential Teriyaki Sauce Components: Precision Matters
The quality of your teriyaki sauce ingredients directly dictates the quality of the final product. While this seems like a simple mixture, sourcing authentic components like mirin and sake elevates the flavour profile significantly beyond what simple substitutes can offer.
Sourcing the Star Players: Mirin, Sake, and Soy Sauce Deep Dive
The backbone of any authentic teriyaki is the soy sauce, which provides the essential salty base. We recommend using a low-sodium version to give you more control over the final salt level once the sauce reduces.
Mirin, a sweet Japanese rice wine, is crucial; it contributes both sweetness and that coveted glossy appearance. Sake, its drier counterpart, adds a layer of complexity and depth that water simply cannot replicate.
Don’t forget the aromatics: fresh grated ginger and minced garlic provide the necessary pungent lift that cuts through the richness.
The Non-Negotiable List: Everything You Need to Start Glazing
To create this phenomenal glaze, you will need 1/2 cup of soy sauce (low sodium preferred), 1/4 cup each of mirin and sake, 2 tablespoons of granulated sugar (or brown sugar for a deeper hue), 1 teaspoon of freshly grated ginger, and 1 clove of minced garlic.
For thickening, we incorporate 1 tablespoon of cornstarch mixed with 2 tablespoons of cold water to create a slurry.
Substitutions for the Pantry Challenged Cook (When You're Missing Mirin)
We understand that not everyone keeps Japanese rice wines stocked. If you are missing mirin, a good teriyaki sauce substitute is to use 3 tablespoons of dry white wine mixed with 1 teaspoon of sugar to mimic the sweetness and flavour profile.
If you lack sake, simply use water or unsweetened white grape juice in its place for the specified volume.
Tool Time: Which Saucepan Delivers the Best Results?
For the actual cooking process, a small, heavy bottomed saucepan is your best friend. This helps distribute the heat evenly, significantly reducing the chance of scorching the sugar at the bottom, which can quickly turn your beautiful glaze bitter.
You'll also want a whisk handy to ensure the slurry incorporates smoothly.
The Swift Science: Cooking Down Your Perfect Teriyaki Glaze

This entire process, from combining liquids to achieving the perfect consistency, should take no more than 10 minutes. We are aiming for reduction and controlled thickening simultaneously.
step-by-step: Combining and Heating the Liquids Safely
Begin by introducing the soy sauce, mirin, sake, sugar, ginger, and garlic into your saucepan. Place this over medium heat. Whisk this mixture gently but consistently until you observe the sugar fully dissolving into the liquid and the mixture just reaches a light simmer we are not looking for a rolling boil yet, just gentle warmth to activate the aromatics.
The Cornstarch Conundrum: Creating a Smooth, Lump Free Thickener Slurry
This step is the single most important technique for achieving a smooth sauce. In a separate, small bowl, whisk together the 1 tablespoon of cornstarch (or potato starch, which works equally well) with the 2 tablespoons of cold water until the mixture is entirely uniform a process known as making a slurry.
Never, ever dump dry starch directly into hot liquid; it will instantly clump into unappetizing, gelatinous nodules.
Temperature Control Secrets for the Ideal Sheen
Once your liquids are simmering, give that slurry one last quick whisk (it settles rapidly!) and slowly pour it into the simmering liquid while whisking vigorously. Immediately reduce the heat to low-medium. You must continue whisking gently for about 1 to 2 minutes.
The sauce will visibly transform, becoming thicker, smoother, and developing that characteristic glossy sheen.
Related Recipes Worth Trying
- The Best Homemade Teriyaki Sauce Recipe Shiny Authentic — Ditch the jar This 20minute Homemade Teriyaki Sauce recipe is perfectly balanced brilliantly glossy and amazing as a Teriyaki Sauce for Salmon Get the...
- Authentic Homemade Teriyaki Sauce Recipe for Chicken Salmon — Ditch the jar Learn how to make the best Homemade Teriyaki Sauceits rich glossy and ready in under 20 minutes Perfect for your next batch of grilled salmon
- Quick Zesty Chimichurri Sauce Recipe Ready in 15 Mins — Skip the weekend fuss This easy Chimichurri Sauce recipe delivers an intensely fresh garlicky kick perfect for steak or grilled veggies Learn the secret to...
Achieving Optimal Viscosity: When to Know Your Sauce is Ready
How do you know when to pull the pan off the heat? The key test is the "spoon back" test. When the sauce is ready, it should be thick enough to coat the back of a spoon visibly. If you run your finger across the coated spoon, the line should hold clearly without the sauce running back together immediately.
Remember, the sauce thickens considerably more as it cools, so remove it from the heat when it seems slightly thinner than you desire the final product to be.
Beyond Chicken: Creative Applications for Your Fresh Teriyaki Sauce
While this teriyaki sauce recipe is famously paired with poultry, its versatility is staggering. Use this glaze liberally over pan-seared steak strips, toss it with roasted root vegetables like carrots and sweet potatoes, or brush it onto firm tofu cubes before baking.
It’s even fantastic as a dip for homemade spring rolls or as a flavour booster tossed through cooked noodles. For those looking for a gluten-free teriyaki sauce , simply ensure you substitute standard soy sauce with Tamari right at the start.
Longevity and Preservation: How Long Your Homemade Glaze Lasts
Because this sauce contains fresh garlic and ginger, it should be treated with a bit more care than shelf stable bottles. Once cooled, transfer your finished glaze into an airtight glass jar. Stored correctly in the refrigerator, this homemade glaze maintains its peak flavour and texture for up to two weeks.
The cornstarch keeps it stable, but the fresh ingredients dictate the timeline.
Troubleshooting Common Teriyaki Sauce Setbacks
Even with the best guidance, sometimes things go slightly awry in the kitchen. Fortunately, fixing common issues with homemade sauces is surprisingly easy.
Flavor Remix: Infusing Your Teriyaki with Ginger, Garlic, or Citrus Zest
If you find the flavour a little flat perhaps you used low-sodium soy sauce and it needs a boost you have options. For an extra aromatic punch, you can infuse the base liquids (before adding the slurry) by simmering them with a few extra slivers of ginger or a strip of orange zest for 5 minutes, then straining them out before the final thickening stage.
From Dip to Drizzle: Storing Leftovers for Maximum Freshness
Transferring the sauce to a jar quickly after cooling allows for the best storage. If you find the sauce becomes very stiff upon refrigeration (it will indeed solidify slightly), don't worry!
Simply microwave a small portion for 10 15 seconds, whisking it well, and it will immediately return to that perfect, drizzly consistency, ready for dipping.
Fixing a Sauce That's Too Salty or Too Thin
If you taste the finished product and it leans too salty, counteract it by adding a tiny splash of water or a half teaspoon more sugar to balance the intensity. If, however, you cooled the sauce and it’s disappointingly thin meaning it didn't thicken enough during the simmer you haven't lost the batch!
Simply create a new, very small slurry (1 teaspoon starch to 2 teaspoons cold water), bring the sauce back to a gentle simmer, and slowly whisk in this second slurry until the desired viscosity returns.

Recipe FAQs
Can I make this Teriyaki Sauce ahead of time, and how should I store it?
Absolutely, making it ahead is the best way to go! Once completely cooled, transfer your homemade Teriyaki Sauce to an airtight container, like a clean jam jar. It keeps brilliantly in the fridge for up to two weeks; it’ll just thicken up a bit more, so give it a good shake or warm it gently before using it.
My sauce didn't thicken properly what did I do wrong? Was my heat too low?
Nine times out of ten, this is down to the cornstarch slurry. You must whisk the cornstarch into cold water before adding it to the hot liquid to avoid lumps, like trying to stir grit into your morning tea!
Also, ensure the sauce is simmering gently when you add the slurry, as it needs that heat to activate the thickening power.
I’m cooking for someone who doesn't drink alcohol; can I skip the Sake in this Teriyaki Sauce recipe?
Don't you worry about that! Yes, you can easily skip the Sake without spoiling the dish. To maintain the liquid balance, simply substitute the 1/4 cup of Sake with an equal amount of water or, even better, a light, unsweetened white grape juice for a touch of natural fruitiness.
How can I make this Teriyaki Sauce recipe gluten-free or reduce the salt content?
It’s straightforward to adapt this for dietary needs. For a gluten-free version, swap out the standard soy sauce for Tamari, which is wheat free and works just as well. To cut the sodium, simply use a low-sodium soy sauce to start, and then taste before adding any extra salt at the end you’ll find it’s already flavourful enough!
What’s the best way to use this sauce? Should I marinate with it or just use it as a glaze at the end?
That’s a cracking question! For things like chicken or tofu, you can certainly use about a third of the sauce as a quick marinade for 30 minutes before cooking. However, this thickened version is truly best used as a glaze.
Brush it on during the last few minutes of grilling or pan-frying so the sugars caramelise beautifully without burning.
Fiveminute Homemade Teriyaki Sauce
Ingredients:
Instructions:
Nutrition Facts:
| Calories | 3614 kcal |
|---|---|
| Protein | 21.1 g |
| Fat | 114.0 g |
| Carbs | 284.8 g |
| Fiber | 37.7 g |
| Sodium | 4464 mg |
